Despite the fact that Apple brand equipment is of high quality, even in its operation glitches and errors often occur. This is especially true for failures in service applications, when error messages may appear due to firmware incompatibility, outdated application versions, and other little things.
In most cases, problems occur when updating or restoring the system
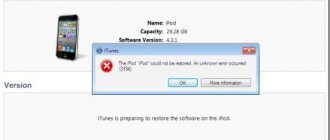
Let's look at what some of the problems that appear when working with products on the iOS platform mean and how to fix them. We are most interested in error 9, error 3004 and error 3194 - they are among the most common errors. It is worth clarifying that most of them can be eliminated yourself, as you will later see for yourself.
What to do if you couldn’t restore your iPhone “Error 9”
Error 9 when restoring an iPhone mainly occurs among owners of older smartphone models, or rather, up to iPhone 7. Let's explore ways to solve the problem.
Update your iPhone again
The first way to correct the situation is to update the system again. The solution will be effective if the wire connecting the PC to the mobile device has come loose or was accidentally removed from the connector. Instructions:
- https://www.apple.com/ru/itunes/download/ – go to the website and download the latest version of the iTunes service for Windows.
- After installation and login, go to the “Help” section and “Updates”.
- Press and hold two keys on your phone – Home and Power. If you are using an iPhone 7 or 7Plus, then you should hold down the power button and volume down. Hold them for 10-15 seconds until the logo image appears on the screen.
- After this, you can connect your smartphone to your computer via a cable.
- iTunes will offer two options - Update or Restore. You need to select the first one, that is, start the update, which will subsequently save all the information on the phone.
Perform recovery via DFU mode
If, after following the instructions, you started the device, and it turns on in recovery mode, then you need to:
- Open the program on your PC again, hold down two keys on your mobile phone and connect it using a cable;
- At the end, when iTunes offers two solutions, you should select the second option - Restore.;
- The procedure involves completely cleaning the smartphone. That is, all stored user information will be deleted. But, it is easy to return if you use a backup copy.
Hardware problem
Pay attention to the serviceability of the USB cable and the connector itself on the computer. Connect another device, try a different port, or find a suitable cable
Checking the hosts file
The error may be related to the hosts file, which is located in the Windows system files. To fix the problem, go to the folder – C:\Windows\System32\drivers\etc\. Then open the file called hosts.
Delete all data located below the command - 127.0.0.1 localhost. Finally, reboot your computer. If the file cannot be edited, then run it with admin rights enabled.
Virus check
Sometimes the reason may be hidden in the presence of viruses on the PC. Use the antivirus or firewall provided in Windows as a standard system defender. After checking your computer for malicious software, repeat the procedure again to update or restore your iPhone.
Contact the service center
If the described solutions did not bring the desired result, then the fault is related to hardware. That is, the battery, gyroscope cable, and memory could be damaged. Take your smartphone to a service center, where specialists will diagnose and, if necessary, replace faulty parts.
Effective treatment method
So, what to do when an error occurs when restoring iPhone 3503? The first option involves performing the following manipulations:
- Go to the Network, search, download and install the special 3uTools application.
- After completing the installation process, the program must be updated by clicking on the “Check Update” button.
- On your mobile device, simultaneously hold down the power and home buttons.
- Wait for the company logo to appear and release the power button.
- As soon as the picture on the screen changes, remove your finger from the second button.
- Steps 3,4 and 5 should be carried out with the 3uTools program already running and connected to a PC.
- Using the wedge on the “Flash” button, start downloading and installing the problematic application through this software.
- Wait for the started process to complete. Next, follow the recommendations from the updated mobile equipment.
As an alternative, you can use several more similar tools, which also involve the active use of a PC and switching the mobile phone to DFU mode, as described in the previous instructions:
Recover iPhone (Error 3503) using iMyFone iOS
Naturally, this software should initially be found, downloaded and installed. After running the tool:
- Go to standard mode, accessible from the main screen.
- Transfer the problematic equipment to DFU using the method described above.
- Start installing the new firmware - the program will automatically detect the connected mobile phone or tablet.
- After completing the installation procedure, click on “Start correction”.
A few minutes will pass and the message about this error should disappear from the screen.
- Corrections using iTunes funds
- Once again, switch the connected iPhone to the computer into DFU mode.
- Activate the launch of the iTunes application on PC.
- The program will analyze all connections and detect the connected gadget. Select it.
- Go to “Summary” and click on “Restore”.
After an automatic restart of the mobile equipment, the conflict situation should be eliminated.
Some other possible solutions you can try are:
- Make sure your Internet connection is reliable.
- Update iTunes to the latest version.
- Try to install the problematic update after disabling the “Find My iPad / iPhone” option.
The last treatment option can be implemented by going to the settings menu, where you must first go to “iCloud”, and then move the permission slider to the inactive state for the required function. After confirming this action, you can try to start the previously interrupted procedure again.
Error classification
Apple support on a special page on the website divides failures by number into several categories. However, you will not find some codes. For example, there is no number 52 on the support page, because iTunes does not crash with such a code. Error 47 is also not listed, although some users complain that due to a glitch with this number they are unable to restore their iPhone.
If you encounter problem 47, there may be several reasons for its occurrence:
- Failure of the modem chip.
- Modem processor failure.
- Liquid has entered the modem part.
As you can see, error 47 is due to a hardware problem. Therefore, if you encounter failure 47 when restoring your iPhone, take your mobile device to a service center. Even the technician does not immediately determine the exact cause of problem number 47, so it is better not to risk trying to carry out repairs yourself.
Recovery mode
To switch to this mode, just follow a few simple steps:
- Connect the original USB cable to the PC.
- Turn off the iPhone by holding the Power button.
- Wait until the display goes out.
- Press and hold the Home key until the device turns on.
- Connect the iPhone to the USB cable that was connected to the PC in the first step.
- Continue holding "Home" until the iTunes logo and the cable itself appear on the screen.
If everything is done correctly, the phone will go into Recovery mode. If in this case error 4005 in iTunes does not disappear, then the device may be operating in loop mode. In this case, the so-called “butterfly effect” is observed.
Error resolution methods
First way
The easiest way to deal with error number 42110 is to understand access rights:
- Find the iTunes shortcut on your desktop, Start menu, or installation directory. Right-click on the shortcut, call up the drop-down list of active actions, select “Properties”;
- In the tab that opens, go to the “Compatibility” section. Check the box next to “Run this program as an administrator”;
If the method does not help, you can also activate “Compatibility Mode” with Windows XP and/or Vista if the problem occurred on “Ten”; You need to “Apply” the changes, and then try to launch iTunes again.
Second way
Most likely, the problem will not arise again, but if this method did not lead to success, then it is time to act truly radically:
The first step is to close iTunes completely. It’s better to immediately check whether the player is working in the “Task Manager” (Ctrl + Shift + Delete), and, if any processes related to Apple products still remain, “End Task”. Next you will have to go to the “C:\ProgramData\Apple Computer” directory and find the “iTunes” folder, where, most likely, several files with the *xml extension and an empty “adi” folder are stored. All the listed documents are useless in the fight against error 42110
Why? The answer is obvious - the developers hid everything “most important and necessary” from prying eyes. You can remove the “invisibility” of files in the following way.
In the already open folder with iTunes (the address is written above), click on the “View” menu item, and then on “Options”, and by calling up the drop-down list, open the unique properties for displaying folders and files.
In the tab that opens, click on “View” again, and then check the box next to “Show hidden files and folders.” Accept the changes, save and look again at the “C:\ProgramData\Apple Computer\iTunes” directory. There, as a rule, an unknown SC Info folder immediately appears, containing several keys and digital signatures. All preparations have already been completed, the final touch remains - you need to select a folder and, holding down the Shift + Delete key combination, agree to complete deletion. Wait until the procedure is completed, be sure to reboot, and then launch iTunes again.
In 99% of cases, the second method works flawlessly. The system will automatically compile new keys and digital signatures, re-create all the necessary files and launch the media player in its original form (you will have to re-authorize with your Apple ID).
If the software is to blame
This is indicated by errors 53, 27, 1014 and many others. And again, the manufacturer himself offers the user instructions for eliminating them.
To troubleshoot software problems, you need to follow the following steps:
- Reopening the iTunes program (in a situation where it was open, you need to close it and then restart it).
- Check that the utility installed on your PC is the latest version. If this is not the case, you need to update to the latest version.
- See if security programs are interfering with the normal operation of the iPhone.
- Check the serviceability of the USB cable, Internet, PC or laptop.
- Make 1-2 more attempts to restore the system.
If none of the methods mentioned above helped resolve software problems, your computer may have many programs installed whose drivers are outdated and need to be updated urgently. The user will have to carry out painstaking work to identify such programs. But if everything turns out to be in order, there is only one thing left to do - contact Apple's customer support department.
Checking the browser
Users have experimentally proven that iTunes communicates best with the standard browser built into the Windows operating system - Internet Explorer. But what settings should I set so that error 3004 does not appear again?
1) Install the browser (if it was removed) and send its shortcut to the computer desktop.
2) Right-click on it and select the properties tab in the context menu that appears.
3) We see a frame with ample space for activity. We are only interested in the “Programs” item.
4) If you are prompted to set Internet Explorer as your default browser, we agree.
The antivirus should work in moderation
Agree with a simple life axiom: everything should be in moderation. This rule even applies to the antivirus program that protects our personal computer or laptop from malware. It's good when the antivirus blocks truly infected objects. But when it causes error 3004 in the iPhone 4S or another version of the device, it becomes a source of problems. Software downloaded using iTunes contains startup commands. This is exactly what the antivirus worries about, and it blocks the flow of information.
Ways to solve error 3014
Method 1: Reboot your devices
First of all, when faced with error 3014, you need to restart both the computer and the Apple device being restored (updated), and for the second one you need to do a forced reboot.
Restart your computer in normal mode, and on your Apple device, hold down two physical buttons: power and Home. After about 10 seconds there will be a sudden shutdown, after which the device will need to be booted in normal mode.
Method 2: Update iTunes to the latest version
An outdated version of iTunes can cause many problems in the operation of this program, and therefore the most obvious solution is to check for updates and, if any are found, install them on your computer.
Method 3: Check your hosts file
As a rule, if iTunes cannot connect to Apple servers, then you should suspect a modified hosts file, which in most cases is modified by viruses.
First, you will need to scan your system for viruses. You can do this using both your antivirus and the special treatment utility Dr.Web CureIt.
Method 4: Disable your antivirus
Some antiviruses and other security programs may mistake iTunes actions for virus activity, thereby blocking the program's access to Apple servers.
To check whether your antivirus is the cause of error 3014, pause it for a while, then restart iTunes and try to complete the restore or update procedure in the program.
If error 3014 no longer appears, you will need to go to your antivirus settings and add iTunes to the exclusion list. It would also be a good idea to disable TCP/IP filtering if a similar function is activated in the antivirus.
Method 5: Clean your computer
In some cases, error 3014 may occur due to the fact that the computer does not have the necessary free space required to save the downloaded firmware on the computer.
To do this, free up space on your computer by deleting unnecessary files and computer programs, and then try again to restore or update your Apple device.
Method 6: Perform the recovery procedure on another computer
If none of the methods helped you solve the problem, then it may be worth trying to complete the procedure for restoring or updating your Apple device on another computer.
Describe what didn't work for you. Our specialists will try to answer as quickly as possible.
additional information
Typically, the settings discussed above allow the user not to worry about error 3004. However, two more factors may influence its occurrence:
1) Unlicensed software (not always). The solution may be to update the software using another computer/laptop.
2) The presence of viruses on the computer. The Trojan program may well block iTunes service’s access to official servers. If the error persists and the first two steps did not help, it’s probably worth scanning your personal computer.
Error 3194
Error 3194 also pops up when updating iOS when using iTunes.
How can I fix it? There are three options for removing the error:
- Again, iTunes errors can most often be resolved by updating this program. Open the Help menu and select Updates to have the app search for them. Then update the utility, then restart your device and launch iTunes again.
- It is likely that changes have occurred in the hosts file on your computer, due to which the PC does not allow the system to update, and iTunes error 3194 occurs. In this case, you should make changes to it as follows: Go to the Windows directory folder called System 32, open Drivers/etc. Find the hosts file and open it using notepad, but be sure to have administrator rights;
- In the text that appears in front of you, you need to delete the line 74.208.105.171.gs.apple.com, then save the changes;
- If you cannot edit the document, copy it from the folder to your desktop, open it there, and make changes. Then transfer the file from the desktop back to etc, replacing the source;
- If you are using a computer running iOS, to correct the file you should go to “Mac OS X”, then select “Go” and go to the Finder folder. /etc/hosts. You can open the file through TextEdit;
- Now connect your device to your PC, try launching iTunes again and update or restore.
Note. Error 3194 often appears during firmware recovery when a user tries to install a previous version of software on an iPhone or iPad. In this case, all the above methods will not work for you. For such an operation, you need to do a JailBreak on the phone, which is unsafe and can lead to its inoperability. If you do not have knowledge about the intricacies of this process, it is better to contact a specialist.
Thus, we looked at the common iTunes errors that appear on the iOS system - error 9, error 3004 and error 3194. We can conclude that often to eliminate them it is enough to update iTunes or check the Internet connection, in other cases you need to perform a few simple manipulation. Be that as it may, all of them are quite easy to fix on your own both on the iPad and on other Apple equipment, as you can see thanks to the recommendations described above.
Using Dr.Fone iOS Toolkit to Fix iTunes Error
There are literally hundreds of different errors that can happen when it comes to iTunes and iPhone. This doesn't mean that all these errors will happen at some point, it just means that something will cause these errors
If you happen to trigger an error, it is important that you know how to react and how to get it addressed as quickly as possible. With the help of , you are able to fix iTunes errors in no time at all, no matter what errors you get
Step 1
– First you need to make sure that you have Dr.Fone prepared. Start by downloading the Dr.Fone iOS toolkit program, install accordingly, and once it has been installed go ahead and launch it.
Step #2
– Once the program starts, it will take you to a menu screen where you can choose from several different options.
Step #3
– For this process, We will use the “
System Restore
” option, so click on it.
Step #4
– Before continuing with the rest of the steps, you will need to connect your iPhone device using a USB cable. After connecting your device, allow Dr.Fone to detect in a few minutes that it has been connected.
Step #5
-A menu will be displayed, informing you of all risks and information about “
System Restore
”. Once you have read the information, go ahead and click on the “Get Started” button.
Step #6
The next screen that you will be shown is regarding the firmware that Dr.Fone will use to restore your device. Dr.Fone will by default enter the information that it has detected from your device regarding the installed firmware. However, you can change this information. It is recommended that you do not change information that is already in place, however, it is possible to do so there if necessary.
Step #7
– Once you are sure that the required information has been entered, go ahead and click on the “
Download
” button.
Note:
How long it takes to download the Dr.Fone firmware for iOS purely depends on how fast your broadband is, so if you have low speed then be patient.
Step #8
– Once the firmware is fully downloaded, Dr.Fone will automatically use the firmware to repair the error on your iPhone.
As you can see, there is not much to this reimbursement process, it is simply a matter of understanding each step. Once the firmware has been downloaded and has been used to repair the error on your Apple device, it will reboot and you will be able to use the device again without running into the error anytime soon. However, if you are trying to restore your device in the future and another error appears, just go ahead and do the same steps that we just discussed.
Dr.Fone Toolkit
The great thing about Dr.Fone for iOS is that it requires no prior knowledge about the technology and just requires a few minutes of time and effort in order to successfully fix iTunes errors. As shown in the above steps, Dr.Fone toolkit for iOS is not a complicated program at all. On top of that, although the steps described above may seem scary and time-consuming at first, the truth is all processes are like this and they just seem scary at first. Once you have installed the program and have had first-hand experience with Dr.Fone for iOS, you will realize that there is no reason not to have the program and that it should be a standard part of your setup regarding iPhone Data Management. Dr.Fone also has a number of other features available such as.
How to Check if Software is Outdated
Old versions of programs or, even worse, modified programs that were made so as a result of hacking, can cause many errors when operating the iPhone 5S or other versions of the gadget. So-called unauthorized modifications of iOS are very common reasons for malfunctioning of Apple smartphones. Simply put, it is a firmware hack carried out by attackers to access user data.
But this kind of problem is not always serious and requires expensive repairs or replacement of the gadget. For example, when the owner of a device tries to install an earlier version of iOS (downgrade) on the device than he had before, an error always pops up. The solution in this situation is simple: you need to update the iTunes utility to the latest version, and then start the recovery process. The latest version of the operating system will be downloaded and installed on the iPhone, and the device will work without interruption.
When working with iPhone and iTunes, users periodically encounter various errors. Some can be fixed on your own, but there are problems that cannot be eliminated without the help of specialists.
Such a failure, for example, is error 53, which appears after trying to update or flash an iPhone. The cause of the problem may be damage to the Touch ID button or cable. Another possible option is replacing the Touch ID button. Each button has an individual number and is tied to the processor of a specific device, so that after replacing the scanner, the iPhone will not work.
If only the cable is damaged, you can take the phone to a service center so that specialists can replace it. If the Touch ID button itself fails, all that remains is to replace the iPhone with a new one.