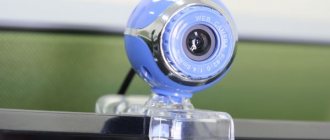
Today, a webcam is a mandatory attribute of laptops of all price categories, as well as an important accessory for desktop PCs. It does not allow you to count on decent quality of pictures or videos, but it is quite suitable for video calls, chats and simple photos. There are just situations in which webcam doesn't work. It just won't turn on and the video capture app shows a black screen or error. There are a lot of physical and software failures that can lead to similar consequences, so our instructions are valuable for users with any skill level.
Checking the webcam connection
If the computer does not see the webcam, the first thing to do is make sure that it is connected correctly. To do this, check how tightly the USB connector fits into the corresponding port. We recommend connecting the camera to the connectors on the back of the system unit; they are more stable, faster and less likely to fail. We also check that the cable is in good condition and is not damaged anywhere (manual inspection is a good place to start).
The next step is to try turning on the webcam. Usually there is a special key combination to launch it. It is worth studying the row F1-F12; one of the buttons should have a corresponding mark. Combining this key with FN will most likely launch the camera.
File system is damaged
Another reason why a laptop usually does not see the built-in webcam. In short, a file system is a way of organizing and storing information. And at the slightest error in it, the performance of certain components is disrupted.
How to fix it:
- Open "Computer".
- Right-click on the drive on which the OS is installed. Usually this is drive "C".
- Open the “Properties” section.
- Go to the “Service” tab and click on the check button.
- Check all available options and click “Launch”.
- Add to schedule by clicking on the appropriate button.
To start checking, you need to reboot the system. All errors found will be corrected.
Drivers
One of the most common reasons why the camera does not work on a laptop is that it does not have the necessary drivers. The good news is that the problem is easy to fix.
Diagnostics of driver health
Why doesn't the webcam on my computer work? Very often Windows simply does not know how to work with it or perceives it incorrectly. We move from physical checks to software ones. Our task is to find out how the computer perceives the webcam.
How to determine it:
- Right-click on Start and select “Device Manager”.
- Open the “Image Processing Devices” block.
If the name of the webcam is displayed here and there are no notifications next to it, then the system perceives it correctly. Otherwise, Windows cannot recognize the device and requires driver installation. This is indicated by the presence of “Unknown devices”, the absence of a webcam model in the list of devices, or the presence of an exclamation mark next to it.
Restoring driver functionality
If during the previous step it was possible to determine that the camera on the laptop does not turn on due to incorrect drivers, it is worth correcting this situation. We can achieve our goal in several ways:
- Download drivers from the official website. The best way in 90% of cases. Just enter “Drivers for [name of device manufacturer]” into the search and you will most likely get to the developer’s website. After downloading and installing the file, we recommend rebooting the system and the problem will be solved.
- Reinstall manually. We can try to remove the equipment (via RMB using the model name in the “Device Manager”). After reconnecting the device or restarting the computer, Windows will try to select the optimal drivers for the webcam. She often succeeds.
- We use applications for automatic installation. Programs like Driver Pack Solutions offer smart driver scanning and updating or installation. Most likely, the application will detect the problematic device and install the correct drivers for it.
Another way is to go to the hardware properties and use the VEN and DEV identifiers to find drivers for a specific device model on the Internet. The data is located on the “Details” tab in the “Equipment ID” section.
Restoring driver compatibility
After upgrading to a new version of Windows 10, the webcam on your computer does not turn on? Most likely due to a conflict between the system and the software (software) or lack of support for it. This can be fixed using the operating system tool.
Step-by-step instruction:
- Click on the search button.
- We set the search keyword “Previous” and open the only tool found.
- Click on the “Troubleshoot compatibility issues” button.
- Select the driver or camera software from the list or specify the path to it manually and click on the “Program Diagnostics” button.
Healthy! A universal driver for a Windows 10 webcam often helps fix the problem. It is produced by laptop manufacturers, offering a full set of software for all models of devices of their own production. Installing the program should fix compatibility issues.
System errors
The second problem, which may well be, is damage to the system files responsible for the correct operation of the software.
How to fix errors:
- Launch the command line “cmd”.
- Enter sfc /scannow.
- Issue the command for execution by pressing “Enter”.
- Wait for the scan to complete and reboot the system.
This is a system tool that automatically restores important files from the backup area.
Quick online check of webcam functionality
It’s not only drivers that cause problems; at least as often the source of the problem is incorrect settings of the video capture program. Perhaps her access to the equipment is blocked, which is why the utility cannot display the picture. An easy way to find out if this is the case is to use an online service to check the camera's functionality.
How to check your webcam in Windows 10:
- Go to the WebcamTest website.
- In the pop-up window, click on the “Allow” option.
- We are waiting for the image to display.
If the picture appears, then you should further search in the settings of Skype or another service for video calls.
What to do if the camera on a laptop with Windows 10 does not work in Zoom
As in the previous paragraph, the reasons may lie in a system failure or driver error, or in incorrect application settings. In the first case, the problem is eliminated using standard methods described at the beginning of the article. In the second, they check whether Zoom has access to the video camera.
In most cases, the cause of an error in the operation of the built-in video camera is a software failure or incorrect hardware settings. Hardware problems are rare, but in this case you will have to contact a service center to fix the problem.
Webcam settings (image lag issue)
Sometimes the Windows 10 system does not see the camera on a laptop, but not only this situation, but also various bugs can cause inconvenience. One of the most unpleasant is picture delay. Even a few seconds of interruption in the display results in serious discomfort. The main reason lies not in the camera settings, but in the low connection speed between users.
How to really reduce latency:
- Reducing the image resolution. This will reduce the load on the network. Not all models support this setting, but it is often available in the manufacturer's proprietary software.
- Disable VPN. An active VPN or proxy most often causes lags and freezes.
- Connect to a high-speed network. It's better to talk over Wi-Fi, it's a more stable and faster access point.
- Turn off downloads and other tools that use a lot of traffic.
For laptops
A fairly common reason that the webcam does not work on a computer is the laptop’s simple lack of camera support capabilities. This problem is relevant for older models.
In this case, there are also two methods of struggle. The first is buying a new laptop. Preferably with a built-in camera. Then there will be practically no problems. Just install the drivers and everything will work.
The second is refusing video calls. If you can’t live without them, you’ll have to look for a replacement laptop. But there is another rather interesting point that relates to our topic today. Which one? Now we will recognize him.
Setting up a webcam in the application (Skype, Vkontakte, etc.)
If the Windows 10 camera does not work, it is worth checking that this device is selected as the default image capture device. Some minor accessories may intercept this option, but not cope with the task. There is also often a conflict between the built-in and additional cameras. If the communication program supports this, you need to select the default device in the settings.
For example, Skype supports a similar function. In its parameters on the “Video Settings” page we can “Select a webcam” and set many useful image enhancements.
How to set up a camera for VK:
- Open the browser menu (in our case Google Chrome) and go to “Settings”.
- In the “Privacy and Security” block, select “Site Settings”.
- Go to the “Camera” section.
- We remove VK from the “Block” list.
- Reload the VKontakte page, start a video call and click “Allow”.
The camera on the laptop does not work in Skype
If during a call there is a problem with the transmission of the video stream and the interlocutor sees a black screen, first check whether the failure is related to the operation of the application or there are problems with the camera. To do this, they test the “web” in another program.
Based on the results of the inspection, the cause is determined:
- If the equipment does not work in all applications, fix the problem by adjusting the settings or updating drivers.
- If the webcam does not support only Skype, most likely the reason is incorrect video settings.
To fix it, go to the “Settings” section and allow application access to the camera. After this, restart Skype.
Installing Cyberlink Youcam
Watching the video gave me the idea of using Youcam. The laptop came with the official version of this camera software from Cyberlink. Youcam installs a virtual webcam “Cyberlink webcam Splitter”, with which you can split the video stream between two programs and apply various effects to the video in real-time. We launch and see a bleak picture: there is still no picture from the camera.
It was experimentally found that if you lower the webcam resolution (in our case to 352x288), the camera starts working!
In our case, we carried out this operation through the Youcam settings panel.
Webcam image in Youcam
We set “Cyberlink webcam splitter” as an active camera in Skype and see the long-awaited picture.
One of the inconveniences of this method is the need to change the default camera everywhere to “Cyberlink webcam splitter”. On the other hand, this is the only option that we found to get the webcam to work without returning the laptop back under warranty.
This method of solving the problem has not been found on the Internet and, of course, has a right to exist.
Thanks to high technology, new devices become available to us every year that serve to make our lives easier. Over the past few years, several communication tools have been developed and are still being improved with additional features and connection methods.
The big breakthrough was the ability to stream video over a distance. Subsequently, this opportunity was developed in several directions, for example, we can watch TV channels via an Internet connection. The most promising was the possibility of video communication, which is now at its peak of popularity thanks to the Skype service.
Instead of an afterword
Any software malfunction related in one way or another to the web camera can be resolved, which cannot be said for physical or hardware problems, which can only be saved by the warranty period.
But since a webcam device is relatively inexpensive and you can easily find a model for up to 200 rubles, you shouldn’t be too upset about the loss. Technologies do not stand still and most likely you will purchase equipment that is much better in terms of both workmanship and technical characteristics .
Check your settings
If your webcam is disabled and no apps can use it, then the setting has most likely changed with the new Windows 10 update (1809). Review your Windows settings to check for this issue.
- Go to Settings > Privacy > Camera.
- Next on the right side you will have permissions for webcam access. Check that everything is turned on, then restart your PC.
Let's try to solve the problem in simple ways
Reinstalling Windows and searching for driver updates on the official website did not yield any results. If you check the camera through a popular verification site:
In Skype, we see a black screen and a rotating wait indicator.
While searching for a solution, I found a good video with a similar problem. But, in our case, these actions did not produce results. No driver updates were found via Windows Update and shining a flashlight into the camera did not help. However, it may be useful to you:
Verdict - she died
If it becomes clear that the laptop’s built-in camera has “died,” you can always replace it at a service center or attach a new external one to the screen. External cameras have better video signal transmission quality, but create certain inconveniences due to their bulkiness. How to connect a camera on a laptop? Very simple! You just need to insert the plug into the USB connector of the device and install the drivers.
One of the advantages of laptops over desktop personal computers is the presence of various built-in equipment, including a webcam. For users who spend a lot of time talking in video chats, the failure of this device is quite unfortunate news.
Many problems with the webcam on a laptop can be resolved independently without the help of specialists. Let's look at why the camera may malfunction and how to fix it.


