Spontaneous rebooting (reboot) unnerves even experienced users. It's always unpleasant when technology hints at a malfunction. It’s especially sad if data is lost after a reboot.
Most programs have autosave, but it’s a shame to lose even the last 5-15 minutes of work. What can we say about interrupted missions of computer games.
Informative article: Replacing RAM on a PC: 7 simple steps + solving possible problems
Overheat
The processor or video card in your computer usually overheats. The typical cause is dust. When a “coat” of microparticles accumulates on coolers, they interfere with the normal operation of the fans and shorten their service life. In addition, dust interferes with cooling. Spontaneous rebooting of a clogged computer is a typical occurrence. Putting things in order “under the hood” without delving into the nuances is quite simple. This task can be handled by a user who is not experienced in computer hardware.
How to fix?
There are two types of cleaning the system unit: superficial and thorough. In any case, the first thing you need to do is disconnect the computer from the power supply, and also disconnect the cables of the mouse, keyboard, monitor and other devices from the system unit. Next, unscrew the screws that secure the inspection cover of the system unit. We remove static electricity from our hands by touching the battery radiator and begin cleaning.
You can collect dust using a vacuum cleaner. It is only important to work carefully - without touching the fragile components of the PC with the nozzle of the household appliance. You can use a paint brush to clean hard-to-reach places. Express cleaning involves:
- cleaning dust from all internal surfaces of the system unit,
- passing a vacuum cleaner through external connectors and grilles.
Such cleaning often helps prevent overheating, but after the first 5 years of operation, the computer needs more thorough service, including replacing the processor thermal paste. To do this you need to remove the cooler. A discrete video card requires a similar procedure. Inexperienced users should contact a service center for complete cleaning. The situation is similar with laptops. In this case, disassembly/assembly requires certain skills.
Interesting article: How to improve laptop cooling - 5 ways
Key symptoms
To begin with, we will highlight two classic categories from which we need to build:
- hardware errors;
- software glitch.
The first category is divided into several basic sub-items:
- power outages;
- wear and tear of equipment;
- overheating of components;
- illiterate selection of iron;
- negligence committed during PC assembly;
- Chinese hardware from AliExpress (you can separate this item into a separate category, but next time).
As for the software part, not everything is so simple here:
- driver conflict or lack of digital signature on them;
- problematic update;
- unlicensed version of Windows;
- file system failure;
- hard drive wear (the root cause is hardware, but is often achieved by software);
- unsuccessful manipulations with the registry and BIOS;
- viral activity;
- consequences of overclocking components;
- software incompatibility with your version of Windows.
And these are just the basic reasons. We’ll talk about everything in depth so that you don’t have to look for additional information online on other sites.
Power problems
Windows may reboot due to power problems. Possible reasons:
1. Illiterate upgrade For example, we decided to install a powerful discrete video card, and the voltage from the old power supply was not enough.
2. External factors The computer operates in the private sector, where electric lamps barely glow. Also, the reason for the lack of voltage may be connecting the PC to old electrical wiring. You can eliminate the problem by checking the outlet with a multimeter.
3. Poor quality PC assembly The assembler incorrectly supplied power to the components. This also includes loose wire contacts.
How to fix?
Here are three recommendations that will help you figure out what to do if your PC reboots due to power supply:
- If you are planning to add a powerful video card to your computer, first consider whether the power supply is strong enough to pull it. You may have to buy a new power supply at the same time.
- External factors are more difficult to overcome. You can solve the problem of poor voltage in the house by installing a powerful stabilizer. Or use a laptop instead of a desktop PC. An uninterruptible power supply will save you from the vagaries of electrical wiring and power surges.
- In case of clumsy assembly, you should contact a service center.
Setting up identification on an iPhone: Face ID does not work on iPhone x: 5 recommendations on what to do
power unit
Quite often the problem turns out to be the computer's power supply. It either overheats (from the same dust or a faulty fan), or it’s time for it to retire, or at least get repaired. Due to high temperatures in power supplies, especially cheap ones, capacitors dry out and the circuit cannot cope with voltage ripples.
In combination with a cheap motherboard, this leads to computer shutdowns after a short period of operation. You should try connecting another power supply of suitable power. I’ll give you some advice: you shouldn’t buy a cheap power supply, although the temptation to save money on something you don’t feel (at first) is very great. Repairing a cheap power supply is impractical and even dangerous to the life of your computer!
Problems with RAM
Memory sticks bought second-hand after a long period of use are prone to RAM defects. When upgrading, it is advisable to buy a new RAM with a guarantee. In case of a defect, the system begins to reboot periodically: from 1-2 to 5-10 times a day.
To identify the problem, you can use specialized software, for example, Prime95 or MemTest86+. If one stick is enough to run the operating system, you can experiment with the hardware, removing part of the memory and checking how the PC will function without it. The speed will drop, but reboots may stop.
The computer itself may also reboot for other reasons related to RAM:
- PCs have RAM sticks from different manufacturers, they differ in volume and have different frequencies;
- The RAM slot is faulty or dust has entered the connector.
Memory problems lead not only to reboots: the computer may turn off on its own or not turn on at all.
How to fix?
If the memory is faulty, the best solution is to replace the stick with a new one. When inserting new GB, you should pay attention to the condition of the slot. If it is clogged with dust, it must first be removed with a vacuum cleaner.
Checking the RAM: How to check RAM in Windows 10: 2 methods
Faulty components
My computer rebooted itself due to a faulty memory stick. In general, the culprit can be any link, even the train. The best way to diagnose is to turn off everything the computer can operate without. That is, you only need to leave the motherboard, processor, cooler, one memory stick, built-in video card (if any) and that’s it. If restarts are repeated, then most likely the motherboard or memory stick is to blame; try moving it to another slot.
If everything is fine, then connect the keyboard, then the mouse, hard drive and boot. Then we connect the remaining peripherals: additional memory, discrete video card, sound card, printer, etc.
Problems caused by installed programs are much more varied, I will discuss them in future articles, so subscribe to my blog updates to stay informed. If you found the information useful. Share it with your friends using the social service buttons below the article.
Malfunction of components purchased from AliExpress, diagnostics of reboots
Problems with RAM or other hardware may be caused by installing components from AliExpress. Purchasing the necessary PC elements on this site is like a lottery.
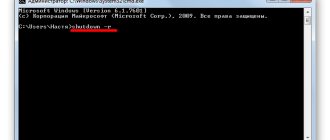
The “blue screen of death” will help you find the reason why the computer periodically reboots itself. If it does not appear before rebooting, the issue is most likely in the OS settings. To fix them, click Control Panel → System → System Protection → Advanced → Boot Options.
Uncheck auto reboot. After this, most likely, if the computer crashes, it will display a “blue screen of death” and freeze without rebooting. Based on the contents of the BSoD screen, you can search for the cause by typing the error code into Google.
How to fix?
If the user does not know trusted sellers selling on Ali, it is better for him to buy hardware in Ukrainian online stores. A warranty on parts allows you to work and play with peace of mind.
Choosing a tablet for kids: Which tablet to buy for a child: 5 selection options
The computer reboots itself from Windows 7, 10
The computer constantly restarts when starting Windows 7 or 10. This problem has one solution for both OS. Windows 10 and 7 may reboot spontaneously after updating. There may be a continuous update feature installed, which can be deactivated and adjusted to personal preference. First, sign in to Windows Update. Press Win+R, type gpedit.msc in the line that appears, press “Enter”.
We follow the path – “Administrative Templates\Windows Components\Windows Update”.
We change two options. The first is “Do not automatically reboot when installing updates automatically if there are users working on the system.” Double-click with the mouse. Check the “Enable” box and click “Ok”. Next: you need to deactivate the “Always automatically reboot at a specified time” option. We also double-click on the parameter and in the window that appears, check the “Disable” box. After all the manipulations, you need to restart the computer. After this, the problem with Windows 10 or Windows 7 automatically restarting will no longer bother you.
>2 reasons why the processor is loaded at 100%
Software problems
Software failures that cause the PC to reboot itself can occur for various reasons:
- It is easier to defeat a spontaneous reboot if it occurs at the moment of launching a single program. Maybe it was written for another operating system, for example, some outdated unsupported Windows.
- Another typical situation is a spontaneous reboot due to Windows 10 updates. In the “ten”, starting from version 1703, you can select the activity period. By default, it corresponds to a normal working day - from 8 to 17-00. Accordingly, if after the update the system needs to reboot, it will most likely do this after 17-00.
- Spontaneous reboots occur due to viruses and antivirus programs. In the first case, the malicious program reboots the computer in order, for example, to make changes to system files or edit the BIOS. Antiviruses reboot the PC to complete the update process.
- Driver-related failures occur when they are installed incorrectly. Sometimes, before installing new drivers, you need to remove old ones. Sometimes “firewood” downloaded from dubious sources and without a digital signature does not take root.
- System clutter. Spontaneous reboots are caused by failures associated with disorder in the system registry, with autoloading, which contains a lot of unnecessary things, with a full hard drive.
Popular reasons for computer reboots
Motherboard and peripherals
Problems of this kind belong to the class of hardware problems according to our classification.
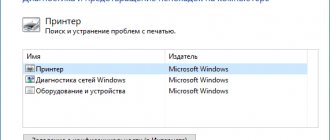
Diagnostics
First of all, when “floating” glitches occur in the form of reboots, I open the system unit and conduct a visual inspection of the condition of the motherboard and expansion cards.
The situation is far from isolated; currently a LOT of MSI motherboards are arriving with the same problem - blown capacitors. Either the resource has been exhausted, but they are just coming en masse. It happened that in a week only 4 boards had to be soldered. The entire replacement capacitor fund has been exhausted!
By the way, as I already mentioned, this malfunction can affect not only motherboards, but also other expansion cards, most often graphic cards.
Repair:
I described on our blog page the situation of replacing electrolytic capacitors. The repair is not very complicated - we find a similar capacitor and, using a soldering iron, simply replace the blown one with a healthy one, while you need to follow a number of basic rules:
- The ideal case is if the capacitor is exactly the same (but this is not always the case);
- The operating voltage should be no less (more is possible) than that of the damaged one;
- The capacity should be no less (perhaps a little more) than that of the spoiled one. But there is a nuance here. The central processor circuit, where many capacitors are concentrated, works on the principle of damping electrical surges, that is, the capacitors there act as “expansion tanks”. There is positive experience in replacing many capacitors with one, the capacity of which is equal to the sum of those removed. This is acceptable, although not very desirable;
- Observe polarity carefully! As a rule, the motherboard has a corresponding mark at the location where the electrolytic capacitors are installed (the “+” symbol), as well as a painted half of the seat. On the capacitor itself there is a contrasting strip with “+” or “-” signs on it, depending on the manufacturer. This stripe indicates the corresponding leg. Violation of polarity threatens rapid failure of the capacitor.
Glitches in RAM
This is also a fairly common problem. It is usually expressed in frequent, unsystematic BSODs with various error codes.
Diagnostics:
Personally, I carry out diagnostics using the cool utility “Memtest86+”, which is included in almost any boot disk (Hiren BootCD for example), and is supplied independently. Above I have provided a link to the official source.
We boot from the disk and run memory testing. We will see one of the following two situations:
A clean output indicates that the memory is working correctly, that is, there is no data corruption. Or like this:
There is clearly something wrong with this situation. We remove one of the memory sticks and repeat the test. In this way, the faulty ruler is localized.
By the way, an important note - it is recommended to complete the test, because the memory may begin to fail due to heating or only on certain patterns; I had a situation where errors began to appear only in the second half of the test.
Repair:
Alas, I would not repair the RAM. I think it's cheaper and easier to replace.
Peripheral or power failures
Various types of computer malfunctions, including reboots, can be caused by malfunctions of peripheral equipment - disk drives, hard drives, sound cards and video capture cards, etc.
Diagnostics:
It’s quite simple - disconnect all equipment from the motherboard, leaving only the monitor and keyboard. Well, and food, of course. Disconnect all other wires. If the problems stop, gradually, one by one, connect all the components and catch the moment when glitches appear again.
Or, what else would be nice to try, have known good equipment (power supply, RAM, hard drive, optical drive) and replace it with it for a while.
This especially applies to power supplies. It has often happened to me that the power supply passes the test, starts up via POWER-ON, but the computer stubbornly refuses to work with it correctly. Either a ripple or an unstable voltage, which a household multimeter is not able to detect.
There were also cases when failures occurred due to the DVD drive, as well as due to a faulty Mobile Rack - connecting the hard drive directly to the motherboard did not cause errors, but connecting through the Mobile Rack case completely crashed the computer.
Solution:
Replace the faulty element causing the malfunction. Well, or, if the problem is obvious, try to fix it. Somehow I managed to resolder the capacitors in the power supply, quite successfully. The only inconvenient thing is that the installation there is quite cramped.
Problems with USB ports and other short circuit problems
I would never have thought that this could be the cause of the reboots. The essence of the problem is as follows: someone, after carelessly handling flash drives, broke out the USB port so that the power contacts were shorted to ground either permanently or due to mechanical vibrations.
The computer (or rather the power supply), under such shocks, either went into deep protection (turned off) or rebooted the computer.
The same applies to incorrectly laid wires inside the system unit. In my practice, there was a case when the power supply Molex, by some miracle, touched a corner of the internal metal structure of the case and the computer instantly rebooted. The problem was solved by carefully laying and holding the cables in a stationary state.
Diagnostics:
External inspection of the I/O ports, as well as a mechanical check to see if the behavior of the computer changes when the wires, cables vibrate, pressure is applied to the covers, etc.
Overheating of chips
A very common problem is simple overheating. The computer simply turns off (reboots) at the moments of highest pleasure of peak load. This is observed in games, resource-intensive applications (Photoshop, AutoCAD, video converters and studios).
Diagnostics:
The best way to diagnose this is by installing temperature monitoring software (HWMonitor or AIDA64 are good options).
Look, the temperature on the processor is shown at 101 degrees (!) - in my opinion, this is a bit too much and the computer does not have much time left before a protective shutdown.
Some information about the temperature can be obtained from the BIOS if there is not enough time to start the system.
Although, if you don’t have enough time, you may no longer need to look at the temperature and you can safely climb inside.
More indicatively, you can run a processor stress test and see the results faster.
Solution:
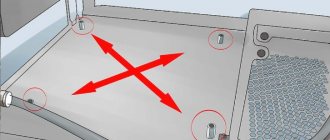
So, let's say that we saw overheating. What to do next? Next, open the system unit and pay attention to the following details:
- Do the fans spin wherever they are present (when the computer is on)?
- Do they rotate freely (with the computer turned off)?
- Has the heatsink come off the processor (often happens on 775 sockets)?
- Is the thermal paste between the processor and the heatsink dry? It's better to change it.
- Isn't it time to carefully vacuum your computer from dust?
Problems with fans can be solved by lubricating/replacing them. Thermal paste is quite easy to change. Well, putting a fan on a radiator correctly is a whole science in some configurations. But you can handle it. After completing the work, I recommend repeating the stress test and assessing the effectiveness of the measures taken.
System files and operating system
Now we have come close to software problems. This is a whole bunch of different malfunctions from driver mismatches to system file corruption and other nonsense.
Most often, problems of this nature are accompanied by a “blue screen of death” (BSOD), information from which allows you to get closer to solving the problem.
If no BSOD occurs and the computer simply reboots, then most likely the “Perform automatic reboot” option is set in case of system failure:
Open the system properties in the “Control Panel”, follow the link “Advanced system settings”, in the window that appears, go to the “Advanced” tab and click the “Settings” button in the “Startup and Recovery” section. The following window will open:
For our purposes, it is better that the “Perform automatic reboot” checkbox is not checked, and that “Small memory dump” is selected in the “Record debugging information” section. If something happens, we can analyze it.
If we no longer have a way to get into Windows, then when loading the system we try to press to get into the boot menu and there we select the item “Disable automatic reboot when the system fails” (see point 4). We will refer to this menu later in the text, so we will mentally remember its location.
- Under point 1, various options for booting into safe mode . A very useful option, sometimes it helps when the problem is in some insidious service or driver. In this case, Windows starts in a minimal environment without starting many services and drivers, often this is enough to start diagnostics from the inside.
- Step 2 - booting in VGA mode allows you to start the system with a low resolution, this will help if the cause of the malfunction is a problem with the video driver. A typical situation: repairmen were fixing a computer by connecting it to their monitor, everything works. We gave the computer to a user who has an old CRT monitor that is not capable of displaying the saved screen resolution and information is not displayed on the screen. This mode will help!
- Step 3 – loading the last successful configuration – launching a previously saved copy of the registry (parameters), in which the loading was successful. With various changes, these sets of settings rotate in such a way that there is a current configuration and a previous stable configuration. If you screwed up something with the services, you can load the latest working configuration, where fatal changes have not yet been made.
- Point 4 - disable automatic reboot when the system fails - this option allows you to most often see a blue screen and understand the causes of the malfunction in more detail.
So, let's get back to our BSODs. Let's consider several typical cases and their approximate solutions.
I wrote “approximate” because “the reasons can be different, but there can be a lot of consequences” :)))
A typical error containing the following fragment: “\SystemRoot\System32\Config\...”
And here's another:
These errors indicate a problem with loading the system registry (one of its “hives”). We restore the damaged file from a backup copy (\System Volume Information\_restore{XXXXXXXXX}\RP[YYY]\snapshot\_REGISTRY_MACHINE_SECURITY or _REGISTRY_MACHINE_SOFTWARE, respectively, first rename them as it was), where {XXXXX} is your disk GUID, and YYY is the largest number (most recent restore point). The required registry file must be found and moved to the \Windows\System32\config\ directory, replacing the file indicated in BSOD.
If this is SOFTWARE, then rename it to SOFTWARE.old, and rename _REGISTRY_MACHINE_SOFTWARE from the above directory to SOFTWARE and drop it into the *\config\ folder. The problem will most likely be solved!
Other BSODs can be solved by the banal chkdsk C: /f (or D: or whatever you have?).
Sometimes restoring Windows over an already installed one helps (this helped a lot on Windows XP).
Malicious software
I don’t currently remember a single malware that forced the computer to reboot cyclically, but, nevertheless, sometimes it wouldn’t hurt to check the computer for malware using third-party tools.
Among the most popular, I highlight three:
- Dr.Web CureIT.
- Kaspersky Virus Removal Tool.
- AVZ4.
These programs are free and allow you to check the connected disk for malware, if necessary, and cure/delete the objects found. I think that in the future I will write separate articles on the use of these tools, but for now, let me take my leave, there are a lot of letters.
Loading...
Friends! Join our VKontakte group so as not to miss new articles! Would you like to say thank you ? Like and repost! This is the best reward for me from you! This way I know that articles of this kind are interesting to you and I write more often and with great enthusiasm!
Also, subscribe to our YouTube channel ! Videos are posted quite regularly and it will be great to be one of the first to see something!
Boot into Safe Mode by manually restarting your PC when Windows starts
This is the simplest method, but in some cases it may not work. The steps are as follows:
1. Turn off your computer.
2. After turning on the computer again, wait for the Windows boot logo, then quickly press the restart button on the system unit (if it is a laptop, press and hold the power button until it turns off).
3. Do the same thing two more times (at least).
4. At the next boot, the system will display a message that “The computer is not started correctly.” On the same screen you will see two buttons: “Restart” and “Advanced options”. Click the second one:
5. The WinPE recovery environment will be launched.
6. Go to the “Troubleshooting” section, then to the “Additional parameters” subsection.
7. Next, select “Boot Options” and click the “Restart” button.
8. The next time you boot your computer, the screen will display the following:
9. To start “normal” safe mode, press the “F4” key. If you need to access the Internet in safe mode, press “F5”.
In some cases, by the way, after 3 reboots of the computer, the boot parameters are immediately displayed on the screen, as shown in the previous screenshot.