12/11/2018 Category: Errors and problems Author: Ekaterina Vasilyeva
Often, when launching a file or even an executable document of a program, users see a small window on the screen with the error message “Class not registered.” Why does it appear and how can I quickly remove it so that I can continue working on my PC without hindrance?
- How to resolve the error:
Reboot the computer - Fixing a bug with opening images
- Fixing an error with launching programs
- Fixing the error “Explorer.exe. Class not registered"
- A universal way to solve the problem through DCOM settings
- Restoring Windows 10 to an earlier state when this problem did not exist
Class not registered
This error usually occurs if the corresponding DLL file is not registered. If you encounter the Not Registered class in Windows 10, depending on the application, you may need to:
- Re-register the ExplorerFrame.dll file
- Run System File Checker to replace the damaged ExplorerFrame.dll file
- Register DCOM Components
- Start the Internet Explorer ETW Collector service
- Re-register Windows Store apps.
Let's see how to fix this error.
1] In this case, you may need to re-register the ExplorerFrame.dll .
To re-register the DLL file, you will need to first open a Command Prompt as an administrator and then type the following command and press Enter:
regsvr32 ExplorerFrame.dll
Once the process is complete, restart your computer. It will search for and replace damaged operating system files if found.
2] If this doesn't help, it's quite possible that your ExplorerFrame.dll is damaged and you may have to replace it with a "good" one.
Open an elevated Command Prompt, type the following and press Enter to run System File Checker:
sfc/scannow
3] Open the Run window, type dcomcnfg and press Enter to open Component Services . Go to the following path:
Component Services > Computers > My Computer > DCOM Configuration.
When you expand the arrow next to DCOM Config, you may see a pop-up window asking if you want to register any component. Click Yes. This may happen one or more times. This will help fix DCOM errors.
4] Run services.msc to open Services Manager . Find Internet Explorer ETW Collector Service, right-click on it and select Start. This will help you if you are facing a problem in Internet Explorer or Edge browser.
5] Re-register Windows Store apps and see if that helps.
System Restore would be the last option to consider.
I'm sure something will help you solve your problem.
Other solutions
This section will contain methods that are worth trying if all other methods have proven ineffective.
Customizing the Start Menu in Windows 10
Using PowerShell
There is one more command that can help solve the problem. First, you should run the program, and then enter and execute the following statement in it: Get-appxpackage -all *shellexperience* -packagetype bundle |% {add-appxpackage -register -disabledevelopmentmode ($_.installlocation + "\appxmetadata\appxbundlemanifest.xml ")}
Editing the Registry
First you need to press win+r and write regedit in the window that opens. Then you will need to follow the path HKEY_CURRENT_USER\Software\Microsoft\Windows\CurrentVersion\Explorer\Advanced. In the last directory you will need to create the EnableXAMLStartMenu variable if it is not there.
The value must be set to 0. After this, you will need to restart the computer.
Checking the disk for errors
You can also check the integrity of system files, as well as the presence of errors on the disk. To do this, you need to launch a command prompt with administrator rights and execute the following statements:
- dism.exe /Online /Cleanup-image /Restorehealth
- Sfc /scannow
Re-registration of libraries
In the power shell, you can run another command that can re-register the libraries, after which the error may disappear. It is worth opening the utility and entering the command Get-AppXPackage -AllUsers | Foreach {Add-AppxPackage –DisableDevelopmentMode -Register "$($_.InstallLocation)\AppXManifest.xml"}
Uninstalling system design applications
If none of the methods helped, then you should remove all applications that change the standard appearance of the interface and generally design the entire system or its elements. After erasing the utilities, you should restart the computer and check if the error has disappeared.
System rollback
If none of the previous methods had the desired effect, then you can use a standard system recovery utility and roll back Windows to one of the earlier restore points, to a time when everything was still working.
In this case, all parameters will return by that time, but user data will not be affected; rolling back all system data can remove the failure.
Explorer.exe class value is not registered.?
EXE errors occur for a number of reasons, but mostly due to problems with executable files or EXE files. EXE is an application extension in Windows. Like other types of files built into your computer system, EXE files can encounter errors from time to time. Some errors are common, but some are difficult to troubleshoot and resolve.
The software you use and the applications your operating system requires use EXE files to perform their tasks. On this note, the PC contains many EXE files, perhaps thousands, making it highly likely that an error may occur. Sometimes EXE errors can affect your computer system. Programs may stop working or your computer may slow down. Even worse, an EXE error may prevent you from accessing and logging into your computer.
Some problems that can cause EXE errors:
- Viruses, malware and spyware
- Incorrect, corrupted, damaged or outdated files or drivers
- Conflict of entries in the Windows registry
- Application conflicts
Causes and types of errors
Making changes to the user-created environment sometimes results in inconsistencies between different versions of the software. The “Class not registered” error most often appears when performing the following operations:
- when you click the "Start" button;
- opening images;
- launching the browser;
- calling applications.
The reason for the message may be:
- system update;
- installing a new version of Windows;
- replacing or installing an antivirus;
- updating your web browser or its version;
- removal of graphics programs, antiviruses, applications;
- failure of Explorer or operating system settings;
- installing and launching applications that make changes to system settings;
- use of the Cyrillic alphabet in the Windows User name.
Solving the problem class not registered Windows 10
When trying to open files of various formats, applications from the store or browsers, users may receive a class not registered error in Windows 10. The problem of an unregistered class with error 0x80040154 can appear due to many reasons, ranging from a simple update of the operating system to the installation of unsafe application systems.
This article will show a solution to the problem class not registered in Windows 10. In accordance with the cause of this error, the user must choose a method to resolve it. The problem also lies in the fact that it is not possible to offer the user a universal solution to the problem without reinstalling the operating system.
Knowledge BaseTry 2 Fix beta
September 23, 2016
HDD ShellExperienceHost Windows 10 Class not registered Desktop flashing Start button does not work Application activation error
Our service received an old PC, purchased around 2009. Previously, it had Windows 7, and after the terror of Microsoft, Windows 10 . Everything was not so bad until (according to the user) the latest update. The material from this article would be enough for three or four self-sufficient publications, but since we encountered all this on one PC at once, we will not divide it. So, the symptoms:
- Start button doesn't work;
- Metro applications do not work;
- The HDD indicator on the PC case does not blink, but lights up steadily;
- When opening the Edge browser, the error “Explorer.exe Class is not registered” appears;
- and for a snack: after loading the desktop, all shortcuts blink in the style of a complete reboot of Explorer, and the taskbar is empty. This lasts two or three minutes, then the taskbar loads with all the icons, which, as said above, don’t work at all.
I’ll immediately answer the question “Why not just reinstall the system?” - this is not the IT Jedi approach. There is a sea of accounting software on a PC, some exotic, so it is impossible to guarantee the return of everything that was before the reinstallation, given that the user himself could not remember everything he uses and what he doesn’t.
Since the problem began to become widespread, we have highlighted all the solutions to the problem “Class is not registered” and “Start button does not work” in a separate article.
We begin diagnostics with probably not the identified problem, but something that the user has not seen: the HDD indication.
Stage 1. Diagnose the HDD.
First of all, I checked the SMART HDD using HDDScan - no problems, no Bad blocks, the temperature is normal, everything is fine. Let's look at the task manager. There are no processes that load the HDD 100%. Kaspersky Anti-Virus 2022 periodically takes up all the CPU time, but not permanently. OK. This is all strange, let’s put it aside for now.
Stage 2. We deal with problems with Metro applications and the Start menu.
Let's move on to the indicated problem: the start does not work. I have encountered this problem several times in Windows 10 . A Powershell script found on the Internet helps
Get-AppXPackage -AllUsers | Foreach {Add-AppxPackage -DisableDevelopmentMode -Register “$($_.InstallLocation)\AppXManifest.xml”}
Another solution found: disabling XAML for the taskbar . This crazy thing is done like this:
- In the registry we look for the branch: HKEY_CURRENT_USER\Software\Microsoft\Windows\CurrentVersion\Explorer\Advanced
- Create a DWORD parameter (32 bits).
- Parameter name EnableXAMLStartMenu, value 0.
- Let's reboot.
Another failure. Everything is in its place, the problem is not solved.
At the next stage, let's dig deeper: we begin system checks:
- Checking file integrity: sfc /scannow
In the command line as an administrator. - We fix Windows Update errors using DISM (what if the user complained about it) DISM.exe /Online /Cleanup-image /Restorehealth
In the same place, from the same administrator. - Reboot. Failure again.
By the way, anti-virus scans of Dr.Web CureIt!, AdwCleaner and MalwareBytes also gave a negative result. I uninstalled the latest updates manually - nothing.
Stage 3. Look at the Windows logs.
Perhaps this is where we should have started (or maybe not). The log is full of messages related to ShellExperienceHost
Source: Apps, Event ID: 5973
Microsoft.Windows.ShellExperienceHost_cw5n1h2txyewy!App
application activation failed Error: Remote procedure call failed. For more information, see the Microsoft-Windows-TWinUI/Operational log and this mess:
Source: Application Error, Event ID: 1000 Failed Application Name: ShellExperienceHost.exe, Version: 10.0.14393.0, Timestamp: 0x57898fd8 Failed Module Name: KERNELBASE.dll, Version: 10.0.14393.187, Timestamp: 0x57cf9899 Exception Code: 0x00000 004 Offset errors: 0x000c2062 Failed process ID: 0x26dc Failed application launch time: 0x01d214c589f64452 Failed application path: C:\Windows\SystemApps\ShellExperienceHost_cw5n1h2txyewy\ShellExperienceHost.exe Failed module path: C:\WINDOWS\Sy stem32\KERNELBASE.dll Report ID: 3d1168da-a312 -4a1f-bf01-2fe186b16a75 Full name of the failing package: Microsoft.Windows.ShellExperienceHost_10.0.14393.187_neutral_neutral_cw5n1h2txyewy Application code associated with the failing package: App
These errors either should have been fixed in previous steps, or were not resolved at all without reinstalling. Nothing again. Let's use heavy artillery.
Stage 4. Heavy artillery.
To be honest, after finishing the previous stage, my fantasy came to an end. But before we do anything reckless, let's be cowardly: make a backup copy of the entire HDD. Using Acronis True Image Home 2016, we begin backup from the Live disk. And then the first clue appears. At some percentage, a message appears from Acronis: I can’t read the sector. Very interesting, because SMART is pure. Then from another DaRT 10 x64 live disk:
- Using diskpart we look for which partition is the system one. Exit diskpart.
- Run chkdsk /f /r C:
(we use C: for simplicity, you may have a different letter). - And lo and behold!
We see the following: The damaged clusters have been replaced in file 137979 under the name \Users\73B5~1\AppData\Local\MICROS~1\Windows\NOTIFI~1\appdb.dat. I didn’t bother looking for what this file was and why it was needed. Everything is clear from its name. - Let's reboot.
We see that the Desktop no longer blinks, the taskbar immediately contains all the icons. This looks like success! The “Class not registered” error is gone, Metro applications open. But the start still doesn't work. And to solve this problem, we execute the script again and reboot. Oh yes, the script itself for those who forgot:
Get-AppXPackage -AllUsers | Foreach {Add-AppxPackage -DisableDevelopmentMode -Register “$($_.InstallLocation)\AppXManifest.xml”}
All problems are solved! You can open champagne. By the way, the HDD light now blinks normally, and is not constantly on.
Class not registered when opening JPG and other images
The most common case is the “Class not registered” error when opening JPGs, as well as other photos and images.
Most often, the problem is caused by improper uninstallation of third-party photo viewing programs, failures in the default application settings of Windows 10 and the like, but in most cases this can be solved very simply.
- Go to Start - Settings (gear icon in the Start menu) or press Win + I keys
- Go to “Applications” - “Default Applications” (or to System - Default Applications in Windows 10 1607).
- In the "View Photos" section, select the standard Windows photo viewer (or another photo application that works correctly). You can also click Reset under Reset to Microsoft Recommended Defaults.
- Close settings and go to task manager (right-click menu on the Start button).
- If tasks are not displayed in the task manager, click "More details", then find "File Explorer" in the list, select it and click "Restart".
When finished, check if the image files now open. If they open, but you need a third-party program to work with JPG, PNG and other photos, try uninstalling it through Control Panel - Programs and Features, and then installing it again and making it the default one.
Note: another option for the same method: right-click on the image file, select “Open with” - “Select another application”, specify a running program for viewing and oh.
If the error occurs simply when launching the Windows 10 Photos application, then try the method of re-registering applications in PowerShell from the article Windows 10 applications do not work.
How to resolve the error
There are several methods to solve this problem.
Reboot the computer
The simplest and most common solution in this situation is to restart the PC. There may have been a system failure that can be resolved by restarting the operating system. Execute it correctly - through the Start panel. Choose either reboot or shutdown. In the latter case, you will have to turn on the device yourself using the power key.
Shut down your PC or immediately select the restart option
Fixing a bug with opening images
If a problem occurs when launching any images or photographs, simply install another utility that will open a file of this type by default:
- Expand the Settings panel interface - through the I and Windows buttons or the Start menu (there will be a gear under the profile image). Click the gear on the Start bar
- We launch the section intended for configuring applications.
In the settings, open the “Application” section - In the second tab for defining default utilities, find the item for viewing images (photos) - click on it.
Open Photo Viewer under Default Applications - In the gray menu on the left, select another utility to launch files.
In the list that appears, select the desired program to launch photos and images - You can simply reset the values for all file types using the button at the very bottom of the page - only branded applications from .
By clicking on “Reset”, you will set the default values - all files will be opened through proprietary Microsoft utilities
After this, restart the PC or the Windows Explorer service if you do not want to turn off the PC:
- Launch the “Task Manager” through the context menu of the “Taskbar”. We right-click on it and select the dispatcher line in the menu on a dark background. Or use the classic key combination Ctrl + Alt + Delete.
From the Taskbar menu, select Task Manager - We find the “Explorer” item in the list of system processes in the first tab.
In the “Processes” tab, find the line “Explorer” - Right-click on it and select the restart option. We wait for the process to reboot and try to run the file.
Wait for the File Explorer process to restart
To set another program as default, you can use a slightly different method:
- Find the file in Windows Explorer - first click on it with the left mouse button once to select the file, and then right-click to open an additional menu. In it, point the arrow at the “Open with” line. In the second menu, select the last option for another application.
Move the mouse cursor to the “Open with” value and select the last item - In another window, scroll through the list with other program options, decide on the application, and select it with the left button.
- Check the box next to “Always use”. Click OK to save all changes.
Select the program, select the checkbox at the bottom and click OK
Fixing an error with launching programs
If you encounter an error with an unregistered class when opening a program, including a browser, try replacing it with another similar utility from another developer. To ensure that the problematic application no longer opens all types of files that it is capable of running, you must do the following:
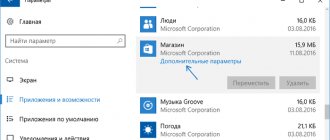
- Launch the “Settings” menu and the “Applications” section, and in it the tab for default utilities. Scroll down the page and select the most recent link, “Set defaults by application.”
Follow the link "Set default values" - On the new page, left-click on the program, for example, on the browser, after launching which an error appears. Click on the "Manage" button.
Find the problematic program in the list and open the management section - For each file type opposite which the problematic utility is located, change the program that will automatically launch it: left-click on the program logo.
Where the problematic program is installed, install another one - In the menu on the left, select another application from those presented.
Select the application from the menu that appears
If you have a problem with the built-in Internet Explorer browser, the instructions described may not help you. In this case, proceed to the following steps:
- Click on R and Windows on the keyboard - type cmd in the window that opens. To perform it and launch the console as an administrator, hold down three buttons at the same time: Enter + Ctrl + Shift.
Paste the cmd command and click OK - Another launch method is through the search bar on the “Taskbar”. Enter the same cmd command - right-click on the “Command Prompt” line in the results.
Write cmd command in the search bar - In the gray menu, click on the first option.
Select "Run as administrator" - Agree to make changes to your operating system. Allow the console to make changes
- In the black editor, type yourself or paste the command regsvr32 ExplorerFrame.dll - press Enter and wait while the console carries out the operation.
Run the command regsvr32 ExplorerFrame.dll in the console - Restart your PC and see if the error disappears.
If you do not have an alternative program that you could use to replace the problematic one, try reinstalling it: completely remove it from your PC, and then install it again. If an error occurs when launching a third-party application, get rid of it for a while using an uninstaller, which will completely clean your system of files remaining after deleting the main program documents. One such uninstaller is Revo Uninstaller. After removal, reboot the PC and reinstall the application (download its installer only from the official source).
If you are talking about the built-in Windows 10 utility, you can remove the program as follows:
- Click on the "Start" button.
- On the left side of the window that appears, you will see a list of installed software. Find the one you are having problems with.
- Right-click on its name and select “Delete”.
Uninstall an app from the Start menu - Then launch the built-in Store or Windows Store. Use the search bar to find the previously removed software and install it again. To do this, just click on the “Get” or “Install” button on the main page.
Install the application again through the Windows Store
Not all utilities built into Windows can be removed using the described method. If it doesn't help, use the PowerShell console:
- Right-click on the “Start” button and select “Windows PowerShell (Administrator).” Click on "Yes" to allow the console to make changes to the PC.
Run PowerShell as Administrator - First of all, enter the command Get-AppxPackage | Select Name, PackageFullName. This will display a list of all built-in Windows applications.
Run the command Get-AppxPackage | Select Name, PackageFullName - To remove a pre-installed program, find its full name and type the command Get-AppxPackage PackageFullName | Remove-AppxPackage, where instead of PackageFullName the name of the program you want to remove is written. It is very convenient to use the * symbol in PackageFullName, which is a kind of template and denotes any sequence of characters. For example, to uninstall Zune Video, you can enter the following command: Get-AppxPackage *ZuneV* | Remove-AppxPackage.
Uninstall the program in the console using a special command
Fixing the error “Explorer.exe. Class not registered"
If you see the name of the executable file Explorer.exe in the error notification window, you can solve the problem by forcibly deactivating the Internet Explorer component. We will describe in detail how to do this in the instructions:
- Call the “Run” window via R and Win - type or paste one of two commands: control or control panel. Click on "Enter".
Paste the control command into the “Open” line - In the panel interface, find the link for programs and components - follow it. In the panel, select the "Programs and Features" section
- In the next window with a list of previously installed utilities, click on another link on the left - “Turn Windows components on and off.”
Follow the third link on the left side of the window - Wait until the system finds all the operating system components.
Wait while the components load - Uncheck Internet Explorer 11. Disable Internet Explorer 11 component
- In the warning window, confirm the disable action.
Click “Yes” to permanently disable Internet Explorer 11 - Click OK to save all changes. Click OK to save everything and exit the window
A universal way to solve the problem through DCOM settings
Regardless of what is causing the error and in what situation it appeared, you can use the built-in Windows Component Services tool to solve it. The course of action will be as follows:
- In the “Run” panel, type the code dcomcnfg - click on OK or “Enter”.
Paste the command dcomcnfg and press Enter - In the middle zone of the window that appears with component services, open the “Computer” folder.
Expand the Computer folder - Now go to the “My Computer” section.
Launch the My Computer directory - We launch the second directory with DCOM settings.
Open the second DCOM partition - In the dialog box you will be prompted to register the element - click on “Yes”.
Click “Yes” to register the component - A second window may appear asking you to register - we also click “Yes” to agree. When the components are already displayed in the middle area of the window, close the window and reboot the device. We try to run the utility or file to check if the error has disappeared.
In the next window, also agree to register the component
When launching Windows 10 apps
If the error in question occurs when launching Windows 10 store applications, as well as error 0x80040154 in applications, try the methods from the article “Windows 10 applications do not work”, which was given above, and also try this option:
- Uninstall this application. If it is a built-in application, use the instructions How to remove built-in Windows 10 applications.
- Reinstall it, the material How to install the Windows 10 Store will help here (by analogy, you can install other built-in applications).
Error when starting programs
If the problem occurs when launching an application from the store, follow the recommendations in the article “Windows 10 apps are not working” or try uninstalling and installing the program again. If you receive an error when launching browsers, follow these steps:
- Open the Default Apps section in Windows Settings
- Click the "Set Defaults" link.
- Select the browser that is causing the error to appear when you launch it. Click "Set as Default".
If a crash occurs when starting Internet Explorer, you should take additional steps:
- Launch a command prompt with administrator privileges.
- Run the command “regsvr32 ExplorerFrame.dll”.
- To restart a computer.
If you encounter a crash when launching Edge, use the procedure for fixing the error from the first section of the instructions, supplemented by re-registering the application.
Set Edge as your default program
If you still get the explorer.exe error when you launch Edge, try setting it as your default program. Sometimes the problem occurs when using another browser as default, in particular Chrome.
Press Win + R, in the dialog box, run the command ms-settings:defaultapps to enter the Default Applications tab.
On the right side, click on the “Browser” button and select Microsoft Edge.
You can also change the default program using the classic menu.
To do this, go to the Control Panel using the control command from the Win + R window.
Go to the "Default Programs" subdirectory. In the next window, select “Set default programs.” In the left navigation bar, select Edge and click on the “Set this program as default” option.
Save changes to “OK” and restart your computer.
Disabling Internet Explorer 11
Sometimes the “Class not registered” error can be resolved by disabling Internet Explorer 11.
Open the Control Panel with the command control from a Win + R window.
Switch the view mode to large icons and select the “Programs and Features” subcategory.
In the left pane, go to the Turn Windows features on or off tab.
Uncheck the "Internet Explorer 11" entry. When prompted by User Account Control, confirm this action. Then reboot the system.
When you open the Start button
Open any folder and enter the path " WindowsSystem32 WindowsPowerShell
"
Find the “ WindowsPowerShell
” directory there and open the “
powershell
” application as an administrator. If the Start menu or Settings still won't open, there is another technique.
Since your Start menu is not working, open the Run
» by pressing the Windows hot keys (the key with the official Windows 10 logo)
and
R. Enter “ control
” into the utility window.
This will help you open all Control Panel items without accessing the Start Menu. In the section with programs and components, select the link with their inclusion and disabling on the left. Find “ Internet Explorer 11
” in the window that opens and uncheck it.
Did you like the article? Thumbs up and subscribe to the Zen channel
In order not to miss interesting things, join the VKontakte
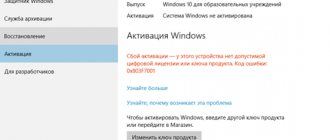
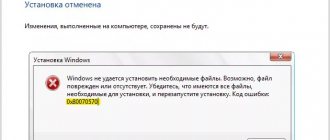
The error appears as code 0X80040154 when you run the application
It happens that the “Class not registered” error appears in the form of code 0X80040154.
The digital value appears most often when opening standard Windows 10 programs. To solve this problem, you need to uninstall the program and install it again.
I hope that we were able to help you understand the problem, and that you found the appropriate instructions for your specific situation in the provided article. /p>
(
1
ratings, average:
5,00
out of 5)
Loading…
Getting rid of the "hole" by the component service
Every version of Windows has a utility called the Component Service. I think it will help us, regardless of the cause of the problem. The work scenario will be like this:
- Open the “Run” window using the Win + R keys and enter dcomcnfg ;
- In the window that opens, go to the “My Computer” tab;
- On the right side, select the “DCOM Settings” ;
A small window may appear asking you to register the components, agree; When the registration process is complete, reboot your PC.
Quite a quick way isn't it? But this does not mean that it will help 100%. There are still points that I want to discuss, let's go.
Registering classes manually
Sometimes manually registering all DLLs and OCX components located in system folders can help fix error 0x80040154. To execute it: launch the command prompt as an administrator, enter the following 4 commands in order, pressing Enter after each (the registration process may take a long time).
The last two commands are only for 64-bit versions of Windows. Sometimes during the process a window may appear asking you to install missing system components - do it.
Class not registered when using browser
As in the first section of this article, you need to go to the “Applications” section and the “Default Applications” subsection. There, find the “Set default values” option.
You will see a window where we select the browser that caused the error when opening it, and then click “Set this program as default.”
If the issue occurs in Microsoft Edge, please read the articles below.
- How to reinstall Microsoft Edge. Browser problems
- How to reset Microsoft Edge
Additional actions
The error may have occurred recently, but some programs were installed, then they need to be removed. Restart your computer and try to open a browser or something else.
The problem also occurs due to damage to the registry, which means it needs to be restored. And of course viruses, where would we be without them? Check your computer for malware using all known methods. This site has a “Security” section, check it out.
The latest option for getting rid of a “hole” in the system is to reset the system (return to the restore point or simply reinstall).
This is interesting: How to create a system restore point for Windows 7,8 and 10
For additional questions, please ask in the comments.
( 5 ratings, average 4.2 out of 5 )
Additional Information
If the suggested methods do not help, the following information may be useful:
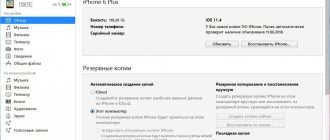
- According to some information, installed iCloud software for Windows may in some cases cause this error (try uninstalling).
- The cause of "Class not registered" may be a damaged registry, see Repairing the Windows 10 registry.
- If other fix methods do not help, it is possible to reset Windows 10 with or without saving data.
I conclude here and hope that the material contains a solution to correct the error in your situation.
Universal method
The following method may work regardless of the situation in which the error message appears:
- Press Win+R, execute “dcomcnfg”.
- Expand the “Component Services” section, then go to “Computers” - “My Computer”.
- Open the DCOM Configuration directory.
- Agree to register the proposed components.
- Close the service window and restart your computer.
According to some reports, the cause of the error may be the installation of iCloud for Windows, as well as a damaged registry. If no methods help to get rid of the problem, you can simply reset Windows 10 with or without saving data.