In this article we will talk about how to crop a photo, image or picture in Paint . This task is sometimes necessary, for example, to cut off unnecessary parts in a photo that only spoil the photo. Or, on the contrary, you need to cut out some valuable fragment along the contour of the photo and save it in a new file.
There are various programs that can help in this matter. But in this article we will look at how to crop a photo in the standard Paint program. Paint is already present in the Windows operating system.
This article shows you how to crop a photo in Paint on Windows 7. If you have Windows XP or Windows 10, use this article as a guide. You will only have a different interface in Paint. And some functions that run differently in Windows XP. In this article I further explain such differences.
For the lesson, I will take a photo of my wife's beading, as well as a simple photo of a hummingbird.
Why do we love Paint photo editor?
As you know, the “Paint” graphic editor has been included with the Windows OS since version 1.0. Then this editor was renamed “PaintBrush”, but later the original name “Paint” was returned to it.
This program is a fairly simple graphical raster editor from Microsoft, built into the functionality of modern versions of Windows OS. It has a basic set of tools for working with images, including the ability to crop (cut out) the desired part of the image.
At the same time, the functionality of MS Paint is free for Windows OS owners, it is intuitive, and working with the editor will not cause any special problems even for untrained users.
Saving format
Now that we have the finished result, we need to save it.
This is done simply - you need to use the Paint button again (as in Figure 4) only now select the “Save As” option (Figure 11). Select the desired format. IN
We will be offered 4 types of formats:
- PNG;
- JPEG;
- BMP;
- GIF.
An image in the PNG format has the best quality, while the GIF format gives the lowest image quality.
When choosing a format, keep in mind that the higher the quality of the image, the larger the size it occupies.
Rice. 11 Saving an image
When choosing a format, a dialog box will appear that will prompt you to select a file name and storage location for the photo.
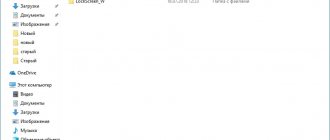
For example, the arrow indicates the selected folder for saving.
Rice. 12 Folder with saved image
If during the saving process you mistakenly selected the wrong file type, it’s okay. There is no need to redo anything again.
On the right in “File Type”, click on the black triangle, as in Figure 15, and simply select the appropriate format again.
Rice. 13 Possible formats for saving
Click “Save” and you’re done, the cropped photo will be waiting for you in the specified location. As you can see, there is nothing complicated here.
Good luck with your photos and easy work in Paint.
Other materials on working in graphic editors:
Computer drawing program: 5 best programs
How to make an inscription in Photoshop - detailed instructions
How to shorten a photo in Paint - implementation features
If you have an image that needs to be cropped quickly and efficiently, I recommend using the tools built into the MS Paint editor.
- To do this, launch Paint (it’s easier to do this by clicking on the “Start” button, typing paint in the search bar, and then pressing enter).
- After launching the editor, press the Ctrl+O key combination to open the file you need in the editor.
- To select the rectangular area we need, click on the “Select” button in the toolbar.
- And select the desired part of the image (place the cursor at the upper left edge of the image part, hold down the left mouse button, and move the cursor to the lower right part of the image).
Click on the “Select” button to select the desired part of the image
Now click on the “Crop” button (located to the right of the “Select” button), the image you selected will be cropped. And you will be able to perform subsequent graphical operations on it (or save it to your PC’s hard drive by clicking on the menu button and selecting “Save As”).
Zoom out the picture (if necessary)
It is necessary to reduce the photo scale if the entire image does not fit in the program window.
You can change the scale of the picture using a special slider, which is located in the lower right corner of the program window. In addition, you can zoom out by pressing the CTRL key and rolling the mouse wheel towards you.
How to crop a photo along its contour in Paint
As you can see above, the previous method helps you crop a photo in Paint using a rectangular selection. At the same time, Paint's capabilities also involve cropping a photo along the contour of the object you need.
- To do this, upload the photo you need, click on the small arrow directly below the select button, and select “Custom Area” in the menu that appears.
- Now all you have to do is circle the desired object on the screen using this selection (hold down the left mouse button and circle the desired object).
- And then traditionally click on the “Crop” button next to the “Select” button.
- If you did something wrong, you can always undo the last action by pressing the Ctrl+Z button combination, or by clicking on the button with the semicircular arrow back (Undo).
Open a picture in Paint
To open a picture using the Paint program, right-click on the desired photo and select from the menu: Open with – Paint.
You can, on the contrary, first launch Paint (Start - All Programs - Accessories - find and run the program), and open the image through the program drop-down menu in the upper left corner and then click Open.
How to crop a photo with an oval and a circle in Paint
Unfortunately, the functionality of standard MS Paint does not have tools for cropping the desired image into an oval and a circle. To implement this, I recommend using more advanced tools, for example, the free version of the Paint Net graphic editor.
- Download this editor from dotpdn.com/files/paint.net.4.0.16.install.zip, unpack and install on your PC.
- Launch it, by clicking on “File” - “Open”, open the file you need.
- On the toolbar on the left, click on the “Select an oval-shaped area” button and select the desired area in the picture with a circle or oval.
Then click on the button at the top “Crop to selection” and save the result to your PC (“File” – “Save As”).
Click on "Crop to Selection"
Method No. 2
The second method is to press Ctrl+O.
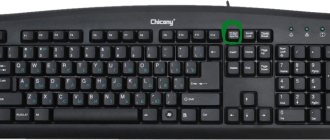
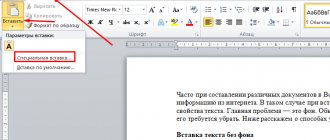
In the last option, you need to click on the insert icon, and select Insert from, as shown in Figure 6.
Rice. 4 The second way to open an image in Paint
The opened file may not completely fit on the screen, it all depends on its resolution. In this case, we will use the “Scale” function, it is located in the lower right corner.
Fig.5 Scaling in Paint
Another way is to turn the wheel on the mouse; when you scroll up, the scale will increase, and accordingly, on the contrary, when you scroll down, it will decrease.
Select the area of the image you need. To do this, click “Select”
Rice. 6 Selection options in Paint
Color Range
Let's talk about Photoshop's selection tool, Color Range, which selects areas in an image based on tone or color. This tool is similar in principle to the Magic Wand Tool in that they both select areas of an image based on tonal and color values, but that's where the similarities end. To activate this tool, you need to right-click on any selection tool or on the main menu tab “Select” and select the appropriate line.
At the very top of the Color Range dialog box, there is a Select option that allows us to choose where to sample colors from. There are two options - take samples from the image or use a ready-made set of colors pre-installed in Photoshop.
The default option is “Sampled Colors”. The “By samples” parameter determines that we will independently select samples in the image. In order to select areas with similar colors, just click on the desired area in the image, and Photoshop will select all similar pixels within the specified specific range (hence the name of the tool).
When using the “Color Range”, click on the desired area with the cursor, which then takes the form of an eyedropper. This tool provides three kinds of eyedropper tools for use - the main one to make an initial selection, the second one, the plus eyedropper, which is an add to selection tool, and the third one, the minus eyedropper, is a subtracts tool from a selection.
You can click on the icons to switch between these tools, but it is better to use another method. The main eyedropper is selected by default, and we can temporarily switch to other tools directly from the keyboard. To move from the main eyedropper to the add eyedropper, simply press and hold the Shift key. To access the subtractive eyedropper, press and hold Alt.
Magnetic lasso
A good tool for selecting objects with smooth contours. The magnetic lasso works very simply. Zoom in, then click on the outline of the selection object. The first marker will appear. Next, move the cursor along the outline of the figure; as you move, new markers will appear. To highlight the contour of an image, algorithms are used that find the most contrasting areas of the image, which are most likely to be the contour separating the figure from the background. The user needs to indicate which part he wants to keep and which part to delete.
Unfortunately, the contrast between the figure and the background is not always enough for the program to correctly recognize the contour.
Therefore, it is important to choose or take a suitable photo. The ease of isolating a figure and removing the background will depend on the characteristics of the image itself. If you want to make things easier for yourself, use images with an object that is sufficiently contrasting with the background - significantly darker, lighter, or simply a different color. The ideal solution would be a studio photograph taken on a plain background. Special effects specialists use green for the background - the likelihood of the color of the figure and the background matching is vanishingly small. The algorithms of graphic and video editors do an excellent job of removing the green background. In all other cases, selecting an image will require additional settings and human intervention.
In this example, we can see that the selection tool with basic settings recognized the outline of the face well, but did not separate the white clothes from the white background. There will also be problems with hair separation here.
If the contrast between the background and figure or the clarity of the photograph is poor, the markers may not be placed correctly. In this case, force them by clicking the LMB. To move around the enlarged image, press and hold the Spacebar. Gradually you will close the outline, after which a dotted line will run. Double-clicking the LMB also closes the path. Unfortunately, in our case this is too difficult - the boy’s hairstyle does not allow us to quickly highlight the picture in this way.
Uploading an image
1. To upload an image to the editor, open the drop-down menu in the upper left corner (the button is located under the “floppy disk” icon).
2. Select “Open” from the list of options.
3. An additional window will appear. In its left panel, by clicking the mouse, select the drive and folder in which the image you want to edit is stored.
4. Click the left mouse button to select the desired picture in the gallery. Click the "Open" button.
Magic wand
This tool, by clicking LMB, will select an area painted with similar shades. The range of shades that the program will include in the selected area can be increased or decreased using the “Tolerance” setting. Tolerance 32 is set by default. Reducing the tolerance will increase the sensitivity of the instrument. It will highlight small fragments that are very similar in color. To expand the selection area, you need to select the “Add to selection” mode. This way you can select a uniformly colored background with a few mouse clicks.
Selection using a mask
You can accurately and accurately select a figure by creating a black and white mask. What are masks for? They allow you to remove (hide) unnecessary parts of a photo, for example, remove the background. Masks allow you to restore erased areas of a photo at any time if you don’t like something.
How to create a mask? In the layers panel, pay attention to the button highlighted below.
After creating a mask, you can edit it. The mask can be painted using regular black or white brushes. By painting with black, we hide what is unnecessary, and with white, we restore the necessary areas of our photo. At the same time, you can change the softness of the edges of the brush, its size, etc.
Launching the editor
1. Press the "Win" key or click the "Windows" icon.
2. In the Start panel, open the Accessories folder. If it is not visible, use your mouse wheel to scroll down the list of programs and directories.
3. Click on the editor's name.
Advice! If you cannot find the utility in the system tray, type “Paint” in the search bar. The editor will appear in the “Programs” block. Click on it to launch.
How to cut out an object in a picture from the background
Initially, you should cut out the photo along the contour, as shown above. This method is suitable for cutting out any fragment, including a face or other object.
To add one picture to another, you need to select the image that will be the top layer and copy it. This is done using the buttons Select all - Copy .
These operations can be performed from the keyboard by pressing Ctrl + A and Ctrl + C.
On the image that serves as the bottom layer, press Insert or Ctrl + V .
After this, it turns out that the white layer of the inserted fragment overlaps the drawing underneath it.
To avoid this, before inserting a fragment, you should check the “ Transparent selection ” checkbox in the selection options.
After this, perform the insert as described above. Now the background of the top image does not overlap the bottom one.