A wireless network is present in the daily life of almost all people. But to take advantage of all the advantages of this technology, you need to know how to properly connect a personal PC based on Windows 10 to a WI-FI access point. Of course, the younger generation can cope with this without much difficulty, but for adults this is a big problem. Therefore, this procedure will be described in detail below, as well as problems that arise during the use of wireless communications and ways to eliminate them. This will allow any user to deal with the question of how to connect Wi-Fi on a Windows 10 computer.
Changes in Windows 10
This operating system has many useful options and design solutions that are not available in older versions of the OS. Moreover, many say that it is also designed for tablets.
PC with Wi-Fi Internet
Main changes in this system:
- design and principle of Internet connection. Now you can organize the design of the system and work on the Internet in a few clicks;
- automatic installation and update of drivers. This feature allows you to avoid program conflicts. This improves the performance of the PC and the system as a whole.
As for Internet options, the new system implements the “Limited Connection” tool. This function allows you to control the amount of Internet traffic consumed by your PC. If the user reaches the limit, the system will notify him about this and offer to disconnect the connection so as not to pay extra money for additional traffic packages. This tool is relevant for 3G, 4G Internet, because providers often offer clients traffic packages of 15-50 GB.
Important! For maximum system performance, you must install all important updates recommended by Windows developers.
WiFi Security
Since when using WiFi, all information is transmitted via radio waves, this makes WiFi networks much more vulnerable compared to wired networks. The fact is that radio signals sent by the access point (WiFi router) and devices that are connected to the access point are available for interception by any similar device that is within the “hearing” radius of the access point or from the client of this access point. That is, intercepting network traffic becomes very simple, affordable and invisible. And intercepting network traffic allows you to collect the information necessary to attack a WiFi network. As more and more access points become available, WiFi increases and so does the number of people wanting to “hack” the WiFi network.
The most common motivation for hacking WiFi hotspots is to connect to the Internet via WiFi for free. A fairly common picture today is that you have a WiFi router installed in your apartment and not only your devices are connected to it, but also the computer of one of your neighbors. You pay for the Internet, and your tech-savvy neighbor gets the Internet for free.
But “theft” of the Internet is not the only reason why WiFi networks are “hacked.” The fact is that if an attacker gains access to your access point, through it he can gain access to all devices that are connected to your WiFi router. And this gives him the opportunity to steal your personal data. For example, passwords to mail, to Internet banking, your documents - in one word, to everything you own.
Therefore, you need to use WiFi with caution. Here are a few rules to follow.
Do not connect to open public WiFi networks through a laptop on which you store valuable information. And if you need access to the Internet via open WiFi networks, then use a firewall and antivirus on your laptop. It’s even better if you install two operating systems on your laptop. One main one, in which all your valuable information will be stored. And the other is empty, only for accessing the Internet through open WiFi networks.
If you use a WiFi router at home or in the office, you must configure the WiFi router correctly:
- Use WPA2 security type.
- The password for protection should be long - preferably 10 - 15 characters, and should consist of a random set of characters. The password marina1234
is very bad - it can be hacked in a few minutes.
The password nve5k-sjehr[
[email protected] $la is good - it’s almost impossible to crack. But remembering and entering such a password is very difficult. - If your WiFi router has a WPS function, you need to disable it.
- If your WiFi router supports administration via a web interface, you need to disable access to this interface via WiFi. The WiFi router's web interface should only be accessible via a network cable.
- Turn off your WiFi router when you are not using the Internet - at night or when you leave home or office. If the access point works around the clock, this makes it easier for the attacker - he has a lot of time to carry out attacks on your access point.
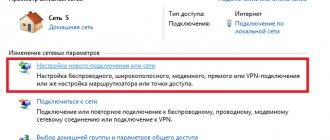
Where to find Wi-Fi on a computer with Windows 10
How to connect AirPods to Windows 10 or 7 on a computer
The Wi-Fi module on a PC can be built-in (the board is installed in the system unit) or external (generally, such an adapter is connected using a USB interface), so it can be launched in different ways. On some PCs there is one key for this, and on others there are two buttons “Fn” and “F1-12”.
Note! After starting the wireless card, the indicator on the corresponding key should light up, and the wireless network icon should appear on the PC information panel.
Live Network Icon
If your PC does not have buttons to launch the Wi-Fi adapter, then the methods for activating it are discussed in detail below.
Private WiFi network
A private WiFi network allows you not only to distribute the Internet to all devices in the house (computers, smartphones, tablets), but in addition you can share resources such as a printer and files. You just need to open public access to the resources that you want to share. This is done in the same way as for a regular wired network. You can use the article Setting up a LAN on Linux and Windows.
If you want to change the network type from Public to Private, read the article “Change network type on Windows 10”.
Connection instructions
How to connect Wi-Fi on a computer without a wire
To activate Wi-Fi on your PC (laptop), you need to follow simple steps.
Make sure that Wi-Fi on the PC is running. To do this, check whether the indicator on the keyboard is lit. If it is not lit, then press the corresponding button. Then they click on the Network shortcut, which is displayed in the bottom panel. Next, select one of the Wi-Fi points available there.
Selecting an access point
After that, click “Connection” and enable the “Connect automatically” option. In this case, indicate the Wi-Fi password if it is protected. Once connected to it, unused networks are often removed. This is done easily and simply. Go through “Settings” to the “Network and Internet” section. Find the “Wi-Fi” option there.
Go to Wi-Fi settings
After that, open “Manage known networks”.
Go to the “Manage known networks” section
The PC display will display a list of remembered OS Wi-Fi networks. In it, they select an unnecessary one and click on it, and then click on “Forget”. This completes the process of deleting an unnecessary network.
Possible problems
If it happens that the Wi-Fi wireless network is not working without any reason, the Windows 10 operating system should not be blamed for this, the problem is clearly located in the settings. Some of the popular problems in this case are:
- WiFi router drivers – it is advisable to reinstall them.
- The problem is in the router itself.
- Perhaps the actions were carried out incorrectly.
- Perhaps all services that are responsible for access are disabled.
- There may be a virus on your computer that is stopping it from working.
For example, when starting the operating system, the Wi-Fi router driver may not ask the virtual adapter to exit standby mode. When the Windows 10 system boots, the service continues to be in this state.
The procedure for creating and configuring a WiFi router access point to a wireless network can also be applied to Windows of earlier versions, in particular version 8 and 8.1.
Found a typo? Select the text and press Ctrl + Enter
Many users had the opportunity to upgrade Windows 7 to version 10 or initially purchase Windows 10. Over time, some encountered numerous problems. One of these problems was the situation with the wireless connection.
Today I will tell you how to connect Wi-Fi on Windows 10. I will also touch on all the questions that arise during the writing of the article, as well as the most common errors and problems. I will try to be short and clear.
I would like to immediately note that all problems that arise are most often associated exclusively with the settings and can be easily resolved.
Content
If there is no power button
Parental controls Windows 10 on your computer
Many computers do not have a button to start the Wi-Fi module, so you have to manually turn it on (there are two ways).
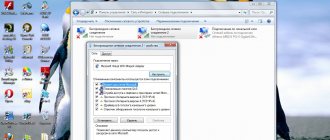
If users do not know how to connect Wi-Fi on Windows 10 computers through the notification panel, then first go to the Network and Sharing Center. They get into it using the “Network” shortcut. Select from the proposed functions “Change adapter settings”.
Opening the Network Control Center
Next, click on “Wireless Network” in the proposed list.
Launching Wi-Fi
Then click the mouse in the proposed “Enable” list.
If the user does not know how to connect to Wi-Fi on Windows 10 through “Settings,” then click “Start” and select the appropriate section. Then open the “Network and Internet” subsection.
Go to “Network and Internet”
Then in the search form they write “Device Manager”. Next, a large list of devices will open, where they find the line “Network adapters” and expand it.
Launching Device Manager
In the list they find the line “Wireless” (sometimes it is simply called Wi-Fi 11 b/g/n). This is a wireless adapter installed on a PC.
Finding an installed adapter
They press on him. A small dialog box will appear with which you can configure the Wi-Fi module (turn it on and off, as well as update the driver for it or remove the adapter from the system).
Note! Sometimes network adapters do not display the Wi-Fi module connected to the PC. Therefore, they look to see if there is an unknown device in the system (marked by a yellow triangle and an exclamation mark inside it). If such equipment is available, then you need to install a driver for it.
Driver tips
I've mentioned installing drivers for the wireless adapter several times. Let me briefly tell you how to do this.
On a Windows 10 laptop, everything is simple. Find the manufacturer's website, select your laptop model there and download the drivers. Unpack the archive and install the firmware.
If you have a stationary PC and use an external Wi-Fi module, then you also need to find the website of the adapter manufacturer, and there look for drivers for your device model.
You can update the driver more easily, without any searches on the Internet. In a way known to us, we find our network adapter and, by right-clicking, select the “Update driver” item.
After installing and updating the firmware, restart your PC!
If anyone needs it, here is a video with instructions on how to make an access point:
If you can't connect
When there is no Network icon on the PC display, this is most often due to the lack of a diver for the Wi-Fi card. To check this, go to the Wi-Fi settings.
Selecting adapter options
This is often done like this:
- Click on the Wi-Fi connection shortcut.
- Next, from the two proposed options, select the “Networks and Internet” option.
- Then find and open “Adapter settings settings”.
- A list of all available network interfaces appears on the display. If there is a “Wireless connection”, then click on it. Then click on “Enable” in the proposed list.
Enabling the adapter
Important! If the Wi-Fi connection is not in the PC settings, then it most likely does not have the necessary module or driver for it.
How to solve the limited connection problem?
The limited connection problem can arise from various reasons. To solve this, you should try to take the following measures:
- The very first thing to do is reboot your device.
- The problem may also be with the router. It would be a good idea to try rebooting it too.
- Access may be blocked by the provider if Internet payment is not received on time. In this case, just make the payment, wait 10 minutes, reboot the router and again enjoy full access to the network.
- Checking the cable (if the connection is made using it). It may be damaged and this is causing connection problems.
- Perhaps the problem of limited connection on the PC is coming from the antivirus program. It can block access to the Internet for security reasons. In this case, you should change the program settings or temporarily disable it.
- Check your router settings. If you are in doubt about filling them out correctly, you can call the support service of your Internet provider and get the help of specialists who will help you configure the router correctly.
- In some cases, the failure may be caused by problems with the network adapter driver. In this case, you should try reinstalling it.
How to view saved keys
Finding out the Wi-Fi key in Windows ten is also quite simple. To do this, click “Start” and select “Network Connections” there.
Switch to available network connections
Next, open “Adapter Settings”.
Go to adapter settings
After that, in the proposed list, click “Wireless Network” and in a small window click on the “Status” line.
Launching the “Connection Status” item
Then open “Wireless Network Properties” and in the “Security” section allow the display of entered characters.
Network password
Now the password for the secure network will always be visible in the “Network Security Key” entry form.
To view passwords for inaccessible networks, open the command line or Windows PowerShell as an administrator.
Launching the Command Console
Then enter “netsh wlan show profiles” into the console and press “Enter”.
Network data
To get all the information about the Network, you need to enter “netsh wlan show profile name=Real key=clear” in this console.
Complete network details
Now the cipher from the secure network is visible in the “Key Contents”.
Displaying the key in the console
What you need to connect Wi-Fi on a desktop computer
Review and configuration of the D-Link Dir-320 modem
As a rule, a laptop, due to its compactness and mobility, already has a Wi-Fi adapter built-in. System units are usually connected to the router via a network cable, but options are also available via a wireless communication module.
To connect a desktop computer via Wi-Fi, you need to slightly modify its configuration by connecting an additional adapter. The types of Wi-Fi adapters for desktop computers are as follows:
- external;
- integrated into the motherboard.
External adapter
To connect to the Network using an external adapter, just plug it into the computer’s USB port, install the drivers through the “Setup Wizard”, and then you can establish a connection via Wi-Fi, as you did on a laptop.
Motherboards with built-in Wi-Fi
Built-in adapters are connected via a PCI/PCI Express connector on the computer motherboard. Some models are sold with a wireless communication module included, and the user installs it independently.
The installation process is quite simple:
- It is necessary to remove the cover from the system unit.
- Install the adapter into the PCI slot.
- Reboot the computer.
- Install the driver.
Important. To improve signal reception, the adapter antenna should be located outside the system unit. Due to the poor location of the antenna, reception may be difficult (the signal may be lost), although Wi-Fi distribution through the router occurs normally.
Disconnecting from the network
To disconnect from Wi-Fi points, click on the Network icon, then select the active connection in the list and click “Disconnect”.
Removing an unnecessary connection
After entering the network key, the PC OS will remember the configuration of this connection, which will allow it not to be specified during subsequent connections to this network, if it is available.
If the PC owner wants to remove the Wi-Fi network, this is done using system settings or the command line.
Important! You need to regularly clear the list of networks, otherwise it will be difficult to understand it.
Removal via system settings
Press “Start” and select the “Settings” tool there.
Selecting parameters
Then click “Network and Internet” in the proposed tools.
Network settings
Next, select Wi-Fi settings and click “Manage Wi-Fi network settings” in the list provided.
Launching WI-FI settings
Then click on the desired network, and in the window that appears, click “Forget”.
Deleting a network configuration
Uninstall using the command line
This method involves the following steps:
- Click “Start”, and then click “Command Prompt (Administrator)” in the list provided.
- If the network is unknown, then enter “netsh wlan show profiles” in the console and confirm your action by pressing “Enter”.
- To clear the system from a specific network, type “netsh wlan delete profile name= network name” in the console and press “Enter”.
Launch the Shell
How to manage an access point
By performing certain actions you can control the access point, namely:
netsh wlan stop hostadnetwork
The command stops the wifi network.
- How to set up wireless Wi-Fi networks in Windows 10
netsh wlan set hostednetwork mode=disalow
Command to completely remove access point data from the system. This is done instantly and there is no provision for a reversible process.
netsh wlan start hostednetwork
Without any doubt, it will take no more than 5 minutes to start distributing the Internet in this way. However, this does not require the use of additional special programs. This method of connecting a network allows you to create a WiFi router in a short time without any hassles and distribute the Internet. Moreover, you can use it anywhere and any time of the day. If you plan to use the network access point every day, the best option would be to purchase a router. Since this option is convenient only for those who use it on work trips, or even need it several times a month.
Common problems and solutions
When connecting a PC to a Wi-Fi network or while working with it, various problems often arise, so it’s worth looking at ways to solve the most common ones.
Connection limited
Sometimes when using a wireless connection, a yellow triangle with an exclamation mark appears on the Wi-Fi network icon. Also, in the list of active networks, “Restricted” is sometimes written under the network name. These messages inform the user that there is no Internet on the PC.
The access point does not distribute the Internet
If the user does not know how to set up Wi-Fi on Windows 10 laptops and get rid of this problem, then you need to do the following:
- most often there is no money in the subscriber’s account, so you just need to top it up;
- restart the PC and router, and then reconnect them to the Network;
- temporarily turn off the antivirus program and try to connect to the Internet;
- a failure sometimes occurs in the hardware configuration, so it is necessary to diagnose the wireless connection on the PC;
- if the Internet is not available at the router connection stage, then this problem occurs due to the router;
- if the problem is in the laptop, then it may be related to the power supply, which saves battery resources by limiting the power of the Wi-Fi adapter. Therefore, when a laptop is connected to the Internet, it is advisable to connect it to an electrical outlet;
- A fairly common reason is an unstable network driver that the operating system installs automatically during the update. You need to uninstall it and install it working. You should always download drivers from the Internet resources of equipment manufacturers (PCs, network cards, video cards, etc.). This will allow you to achieve maximum equipment performance;
- The cable connected to the router may be damaged, or there are other problems on the part of the provider, so you need to check the integrity of the wire and call the technical service of the service provider.
Icon indicating no wireless Internet
Driver problems
Quite often, problems with wireless Internet arise due to an unstable network driver that the operating system installs automatically when updating. Therefore, it is necessary to remove it from the PC and install a working one, which must be downloaded from the resources of the PC and WI-FI module manufacturers.
Adapter is not active
Often the PC does not connect to Wi-Fi due to the wireless adapter being turned off. It is turned on using the “Settings” section or the notification panel, as described above in the “If there is no power button” section.
Network unavailable
This is sometimes due to a decrease in the wireless access point signal. Simply put, the PC is out of range of the router. How to connect to Wi-Fi on Windows 10 in this case? In this situation, the easiest way is to install a Wi-Fi signal repeater in the house, since moving the computer to another location is problematic. The laptop can be moved to another room if there is Wi-Fi there.
In addition, it may be inaccessible due to the fact that it has become hidden. Therefore, you need to manually connect to Wi-Fi using the Wireless Network Control Center. Moreover, you will need a network name and password, and you will also need to specify the encryption protocol used. This will resolve the issue of how to configure Wi-Fi on a Windows 10 laptop to connect to a hidden network.
Important! In any case, you must first check whether the access point is working at all, and only then proceed with the settings.
"In airplane"
Sometimes there is no wireless connection due to Airplane mode being turned on because it turns off the relay equipment.
In this case, the Windows 10 Wi-Fi settings are done as follows:
- Go to the “Settings” of the PC and select the “Internet Network” subsection there.
- Open the “On the plane” item and deactivate this mode.
Disabling Airplane Mode
How to use WiFi
Using WiFi is very easy. Once you have created a connection, you can turn it on and off through the network icon in the tray.
However, you need to understand that the ability to use WiFi is highly dependent on external factors. Because the radio signal is affected by the external environment. Various obstacles such as walls, ceilings, floors weaken both the signal of the access point and the signal of the client device. Windows shows the signal strength from the access point in “sticks”. The pictures at the beginning of the article show the signal level of one or two short sticks. This is a very weak signal. With such a signal, you most likely will not be able to use the Internet.
There are programs that show the signal level in numbers - dBm, for example 60 dBm or 40 dBm. The larger this number, the weaker the signal - a good signal is a number less than 50 dBm. However, you need to understand that the accuracy of such numbers varies depending on the adapter and the driver of this adapter. Under the same conditions, one adapter may show, for example, 71 dBm, and another adapter 82 dBm.
In addition to passive barriers, the quality of WiFi signal transmission can be negatively affected by sources of electromagnetic radiation. So, even if you have the best WiFi adapter installed on your laptop, this does not mean that you will always be able to use the Internet via WiFi.
In situations with a poor signal, using an adapter with an external antenna can help. For example, the TP-Link TL-WN722N/C USB WiFi adapter is equipped with an external antenna. Moreover, it is removable and, if necessary, can be replaced with another one with a higher gain.
What benefits does having an external antenna provide? Continuing the same example - under equal conditions - the same access point, the same time and place of connection, the presence of passive barriers between the access point and the client - as a result, a weak signal in both directions:
- The internal “native” WiFi adapter of the laptop connects to the access point, but practically does not allow you to use the Internet due to low speed and frequent interruptions.
- TP-Link TL-WN722NC with its own antenna provides a stable Internet connection at a good speed.
Settings on the router
To distribute Internet traffic on the router, you need to organize a wireless network. There are general instructions for organizing a Wi-Fi network.
Data for the first login to the router interface
Almost all routers have different menu items and settings sections, but in general this process consists of the following steps:
- First of all, go to its administrative panel. This is done using a browser on a PC or mobile device (for example, using a modern phone), in which they enter the IP address of the router, and then indicate the administrator’s login and password in the login form. In many routers, manufacturers initially use the login “admin” and the password “1234”, so it is necessary to set a complex password and username immediately after logging into the router settings for the first time.
- After successful login, find the Wi-Fi settings item in the main menu of the router. It is often called “Wireless”, “Wireless mode”, etc. Select this item.
- Next, set the SSID (new network name), set the optimal encryption protocol, channel, operating mode, as well as the network key and save these settings.
TP-Link settings
Creating a new network using a router
The line is formed according to the same principles as in previous versions of the OS. The subtleties of debugging are directly related to the capabilities of the network equipment; complete instructions for performing the task are included with the router.
General rules for creating a new mesh include the following:
- the user must connect the network cable to the equipment;
- then plug it into an electrical outlet and activate it;
- on a personal computer, check all detected lines;
- connect to an access point whose name matches the name of the unit being used;
- then the web browser opens and from it you log into the equipment’s web interface via the address: “192.168.0.0”, “192.168.0.1”;
- if the specified parameters do not match, then the latest information can be found on a special sticker located on the back of the router or from the operating instructions;
- the device menu is accessed through the standard identification data “admin” or information from the manufacturer;
- the rest of the steps go through the quick setup wizard; the user just needs to use the system prompts and enter the basic data: network name, password, number of gadgets that will have the right to simultaneously log into the access point.
After the procedure is completed, the changes made are saved. If the rule is ignored, the device will automatically return to its original factory settings after turning off. The computer owner will have to carry out the entire algorithm of actions again.
Adjusting network settings
Increased network security
To increase the security of your wireless connection, experts advise doing the following:
- use WPA2 encryption protocol;
- Be sure to set a strong network password of at least eight characters (must consist of numbers, small and capital letters, and special characters). It is recommended to change it periodically (at least once a quarter). You also need to periodically change the password and administrator name of the router;
- there is no need to use WPS, but you must regularly ensure that this function is turned off;
- turn off the router when not needed.
These simple steps will further protect your home WI-FI network from hacking.
Thus, setting everything up is quite simple if you follow the step-by-step instructions above. It is necessary to carry out actions in the PC settings; it is also important to configure everything on the router. However, even a novice user will not have problems with this.
Connecting a Wi-Fi module on laptops from different manufacturers
Nowadays it is difficult to find a laptop without Wi-Fi connectivity. But for the Internet to work, it is not enough to be able to connect: the interface must be configured correctly.
To answer the question: how to set up WiFi on a Windows 10 laptop, remember that it is convenient to use special function, or “hot” keys, which differ between models from different manufacturers.
Note. Laptops have an indicator light with an antenna icon. If the indicator is on, this means that the adapter is turned on and working correctly, that is, it can “catch” Wi-Fi.
Important. A number of laptops are equipped with a separate adapter shutdown button. If the Wi-Fi module is deactivated through it, using the function keys will not be able to turn on the module. And only after pressing the mechanical switch again, the Fn keys that switch the adapter operating modes begin to work.
Acer laptop
For laptops from this manufacturer, the button that connects the Wi-Fi adapter can be located in different parts of the case. For example, in the top row of the keyboard, on the front of the laptop or on its sides.
On some Aspire series laptops, the button is located below the lock key. On older Aspire models, the tower button can be found in the lower right corner of the keyboard. In 2500 series models - in the upper right corner.
To enable hot keys, the combination Fn + F5 is most often used. If that doesn't work, you can try Fn + F3. Of course, other configurations are not excluded, but these are the main ones.
Important. If after pressing the hot keys the Wi-Fi adapter does not connect, you will need to press them again and then restart the laptop. If there is no result after a reboot, you should use another method of turning on the module, and also check its functionality.
Asus laptop
On new models of Asus laptops, there are no mechanical buttons for controlling wireless modules. But on older laptops they may be provided. Typically, the mechanical switch of the Wi-Fi module is located on the side surface of the case near the USB ports. As a rule, to control the Wi-Fi adapter, a combination of function keys is used: Fn and one button from the “F” row. ASUS laptops are characterized by the combination Fn + F2. An antenna is drawn on F2, which makes it easier to find.
HP laptop
Most HP laptops have a mechanical Wi-Fi switch. It is marked with a radiating antenna symbol, and there is also an LED on its surface.
Typically, the switch is located on the front or side of the laptop. If the button is not there, you should look for it above the keyboard. To activate the module, you need to move the “slider” to the “Enable” position. In this case, the LED color will turn blue instead of yellow.
If there is no such button, you can use the function keys. For laptops manufactured by HP, the combination Fn+F12 is typical. Wi-Fi can be turned on with this combination.
Important. There are many reasons why you cannot activate Wi-Fi, and the list of them is not limited to simply turning it off using a special button. It may be disabled in the BIOS, the module itself may have failed, or something has happened to the services, so you need to check the possible causes of the problems.
Lenovo laptop
You can turn on the Wi-Fi adapter on a laptop from this company using the buttons located on the side or on the front of the case, as well as using the keyboard buttons. For DV series laptops, the module power button is located above the keyboard. For Lenovo Thinkpad - on the left side of the case.
Basically, to control the Wi-Fi module on Lenovo laptops, the key combination is Fn + F7 or Fn + F5. On the T43 model, pressing Fn + F5 simultaneously will open an additional menu in which you must select the word “enable”.
Conclusion
So, Windows 10 provides all the same tools for managing your Internet connection as previous versions of the OS. To a large extent, the differences lie only in the visual design of some sections of the settings menu and their adaptation to touch control.
Sources
- https://besprovodnik.ru/kak-vklyuchit-wi-fi-na-noutbuke-windows-10/
- https://help-wifi.com/nastrojka-wi-fi-na-pc-noutbuke/kak-podklyuchitsya-k-wi-fi-na-windows-10/
- https://adiutor.ru/index.php/windows-10-wifi-setup
- https://qwerty.ru/help/settings/93/96190/
- https://geekon.media/kak-nastroit-wi-fi-na-windows-10/
- https://Vpautinu.com/wifi/nastrojka-besprovodnoj-seti-v-windows-10
- https://Vpautinu.com/wifi/kak-vklucit-wi-fi-na-noutbuke-windows-10
- https://ru.d-ws.biz/articles/wifi-windows-10-setup.shtml
- https://WiFiGid.ru/nastrojka-wi-fi-na-pk-i-noutbuke/kak-podklyuchit-wi-fi-na-windows-10
- https://ZnaiWifi.com/instrukciya/kak-nastroit-wi-fi-v-windows-10.html