Any owner of a smartphone running the Android operating system knows about superuser rights. But if the gadget solves all the user’s problems and this is quite enough, then there is no point in obtaining root rights. Moreover, it can even harm the operating system and components. Many who were able to obtain rights at one time want to remove them because they are unnecessary or because of certain concerns. This material will tell you how to disable root access on Android and in what ways this can be done.
What is Ruth access and why do people delete them?
Root access is a software project that can allow a person to do various functions with a mobile gadget, even with login. This is a line of priorities related specifically to the OS. For example:
- We block advertising. In order to remove annoying banners from various programs and the browser, you need Root access;
- Editing system elements. In other words, the user receives the right to edit Android and has the right to delete, add or change a specific folder or archive at will;
- Possibility to overclock the CPU to the maximum level. Of course, functionality will increase. But, these actions often lead to device malfunction;
- We remove programs with tools that you cannot remove from your smartphone using the usual method. This could be Google Maps with a Calculator, Voice Recorder, etc.
In addition, there are both advantages and disadvantages to Root access:
- Android Pay is not working. You are absolutely right, with these rights you will not be able to use such convenient contactless payment;
- Over-the-air updates will stop. Unpleasant situation. It is quite possible that you will want to install a more recent version of the system. With Root access they will not be sent to you by air;
- If your gadget is under warranty, it will stop working once you acquire Root rights. In this case, you lose the warranty;
- Uninstalling the necessary system programs leads to system failures or even freezes. This may cause many functions on your device to stop working.
So, we got acquainted with the pros and cons of access to Root rights. From here, you now understand whether you need to install them on your smartphone. If not quite, continue reading.
Problems and solutions
The smartphone does not communicate with the PC
The mobile device must be paired with the computer via a USB cable that supports data transfer, not just charging.
If everything is fine with the previous point (it’s easy to check by trying to transfer a photo from your phone to your PC), then you should make sure that debugging is available on the device. We have already examined in detail how to enable it on new and old gadgets in this text.
After flashing the phone does not turn on
Most likely, a problem occurred in the form of an unexpected shutdown during the process. For example, the USB cable came loose or the gadget was discharged as part of the procedure. Just repeat the steps you took to flash the firmware.
If the problem is related to the incompatibility of the image and the smartphone, find the appropriate firmware for your device. Do not use programs that are not suitable for the manufacturer of your gadget.
You can remove rooting without much difficulty, as evidenced by this text, which contains a lot of methods to remove root from Android and continue to use it as before.
Share link:
Root rights options
So, let's check which access option is present on your phone. There are only 3 options:
- Temporary Root is a type of temporary Root rights. These rights disappear immediately after you reboot your smartphone. It is quite easy to obtain these rights, but they are also easy to remove. Hence, this option is suitable for people without much experience;
- Shell Root – extensive Root rights, but they still do not allow complete penetration of system folders;
- Full Root – provides extensive root access. A great way for an Android owner with experience.
Superuser capabilities
But, despite all the dangers associated with obtaining superuser rights, many want to have full control over their gadget. The reason is the desire to customize the device as much as possible to suit your needs, for example, increase the volume of the speakers, change the sensitivity of the microphone, the operation of various sensors, and even just free up space by deleting unnecessary system applications. Having root rights, you can get rid of intrusive advertising in applications and hack license verification.
In addition, the main features of rooting include:
- the ability to install a modified recovery (similar to a PC - gadget BIOS);
- removing system sounds and applications;
- editing the functionality of the shell and any applications;
- changing battery operating modes;
- overclocking or reducing the processor frequency;
- calibration of device sensors;
- installation of patches and unofficial firmware.
Physically, installing root rights means installing the SU binary file, which is responsible for full access to the gadget’s settings. This file is installed along the path /system/xbin/su, but often, in addition to it, busybox is also installed.
There are 3 types of super access: Full Root (full), Shell Root (limited), Temporary Root (temporary). The first type provides permanent rights with the ability to write in the system partition, the second does not provide the ability to write, and the third gives all rights, but crashes (disappears) after rebooting the operating system.
Checking if you have Root rights
How can you tell if your mobile device has root data? One of the simplest and most reliable methods to check whether a smartphone has root access is using the SuperSU application. Basically, this program is automatically placed on the phone as soon as you have activated Root mode. If there is no Ruth, you need to download the application yourself from the official website.
Download the utility from the official website and run it. The green logo of this application is visible on the website.
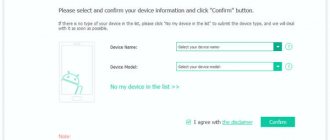
In the window that opens, if the text “Your phone is rooted” appears, you will not be able to perform other actions with the application.
In addition, there is a possibility that a window will appear that will request a waiver of the obligation. All we have to do is agree to the proposed conditions and click “Check Ruth”. We give this software the opportunity to log into your smartphone. You only need to wait 2 minutes. When the green color of the phone and the text of the same color appear. Congratulations, you have Root rights.
Checking for ROOT
QR Code
SuperSU
Developer: Codingcode
Price: Free
How can you find out that your smartphone has these same rights? The easiest and surest way is through the SuperSU program . Usually it is automatically installed on the phone immediately after activating the mode, but if this does not happen, you can download the utility yourself from Google Play.
Download it from the store, install it and open it. We see a pale green screen, where we click “Start” . The following page appears, and if the message “Your phone is not rooted” , further actions with the program are impossible.
Downloading the program
Getting started with the program
No root rights
Or a window may appear asking for a disclaimer. We agree, and then click “Check Root” . We give the program access to the phone and wait a couple of minutes. If the green image of the smartphone and the inscription of the same color light up, congratulations, the smartphone is rooted.
Removing root access using a file manager
This operation is very serious. It is recommended for knowledgeable people to do it. If there is not enough space on the device for special uninstallation programs, it is recommended to use the file manager installed on the smartphone.
To remove Root rights, it is better to use ES Explorer. This application has a simple and sensible design, it has many useful functions, including accessibility to various elements of the OS.
Let's get started:
- We enter the internal disk and pay attention to the folder “system” - “bin”. Here we need to find the element called “ su ” and delete it using a long press. Similar actions need to be carried out with the “xbin” folder;
- Next, look at the "app" . You need to delete the “Superuser” file, the extension of which is “apk” ;
- device and enjoy it without ROOT rights .
The previously mentioned method will only work if your rights allow you to edit system items.
How to temporarily disable root rights on Android?
In many situations, a very convenient solution is to temporarily disable root rights. The Temp Root Remover application was created by independent developers. It is not distributed on Google Play Market, so you will need to look for it on third-party resources, for example, on 4pda.ru.
Temp Root Remover gets rid of special rights by renaming the above su file in the bin and xbin folders. Using the application options, you can rename the su file at any time, and after the need arises to restore root rights, return it to its original name. In this case, you do not have to reboot the device.
Temp Root Remover does not solve the problem of completely clearing the system of traces of root rights. Therefore, you cannot use it before handing over the gadget for service.
Universal Unroot
A fairly convenient program that allows you to remove ROOT rights in just a few clicks. But it has a drawback. It is paid, although inexpensive. Its price is a couple of dollars. So, let's download the software from the Play Market. Next, you need to launch the program. We see an upside-down Android robot on the display. Then, tap on the gray “Unroot” button.
The program will ask if you are ready to completely uninstall Root rights? We agree. After this, the mobile gadget should reboot, which indicates that the operation was successful.
How to install Magisk
To install the application, you need OS version 5.0 Lollipop or higher, an unlocked bootloader and a custom recovery, for example, TWRP. It is highly recommended to make a full nandroid backup in case the installation is unsuccessful.
For full functionality of Magisk Manager, you must use MagiskSU, for the correct installation of which, it is first recommended to remove alternative root administrators. For example, Chainfire's SuperSU is being removed from the app's settings menu.
- Install Magisk Manager
Magisk 24.1 Android 5.0 and above - Download the installation zip file from the program interface, or separately
- Install the zip file via custom recovery and reboot into the system
- Activate "Magisk Hide" in Magisk Manager settings to be able to hide root rights.
ROOT Explorer
On the one hand, this software corresponds to the first method, since for it you can manually remove ROOT rights. But, this application is not an ordinary file manager, but a full-fledged tool that has a decent number of great features. Download ROOT Explorer.
The program quickly allows you to log into the OS. You only need to uninstall some of the elements that are responsible for ROOT access. Next, I showed the archive that the court needs to place.
- Bin – su, busybox;
- Xbin – su;
- App - apk.
Reasons for eliminating root access
As mentioned above, root rights generally interfere if there are some special applications on the smartphone - bank clients or something similar. But there are other reasons to clean up Android:
- You want to contact the service center using the warranty (superuser rights will void it).
- After gaining root access, the device began to slow down and behave inappropriately.
- The owner begins to fear that the protection of the smartphone has been weakened, and therefore viruses can take advantage of this.
Removal using KingRoot program
KingRoot is an application that is designed to work more extensively with ROOT rights. But, regarding this program, we can say that there are complaints from people about hacking and disappearance of data using this application. So, how can we uninstall KingRoot, and at the same time root access? Download KingRoot.
There is nothing complicated in this operation:
- Let's launch the program. Next, we need to go into settings, which looks like 3 dots at the top right of the display;
- Pay attention to the bottom of the window, then we need to tap on the “Remove ROOT access” command and click OK;
- Then, we need to launch the antivirus and carefully scan our device.
When should you give up superuser rights?
Although the possibilities for using your device are greatly expanded, sometimes you need to completely remove root:
- If the device fails, no warranty workshop will repair the device with such extended access to the system. Sometimes the conditions are such that all files must remain in the same, unchanged form, and you will be required to prove that you have not changed anything in it. This is one of the main reasons to remove root;
- When updating system files from cloud services, updates will not be installed on such devices using this method;
- Please note that when you change system files on your own initiative, you may inadvertently remove the built-in protection of the device, and then the simplest virus can do great harm to you;
- We decided to give our device to a child, and in order for the gadget to work properly, it is necessary to remove super rights to avoid troubles.
And maybe this will be interesting:
- Transfer photos from one Android to another in different ways
- Creating an Android Backup
- The procedure for recovering a Google account on Android
We work with Baidu Super Root
This software will allow you to purchase ROOT access. This is her plus. But this software also has its downside. The program is not easy to remove using the usual method. Besides this, it is not known whether additional programs will help you or not?
Do you need to remove Baidu Root and at the same time root access? In this case, you need to reflash the phone using recovery and at the same time ROOT access will be lost.
If you lack technical knowledge and are afraid of losing the necessary data, then you should not download complex programs.
Uninstall Magisk Manager
All the latest version files necessary for deletion can be found in the Magisk Manager topic
To uninstall an application automatically , you need to flash Magisk-unistaller.zip of the appropriate version through custom recovery.
If the archive does not work
, you need to restore the boot partition (boot.img) from a backup, and also manually delete /data/magisk.img, /cache/magisk, /data/busybox.
Removing Root access using a PC
We will consider Samsung smartphones, since they have their own difficulties in removing ROOT rights. So, we need:
- Connect your phone to your computer and enable developer mode via USB;
- Download special drivers from Samsung that allow the PC to recognize the phone and start working with the connected device;
- Odin3 application, which will handle the firmware;
- The firmware itself. More precisely, its archive with the desired element, which has the extension .md5.
Let's start work. You need to turn off the phone and enter it into a special mode using the power and audio keys. Next, you need to launch the downloaded software and connect the mobile gadget to the PC via USB.
Tap on “PDA” and indicate the address of the firmware element. Let’s check the boxes above the “Auto Reboot” and “PDA” tabs, after that, don’t press anything except the “Run” button. We have started flashing, which will take from 10 to 15 minutes. If you did everything correctly, a green light will appear in the program and the text “Done successfully.”
For phones of other brands and utilities, different ones are needed: on Xiaomi it is MiFlash , on Lenovo it is FlashTool , etc.
Removal through special applications
The easiest way to revoke the root is through special programs. As a rule, these are multifunctional applications that allow you to enable or disable root. Next, we will look at the best examples of such programs.
Universal Unroot
This application is an exception to the rule, since it can only turn off root. The program has a simple interface and is available for download through the Play Store. After installation, you only have to take a few steps:
- Launch the program.
- Press the “UNROOT” button.
- Confirm the operation.
Please note that when removing the root, Universal Unroot may require extended rights for a limited time. Grant permission for 10 minutes, then restart your smartphone for the changes to take effect.
SuperSU
And this program is already capable of both closing and opening root access. We will, of course, be interested in the process of revoking root rights, which occurs according to the following scenario:
- Install SuperSU via the Play Store.
- We launch the application and grant all the necessary permissions.
- Click the “Start” button.
- Go to the “Settings” tab.
- Select the option “Complete removal of Root” and confirm the operation.
If everything is done correctly, then the previously existing restrictions should disappear. If you wish, you can regain superuser rights through SuperSU.
ROOT Explorer
This program is a file manager with a root access activation function that allows you to display previously hidden folders. To revoke extended rights, you will need:
- Launch the application.
- Open the main menu by pressing the button in the form of three stripes.
- Move the slider next to the “Root Explorer” item to the “Off” position.
Please note that this shutdown method does not work in all cases. In particular, problems have been observed among users who have opened root access using other programs. However, ROOT Explorer allows you to disable root by deleting a file, which we will discuss later.
What problems may arise after uninstalling ROOT?
One of the most common problems is frequent PC restarts. This can occur either if ROOT is installed incorrectly or after Ruth is removed. The OS is starting to act up. For example, you accidentally deleted an important element, or did not pay attention to malware.
If this happens, you need to reset your phone to factory settings. Before such a procedure, you need to save important folders on the cloud or on your computer. You need to turn off the phone by pressing the Home button and the audio key.
The “Restore” command will turn on, where we enter the “Reset to factory settings” tab. Then, you need to clean the OS and reboot the phone.
Additional modules
In addition, Magisk Manager includes a powerful mod engine, which corresponds to the general concept of the application and works without modifying the system partition (systemless), you don’t have to worry about damage to system files, this approach allows you to disable all add-ons at any time. Installation of modifications is carried out through custom recovery or directly through the Magisk Manager menu. There are already many modules, the most interesting of which we will consider separately:
App Systemizer is a module that allows you to install any user application as a system application without modifying the system partition. Installing it manually into the system partition is not the easiest task, and in the module you just need to mark the required applications.
Viper4Android is a popular sound effects manager with extensive capabilities for customizing the audio path. With its help you can easily unleash the potential of any modern smartphone!
SELinuxPermissive Script - Places SELinux security into Warning Only mode. This manipulation is required by some applications, for example, the Viper4Android audio engine.
Xposed - a powerful modding engine without changing apk files requires no introduction. Supports Android from Lollipop to Marshmallow. It's gratifying that now it works without modifications to system files! To install it, in addition to the framework itself from Magisk Manager, you need to install Xposed Installer!
The choice of modules is really wide; you can find them in the application, or in a special section on XDA-Developers. There are both general modifications, such as ViperFX or AdBlock, and those tailored for specific devices, for example, activation of 50/60 FPS video recording for Nexus 5X/6P, or APT-X HD codecs for OnePlus 3. Everyone will find something interesting , and those who wish will be able to create something of their own, the author presents all the necessary tools!
Is it necessary to hide the root from Android Pay?
One of the conditions for using Google Pay is the absence of root. This is due to Google’s desire to protect the program and users from fraudulent activities. Therefore, having root excludes the installation of Android Pay and the use of contactless payments.
The decision whether to hide root or not is made by the user. If a person needs an application, he will have to choose and implement one of the proposed methods. Otherwise, when installing Android Pay, a message will appear that the system cannot check the phone due to root rights.
There is no need to completely remove root. All that is required is to bypass the restriction (hide the installed option) by removing superuser rights from the program. The problem cannot be solved by simply resetting the smartphone to basic settings.