In this tutorial I will tell you how to remove write protection from a flash drive. Let's figure out why the "Disk is write-protected" error appears and how to unlock a USB flash drive, SD memory card and other devices.
Flash drives and similar data storage devices have a microcontroller that controls the read/write processes. As well as NAND memory chips, where information is written, and a file system in which data is marked.
If one of the components fails or fails, stable operation is disrupted, causing errors to appear on the device and it becomes impossible to record anything. Here are the most common causes of this problem:
- Extracting while copying may cause a file system failure.
- Faulty computer USB socket - high voltage or short circuit can damage the controller and memory.
- The work of malware or viruses - they block data recording at the software level.
- The flash drive is completely full and, as a result, the file system crashes.
- Poor quality assembly.
- Presence of bad blocks.
Method 1: Unlock with switch
Some models may have a built-in switch labeled Lock, which prohibits copying to the device. Just move it to the opposite position and try recording the files again.
A similar switch can also be installed on the SD card. Don't forget to check it and the adapter the card is plugged into.
What does it mean
When working with portable media, you may encounter the following message: “The disk is write-protected...”.
This status does not allow you to perform any actions with files downloaded to a DVD-RW, flash drive, SD card or other media.
But it is not necessary to purchase a new device; it is quite possible to fix the problem yourself using certain algorithms.
Method 2: Software Unlock
There are special programs and tools that change access rights on a flash drive. In this case, recording will be prohibited for all users. Such protection is installed to protect information from deletion and from viruses.
There are several solutions:
- Formatting
- Changing access rights
- Removing protection using the command line
Formatting
Important! Before performing the procedure, copy all important information to your PC, as all data from the device will be erased along with access rights.
1. Open This PC. Right-click on the flash drive and select “Format”.
2. Check the “Quick” box and click “Start”.
Manually changing access rights
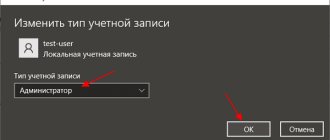
1. Open This PC. Right-click on the flash drive and open Properties.
2. Go to the Security tab and click the Edit button.
3. Select the “Everyone” group, in the “Allow” section, check the “Full Control” checkbox.
4. Click "Apply" and "OK".
On a note. By changing the permission settings, you can deny or allow read/write access to all or individual users.
Removing protection via the command line
This method is suitable if the “Read Only” attribute is applied to the device or quick formatting did not work.
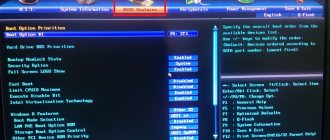
1. Directly in the open Start menu, type command line and run the application as administrator.
2. Type diskpart and press Enter. This will take you to the Disk Management utility.
3. Then type list disk and press Enter. This is needed to get a list of all connected drives.
4. Select the flash drive using the select disk disk_number command. Press Enter.
5. To remove attributes, type attributes disk clear readonly and press Enter.
If it doesn't work, add the following commands to clean up and completely format:
- clean - complete cleaning of the flash drive.
- create partition primary - creating a new partition on it.
- format fs=ntfs — formats the device into the NTFS or FAT32 file system.
Which flash drives most often become write-protected?
It all depends on how you use the device. It can be easily converted to a write-protected disc. The manufacturer (Sony, HP, Toshiba, SanDisk, Stronium, Samsung, Kingston, etc.) does not matter.
Is it true that in most cases it is the SandDisk Cruzer Blade that gets infected?
Yes, mostly SanDisk flash drives face the problem of write protection. To be more precise, the Cruzer Blade model is vulnerable.
Mostly SanDisk flash drives face the problem of write protection
Method 3: Removing the write ban in Windows
Write protection can be set on the system itself. This usually happens due to viruses. Or perhaps someone manually enabled the lock through system tools. Next, we'll look at how to fix this.
To carry out all actions, you must have administrator rights.
Step 1: Check Group Policies
1. With the Start menu open, type gpedit.msc and open the application.
2. Expand the branch: Computer Configuration – Administrative Templates – System – Access to Removable Storage Devices.
3. In the right part of the window, double-click on the “Removable drives: Deny writing” option.
4. Make sure the switch is set to Disabled and apply the action.
Step 2: Check the Registry
In the Start menu, type regedit and open Registry Editor.
Expand the branch: Computer - HKEY_LOCAL_MACHINE - SYSTEM - CurrentControlSet - Control. If there is no “StorageDevicePolicies” section in the list, then everything is OK.
And if there is a “StorageDevicePolicies” section, then click on it and in the right part of the window double-click on the “WriteProtect” parameter. Set the value to 0 and click OK.
Step 3: Virus Removal
In my practice, I often encounter viruses that hide all data on the device or prevent anything from being written down. So if your antivirus program hasn't been updated in a while, now is the time to do it. And conduct a full scan of your computer for viruses and then treat/remove them.
For additional cleaning, I recommend downloading two free utilities and scanning your PC with them.
Dr.Web Cureit
Official website: free.drweb.ru/cureit
Open the program and click on “Select objects to scan.”
Mark all objects and run the scan.
Wait for the scan to complete and confirm cleaning if any threats are found.
Malwarebytes
Official website: ru.malwarebytes.com
Malwarebytes is a program for removing vulnerabilities and Trojans. Unlike standard antivirus, it conducts deeper scanning for cyber threats.
If your computer does not have an antivirus program, you can download it from the official website. Such a program must be installed on the computer, but only one. Here are the most popular antiviruses:
- Kaspersky (kaspersky.ru)
- Nod32 (esetnod32.ru)
- Avast (avast.ru)
Why did this happen?
The reasons for this problem may be different. For example, most often it is a virus. If the system is infected with malware, then the likelihood of write protection on external devices is high. For example, you removed the flash drive while transferring data from the computer. As a result, write protection appeared. Even when using data encryption algorithms on a USB storage device, the above-mentioned problem may also occur.
The reason for the inability to format a flash drive may be a virus.
If it doesn't help
If all the methods discussed above did not help, check and update the drivers for the motherboard and USB ports. To learn how to do this, read the lesson “How to update drivers.”
Then move on to the advanced methods:
- Low-level formatting
- Checking for bad sectors
- Reflashing the device
Low-level formatting
Unlike standard formatting, low-level formatting performs a deeper cleaning of the device, removing errors and faulty software sectors. In some cases, this helps to bring the flash drive back to life and remove the protection. For work we will use a special program.
1. Go to the website hddguru.com/software, download and install the “HDD Low Level Format Tool” program.
2. In the program window, mark our device and click “Continue”.
3. Open the “LOW-LEVEL Format” tab and click on “Format this device”.
4. Confirm the action and wait for the formatting process to complete. Depending on the volume, it may take from several minutes to several hours.
If the process is stuck. Did errors occur during formatting or did the process freeze? This happens when the device is faulty or physical sectors are damaged. To check you will need a special utility.
1. Follow the link hdd.by/victoria and download the Victoria program.
2. In the right window, select a removable device.
3. Open the “Testing” tab and click on “Scan”.
4. When scanning is complete, pay attention to the blocks. Red and blue indicate bad sectors.
If bad sectors are detected, it is better to copy all the information and not use the device again, as it may stop turning on at any time. You can patch up bad sectors with the paid hdd regenerator program. But this is not reliable - after some time they will appear again.
Flashing a flash drive
Step 1: Download the official utility
Firmware may be required if the controller program on the flash drive is damaged. In this case, it stops showing the real volume and does not allow you to record anything or perform formatting.
For such cases, the manufacturer publishes a special utility on its website. It automatically detects the device and installs working firmware. To download such a program, go to the manufacturer’s official website. Often the utility is located in the support section.
For example, for Transcend there is a JetFlash Online Recovery utility. Thanks to her, a large number of flash drives were recovered.
How to format a drive
You must approach this point carefully to avoid accidentally deleting information from your hard drive. A write-protected flash drive is formatted using a different path from the standard one.
The algorithm of actions includes 2 steps:
- Device identification.
- Use suitable software.
For each step there are several utilities that can cope with the task.
To identify the card use:
- Flash Drive Information Extractor. To get complete information about the flash drive, just launch the program and press one button. Diagnostics takes no more than half a minute. If during diagnostics the program stops responding, you need to remove the flash drive and the necessary information will be displayed.
- ChipGenius. The program is constantly updated by the developers to work with all flash drives. Diagnostics can be carried out not only for USB flash drives, but also for players and microSD.
- CheckUDisk. An old program that has not been updated for a long time. Works best with old flash drives.
The following free utilities are used to format the device:
- AlcorMP. The program version is selected depending on the controller. No installation is required for use, but this does not affect the number of features of the utility. Before formatting, you must configure AlcorMP. It may not detect some flash drives, so you need to select a program build, so for Oltramax you will need to try to format several versions at once. Why this happens depends on the internal settings of each version, which are determined individually for certain cards.
- Kingston Format Utility. Simple interface. Work is possible only with flash drives from Kingston, it does not see other media.
- HP USB Disk Storage Format Tool. A simple program in which you only need to select a file system and start the process.
- Silicon Power Low Level Formatter. Suitable for flash drives using a Phison controller, such as Sundisk.
Easy Troubleshooting: Check the Storage Chassis
Some USB flash drives have a mechanical switch on the case that automatically turns on write-protect mode.
Mechanical switch
Hence, check if there is any small slider on it as it may change position due to external factors.
On a note! If so, then simply slide the switch to the unlock position and check if the problem is resolved. Otherwise, the drive is most likely damaged. Contact a computer specialist or purchase a new device.