Hello dear readers! And we will have an interesting article today. Today we will look at a question that worries many, namely, how to catch or transmit a Wi-Fi signal over a long distance. For a home router, one problem remains - the gain is small for a large apartment or house. At the same time, mostly cheap devices have broad-directional antennas, which do not hit as far as we would like.
Sometimes in suburban areas, villages, villages or manufacturing plants, a Wi-Fi signal transmitter is needed over long distances. Now we will clarify a small issue. The fact is that the transmitter is precisely the primary base or, for example, our router. But the receiver will be a laptop, phone, tablet, etc.
And here you need to understand what exactly you want. Make a more powerful base so that other people from many kilometers away can catch your Wi-Fi signal. In this case, you need to buy expensive equipment and install a high antenna. But if you want to catch someone else’s Wi-Fi signal at a great distance, then the issue is much simpler to solve. I hope we have resolved the issue with the definition of the transmitter and receiver.
There is another third option - installing and configuring a multi-kilometer bridge. Here's an example. A fiber optic network was installed in the village. At a distance of 2 km there is a house, to which, of course, no one will run the wire separately. The owner of the house went to the village to negotiate to share the Internet with a friend.
You can install a powerful, narrowly directional antenna at the transmitter point, which sends the signal exactly to that house. There, to improve reception, another similar antenna is placed on the roof. Next, the two routers are connected and a regular bridge is configured. One router receives the Internet and shares Wi-Fi with the second. This results in a PtP topology.
Affordable ways to strengthen the router signal to improve wifi reception in the apartment
In fact, boosting the wifi signal from the router is very simple and easy.
And it doesn’t matter at all what manufacturer it’s from - TP-Link, Asus, D-Link, Zyxel, Keenetic, Tenda, Netis, Netgear, Xiaomi, Rostelecom, Beeline, MGTS and so on
There are several most popular ways to expand the modem’s reception area and improve the quality of communication, which you can use yourself at home in any apartment:
- Buy a router with a more powerful built-in antenna,
- Place it somewhere in the corridor in the center of the apartment,
- Use one of the means of strengthening the wifi signal - a second router, an external antenna, a repeater, a mesh system.
Many people, when renovating an apartment, determine where to install the router somewhere in a special server room, or in a dressing room, or in an electrical panel. In a word, out of sight. But the configuration of the apartment layout is often such that the wireless signal from the router does not reach rooms remote from the installation site. Or the wifi range is not sufficient to get any acceptable speed on it.
Transmission up to 100 meters
For such a short distance, two regular routers are suitable. One needs to be configured as an access point, and the second as a client. It is also important that each one has a different IP address.
If you take standard routers of the TP-Link TL-WA5110G model, then their basic antennas will allow you to connect at a distance of 1 km without problems, and if you replace them with directional catchers, the range will increase several times. In this case, you will need to use a special adapter that has a type N connector to RP-SMA. If everything is done correctly, you can easily get a range of 7 km.
Help setting up your router
First, you need to check the hardware version of the router by looking at the sticker on the bottom of the router.
By marking the router on the Internet, you can download a new version of the firmware for the router. The new firmware version significantly improves the performance of the device.
Model
To set up a Wi-Fi router, you need to configure your computer, set the protocol and type of connection to the provider.
In the Windows XP operating system, you need to select: “Start” → “Control Panel” → “Network Connections”.
Network connections
In the Windows Vista / Windows 7 operating system, select: “Start” → “Control Panel” → “Network and Sharing Center” → “Manage Network Connections”.
Setting up a network card
If the connection protocol is DHCP or Static IP, then when you open the “Network Connections” folder you will see the following:
LAN connection
To clarify the protocol, right-click the “Local Area Connection” shortcut and select “Properties” from the menu. In the window that appears, select the TCP/IP v4 protocol and click the “Properties” button. A new window will open.
LAN connection
If in the window that opens there are dots next to the inscription “Obtain an IP address automatically,” then the connection protocol is DHCP.
Automatically obtaining an IP address
If there are dots o, and in the windows next to the inscriptions “Subnet mask”, “IP address” and “Default gateway” there are numeric values, then the connection type is Static IP.
These numbers need to be written down and the “OK” button pressed.
Automatically obtaining an IP address
After specifying the protocol and type of connection to the provider, you need to connect the router correctly.
Router connection diagram
After this, you need to determine the factory IP address of the router. You can find it in the instructions for the device. This IP address is entered into the address bar of the Internet browser and the “Enter” key is pressed.
Address bar
In the authorization window that opens, enter the login and password from the instructions (usually the login and password are admin).
Authorization
After authorization, you can begin setting up the router. In the web interface that opens, go to the “Main” section, select the “WAN” subsection and then in the “Connection Type” menu select “DHCP Client or Fixed IP”. Click the “Clone MAC Address” button, and then the “Apply” button.
Web interface
For the DHCP protocol, the steps taken are sufficient to configure access to the Internet.
For the Static IP protocol (when the provider assigned a static IP address to the computer’s network card), in the “Main” section, select the “WAN” subsection, and in the “Connection Type” menu, select “DHCP Client or Fixed IP” and click the “Clone MAC” button Address". Then put a dot next to “Specify IP” and enter in the three fields “Subnet mask”, “IP address” and “Default gateway address” that you wrote down earlier.
WAN setup
When the “Apply” button is pressed, the computer for which the setup was performed will have access to the Internet.
How to transmit WiFi over 5 km. and more?
Option 2. Let’s move on to “heavy artillery”
If you need a more serious option, the next part of the article is just for you.
Ubiquiti is widely known for its products for building wireless connections. The brand also produces equipment for smart homes, CCTV cameras and much more, but the first thing that comes to mind when you hear Ubiquiti is undoubtedly Wi-Fi equipment.
We will not talk about the entire line of equipment, but will select only what we need.
Brief description of the equipment
We will build the bridge using NanoBrige M5 or NanoBeam M5 equipment.
- The NanoBrige M5 has been discontinued, but can still be found at some dealers, and there are plenty of used options available.
- NanoBeam M5 is a new development, it is similar to the previous model, but it has a completely different filling. A faster Atheros MIPS 74KC processor, more RAM, and now 64 MB of RAM on board. The gain of the external antenna has increased. The shape of the emitter has changed. The design itself has also changed for the better. Installation is even easier and faster.
Both devices are positioned by distributors as equipment for distances of 5 km, but in practice, links of 20 km or more were launched with very good stability indicators and throughput at such a distance of over 120 Mbit/s via Wi-Fi.
Below are the antennas themselves for transmitting wifi over long distances.
Let's move on to the settings
Having configured the network interface of your PC or laptop for the 192.168.1.0/24 network and connected the equipment according to the following diagram, we can begin configuration.
If your equipment is new, so to speak, “out of the box”, then after entering 192.168.1.20 in the address bar of the browser and clicking go, we should get to the authorization page, it looks like this:
Standard login/password for ubnt/ubnt login
If for some reason you do not get to the authorization page or the standard login/password does not work, most likely you have equipment that was previously configured by someone.
It can be reset to factory settings by pressing the Reset button, which is located on the emitter, near the RJ-45 connector
After the reset, if the authorization page has loaded, enter the login/password ubnt/ubnt and go to the MAIN tab of the device’s web interface.
All basic information about the device status is displayed here.
All the settings we need are located on the WIRELESS and NETWORK tabs.
Configuring the antenna to AP mode
The picture shows important points that need to be configured.
Brief description of the highlighted items:
- Wireless Mode – Operating mode. Select which mode the device operates in
- AccessPoint – access point (distributing Wi-Fi)
- Station – device that will connect to Access Point
- SSID – Name of the wireless network. Will be displayed when searching for a network
- Channel Width – Channel width. The higher the value, the greater the throughput, but the lower the stability of the channel. If the distance is small and the Fresnel zone is clean, feel free to set it to 40 MHz
- Frequency, MHz – Operating frequency. We choose carefully, because when choosing a frequency that is occupied by another device located in the field of radio visibility, we will observe a deterioration in the quality of the signal.
- Output Power - Outgoing power. When the distance between AP and Client is 10 km or less, it is recommended to reduce the transmitter power to 19 – 20 dBm
- Security - Security. Exactly the same as in the router settings - password protection of the wireless connection. May have a slight impact on network performance, but it is recommended to enable, preferably WPA2-AES mode.
After changing all the necessary parameters, click the Change button at the bottom of the page, and then, in the line that appears at the top, the Apply button. Only in this case the settings will be changed!
Configuring the antenna in Client mode
Almost everything is the same here, only the operating mode is different.
Important point! If you check the Frequency Scan List, MHz field and enter the frequency configured on the Access Point, the connection will be much faster, since the client will not go through all the channels in the range, but will scan only the frequency indicated in the scan sheet.
How to improve your signal with new equipment
To solve the problem, you can resort to replacing some components or purchasing additional devices.
Replacing the receiving device
Study the characteristics of the device from which you connect to the Wi-Fi network. Information can be found on the developer's official website or in the documentation that comes with the device.
The manufacturer may have installed a bad Wi-Fi receiving adapter or a weak antenna. By reading reviews, you can find out if anyone has encountered a similar problem. If the model has a problem with the adapter or antenna, it will be possible to replace these components by installing higher quality components.
You can replace the device antenna
But you should only replace components if you have sufficient experience in this. Replacing the internals will void the device warranty. If you are not confident in your abilities, contact the service center.
Antenna replacement
The antenna's job is to distribute and receive a response signal. The distribution range depends on the power of the antenna, and the sector into which the signal will be received depends on the direction. There are two types:
circular. They create a ball near themselves, that is, they distribute the signal evenly in all directions. Used in almost all routers by default
Their advantage is that it doesn’t matter which side you are on from the router, because the signal is everywhere; directed. Produces a signal only in a certain direction
Their advantage is that due to the accumulation of a signal in a certain direction, the range and power of the signal increase. Disadvantage - the signal will only be along one side relative to the router. If you approach the distribution point from any other side, you will not be able to catch the Wi-Fi network. There are directional and omnidirectional antennas
You can buy a more powerful circular antenna if you want the signal to be heard in all directions. This is convenient if the router, for example, is located on the second floor, but devices from the first floor, and from the third, and from rooms located on opposite sides of the router are connected to it.
If you have the opportunity to position the router so that all devices are located in one line relative to it, then you can purchase a directional antenna. This way you will achieve a high signal propagation range.
Antenna modification
If you don’t want to buy a new antenna, you can remake an existing one or make a new one yourself. There are instructions on the Internet for different models and descriptions of how to make an antenna from scratch. There is no universal method, since it is necessary to take into account the characteristics of each router, the conditions in which it will be located, the tasks it faces, as well as other characteristics of the antenna: length, width, material of manufacture, shape.
For example, you can make a special nozzle from pumpan foam or a wooden plank and nails. This attachment turns a circular antenna into a directional one, so the signal in a certain direction is amplified and weakened in others (see paragraph “Replacing the antenna”).
The antenna can be modified
The distance between the nails will increase in proportion to the distance from the antenna: 19, 24, 29, 33 mm. These distances are suitable for a router operating at 2.4 GHz.
The nozzle should be made, observing the dimensions
Purchasing repeaters
A repeater (or repeater, or access point) is a device that forwards a Wi-Fi signal sent by someone. The repeater catches the signal from the router and distributes it around itself with increased strength, that is, it relays it further.
It is convenient to use a repeater if the distributed network does not reach some point in your home or office. By installing a repeater at the extreme edge of the Wi-Fi signal, you will extend the range of the main Wi-Fi network. Setting it up is simple: one button is pressed simultaneously on the router and on the repeater, after which the devices are connected, and from that moment they begin to work in pairs.
The repeater distributes the signal from the router further
Some routers have a “Boost” feature that turns the router into a repeater. If you have two routers, you can make one a Wi-Fi point, that is, leave it as a router, and turn the second into a repeater.
When buying an access point, you need to consider the compatibility of the router with this repeater model. It is recommended to purchase a repeater and router from the same manufacturer. For example, if you have a TP-Link router, then it is better to buy a TP-Link repeater.
How to transmit wifi at a distance of 1 km?
Option 1: radio bridge for 1 - 7 km.
To build the bridge we will need two of the simplest wireless access points. A good option would be TP-Link TL-WA5110G. Why is she so remarkable? The transmitter power of this access point model (hereinafter referred to as AP) is 26 dBm, which is several times higher than the power of any other AP for home use. The equipment has been discontinued, but if you can find a working used copy, feel free to buy it.
For the radio bridge we will need 2 APs. We configure one as a regular access point, and the other as a client.
Example of AP transmitter settings
- SSID We set the network name as desired, you don’t have to change the standard one
- Region. The region does not play a special role
- Channel. It is advisable to choose a channel from 6 and higher, since on “high” channels d 2.4 GHz the air is less noisy
- Power. To begin with, set the transmitter power to maximum, i.e. 26 dBm, and check the Enable High Power Mode checkbox.
- Mode. We set the mode to 54Mbps (802.11g), since the other one in the list has lower bandwidth.
Example of AP receiver settings
We switch the AP to client mode.
We register the SSID as on the first device (you can also click on the Survey button at the bottom of the page, there we will see a list of devices available for connection and click Connect).
Don't forget to set different IP addresses on both APs (Network Section)!
With standard antennas, the devices reliably connect at a distance of 1 km in line of sight.
If you replace the standard circular antenna with a directional one (see figure below), you can significantly increase the communication range.
But in this case, you will have to use an adapter (pigtail) from the N-type connector to the RP-SMA, which is installed in the AP.
With this configuration on both sides, the points will show stable operation at a distance of 7 km.
There is only one disadvantage of this option - if the air is very noisy, the antenna will pick up and amplify all the interference in the area, which will negatively affect the quality of the channel, packet loss is possible, or even communication interruptions, but you can experiment with other antennas, in which the radiation pattern has a narrower beam and fewer “side lobes”.
It is also possible to use the structure outdoors, but the TD itself must be placed in an airtight box. The pigtail can be removed through the cable entry by sealing the hole with raw rubber or frost-resistant silicone.
Summary of the set “Option 1”
The configuration is quite workable and has the right to life. The cheapness of the components (used option) allows you to give preference to it if there are no increased stability requirements for the wireless bridge and a throughput of 8-12 Mbit/s is satisfactory. A complete set of used equipment for both sides can be purchased for about $50. The use is especially justified when some components are already in stock or were received for free. With external antennas, you can use not only the TP-Link TL-WA5110G, but any access points with a removable external antenna and a suitable connector.
The downside is that it is difficult to install and configure for an untrained user. Several detachable connections, the quality of which can significantly affect the signal level.
Wired networks: features, pros and cons
Modern office wired networks typically use twisted pair cables and RJ-45 ports. The operation of wired networks is described by IEEE 802.3 standards. Today there are two main standards in use:
- IEEE 802.3u with a maximum throughput of 100 Mbps. Today it is found only in budget laptops, old computers, including network equipment, or in devices where high speed is not needed;
- IEEE 802.3ab with a maximum throughput of 1000 Mbit/s is the most common today - gigabit network cards are integrated into most motherboards, and there is a wide selection of network equipment on the market, including inexpensive ones.
There is also the IEEE 802.3an standard, which allows, under certain conditions, to achieve speeds of 10 Gbit/s using conventional twisted pair copper cable. Support for this standard can be found in workstations and servers, but 10-Gigabit switches are too expensive for SOHO, which slows down the replacement of a gigabit network with a 10-gigabit one. There are intermediate solutions - gigabit switches with 2-4 10-gigabit SFP+ connectors, which allows you to connect a server or other network segment via a 10-gigabit interface.
Pros of a wired network
The main advantage of a wired network is stability and reliability.
High speed and stability. So, let's take a common network configuration with an operating speed of 1 Gbit/s. This speed is available to each client on the network and is not divided between them, plus, it is the speed in each direction, i.e. the total throughput can reach 2000 Mbit/s (IEEE 802.3ab). In addition, there is support for large packages (Jumbo Frame, these are packages of 9kb and 16kb), which allows you to increase the speed when transferring large amounts of data by reducing the transfer of overhead information, as well as reduce the load on the processor. Another method that increases network throughput is channel aggregation (IEEE 802.3ad), which allows you to obtain throughput above 1 Gbit/s. Finally, twisted pair works effectively over wire lengths of up to 100 m without compromising the stability and speed of the connection.
Equipment. A Gigabit wired network controller is now integrated into any motherboard sold, i.e. in fact, it is free for the user. The cables are also relatively cheap, plus you can cut them yourself to the desired length. There is, as they say, network equipment on the market for every taste and budget; you can always find inexpensive and yet effective solutions.
Safety. One of the significant advantages of a wired network is security. First of all, physical, because To connect to the network, an attacker needs physical access to the premises, to an outlet.
Cons of a wired network
As with any cable, the main disadvantage is the need to lay cables to each workplace, and in the future - to bind the employee to this workplace. Wiring, as a rule, is carried out during the renovation of the premises, so with any changes in the organization of the office, the network infrastructure will also most likely have to be transferred. As a result, changing the seating arrangement of employees, adding workstations or network equipment (printer, MFP, etc.) is a non-trivial task that may require re-routing cables. Well, or various kinds of “crutches”.
Finally, only one device can be connected to one wire, and some devices (smartphones, tablets, etc.) cannot be connected to a wired network at all.
Access to the Internet
Modern Wi-Fi wireless technology can be used to provide Internet access to devices within range of the signal. The coverage of one or more interconnected access points can extend from a small space to a considerable number of square kilometers. Coverage over a larger area may require a group of access points with overlapping coverage.
Wi-Fi provides service to private homes, businesses, and public places with hotspots that are installed either free or for a fee, often using a specific web page to provide entry. Organizations and businesses such as airports, hotels and restaurants often provide free connections to attract customers.
Routers include a digital subscriber or cable modem and a Wi-Fi access point. They are often installed in homes and other buildings and provide Internet access and interconnectivity to all devices connected to them, either wirelessly or via cable.
Firmware update
The wireless controller and access points are ready to work right out of the box, however we always strongly recommend updating the software that comes pre-installed on the devices. The new firmware will not only correct detected inaccuracies in the code, but will also add new functions. For example, one of the most interesting new products for our equipment will be support for cloud management, which allows you to centrally manage several wireless controllers at once. This option will be in demand in the case of very large or distributed objects. We are also introducing support for the IPv6 protocol, which will allow us to use our wireless equipment in new generation IP networks. For network administrators, we have added support for the SNMP protocol, which makes it possible to centrally manage devices and collect statistics on the use of the controller and access points. As well as command line support. The software of any of our wireless controllers is updated using the web interface. The whole process takes about five minutes and does not require any special knowledge from the user. The method for replacing firmware on access points depends on the mode in which they operate: FIT or FAT. In FAT mode, the access point acts as an independent device, so changing the firmware version is done using the web interface of a specific device.
When building a wireless network at a large or complex facility, many wireless access points are needed to ensure a continuous area of reliable coverage. In this case, they (being in FIT mode) are controlled using a wireless controller. To update their firmware you also need to use a controller. Centralized change of access point firmware versions is carried out using the controller’s web interface, where you need to download a file containing the new firmware version, and also specify the start time of the update. You can also view the list of access points that it will affect here.
The ability to centrally update is especially useful for the AC500 wireless controller, since this model supports up to 500 access points simultaneously, which makes manual firmware replacement on the monitored object almost impossible. Since our range of equipment is constantly expanding, after the release of a new model (for example, CAP1200), it is necessary to update the database of supported devices on the controller to expand the list of managed equipment.
Budget TP-LINK Archer C6 for high-speed home Internet
- Wi-Fi speed 1167 Mbps;
- work in two ranges;
- transmitter 23 dBM;
- IPv6 support;
- bridge mode.
The best option for home. Equipped with Wi-Fi capable of operating in two bands at once. The gadget has gigabit-type LAN connectors. Bridge mode is provided. WDS technology and guest network are supported. Work via IPv6 protocol is possible. There is a built-in firewall, a DMZ option and static routing are provided.
This budget product supports VPN pass through technology along with tunnels. There is support for the PPTP protocol. The quality of wireless data transmission is ensured by a 23 dBM transmitter with 4 non-removable external antennas. MIMO mode supported. Configured using the Web interface.
A high-quality and powerful device that is very easy to set up. Even with all the LAN ports filled, there is no slowdown in speed. I'm pleased with the dual-band Wi-Fi. But the settings interface could be made less cluttered. But for this price it's normal.
Pros:
- 4 gigabit ports;
- static routing;
- Wi-Fi on two bands;
- IPv6 protocol;
- VPN support;
- MIMO mode;
- 4 external antennas;
- bridge mode.
Bottom line
As we showed above, installation and configuration of TP-Link equipment is extremely simple, and a large number of changeable parameters allows you to flexibly configure the network in accordance with all customer wishes. Below we list the key features of our products that we consider the most popular and relevant when building large-scale networks:
- automatic discovery and centralized management of access points;
- possibility of local and remote placement of access points;
- load balancing;
- support for local switching of user traffic by access points;
- unified setup;
- possibility of hot backup of the wireless controller;
- PoE support;
- lack of moving parts for controllers and access points;
- support for multiple SSIDs;
- various methods of user authentication;
- flexibility and scalability of the solution;
- 3 year warranty and technical support in Russian.
Advantages of wireless Wi-Fi networks
Ease of creating and expanding a network
Perhaps this is the main advantage of a wireless network. It means that organizing an efficient and fast enough wireless network will not require a lot of time and effort. And most importantly, it will require minimal costs.
For example, if you bought a renovated house or apartment and there is no wired network, then Wi-Fi is your solution.
The point is not even that creating a “regular” network is sometimes just too lazy (this also happens). And the fact is that with one or more access points, you can connect even separate buildings to a single local network. Or computers on different floors. Even if they are located at a great distance from each other.
In addition, a wireless network can be created quickly, beautifully (without a bunch of wires) and inexpensively. Especially when organizing a wired network is not always possible. For example, at various conferences, exhibitions, visiting seminars, etc.
We should also not forget about buildings in which laying a cable system is not possible due to their historical value. This applies to museums, architectural monuments, etc.
As for expansion and connection, the situation is quite simple. Add a new computer via Wi-Fi and you're done. If you want to create an Ad-Hoc connection, please, if you want with an access point, again...
Mobility
Today, universal mobility is an undeniable advantage. It gives a person the opportunity to do his business in any conditions, wherever he is. Mobile phones, tablets, laptop computers. All these representatives of technology, which bring this very mobility into human life.
With the advent of wireless networks and related computer technologies, mobility has become more important. At the moment, it makes it possible to connect any devices capable of communication with each other. And due to the fact that at the moment there are so many of them in the modern world. Having a mobile device, you can easily move around the city or country. And be sure that you will always stay in touch. And you can get the most up-to-date information. Right now!
Sooner or later, the proverb “If the mountain does not come to Mohammed, Mohammed goes to the mountain” can be slightly altered. “If you don’t want to come to the network, the Wi-Fi network will come to you. Even abroad - connect to Wi-Fi - and you have access to everything. No overpayments.
Possibility of connecting to a different type of network
Advantages and disadvantages of a wireless network. The advantage of a wireless network is that it can always be connected by wire. Moreover, you can connect any PC or laptop. To do this, just use the port on the access point or router. At the same time, you will have access to network resources without any restrictions. This is for the case when there is no driver for Wi-Fi.
This feature is mainly used when connecting remote buildings and points to a common network. Multiple buildings are connected via wireless technology. In those places where it is impossible to install a wired network, or it is too expensive. In short, it's unreasonable.
High speed Internet access
Having an access point with an Internet connection, you can organize access to the Internet. And all your computers on the local network. At the same time, the connection speed will be much higher than conventional 3G modems, and even LTE, can provide.
Wireless network access is a fairly serious alternative to such an expensive solution as a fiber optic channel. Even some large companies cannot afford to lay such a channel. Here we are talking about 4G technologies and the approaching 5G boom.
The same cannot be said about buying an access point or Wi-Fi router, which an ordinary user can purchase. It’s just a matter of the amount you’re willing to pay for the channel provided. And of course the price of the router itself.
A channel with a speed of 10 Mbit/s or more has not been considered a great luxury for a long time. Both in the Russian Federation and in European countries. USA or Channels. And at the moment, in almost any home you can get 100 Mbit/s. and for a reasonable price. All that remains is to install the Wi-Fi router and that’s it.
Basically, any access point or router has a WAN port with an RG45 connector. This makes it possible to connect to common wired Ethernet networks. From any telecom operator in your home.
Controller setup
We will not describe in detail here all the capabilities of all menu items of the web interfaces of TP-Link wireless controllers. Instead, we'll walk you through the entire initial configuration process of the AC500 when adding a controller to an existing network. Wireless network controller TP-Link AC500 CAP series, Auranet line
For those who want to learn more about the capabilities provided by the controller's web interface, we recommend using the emulator available on our website. The procedure for deploying a wireless network is quite transparent and consists of several simple steps. It’s worth starting with preparing the network infrastructure for the introduction of the wireless segment. To be specific, we will assume that it is necessary to provide wireless network coverage at an object that is one building or a group of closely located buildings connected by a local network. TP-Link wireless equipment has the ability to remotely connect access points to the controller, but for simplicity, we will assume that all connections are made within the same local network. We decided to somewhat complicate the task of pilot implementation and use the existing wired infrastructure built on the basis of equipment from another manufacturer, as well as place the controller and access points in different subnets.
Preliminary configuration of the wired part of the network (connecting the controller)
To connect the AC500 controller, a virtual network VLAN 101 was created on the L3 switch. The controller is connected using the fifth interface to the Gi0/6 port of the switch, which is configured in trunk mode. For routing, a virtual L3 interface (SVI) was created. switch3560#sho vla bri VLAN Name Status Ports — — — — 1 default active Gi0/7 101 AC500 active 1002 fddi-default act/unsup 1003 trcrf-default act/unsup 1004 fddinet-default act/unsup 1005 trbrf-default act/unsup switch3560#sho run int vla 101 Building configuration… Current configuration: 108 bytes ! interface Vlan101 description TP-LINK AC500 ip address 192.168.1.1 255.255.255.0 load-interval 30 end switch3560#sho run int gi0/6 Building configuration… Current configuration: 164 bytes ! interface GigabitEthernet0/6 description AC500 switchport trunk encapsulation dot1q switchport mode trunk load-interval 30 spanning-tree portfast trunk end Now you need to configure the wireless controller itself: also create VLAN 101 and configure the corresponding L3 interface. The fifth physical port of the controller must operate in trunk mode. In principle, the switch port for connecting the controller can be configured in access mode, but then the controller will only be able to route (not switch) user traffic for those access points that transmit it through it to the “larger network”. But more on that later.
Preliminary configuration of the wired part of the network (connecting access points)
To connect access points, we create VLAN 102, in which their management interfaces will be located. Switch ports are also configured in trunk mode. switch3560#sho vla bri VLAN Name Status Ports — — — — 1 default active 101 AC500 active 102 CAP1750 active Gi0/7 1002 fddi-default act/unsup 1003 trcrf-default act/unsup 1004 fddinet-default act/unsup 1005 trbrf-default act/unsup switch3560#sho run int gi0/7 Building configuration… Current configuration: 159 bytes ! interface GigabitEthernet0/7 description TP-Link CAP1750 switchport access vlan 102 switchport trunk encapsulation dot1q switchport trunk native vlan 102 switchport trunk allowed vlan 1,101-103 switchport mode trunk load-interval 30 spanning-tree portfast trunk end Perhaps it is worth focusing on that in the 802.1Q trunk between the access points and the switch, VLAN 102 was set as the native VLAN. This configuration is due to the fact that access points send untagged control frames to the network. You also need to ensure (and disable if necessary) that switches do not tag frames for the native VLAN. switch3560(config)#no vlan dot1q tag native switch3560#sho vlan dot1q tag native dot1q native vlan tagging is disabled On the access point side, no special configuration is required, just switch the device to FIT mode (enabled by default) and connect to the appropriate port switch.
Configuring the L3 interface of the switch for the virtual network into which the access points are connected is similar to what has already been done for the controller network. switch3560#sho run int vla 102 Building configuration… Current configuration: 141 bytes ! interface Vlan102 description TP-LINK CAP1750 ip address 192.168.2.1 255.255.255.0 load-interval 30 end We decided to place the DHCP server for the wireless network segment on the L3 switch. You can use any third-party DHCP servers that support options 60 and 138. switch3560#sho run | sec dhcp pool ip dhcp pool tp-link network 192.168.2.0 255.255.255.0 default-router 192.168.2.1 dns-server 8.8.8.8 8.8.4.4 option 60 ascii TP-LINK option 138 ip 192.168.1.2 switch3560#sho ip dhcp snooping binding MacAddress IpAddress Lease(sec) Type VLAN Interface — ————— ———- ————- —- ——————— 50:C7:BF:85:E2:30 192.168.2.2 86105 dhcp- snooping 102 GigabitEthernet0/7 Total number of bindings: 1 When placing the access points and controller on the same virtual network, you could use the DHCP server built into the controller.
Managing Wireless Network Identifiers (SSIDs)
A good practice is to associate each existing wireless network ID with its own virtual network, that is, setting up a one-to-one mapping between the SSID and the VLAN. In this pilot, for simplicity, we will only use one SSID, so we will only need to create one more VLAN 103. switch3560#sho vla bri VLAN Name Status Ports - - - - 1 default active 101 AC500 active 102 CAP1750 active 103 client active 1002 fddi -default act/unsup 1003 trcrf-default act/unsup 1004 fddinet-default act/unsup 1005 trbrf-default act/unsup
Once the virtual network for client traffic has been created, you can proceed directly to creating a new wireless network and binding the SSID to the VLAN.
The basic setup of a new wireless network ends here, since already at this moment user devices can successfully connect to the network.
Configuring auxiliary wireless network settings
In addition to the main parameters, the administrator has access to a number of auxiliary options for fine-tuning. For example, you can change the parameters for balancing users between access points and their redistribution between frequency ranges, as well as set the operating parameters of wireless transmitters.
Authentication
The wireless controller, together with access points, can not only request a secret key when connecting to the network, but also perform additional user authentication using a RADIUS server. In addition, users connecting to all or some SSIDs and accessing specific virtual networks can undergo additional authentication based on MAC addresses, web, or Onekey. Perhaps one of the most common methods of additional authentication is web authentication, when the user is redirected to a special web page where he is required to enter a login and password. TP-Link AC50/500 wireless controllers allow web authentication both based on a local list of users stored on the controller itself, and using a remote RADIUS server.
It should be noted that the latest firmware version for the AC500 wireless controller now allows authorization via Facebook (Facebook Wi-Fi), as well as SMS authorization using the twilio service. Now let's look at the traffic patterns of wireless subscribers in the wired part of the network.
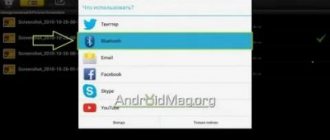
Connecting your phone to your TV via WiFi Direct
Let's take a closer look at the process of setting up the phone to connect it to the TV after we have enabled WiFi Direct on the TV. On Android mobile devices, installation of third-party programs is usually not required to activate this function. Let's look at how to connect to TV from a smartphone via Direct using Android 8.0 as an example:
- First you need to turn on Wi-Fi. This can be done in the “Network and Internet” settings, or by activating the corresponding shortcut and lowering the top notification shade.
- After activation, click on Wi-Fi to access additional settings.
- Select the line “Wi-Fi Direct”.
- The list of devices will display the available ones. Select your TV and wait for it to connect.
Once the connection is established, you can broadcast the image from the smartphone screen to TV, transfer information or play music.
Best WiFi Signal Strength Testing Apps for Windows
How to increase WiFi signal strength?
One Google search is enough to find dozens of tips and tricks for increasing your WiFi signal strength.
Some of them are meaningless, some give questionable results, and some are legal. However, most of them are related to either the placement of the router or its configuration. Where you place your router matters a lot, as any WiFi signal measurement app like NetSpot can reveal. You want to give your router some room to breathe. Do not place it too close to walls or other large obstacles.
Consider the area you want to cover with your WiFi signal and place your router as close to the center of the area as possible to distribute the signal evenly. If your signal is still weak, consider placing your router somewhere higher, such as on a shelf. Use NetSpot or another similar app to measure your Wi-Fi signal strength to determine if you've chosen the right location.
Once you're happy with the router placement, it's time to launch the admin user interface and change a few settings. Let's start with the security settings. Choose a strong password and use WPA2 encryption to protect yourself from hackers and people who want free Wi-Fi access.
Then open NetSpot or another WiFi signal strength app and see what channel other wireless networks in your area are using. To avoid interference, you want to configure your router to use the least obstructed channel. Luckily, it's as simple as changing one setting. Use NetSpot or another application to check the effect of changed settings on signal strength.
.
How to change the radius of a wifi signal and increase the range in the router settings?
And one more little secret. The control panel of some modifications of routers has a separate adjustment for the power of wifi signal relay. By setting it to the highest, you will get the most out of your router. The minimum value will ensure high-quality reception no further than inside one room. I wrote about this in detail here, read it. Now I’ll quickly show you with a few examples what it looks like for different brands.
Strengthening wifi signal on a TP-Link router
To set the signal strength on your TP-Link router, you need to go to “Advanced settings” in the section dedicated to wireless mode. There are three gradations here - low, medium and high.
How to increase wi-fi range on an Asus router
On Asus routers, you can adjust the power very carefully - it is called “TX Power Control” and is set manually to a numerical value not exceeding 200.
Changing the wifi signal range on the Zyxel Keenetic router
For Zyxel Keenetic routers, the transmitter power settings are divided into fixed positions, but there are more of them than for TP-Link. Indicated as a percentage of the total strength of the wifi repeater. In the old version of the admin panel it is located in the wifi network configurations. And this is how everything looks in the new Keenetic panel - you need to go to “Home Network”
and open the “Advanced settings” link
Increasing wireless signal strength in Tenda
These are the main effective ways to improve the WiFi signal and, as a result, expand the wireless network reception area. Many craftsmen manage to amplify a router using an ordinary foil can that is placed on the antenna. However, I am still a supporter of more traditional methods. As practice has shown, the best results are achieved when a combination of several techniques is used. That is, the choice of devices with the best antenna characteristics plus their successful location, planned at the stage of renovation of the premises. Try, experiment, and you will succeed!
WiFi Signal Strength Meter
Windows and other operating systems have a Wi-Fi signal strength meter, but this is usually basic software that doesn't tell the user much about the wireless signal. Luckily, there are many other programs that do the same thing, but show the user more detailed information about the wireless connection. Let's describe some of these programs. Net Stumbler Net Stumbler performs several functions. It is a wireless signal strength meter that provides the user with detailed reports about the wireless network. Net Stumbler also provides the user with a "map" of access points in the area. However, apart from the software, Net Stumbler provides users with the latest news about WiFi, 3G and other related topics. Net Stumbler is available as the original software or as "Mini Stumbler", which is smaller than the original but provides almost identical services. Both versions of Net Stumbler are available for free.
OmniPeek OmniPeek is a packet analyzer that also includes a wireless signal strength meter. WildPackets has released software designed to troubleshoot network problems and analyze network protocols so that laptop users can always have the maximum level of wireless availability. OmniPeek includes over forty different plug-ins, remote adapters, decoders, and plug-in wizards. OmniPeek also includes the "MyPeek" service, which provides many additional features such as plugins, scripts, and a community of OmniPeek users. In addition to all of this, OmniPeek has a PlaceMap feature that displays hotspots in that area and pinpoints them on Google Maps so users can actually see a map of the best areas for a wireless connection.
WiFi Signal Strength WiFi Signal Strength displays the SSID (Service Set Identifier) and wireless signal strength of the network. The program updates this information every five seconds, and users have a good (near real-time) assessment of their wireless connection. WiFi Signal Strength works with Windows 2000 and Windows XP, and you can download it for free.
Stumbverter Stumbverter is another app that identifies wireless signals on a visual map so users can see exactly where the best wireless connections are. Stumbverter can import information from other WiFi signal strength meters, such as Net Stumbler, and place it on maps from Microsoft MapPoint 2002. However, Stumbverter does not require any other program to function properly.
WiFi Hopper WiFi Hopper combines a networking function, a site overview tool, and a connection manager into one WLAN utility. WiFi Hopper can display advanced network information such as SSID, encryption type, frequency, channel and other important data that the user needs to know about their network. The GPS device included in the software can detect network access points and display them on a visual map. Since WiFi Hopper can also detect security settings, it is completely free.
WirelessMon WirelessMon is a standalone program that can monitor wireless signal strength and IP information in real time. WirelessMon can log detected data to a file on your computer and provide IP statistics and other information in the form of graphical charts and graphs.
.
Selection and main characteristics
Wi-Fi transmission over long distances is carried out using several identical antennas. Using modern technology and equipment, it is possible to establish a range of 90 km. Devices are selected based on the desired information transmission speed and distance.
WiFi up to 12 km is considered a short range. The TP-LinkTL-WA5210G access point is well suited for these purposes, has a low price, acceptable characteristics, is easy to configure and use.
How to transmit a Wi-fi signal over a long distance:
- make the Wi-Fi signal transmitter more powerful over long distances. However, such an action is not always feasible. The permitted powers have limitations; each subsequent long-distance Wi-Fi transmitter must be more powerful than the previous one;
- eliminate interference from the transmission channel. So, in a big city it is better to use the 3 GHz band;
- use a strong antenna. Every 3 dB of gain increases the signal power several times.
An omnidirectional wi-fi antenna receives and transmits a signal simultaneously in all directions over a distance of 1 km. The range is shorter than that of a directional one with a wi-fi transmitter for 3 km and beyond. The device is more suitable for apartments, offices, multi-storey buildings.
How to transmit Wi-Fi over 500 meters? First of all, check whether you accept the network you need. Next, contact your provider and make sure they will connect you. The last step is installation. Order it or make it yourself.
How Wi-Fi is transmitted over long distances
Today, the long-distance Internet transmission service is used everywhere, but it is most widespread in business. It can be useful when several offices or departments are located at a relatively large distance, but cannot use the same network.
When it comes to wireless network topology, there are two main types:
- PtP (Point to point), which means “point to point”;
- PtMP, that is, “point-to-multipoint”.
In the presented diagram you can understand what each of the topologies looks like. The first is indicated in green, and the second in blue.
In this way, you can transmit a signal and receive it with any type of device - PC, Windows laptop and phone.
LTE
This standard is currently the most promising along with other global networks. Mobile broadband provides the fastest wireless packet data transfer speeds. Regarding the operating frequency band, everything is ambiguous. The LTE standard is very flexible; networks can be based in the frequency range from 1.4 to 20 MHz.
The range of networks depends on the altitude of the base station and can reach 100 km. The ability to connect to networks is provided to a large number of gadgets: smartphones, tablets, laptops, game consoles and other devices that support this standard. The devices must have a built-in LTE module that works in conjunction with the existing GSM and 3G standards. If the LTE connection is lost, the device will switch to the existing access to 3G or GSM networks without interrupting the connection.
Regarding the data transfer speed, the following can be noted: compared to 3G networks, it has increased several times and reached 20 Mbit/s. The introduction of a large number of gadgets equipped with LTE modules ensures the demand for this technology. New base stations are being installed, which provide high-speed Internet access even to settlements remote from megacities.
Let's consider the principle of operation of fourth generation networks. Wireless packet data transmission technology is carried out using the IP protocol. For fast and stable synchronization, both frequency and time duplex are formed between the base station and the mobile station. Due to the large number of combinations of paired frequency ranges, broadband connection of subscribers is possible.
The spread of LTE networks has reduced tariffs for using mobile communications. The wide range of the network allows operators to save on expensive equipment.
Is it possible to share Internet megaphone?
How to share the Internet with another subscriber on Megafon if you have an Android phone:
- Pull out the quick settings menu (swipe down from the top of the screen).
- Click on the “Mobile hotspot” button.
- In the confirmation window, click “Ok”.
Mar 30
2022 Interesting materials:
How to install the Opera browser on your computer? How to install Internet Explorer on your computer? How to install Microsoft PowerPoint on your computer? How to install PowerPoint on your computer? How to install headphones with a microphone on a computer? How to install an ISO image on a computer? How to set a password on a folder on a computer? How to set a password to log into a computer? How to install presets in Lightroom on a computer? How to install an application on Android from a computer?
The best routers of 2022
But still, let's look at several router models that I could probably recommend in 2022. These are not very cheap and not very expensive options that will most likely suit more people. Finally, we will consider several models of Wi-Fi Mesh systems.
TP-Link Archer A7
A good router option for a home or apartment.
It has everything you need:
- Supports two bands and, accordingly, the 802.11ac standard.
- Gigabit ports.
- USB port.
- Simple and intuitive web interface, control via application.
- Cool appearance.
Among similar models you can also look at Archer C1200, Archer A6, Archer C7 and the more expensive and productive Archer A9.
You can also read my review of the TP-Link Archer A7 router.
Asus RT-AC1750U or Asus RT-AC65P
Interesting models, the performance and functionality of which will definitely be enough for home use. Dual-band, with Giagbit ports and a USB 3.1 port. Unusual appearance.
If you want a time-tested router, then ASUS has models RT-AC58U, RT-AC66U, RT-AC1200G+. Just carefully study the technical specifications.
D-Link DIR-878, DIR-853, DIR-825
All three routers are dual-band (2.4 GHz and 5 GHz) and have gambit WAN/LAN ports. D-Link DIR-878, for example, is more expensive. But it is the most productive and fastest. And for some reason without USB. D-Link DIR-825 is the most affordable option, which is perfect for a small apartment or house.
If you want a more affordable option, check out the D-Link DIR-806A. But it does not have gigabit ports.
Keenetic Viva KN-1910
The manufacturer Keenetic has a fairly large line of Internet centers (routers). One of the optimal models (in terms of characteristics and price) is Keenetic Viva. Of course, this is a dual-band model. WAN/LAN ports support speeds up to 1 Gbit/s, Wi-Fi speeds up to 1267 Mbit/s. There are two USB ports. Support for 3G/4G modems, excellent web interface. Can be used as an ADSL modem after purchasing and connecting the Keenetic Plus DSL adapter.
Keenetic has both more affordable and simple models (for example, Keenetic Speedster, Keenetic Extra) and more advanced and correspondingly expensive (Keenetic Giga, Keenetic Ultra). This is probably one of the best routers for home in 2022.
Netis WF2780
I had this Netis WF2780, a normal option. Especially when the budget is limited, but you want to buy a modern router.
It might be interesting to read: Netis WF2780 – review, setup, reviews
There is an even more productive gaming model Netis WF2681 in a red case.
Tenda AC9 and Tenda AC10U
A couple more inexpensive, modern routers, but from the manufacturer Tenda. Quite serious routers with excellent characteristics. Both are dual-band and have gigabit ports. There is also a USB port.
Read my review of Tenda AC9 and Tenda AC10U.
There are even more affordable options (including dual-band ones). For example, Tenda AC5 or Tenda AC8.
Mercusys AC12G
Another affordable manufacturer. And their most popular router is Mercusys AC12G. I advise you to consider the Mercusys AC12G. There is an even cheaper Mercusys AC12, but it does not have gigabit ports. But as an option, if you don’t need fast WAN/LAN ports, you can also look at AC12.
I had this model for review: Review of the Mercusys AC12 router.
Xiaomi Mi WiFi Router 4A Gigabit Edition
If we consider routers from Xiaomi, then in 2022 I would choose the Mi WiFi Router 4A Gigabit Edition model. Or rather, I wouldn’t buy a Xiaomi router at all. No, not because they are somehow bad, I just don’t really like them. And many people have various problems during the setup process. But if you love Xiaomi technology, then consider the Mi WiFi Router 4A Gigabit Edition.
This is a regular dual-band router with Giagbit ports. There is an even more affordable model, Mi WiFi Router 4A. No gigabit ports
The appearance and price of these routers certainly attracts the attention of buyers.
Options from other manufacturers
- MikroTik: hAP ac², hAP ac lite tower, hAP ac.
- Huawei: model Huawei WS5200.
- Totolink: model A3002RU 6617.
- Strong 750.
Please note that above I only considered the optimal (in my opinion) router models that are suitable for home use and that can be recommended for purchase even at the end of 2022. And most likely they will be relevant in 2021
There are a huge number of other, both more affordable and more expensive and advanced routers on sale. Choose a model based on your requirements and budget. But I wouldn’t recommend saving too much on a router.
Specifications remain unchanged
At the hardware level, Wi-Fi Direct chips will differ little from conventional Wi-Fi modules. It follows that the technical characteristics of Wi-Fi Direct will be almost the same as those of modern Wi-Fi networks. The new devices will even be backwards compatible with most existing Wi-Fi devices (regardless of the specific 802.11 a/b/g/n version).
Most Wi-Fi Direct chips must operate at 2.4 GHz and therefore will work seamlessly with earlier versions of the 802.11 standard (up to version n, with the exception of 802.11a), and in some cases will be compatible with 802.11n.
Some Wi-Fi Direct modules will operate at a frequency of 5 GHz and, therefore, will be able to connect to 802.11a and n networks. As can be assumed from the information currently available, most chips will support both frequency ranges (2.4 and 5 GHz).
Certified Wi-Fi Direct devices will be able to support the same data transfer speed as conventional Wi-Fi chips, that is, about 250 Mb/s. Apparently, we are talking about chips created on the basis of 802.11n, and as soon as the first Wi-Fi Direct devices based on 802.11ac appear, the speed will increase several times.
The maximum speed will depend on the transmission medium, the number of connected devices and their specific characteristics.
Under ideal conditions, as with regular Wi-Fi, the new devices will be able to connect to each other over a distance of up to 200 meters.
Recommendations
Before starting work, it is necessary to take into account the fact that there must be direct visibility between the reinforcement objects. That is, both ends must be on a straight plane with no other objects between them.
In addition, the so-called Fresnel zone must be observed. It can be considered using an ordinary pipe as an example, with two antennas located at the end of each output. Thus, the Fresnel zone is the inside of the pipe. The rule states that there will be a high-quality signal between two points only when the inside of the imaginary pipe is perfectly clean, which means the complete absence of trees, structures and other objects.
Important! The radius of such a zone depends on the distance between points and the frequency of radio waves at which they are used. The longer the range, the larger the radius required.
There is also no need to calculate everything yourself, since there are a large number of specialized sites that have online calculators. You just need to enter certain data, and the system will calculate everything automatically.