Why do you need synchronization on Android?
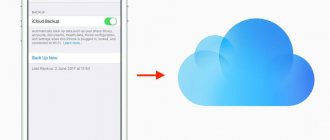
Synchronization is needed so that when resetting a smartphone to factory settings, or even purchasing a new one, the user can restore his data from the cloud, as well as if he accidentally deleted important information and wants to restore it.
There are applications that allow you to successfully synchronize data and make a backup copy of it. The first and most popular of them is Google. When you first start your smartphone, Google always prompts you to set up an account and enable synchronization. After the phone buyer has entered his data and enabled synchronization if desired, Google turns on automatic copying to disk. Xiaomi has its own application – mi cloud. Its functions are very similar to the previous one, but it is only available on smartphones from the famous Chinese manufacturer.
But synchronization, like all things in the world, has its drawbacks. Its main disadvantages are the very high load on the CPU during operation and startup. A person begins to worry, for example, when he took a photo and uploads it to Instagram, and in the background the same photo is uploaded to the cloud, which leads to the mobile device freezing. The problem here is that on weak devices the processor is very heavily loaded with multiple processes. Synchronization also results in:
- Software failures
- RAM usage
- Gadget overload
All these reasons force many people to disable synchronization. How to do this correctly will be discussed in this article.
What happens if you turn off synchronization on Android
When the user thinks about turning off synchronization, he is always afraid for the safety of his data, and sometimes even thinks that the mobile device may even break after this. But disabling this function will not harm the phone or the person’s data in any way.
Turning off synchronization will only remove the automatic backup of photos, videos, files and text documents. After this, the load on the processor will be significantly reduced, RAM will be freed up and it will be possible to upload photos without failures, since the root of the problem has been removed. But if the user found this function useful, he can upload his files to the cloud himself, and when he buys a new device, they will not disappear anywhere.
Activate the display of contacts
The next logical question is how to sync Android contacts with Google on a new device. To do this, you must first perform a similar procedure. If this doesn't work, you may need to reset the display. To do this, follow a few simple steps:
All the necessary numbers will appear in the address book, and you will be able to use the synchronized data. If you have multiple Google accounts, make sure you use the same one for both phones. You can register with Google either from your phone or through a personal computer.
How to turn off synchronization on Android
Disable app syncing
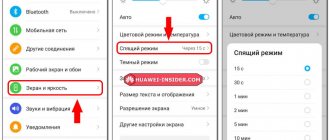
If the user wants to disable application synchronization, and not completely remove file backup, then first they need to open the settings. You can do this either by clicking on the gear icon on the device’s desktop, or by opening the top widget and clicking on the gear icon.
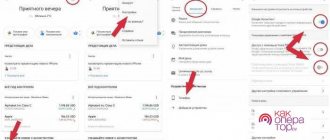
Next we find the Accounts item, it can be called differently, it all depends on the versions of the system. At this point we open Google accounts.
Next, manage synchronization (which can also be called by different names) and uncheck absolutely all the boxes. Then you need to close the settings.
After this, synchronization of these applications will be disabled, for example, you disabled synchronization on VKontakte, after which all files uploaded there will no longer be sent to the cloud. Disabling Google Play synchronization helps disable sending data from applications. As mentioned earlier, all this guarantees fast operation of the device and eliminates errors and glitches.
Disabling data backup to Google Drive
But if the user needed to turn off not only application synchronization, but also backing up data to Google Drive, then he will have to go to the settings again, then find the personal data section, then pay attention to the restore and reset item, which can also be called backup and recovery. At this point, you need to disable the option of backing up data by simply clicking on the lever next to this inscription, and also disable: upload to Google drive.
After disabling backup, neither application data, nor phone settings, nor copies of messages sent via SMS will be sent to Google Drive. But after resetting the smartphone to factory settings, this data cannot be restored in any way.
What can you delete to free up memory on your phone?
Clearing phone cache
- Open your smartphone's settings.
- Go to the “Memory” or “Storage” section.
- Select the “Cache Data” section and click the “Delete Cache” button.
- Next, click “OK” to complete the cleanup.
Interesting materials:
What to do if the computer gets very hot? What to do if the mouse doesn't move? What to do if there is no signal on the monitor? What to do if the monitor says no signal detected? What to do if the screen is not taken? What to do if the protective glass does not stick? What to do if you haven't paid for your internship? What to do if Yandex browser does not open? What to do if Nvidia does not open? What to do if the play market does not open?
Prohibiting synchronization with other services
If this does not help to completely remove it, if even after completely disabling application synchronization and turning off data backup there is no result, then the problem lies in third-party applications that use this function. For example, smartphones from Xiaomi use mi cloud, and it also needs to be turned off in a simple way:
- Step 1: Unlock your Xiaomi phone and tap the Settings icon.
- Step 2: Find and click "Account" on the Settings page.
- Step 3: Click Sign Out. Then close the Mi Cloud service at this time. Note: Just logging out does not mean the sync feature is completely disabled if your Xiaomi account is logged in again. Phone data such as photos and contacts will be automatically synced.
- Step 4: Tap on the Mi Cloud service and select the item you want to open in the service.
- Step 5: Click on the switch.
There is also a dropbox service that can be built into the system after purchasing the device, and it cannot be deleted. To disable it you need:
- Open Dropbox. This is an open blue box icon. You can usually find it on your home screen or app drawer.
- Click the three stripes icon
- Click on the inscription: settings
- Scroll down and open the item: Manage notifications. It's under the "Advanced Features" heading.
- Uncheck each type of notification. When all fields are empty, notifications will be disabled.
- After this, you need to go to the application settings, find dropbox there and click on the button: disable the application
Also, WhatsApp, a messenger application, can make reservations regardless of device settings. You can disable it like this:
- Open WhatsApp and go to settings.
- Go to data usage and storage settings.
- Disable automatic media download settings.
There are three options available to automatically load media:
- When using mobile data
- When connected to Wi-Fi
- While roaming
- You can open it individually and uncheck all the options available for photos, videos, audio and documents.
Then click on the "OK" button, once you have completed this setting, the media will not be automatically downloaded on your WhatsApp.
How to choose what information to sync with your account
Select "Accounts and Backup" or "Cloud and Accounts." If there is no such item, proceed to the next step.
Select "Accounts".
Select an account, in our example we select a Google account. If there are several accounts, select the one you need.
If the account you need is not on your device, register it (if the account has not yet been created) or log in to it (if the account has already been created).
Select Account Sync if you have one. If there is no such item, go to the next step.
A list of data that is synchronized with your account will appear. Enable synchronization of the data you need. If you don’t use anything from this list, feel free to disable it.
Others regularly check by phone for new email messages. Both methods incur costs, especially if the mail contains a large attachment.
Other synchronization problems
Synchronizing data between the tablet and the server is a very complex data exchange process in which a number of actions are performed at both ends depending on the flow of incoming data. Survey Solutions hides the complexity of this behind a simple sync button available to the interviewer at any time. Typically, when the synchronization is successful, the interviewer receives a confirmation message and some summary statistics describing the actions taken (for example, the number of assignments received or files transferred).
In some cases, synchronization stops with errors. When errors are caused by interference in the communication channel, synchronization may be successful when repeated.
Countries with less reliable networks are more likely to fail. This also applies to longer sync sessions, such as those where a large number of files are being synced or where the files have a large amount of data. Synchronization often helps the entire system work.
Synchronization is the process of communication between the tablet and the server, in which the connection is initiated by the tablet, which performs a search and sends a request to the server. Therefore, the server must be active and visible at all times when files can be synchronized (during the entire data collection period).
The tablet looks up the server by name, known as a sync point, which is the URL of the server on the network. This setting is entered once when the Survey Solutions application is installed and registered for the first time. It usually does not change during data collection, although it is possible to change it in the Interviewer application settings.
If a recurring sync error occurs after several retries, the easiest thing you can do is to navigate to the sync point in your browser (usually Chrome on Android devices), such as https://demo.mysurvey.solutions. The page that opens usually contains some readable information about connection problems. This will help you pinpoint the cause of the problem and use the troubleshooting guide below to find a way to fix it.
4.7/5 — (23 votes)
Disabling through settings
The cloud sharing feature is very useful, especially when working with multiple smartphones or changing mobile phones. Depending on the selected settings, the following will be loaded:
- Contacts;
- Messages;
- Calendar;
- Mail;
- Documentation;
- Many other company services.
Synchronization with other installed services and applications from third-party developers is available. It just depends on the number of products and the type of products. The action algorithm is no different from how to remove synchronization from account on Android .
Go to the system settings of the phone. This can be done using the gear icon in the notification shade or using the All Apps menu.
Click on the line “Accounts”. Shows apps that use the cloud pairing feature and Gmail addresses that are linked to the phone. In our case, there are 4 profiles attached to the smartphone at once, select the one you need. To completely disable the function, you will have to repeat the steps with each mail.
We recommend: Formatting a flash drive for Android
In the panel that opens, you can delete your account. Select “Account Synchronization”.
Set all sliders to inactive. For the changes to take effect, click on the icon with three dots and tap “Synchronize” in the context menu.
Important: for all data to be updated, the smartphone must be connected to the Internet. Don’t know how to distribute Wi-Fi from a smartphone to a laptop? Read the article: “How to distribute Wi-Fi from a phone to a laptop.”
