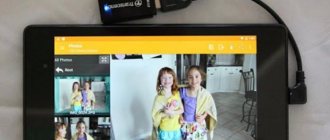
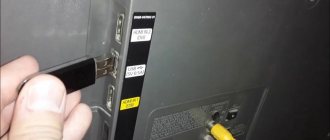
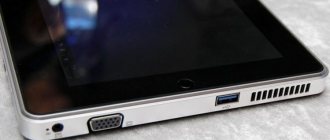
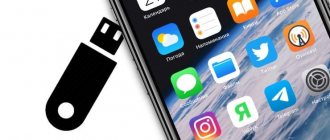
Users of smartphones running the Android operating system and large internal storage do not have to worry that they will suddenly run out of memory. Some are much less fortunate, but this does not mean that you need to immediately run out for a new gadget or buy a large SD card. Almost every smartphone or tablet can be connected to a regular flash drive. This material will tell you how to connect a flash drive to an Android smartphone via USB, whether this is possible and whether there is a program for Android for reading flash drives.
What do you need to connect a USB drive?
Flash drives can be easily connected to Android smartphones when the device supports USB Host. This feature is enabled by default in Android models younger than 4-5 generations. To connect you will need one of 2 things:
- OTG cable with micro USB, mini USB, USB Type-C connectors and a second connector directly for an external drive;
- Double-sided flash memory with USB and micro or USB-C.
The USB-C connector and USB Type-C adapters are suitable for laptops, desktop computers and mobile devices (including tablets). It’s good when the flash drive has the FAT32 file system, but sometimes NTFS is enough.
What is OTG
An OTG cable is a special adapter that allows you to connect devices with a standard USB connector to phones and tablets. In short, this is an adapter, one end of which is connected to the smartphone, and an accessory is inserted into the second.
You can purchase an adapter at any store that specializes in electronics and gadgets for them. We also note that some phones already come with OTG. For example, this detail was seen on Samsung and Sony smartphones.
More on the topic: how to connect an external hard drive to an Android tablet.
How to connect a flash drive to a smartphone: steps
- We connect the OTG cable with one end to the smartphone and the other to the flash drive. If the flash memory is double-sided - it has its own USB-C and micro USB ports - a cable is not needed.
- When everything works, a notification about connecting a new disk will appear from the built-in file manager.
- If you see a notification that the USB drive cannot be connected, it means that the drive has encountered an incompatible file system.
- The flash memory is inserted, but there are no notifications - the device does not support USB-Host or there is not enough power to connect.
Sometimes you need to enter Developer Mode on the device for the flash drive to be detected. The path looks like this: Device and privacy – SIM card toolkit, Accessibility – Developer options – Connection in OTG mode (here you can configure Automatic shutdown after N minutes of inactivity). On some phones, you need to additionally check the USB Debugging tab.
Types of flash drives
The need to use flash drives arises for a number of reasons. It is worth identifying the most common ones:
- Because the device is quite budget-friendly, the built-in memory may not have the required amount of data to store a certain amount of data;
- A flash drive helps relieve the memory of even the fastest device so that it works even faster and is not susceptible to virus attacks.
Depending on the purpose, there are different types of flash drives. Each type has its own specific characteristics, which in the future, if properly selected, will help the user eliminate the problem.
If we divide all flash drives of the modern standard into two large categories, then it is worth highlighting the following:
- USB Flash Drive. This is such a universal option that is used by a large number of users, even if they do not know about the conditional division of flash drives into two large groups. This type has high reading speed, compact size, and mobility. It is worth noting the ease of connecting the drive. All available external ports are easily connected in one way or another. Sometimes a cord may be needed for connection;
- Flash - map. Another worthy option that is optimal for all phone models, both Android and iOS. It is miniature and does not require disconnecting the device to place it. It also has a high speed of reading information and exchanging information.
If we consider convenience, then the second option is much more interesting and comfortable for a modern mobile device. Each phone has a connector specifically for this type of card, so it’s worth choosing this accessory.
Characteristics of Flash cards
If we talk about flash cards, then they are the best option, which also works quickly. Choosing the right card is not that easy. It’s worth choosing the right one, so it’s worth considering the main indicators for choosing a flash drive:
- The form factor is the indicator that is important. It helps determine the physical possibility of installing a card in a particular device. There are three form factors: SD, MicroSD, MiniSD. Each has its own dimensions and features;
- Memory capacity varies. The choice depends on the user's preferences and how much memory he ultimately wants to offload. The range can vary from 1 GB to 2 TB;
- Class is what determines both the quality of memory and the speed of processed information.
Note! If you need a flash card purely for photography, then a second-class card, which is designed to process 2 MB per second, would be an excellent option. If you need to record a video and save it later, then you should count on a high class that processes 16 MB per second.
As soon as the user understands which characteristics are decisive and how to choose one or another flash drive, it is worth proceeding with connecting the flash drive in general. To learn in detail about certain characteristics of flash cards, you should watch this video
How to view the contents of an external USB drive through a file manager?
Third-party programs are more convenient than internal ones and have wider functionality. Examples of successful applications:
- X-Plore File Manager is a free Russified program with a simple interface. There are no unnecessary options that slow down your work. To detect a flash drive, you need to open Settings and Allow access.
- Total Commander for Android - available: copying, moving, deleting without recycle bin, playing media files. To obtain additional functions, you need to install specific plugins.
- ES Explorer - automatically supports playback from NTFS flash drives. In addition to the main function - organizing files and folders - there is access to cloud storage and the ability to manage applications.
Total Commander and X-Plore allow you to enable NTFS support if you have the paid Microsoft exFAT/NTFS for USB utility.
A common advantage of third-party managers over built-in ones is uninterrupted contact of media connected via a cable with memory cards. Information from the phone to the USB drive and back is transferred freely, and the built-in file manager sometimes ignores memory cards.
Connect the USB flash drive to the wireless card reader
If none of the previous methods are suitable, then you can use a wireless card reader. For example, you can use Kingston MobileLite Wireless G2.
It's easy to connect.
- Turn on the mobile device. If the initial setup has not been carried out previously, then it should be done;
- You should download the corresponding application.
- Install the flash card into the card reader, and then connect to it via Wi-Fi;
- Open the file manager, and then create a connection;
- In the future, you should use the created connection to access the drive.
This is also a fairly simple method that allows you to quickly increase the memory of your mobile device.
Is it possible to connect a flash drive to a phone without root?
You can connect to smartphones younger than 2016 according to the scheme above. Models older than 2013 will require third party apps. Each phone released between 2013-2016 must be checked separately. The simplest and most accessible applications:
- Nexus Media Importer.
- Nexus USB OTG FileManager.
These programs work without making changes to root, support FAT and NTFS (both paid).
- Gato Negro USB OTG File Manager is a free application, but with a lower rating. Allows you to add, rename and delete files. Some users noted that the flash drive is recognized, but when trying to copy it gives an error.
If you still need root rights, it is convenient to work in the Kingo Root and KRoot Checker programs. At the same time, the developer warns that he is not responsible for the consequences. There is a danger of damaging your smartphone and being left without warranty. Also, for all phone models you need to look for separate instructions.
When you get root rights to quickly recognize flash memory and display it in any file manager, try the free StickMount application (there is a paid Pro utility). You can download it from the Play Store.
After connecting, you need to check Launch StickMount automatically for the running device and allow Full access to all functions. After this, the sdcard/usbStorage folders will be located in the file manager.
The program supports file systems of different phones without being tied to the firmware. The list of available ones includes: fat and fat32, as well as ext2, ext3 and ext4.
How to check Android and OTG compatibility
Unfortunately, not all smartphones can boast of supporting the OTG protocol. But how can you find out in advance whether the device can recognize an additional gadget? The simplest thing is a visual definition . If your phone has a standard microUSB, most likely it will connect to the adapter without any problems.
But for a better test, we recommend using a special program, namely USB OTG Checker . This is a very useful application with a minimum of functions that perfectly performs the main option - recognizing OTG support or lack thereof on an Android smartphone.
USB OTG Checker app
QR Code
USB OTG Checker Compatibility?
Developer: FaitAuJapon.com
Price: Free
The utility can be easily downloaded from Google Play. After installation, we launch it and after a few seconds we see either a green square or a red one on the main screen. Everything is very clear here : green means successful further synchronization , red means the inability to connect to the adapter .
Below is a table with a little information about the device, which shows the phone model, its name and ID. This, in principle, is where all the functionality of the application ends.
If the result is negative, there are two options to solve this problem . Perhaps the flash drive is simply not recognized by the built-in Explorer. There are special utilities for this, which we will discuss below. Or the OTG protocol is completely blocked in the device. Then, unfortunately, you won’t be able to do anything except buy a new phone running Android.
Why doesn't Android see the USB flash drive?
There are cases when the equipment is not recognized. Situations in which the phone does not recognize the USB flash drive or periodically stops recognizing:
- If there is no activity with the flash drive for several minutes. The smartphone begins to save battery power and pretends that it does not recognize the external media (the flash drive disappears from the list of available devices).
- The mobile phone is not compatible with On-The-Go technology. In such a situation, no application will help.
- When connecting a flash drive using an OTG cable and adapter. Two seemingly identical adapters may have two different pinouts and belong to different technologies (Thunderbolt and OTG).
- In the design of a smartphone or tablet, the manufacturer has set a ban on reading flash drives. Sometimes updating the firmware helps. Changing the settings in the root directory may also help.
- The flash drive is formatted in NTFS. Smartphones cannot read this file system. You need to reflash the flash drive to exFAT or FAT32 formats.
- The amount of flash memory is too large. Do not exceed the 8 GB limit.
There is a whole range of applications, including free ones, for connecting flash drives to smartphones. The newer the phone, the greater the likelihood of automatic recognition of flash drives.
The principle of working with files on a flash drive
Connecting a flash drive to a smartphone can significantly expand its memory capacity. You can download your favorite movies, music, photos, documents and even software in a matter of seconds.
To quickly transfer information to your computer, just click on the “Import” button and drag the necessary documents into the window that opens. To transfer files from your computer to your smartphone, you need to use the “Export” button.
You can transfer a lot of useful information to a flash drive. Even a 2 GB drive will help you use your old smartphone to its maximum advantage.
Part 2: Sync Android to PC/Mac via Bluetooth
Bluetooth is another easy migration assistant for PC to Mac, Android to PC and Android to Mac. If you just want to transfer a few songs or photos from your phone to your computer, Bluetooth is a good option. It doesn't require you to put the music on a flash drive. But transferring large files between digital devices via Bluetooth is a disaster as it is very slow.
How to Sync Andro > Step 1. On your Android phone, go to Settings > Wireless & Networks and turn on the Bluetooth feature. Then switch to your computer, right-click the "Bluetooth" icon in the "notification bar" on the desktop, select "Add Device", select the phone name and click "Pair".
Part 3: How to Export Android Files to Computer with FTP
FTP, also called File Transfer Protocol, is a standard network protocol used to transfer files between a Mac and an Android phone. Today, some Android phones have this feature like Xiao Mi. By establishing a connection between Android and computer via FTP, you can view all the files saved in your phone on your computer. To use FTP, you must have a good Wi-Fi network.
Troubleshooting Possible Problems
Let's also consider failures that may appear during the execution of the instructions above.
Problems with flash drive recognition
In some cases, the connected storage device is not recognized by the phone. As a rule, the most common reason for this behavior is either an incorrect file system or problems with the adapter, but it also happens that the problem is observed on the computer. Please refer to the following articles for a solution.
Read more: Phone or tablet does not see the flash drive: reasons and solution What to do if the computer does not see the flash drive
"No access" error
Sometimes the external media does not allow you to paste the copied data, displaying a “No access” error. This error means two things, the first is that for some reason the flash drive is write-protected. You can check this using a computer, as well as fix the problem.
Read more: Removing write protection from a flash drive
The second is a possible virus infection, since malware often prevents you from accessing the contents of a flash drive and changing it. There is an article on our website that will help you fix this.
Read more: How to check a flash drive for viruses
We are glad that we were able to help you solve the problem. In addition to this article, there are 12,719 more instructions on the site. Add the Lumpics.ru website to your bookmarks (CTRL+D) and we will definitely be useful to you. Thank the author and share the article on social networks.
Describe what didn't work for you. Our specialists will try to answer as quickly as possible.
Possible obstacles
If after connecting the flash drive is not detected, make sure that the media itself is working properly by connecting it to the computer. Other possible reasons are damage to the adapter or the version of Android OS is too old - you can freely connect a flash drive to your phone starting from generation 5.0.
If the built-in LED works but you can't access data, check to see if the flash memory is formatted as NTFS. It is quite possible that your smartphone only supports FAT32 partitioning - then you will have to perform a new formatting, not forgetting to save valuable data.
Have you encountered other difficulties that you can’t cope with on your own? The Good Deeds Service will help you - we will conduct a remote consultation and tell you what to do to use the flash drive with maximum comfort!
How to transfer applications to a memory card
A significant part of the internal storage is occupied by games and applications. They can also be transferred to a memory card. True, the operation will take a little more time and effort, since many obstacles await the user along the way.
If you have a smartphone based on an older version of Android up to Android 6, use the following instructions:
- Open your phone settings.
- Go to the "Applications" section.
- Select the program you are interested in.
- Click the "Move to memory card" button.
After this, the game or application will no longer take up precious space in the internal memory of the device.
In any case, most users have a smartphone with a more modern version of Android, so the instructions discussed above will not work. We need an alternative option, which is only possible after formatting the external drive. That is, the user will have to erase all data from the SD card, merge it with the internal drive during the setup process, and then reinstall the necessary applications.
Third party music services
Continuing the topic of subscription services, it’s worth mentioning the well-known Apple Music. The music library here is more extensive, but you won’t get any additional bonuses other than music tracks and recommendations. Moreover, you can use Apple Music absolutely free for the first 3 months. It is also impossible not to mention the domestic service Yandex.Music with a fairly good base of performers and an affordable pricing policy. It would be possible to include Spotify in this collection, but it has not been officially launched in Russia and in order to use it, you need to “dance with a tambourine” a little.
Install the flash drive into the expansion slot
If you have a MicroSD flash drive, then install the card directly into the expansion slot, provided that this feature is supported by the smartphone. To do this, follow three simple steps:
Remove the battery compartment cover or remove the card cassette as shown in the picture below:
Slot for installing a memory card.
Cassette for installing a MicroSD card.
Place the flash drive in the appropriate slot or cassette.
Reinsert the cassette or close the cover.
The new drive will appear in the memory section and will also be available for reading and writing information.
