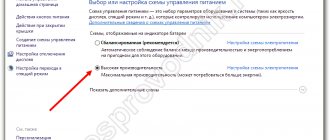
A home personal computer is used to perform many operations. Among them are video communication with the user of another PC or mobile phone, video surveillance on remote access, and more. To perform these functions, the computer uses a webcam and the necessary software. What to do if the webcam is faulty or missing altogether?
Connecting a portable electronic device as a webcam to a PC
There are three main ways to turn a digital gadget into a computer web camera:
- connecting it via a USB cable;
- connection via Wi-Fi;
- use in remote access via the mobile Internet.
The latter method is used in the absence of a wi-fi router (network router), a USB cable, or to monitor an object at a certain distance.
Connection via cable
This is the easiest way to synchronize devices. A USB-micro-USB cable is used to connect them.
This is done as follows:
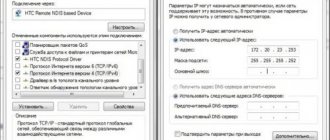
- The cable plug is inserted into the computer connector.
- A micro-USB plug is inserted into the gadget connector.
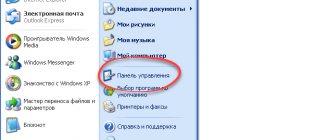
- In the mobile device settings, the “Developer Settings” or “Developer Options” section opens.
- The “USB Debugging” item is checked.
- Special applications for mobile phones and PCs are used.
Connect via Wi-Fi network
When implementing this method, connect the device to a Wi-Fi access point and use applications to synchronize the computer and smartphone.
Connection via mobile internet
To connect, use utilities for a gadget located on a mobile Internet network and a software adapter for a PC.
How to use your phone camera on your computer?
Video calling is more popular than ever. The ongoing pandemic is greatly affecting our lives. In addition to the need to remain vigilant in the interests of health, schoolchildren and students are switching to online learning, and adults are switching to remote work. Free instant messaging and video conferencing apps pose a problem for many. However, for comfortable use, you must fulfill several simple conditions.
You may have a favorite (sometimes pre-installed) video calling app, but you won't be able to do it without reliable landline or high-speed mobile Internet. You also need a smartphone, laptop or computer. Often, some people lack a microphone or a good webcam. Instead of resorting to additional purchases, use your phone as a webcam for your computer.
Yes, you can talk a lot about smartphones, complain about their individual elements and characteristics, but manufacturers have recently put a lot of effort into photo and video capabilities. Phone cameras offer much better quality than the built-in webcams in laptops.
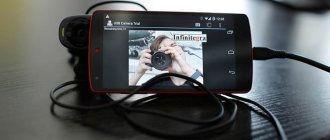
Nowadays, almost everyone has a more or less modern smartphone. You can easily connect your phone as a webcam to your computer and use it instead of additional accessories. You just need to install the appropriate application and configure the connection with your laptop or PC (wired or wireless) according to your preferences or capabilities.
Connection software
Special programs are used to pair a personal computer with mobile devices.
For computer:
- WebCam Monitor;
- webcamXP;
- manycam;
- DroidCam;
- Lux Riot DVR;
- Active WebCam and others.
For portable Android devices:
- IP Webcam;
- Ustream;
- Home Security Camera - Alfred;
- TrackView;
- AtHome Video Streamer;
- DroidCam Wireless Webcam;
- WardenCam and others.
One of the applications is downloaded to each device, installed, and downloaded.
Using a webcam on Android or iPhone with MacOS
If you work on macOS, then, unfortunately, there are not many good and convenient options. One that I have recommended to others is EpocCam, which also supports Android and Windows.
We were able to connect it to the cameras and microphones of our Android and iOS devices without any problems, but couldn't figure out how to fix the latency issues. Every video call I made with this service connected was unbearable (on various video conferencing services) because the person on the other end could only hear my responses some time after I said it.
A recent Zoom update also broke EpocCam's functionality, and while there are workarounds, I wouldn't recommend trying them. But if you're running out of other options, check out the free version (it has quite good reviews, after all).
- Install EpocCam Webcam Viewer from the Mac App Store (requires macOS 10.11 or later). On your iPhone or iPad, install the same app (requires iOS 10.3 or later).
- Next, you need to download the macOS drivers, which you can get here.
- Make sure iPhone/iPad and Mac are on the same Wi-Fi network and launch apps. The Mac client will automatically start showing a picture of your mobile device.
- Select EpocCam as the camera input in your video conferencing software.
The only bad thing about EpocCam is that it's not completely free.
The free version comes with many limitations. For example, video resolution is limited to 640×480. Additionally, in the free version, you cannot use your iPhone's microphone. So, if you want to try the free version, you will definitely need headphones with good microphone quality.
Establishing a connection
Via USB:
- The USB Webcam utility (for example) loads on both devices.
- The connection is made via a USB - micro-USB cable.
- The connection is enabled in applications on both the PC and the smartphone.
- An automatic connection occurs.
- The G Webcam Video video camera appears in the Skype application and other video messengers on your computer.
- The video camera in the application is turned on by the corresponding icon.
- Pairing has been established.
- The image quality depends on the smartphone's video camera.
Pairing in other software is carried out according to the instructions. Video camera settings can be edited in most programs.
Via wi-fi:
- The DroidCam Wireless Webcam application (for example) is downloaded to your computer and smartphone.
- The phone screen displays the IP address.
- It is copied and pasted into the “Connect over WiFi” window on the PC.
- Audio and Video icons are marked.
- The Start button is launched.
- In the Skype and other applications, the DroidCam Source 1 camera is indicated
- The video camera is connected.
Connecting your phone as a webcam via USB cable
If you're having trouble connecting your DroidCam to your wireless network, try connecting your Android device to your computer using a cable.
But first, you need to enable USB debugging in the device developer settings so that the PC can monitor the hardware of your device.
- On your smartphone, go to “Settings” > “About the phone” and click on the build number seven times. Now go to “ Settings” > “System” and you will see a new option for Developer Options (it may be hidden under “Additionally"). Click on it and scroll down a bit to find USB Debugging. Turn it on.
- Connect your Android phone to your computer. If the device starts charging, you need to open the notification panel and tap " Charging your device via USB».
In the new settings window that opens, click “ File Transfer ”. - Open the DroidCamApp PC client and click on the middle USB icon.
- Use the drop-down menu to find your device (if it's not there, tap the update icon and make sure DroidCamApp is running). Make sure the DroidCam port number matches the number in the app and click “ Start ”.
- Change the microphone and camera connections in your video conferencing app to DroidCam and you'll be good to go.
To choose between the front and rear cameras, tap the three-dot symbol > Settings > Camera in the Droidcam app.
I would recommend you to use the rear one because it will give you better video quality.
On the desktop client, check your video and audio settings. If the audio option is not enabled, then your microphone will not hear audio. Click on the Start button to see if you have successfully connected your Android phone as a webcam.
Possible problems and solutions
After connecting a portable device to a PC as a webcam, a “no connection” error may be displayed. The reasons are as follows:
- Lack of power at the USB connector. The solution is to use a shorter wire or different USB connectors.
- Poor contact in the connector. The solution is to replace the cable.
- The cable does not support data transfer. The solution is to replace the cable.
- Blocking an application from running in Windows Defender Firewall on a PC. The solution is to disable the ban in the firewall settings.
- The video lags a lot when connected via Wi-Fi. The solution is to set the video quality to a lower level.
- There may be technical problems with the camera of the mobile device itself. To eliminate them, you need to contact specialists.
Android devices, like Apple products, replace the web camera of a personal computer, provided they can be connected via cable, Wi-Fi or mobile Internet. The software for this task is more than enough.
- Author: Elena
Rate this article:
- 5
- 4
- 3
- 2
- 1
(1 vote, average: 5 out of 5)
Share with your friends!
Can I connect my phone camera to my computer through other applications?
Of course, there are actually quite a few such programs. For example, iVCam Webcam is a free and popular solution for using your phone as a web camera for your computer. Mobile device owners can also try DroidCam wireless webcam software. All of these applications work on similar principles, and their setup is similar to that discussed using EpocCam as an example.
DroidCam
Free or $4.99
DroidCam is one of the older apps on our list and does a great job. The smartphone connects to a computer, supporting video at 720p and 1080p resolutions. There is a direct connection via USB and muting of phone calls.
You can watch DroidCam from a browser, making your smartphone work like an IP camera. The application is free and offers full functionality. There is a Pro version for $4.99 with additional features, but you can do without them.
Camo
Free
Camo is a relatively new app on this list. You can use any camera from your smartphone, including the front camera. The desktop application works with more than 40 programs, including the popular Zoom, Meet, Teams, OBS, Streamlabs, Skype, Twitch.
Video resolutions from 360p to 1080p are supported. You can use many Android devices at the same time. The application is free for home use, and there is also a corporate version. The only drawback is that this is a beta version, so it may have bugs.
IP Webcam
IP Webcam is another good app with the same capabilities. To use your Android phone as a webcam using this app, follow these steps:
- Install IP Webcam on your phone and launch the application, application page in Play Store - https://play.google.com/store/apps/details?id=com.pas.webcam
- After launching the application, the settings screen will immediately open. Scroll down and click “Launch”.
- The phone screen will display the address at the bottom where you can access the camera. Enter it into the address bar of your browser on a computer connected to the same network as your phone. A page should open like the image below.
- In the menu of this page, select “Chat Drivers” - “IP Camera Adapter” and download the driver to your computer from the link on the next page. Install it on your computer. You can also simply download the webcam driver from https://ip-webcam.appspot.com/
- After installation, run the IP Camera Adapter configuration utility and enter the IP address indicated on the phone screen, adding /video at the end, for example https://192.168.1.168:8080/video and click Ok.
- Ready. Now, as with the previous application, you can launch any messenger or other program that requires a webcam, say Skype, select MJPEG Camera in the camera settings and use your phone as a webcam.
Again, this all works fine in most, but not all applications. Also remember about the privacy settings in Windows 10, where access to the camera may be blocked, read more: What to do if the webcam does not work in Windows 10.
XSplit Connect
Free or $5
XSplit Connect is a well-known name in the streaming industry, so it also has a webcam app. The program works great with default settings and offers excellent functionality. Among other things, there is a blur slider for adjusting the bokeh effect.
Popular streaming programs XSplit Broadcaster, OBS, Streamlabs are supported. The program itself is free, but it is included in the XSplit Broadcaster software suite, which starts at $5 per month.
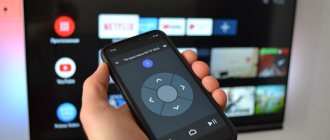
How to connect a Wi-Fi video camera to Android
If you own a camera that has the ability to connect via Wi-Fi, then we will tell you how to synchronize the camera using the example of the DSC-QX100 device.
How to connect a Wi-Fi camera to an Android device:
- To connect, you will need to turn on the power.
- We go to the “Play Memories Mobile” application, which can be downloaded absolutely free from the Google Play page.
- Select the SSID password, which is located under the camera's battery cover.
- Enter the password that is available where the SSID code is located.
- After this, you will need to touch the NFC tag of your mobile device to the NFC tag of the camera. Once you touch the devices, you will need to hold them together for a few seconds until the “Play Memories Mobile” utility starts. The power is turned off: you need to touch the phone’s camera and do not remove it until the lens starts working.
- By connecting an external camera, you can shoot colorful videos and take high-quality photos.
How to turn an old phone into a webcam
No, not as old as in the photo above, of course, but as in the photos below
.
Introduction
I started college last fall and, because it was in the midst of the COVID-19 pandemic, our classes were taught remotely. I urgently needed a webcam, but since I didn't have time to buy one before prices skyrocketed, and I wasn't going to pay $150 for a half-decent webcam, I started looking through the possible options and found one application that which promised to turn my phone into a webcam for free. I installed the app on an old phone I had lying around and 3D printed a small phone mount that served me well as a webcam for an entire semester.
After moving to college and buying a new monitor, I needed a new mount, so I laser-cut one from wood at the Georgia Tech Makerspace. translator: Makerspace (“space for creators”) is a format of creative workshops, widespread in American educational institutions. Makerspaces are designed to develop a creative and practical solution mindset in students.] Now I've developed a more versatile and better adjustable version of the phone mount as a webcam so others can use their old phones as a webcam as well.
Using an old phone as a webcam is a surprisingly good solution - you not only get the webcam you probably already have, but also a better device in many ways. Since the app I used works over Wi-Fi, you can unplug the webcam from any cords and carry it with you however you like. This phone was perfect for demonstrating my workspace to examiners while taking various tests remotely, as well as for demonstrating the equipment I work with at my desk. Plus, even an old phone has better video recording capabilities than most webcams, so the video quality will be as good or better than with all but the most expensive webcams. So, if you have an old phone and a 3D printer, let's start turning trash into treasure!
Materials used:
- 3D printed parts
- Screws and nuts
- Ideally, a 5/16-24 * 1 ¾" socket head cap screw (bolt) and matching locknuts, although others will work.
- Old phone running Android 5 Lollipop or newer (I have a Galaxy S7)
Required Tools
:
- 3D printer
- Allen key that fits the screws you are using (3/16" when using 5/16-24 screws)
- A wrench that fits the locknuts you are using (1/2" when using 5/16-24 locknuts)
- Deburring knife
- Sandpaper (may be needed)
- Tool knife (may be needed)
Step 1: 3D Print Parts
.stl files are included. You will need to print the following parts: one Kickstand, one Platform, one Main Body and two Hooks. . The orientation should match the images of the parts made in the slicer. [ Note translator: 3D printing models are usually distributed in STL files. To turn an STL file into G-code (a language that a 3D printer can understand), you need a slicer program. It is called a slicer because it slices a 3D model into many flat two-dimensional layers, from which a 3D printer will assemble a physical object.
]. Ideally it's good to print with multiple perimeters (maybe 3 or 4) and fairly thick top and bottom surfaces (maybe 1.4mm each), but since I was printing on my institute's printer and didn't want to keep it busy for too long, I used 2 perimeters and quite sparse filling at the top and bottom.
Ideally, you'll want to print parts in PETG (polyethylene terephthalate copolymer) or other material that doesn't have creep issues, but PLA (polylactide) should work fine for at least a while before you notice deformation due to material creep. .
If you don't have 5/16" screws, you can open the included Fusion360 "Phone Mount" file and resize the holes in each piece to fit your screws. The screws should be at least 1 3/4 inches long, basically any screws that are long enough and not too big or small will do. Regardless of what screws you use, to prevent the nuts from coming loose, I recommend using locknuts, Loctite thread locker, or 2 nuts locked together.
Either way, cut up some CAD files and start printing!
Note translator: You can download files for printing parts on a 3D printer using the following links:
content.instructables.com/ORIG/FGD/TM6D/KNYM3K0C/FGDTM6DKNYM3K0C.f3d content.instructables.com/ORIG/FID/ETPK/KO5R9Q45/FIDETPKKO5R9Q45.stl content.instructables.com/ORIG/FM3/YEBC/KO5R9Q46/FM3YEBCKO5R9Q4 6. stl content.instructables.com/ORIG/FO3/ZSJH/KO5R9Q47/FO3ZSJHKO5R9Q47.stl content.instructables.com/ORIG/F7D/RJ8O/KO5R9Q48/F7DRJ8OKO5R9Q48.stl
There is also a 3D preview of these parts on the original article page.
Step 2: Post-processing of printed parts
While you would hope that the parts you printed would require minimal post-processing, mine certainly needed some cleaning up. I started by removing the folds and cleaning up the edges. This is best done with a deburring knife, but since I didn't have one, I used a tool knife and sandpaper. Since this is a mount you'll be looking at whenever you're at your computer, it's probably worth taking a little time to clean it. It is also important to remove the burrs from the inside of each screw hole because the screws should not have much clearance and they may not fit unless you remove the burrs from the holes.
Step 3: Assembling the Phone Mount
Once you've cleaned up all the parts, it's time to assemble the phone mount. Align the hook and folding support leg with one of the holes as shown above. Then add the screw and locknut and screw them together, but do not tighten them. After this, add a hook on the other side, add the screw provided for it, but do not tighten it all the way. Once you have both screws in, tighten one of them gradually until you can turn the hook and flip support leg with a little force, but make sure the screw is tight enough that the weight of the phone won't cause the mount to move. Do the same with the other side and the mount will be almost assembled.
And finally, you need to add a bar. Ideally, you'll just slide it into one of the slots in the main body, although it may require a little sanding if it's very tight, or masking tape if it's loose. In the specific slot you insert it into, your phone's camera (I prefer the main camera rather than the selfie camera) should just protrude above the arched cutout. Start with the lowest level, which is preferable, but if your phone's camera is blocked by the main body on the lowest level, try other levels until the camera is no longer blocked.
Step 4: Install the application on your phone
The app I used is called DroidCam and you can find it on the Google Play Store or Apple App Store.
There is also a paid premium version of this app called DroidCamX which has no ads and allows you to stream video in higher resolution, but I don't think the paid version is that necessary since the phone screen is facing backwards when using the camera. and you simply don’t see advertising, and 720 p is a good enough resolution for video and it is available in the regular version of the DroidCam application. Plus, your video is rarely streamed at more than 720p resolution during video conferencing and the like anyway, so it's not a big deal. However, the developers made a good app and I'm sure they don't make a lot of money from it, so I'm guessing they'll get a little more bang for your buck if you use their product more often. For the app to work, you must be connected to the same Wi-Fi network on your phone and computer, so connect to whichever Wi-Fi network you'll be using after installing the app.
Step 5: Install the client application on your computer
In order for your phone to send video to your computer, you need to install software on your PC that will interact with your phone and “pretend” to be a webcam for your PC.
For DroidCam app, you can download this software from: www.dev47apps.com. There are versions for Windows, Mac and Linux, although I only tried the Windows version. You won't be able to do without this software, but I would advise you to read all the security information and pay attention if your computer detects anything suspicious. I don't really think there's anything fishy about the app or software, but I haven't looked into it well enough to confidently tell everyone on the internet that it's definitely safe, so you should do your research on this yourself.
In any case, if you decide to install this software, follow the installation instructions and make sure that your computer is connected to the same Wi-Fi network as your phone.
If you are using Ethernet, you can either connect via your Ethernet if they are the same network, or you may need to connect to both Wi-Fi and Ethernet at the same time, if your computer's capabilities allow it.
Step 6: Connect Droidcam App
Once you have installed both the Droidcam app and the client app, it's time to connect them.
First, open the DroidCam app on your phone. This app should tell you what Wi-Fi network you are on and provide you with a "Wi-Fi IP Address" and a "DroidCam Port". These are the identifiers that the client application will look for to connect to your phone. It will also give you a web address that you can go to and watch the video, although I don't think it can interact with other programs so its use is limited.
Once you have the Wi-Fi IP address and port of DroidCam, open the client application on your PC. If two windows appear, go to the window labeled “connect”, enter the Wi-Fi IP address and port number of the DroidCam into this window, highlight the “video” checkbox, select (from the three buttons at the top) the “connect” button over wifi (LAN)" and click "start". You should see the video pop up in the preview window of the DroidCam client app. If the "connect" window does not appear, click inside the large rectangle in the DroidCam client window and you should see the connection window pop up, and then you can perform all the steps described earlier. You should now be able to go into your video conferencing software or whatever you use your webcam for and change it to "DroidCam Source[#]". After this, the phone's camera should start working like a regular USB webcam.
You'll need to reconnect when you restart your computer, but you can leave your phone on in which case the DroidCam's Wi-Fi IP address or port won't have to change. The software on your computer also remembers the numbers, so starting it up should be quick and easy.
Step 7: Adjusting the Mount and Connecting the Charging Cable
I hope you can adjust the phone mount with just a little force and the mount will stay in place well. You need to make sure the hooks hook onto the front of the monitor and lay flat on the top side of the monitor. If you adjust the mount so that the hooks point downwards (for example, towards the keyboard), the mount may fall off. The mount can be adjusted to fit almost all types of monitors, and I've used it successfully on every monitor I've been able to test it on.
If you're like me and plan to use this webcam for quite some time, it's worth making sure you have a charging cable handy. Even though you don't need to connect your phone to your computer via a cable, when your phone's battery runs out, it's a good idea to be able to quickly charge your phone. I recommend connecting the charging cable to the mount on your monitor, and you can, of course, disconnect your phone from the charging cable whenever you need to show someone something on your desk.
And now you have a better and cheaper webcam, a real “treasure out of garbage”!
Step 8: Just Discussion
This project has been going on for me for a while now, and I'd like to discuss some aspects of it very quickly. It all started a few months ago when I needed a webcam for distance learning and webcams had gotten crazy expensive due to COVID-19. I had to come up with something because I was a Georgia Tech student doing distance learning from my home on the West Coast and didn't have $150 for a decent webcam. So, I used a CAD program to design a mount for my old Galaxy S7 phone to mount on my monitor and used it for the entire semester. This black 3D printed mount is shown in the photo above.
When I moved into the college dorm this summer, I had to buy a new monitor because shipping it here would have been quite expensive, and monitors are really cheap now.
The old phone mount didn't fit the new monitor, so I used CAD software to design a different mount. This time I laser cut it from 1/8″ thick plywood. It is also shown in the photo above. This was the first project I worked on at Georgia Tech, and I used it mainly for teaching because I had never worked with a laser cutter before. I got it right, so I didn't really need to do the mount again.
I was then given the task of completing a design using a CAD program, and I decided to make a more universal version of the phone mount that could be used with more phone models and monitors. In class we use Solidworks, so I converted a CAD drawing into a Fusion drawing, changed a lot, modified it, and wrote this instruction, but I have to thank my teacher, Dr. Pucha, for he helped realize this project.
In addition, I would like to thank the mentors and sponsors, thanks to whom the work of the Invention Studio and Workshop is so well organized. Such projects would not have been realized if people like them had not made the Workshops so convenient to work in and supported their activities. This mount was 3D printed in the Invention Studio and the equipment used is in the Workshop where I assembled the mount and took a lot of pictures.
I would also like to thank the creators of the DroidCam
for making something amazing and allowing it to be used for free. When I first thought about doing this project, I expected that I would have to shell out a few dollars for some webcam app to make it work well, and it's great that I didn't have to pay anything. It makes projects like this more accessible to more people, and I think that's really cool and important.
PS Addition from the translator. Several useful links with information in Russian for those who are interested in this topic
:
hi-tech.mail.ru/news/kak-prevratit-smartfon remontka.pro/android-as-webcam www.youtube.com/watch?v=GfgnvHBiCzI&t=26s
How can you use the connected device?
Considering the fact that an external camera for Android is used, its functionality will be the same as it will be made by the developers of the application through which the camera will be controlled. But, regardless of the program, you can always view the image from the shooting device in real time. In most cases, you will also be able to take photos and videos.
If you use good software for controlling external video cameras, you will be able to take advantage of most of the functions of a standard camera on Android devices: effects, video communication, lighting and quality settings, etc.
Making a webcam from an iPhone
Read also: TOP 12 Best Wi-Fi signal repeaters for your home | Review of current 2022 models
The apps that let you turn your iPhone or iPad into a video camera have many more options than regular cameras.
Moreover, they allow you to get a picture with very good expansion. You can use both cameras: the main one and the front one.
To connect your iPhone to a computer, you can use one of the following programs: PocketCam, Broadcaster, Mini WebCam 1.0.2, WiFiCam, Mobiola Webcamera or EpocCam 1.9.1.
These utilities work on almost the same principle and involve performing the following actions:
- Installation of a computer part of the software on a PC;
- Installing the application on your phone;
- Connecting your phone and PC via Wi-Fi or USB cable;
- Entering all necessary settings;
- Connect to the selected messenger and use an iPhone instead of a webcam.