Many users are interested in the question - how to install custom firmware on Android? Custom firmware ROM offers a completely new take on the old Android interface. Today, there are a large number of custom firmware for Android, and each of them has its own features and functions.
Today we will tell you how to install custom firmware on Android.
Before you start installing custom firmware, you need to obtain Root rights to your smartphone, and also activate one of the recovery modes, such as ClockworkMOD or TWRP.
Warning:
Make sure that the custom firmware you plan to install is designed for your smartphone. Otherwise, you can turn your smartphone into a “brick”.
Instructions on how to install custom firmware on Android:
- Download suitable custom firmware for your Android smartphone.
- Copy custom firmware to an SD memory card.
- Go to recovery mode. To do this, you need to turn off your smartphone, then press and hold the Volume Up button, the Power button and the Home button (the combination may vary for different Android devices). After a while, a menu will appear on the smartphone screen in which you need to select the Recovery mode.
- Make a backup copy of your smartphone data (Backup).
- Now the main part of installing custom firmware on Android begins. We will look at two options for installing a custom ROM using different recovery modes.
Obtaining Root rights
If you decide to install new software on your device, then you need to obtain administrator rights to be able to make changes to system parameters. In the Android store you can download the z4root or Universal AndRoot applications. They will allow you to get root rights so that you can reflash the equipment in the future.
It is worth clarifying that performing all these actions deletes application data, contacts, etc. from your Android tablet, so back them up. But the multimedia files on the memory card will remain intact, you don’t have to worry about them.
Let's now look at which menus for Recovery can be used to install custom software easily and quickly.
How to install custom firmware on Android via CWM and other recovery modes:
Step 1: Select Wipe data/factory reset and then Yes-delete all user data.
Step 2: Select Wipe Cache Partion and in the next window click on Yes-Wipe Cache
Step 3: Go to the Advanced section and select Wipe Dalvik Cache, then Yes-wipe Dalvik cache.
Step 4: Go to the Mounts and Storage section, select Format /System/data/cache.
Step 5: Next, click on Install zip, then choose zip from sdcard and select the zip file that you copied to the SD memory card.
Step 6: Click on Reboot system now.
Step 7: Wait about 5-10 minutes, after which the smartphone will turn on automatically.
The main differences between Custom and Global ROM
| Global ROM | Custom ROM |
| Development and testing are largely carried out in China; some firmware is created exclusively in India. | The development of MIUI + its testing takes place in the territory of the country where it will be implemented. |
| Official assembly with guarantees from the manufacturer. | Not an official build with the author's promises to fix them quickly. |
| Only safe and stable applications. Android versions meet system requirements. | All built-in applications have been removed (in almost all assemblies), useful little things have been added for a specific region. The Android version may be 2-3 generations higher, even on older models. |
| Constant updates for all supported smartphone models. | Updates are less stable and may be delayed. This can also happen due to insufficient number of testers. |
- Let's start with the most basic thing - location. The global version is being developed in the Middle Kingdom, but with release in European countries in mind . There are no clear restrictions: the global one is suitable, for example, for both Turkish and Russian users. Hence the multimedia and the presence of Google services.
- The custom version, and especially the localized one, is designed for a narrower space . The developer may well create a shell only for Russia, removing all other languages and adding programs that are relevant only in the CIS.
- Another important point is formality. A large number of people who know their job well are working on global firmware . These are designers, programmers, editors. Before the firmware is released, it is carefully reviewed, reviewed and tested. Therefore, the risk of bugs, freezes and slowdowns is minimal, especially in Stable.
- For Ported ROM, several programmers , or even one user, are enough. The firmware does not undergo thorough testing , which is why various “surprises” from the operating system are possible in the future.
How to install custom firmware on Android via TWRP Recovery:
Step 1: Go to the Wipe section and select System, Data, Cache, Dalvik cache.
Step 2: Swipe right to confirm the wipe operation and wait for the process to complete.
Step 3: Next you need to go to the Install section and select the custom firmware that you copied to the SD memory card. Swipe right to confirm the start of custom ROM installation on Android.
Step 4: Wait for the process to complete. The installation time for custom firmware depends on the device and the firmware itself (official/unofficial).
Step 5: Reboot your Android device.
That's all! You can use one of these methods to install custom ROM on Android.
Interesting articles:
- How to register for MIUI 9 beta testing?
- How to install Recovery on Android? CWM Recovery and TWRP Recovery
- Xiaomi Redmi Note 4 how to reset settings
- How to unlock your computer using a fingerprint scanner on Android
- How to find out your WiFi password on an Android phone without root rights
- How to install Ubuntu on Android?
News related to this material
Windows Phone
Guide: How to choose the right new smartphone?
News of phones, tablets and Hi-Tech
How to remove Android lock screen? Fast way
News of phones, tablets and Hi-Tech
How to send photos without losing quality via WhatsApp
Smartphone News
LG G8 ThinQ: display as speaker and amplifier
Problem solving
How to remove Android Gmobi 1 and other viruses on Android
Smartphone News
What it is
Custom firmware, also called Ported and Custom ROM, is an unofficial version of MIUI . That is, it is not being developed by the Xiaomi community, but by a separate group of people not directly related to the company .
An offshoot of custom firmware is localized firmware. When creating this type of shell, specialists focus on a specific region. Of course, this does not happen in China or India, so the version is also called unofficial.
Custom is not a separate type of MIUI. Most often it is based on Stable or Developer ROM.
Changing an existing file
If you are not too versed in all the intricacies of the OS, but want to change something in your firmware, the best solution would be to tweak a ready-made solution. You can change both the native, built-in firmware, and already changed by someone else. There are a lot of customized firmware on the Internet, and you are unlikely to lack their quantity. So, we present step-by-step instructions for assembling your own firmware based on an existing product.
CCACHE
This is a useful utility that is used to cache binary files and can reduce compilation time (by about 50%).
To initialize it, run the following command:
ccache -M 50G
Of course, instead of the given value, you must indicate the number of free gigabytes on your hard drive.
To view caching statistics, use the following command:
ccache -s
To delete cache files use the following command:
ccache -C
Setting up the working environment is almost finished - all that remains is to open the bash.rc file:
sudo nano ~/.bashrc
Now you should go to the last line of this file and insert the following lines into it:
export USE_CCACHE=1 export PATH=~/bin:$PATH
Finally, you should close your text editor and run the following command to apply the changes:
source ~/.bashrc
It's time to reboot the system.
That's all for today!
And these are the next two articles in the series, describing the process of assembling the firmware!
- Building your own Android firmware, part 2/3
- Building your own Android firmware, part 3/3
Types of firmware
Flashing the device, in other words, reinstalling the software, is necessary if you are not satisfied with the software component.
The firmware installation can be stored in one or more files. Depending on this, single-file and multi-file firmware are divided. There are Recovery firmwares, which reinstall the software for Recovery Mode; kernel firmware, that is, reinstalling the operating system version.
As for the kernel firmware, they can be divided into official and custom. Official firmware versions released by the manufacturer of your mobile device or Google are the best option for undemanding users: they do not have a lot of functions, but they are reliable and designed specifically for your device model. And, importantly, they come with a guarantee.
But any third-party (custom) custom firmware releases the manufacturer from the obligation of warranty repairs . Do not think that this is some kind of violation of the rules or that the firmware is illegal. Manufacturers simply cannot know what will happen to your device due to third-party firmware, and they do not want to be responsible for it.
But if you're ready to say goodbye to warranty service, third-party firmware will give you a lot of options. There are different types of third-party firmware, the most famous: Cyanogen Mod, MIUI, Illusion ROMS, AOKP.
Cyanogen Mod
Cyanogen Mod was born as a custom modification and has grown to become the most popular custom Android firmware: in 2016, there are about 14 million devices with Cyanogen installed.
It is reliable, stable and works on many smartphones and tablets. A big plus of the firmware: there is a normal installer. To install CyanogenMod, you don’t need to worry about Recovery modes, getting root rights and other deep things. The program will do everything for you.
CyanogenMod, unlike standard versions of Android, allows full access to the operating system. Even root access on the device will not give you such freedom. This leads to a variety of applications and security problems. The system is open not only to you, but also to viruses. Therefore, it is better to use CyanogenMod together with a good antivirus. The firmware also frees you from the manufacturer’s imposed standard applications that cannot be removed.
Cyanogen simplifies working with the device, supports many themes, allows you to change any element of the system, and increases performance through optimization.
Video: review of CyanogenMod 10.1
MIUI
MIUI is based on Android and CyanogenMod source code. That is why it has many similarities with Cyanogen. This includes complete freedom for the user, improved performance, and support for themes. But MIUI has an interface unusual for Android, which is something similar to iOS. MIUI does not have an application menu at all; instead, it uses an unlimited number of desktops with a set of applications. But, unlike iOS, MIUI also supports widgets, of which there are a lot in the built-in store.
You can install all applications from Google Play Market on MIUI. The built-in SuperMarket store has them all. And some of those that are paid on Play are free on Supermarket.
Illusion ROMS
Illusion ROMS significantly speeds up the device and reduces energy costs. It has advanced accelerometer settings: for example, reducing the rotation angle to “flip” the screen interface from 90 to 80 degrees. You can also customize the screen: in addition to brightness settings, you can change the contrast and color rendition to improve the image.
Video: custom firmware Illusion ROMS for Android (review in English)
AOKP
AOKP has many of the features of CyanogenMod (most firmwares are based on it), but has unlimited interface customization options. You can change everything, every single menu element. You can upload your own animation for the interface, create your own template for a vibration alert, set special actions for any gesture and any press, you can change the background and appearance of the notification panel, remake the status bar, and manually configure the processor.
A separate topic is widgets. They can also be adjusted. Devices powered by AOKP can turn Android into something unimaginably beautiful, all it takes is some imagination.
Video: review of custom AOKP firmware on Nexus 4
Build from source
One of the most correct ways is to use the source code published by the Google or Cyanogenmod development teams. But at the same time, this method is the most difficult, because in order to assemble Android firmware from source code, optimize it and make it work on a specific device, you need to have fairly deep programming skills and understand all the intricacies of the mobile operating system and device hardware. This knowledge is not acquired in a day, so in this article we will not describe this method in detail.
REPO
Can't guess what it is? Well, it is an important tool needed to connect to servers and download the source codes that will be needed later. Its name comes from the word “repository,” which refers to a centralized storage of certain resources. In our case, this repository stores the source codes of all software components that will be compiled and added to the created firmware.
Run the following command to install the described tool on your system:
Instructions for making Android firmware yourself
Build Android firmware from sources
Before you start creating custom firmware with your own hands, it is recommended to install a virtual machine and Linux OS on it.
You also need to install java version 3.3. If you work on the Ubuntu operating system, then you need to find OpenJDK Java 6 Runtime in its repository and download it.
After installing Java, you need to download a special utility for modifying Android, it is called android kitchen.
Now you need to find the firmware that you will modify. xda-developers.com – on this site you will find the firmware you need. The main thing is that they have the word ROM in their name and are clean. Then download it and unzip it using Winrar.
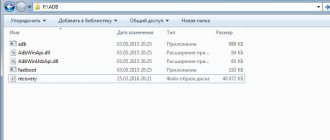
When you open the folder with the unzipped files, you will find the items listed below:
- Meta directory _ inf . In it you can change root rights and display a progress bar. It also contains an update script that allows you to create new data in the NAND memory.
- IN boot.img you can find linux and initrd image. You don't have to touch them. The user can make all modifications for Android using the /prof file system settings or using Clockwordmod.
- And finally, a folder for making new pictures, backgrounds, applications, namely /system. Here the user will find the Android core, which consists of: app - these are applications that are already installed.
- bin – here are elements that will be used by other higher-level ones during the operation of the system.
- fonts - fonts.
- framework - sets of Java classes that are used on Android. Here is the framework-res.apk. This file completely describes the system interface.
- lib - repositories that are used by low-level system components.
- media – ringtones, sounds.
- tts - files for speech synthesizer.
- vendor – documents from the phone manufacturer.
- bin – stores useful programs.
- build.prop – a file containing assembly data and low-level settings.
Ways to remove applications from Android
Launch android kitchen. Launch via Linux or through the Cygwin program. If you are running on Linux, then enter the command cd kitchen, then ./menu.
Now unpack the program . Then go to section 0 or advanced options. Having found commands to improve the version of Android, click on the one that is needed. Here you add your own animations, applications, and free up memory. After the above steps, type command 99. Now click build ROM fron working folder . All that remains is to pick up the archive with output_ZIP.
Editing the finished version
Having studied the production of firmware from source files, we will now consider how to modify the finished file. To edit it, you need to download the file, look for the firmware with the name: Pure Android 3.0 ROM. This name indicates that she is pure.
After downloading the file, unzip it. The folders and files in it are components of the firmware. They are usually located like this:
- Meta - inf . Here lies all the data about the future system. Certificates, checksums and scripts are also found here.
- Boot . img . This is the image so you can download the firmware and install it.
- System folder . This is Android without the kernel. Here are all the system settings and some of the installed utilities.
Then the software . You must go to the / system / app / and change the set of utilities. That is, you can destroy the folder with the utility that you do not need, or, conversely, install the necessary software. You can install utilities that the future Android system will need. To do this, they must already be unpacked. You just need to drag everything you need into this directory and these applications will be automatically pre-installed.
To modify the graphics, it is recommended to go to the folder framework/framework-res.apk . The user should unzip the element and insert two folders there: res/drawable-*, where he can upload his pictures and background with .png resolution. And res/layout-* - files with .xml resolution will be attached here. After the manipulations have been performed, you must collect everything again into one file.
Google Play features that will be useful to every Android user
modify the animation or install a new one by unzipping the archive with the corresponding files. The user then modifies the files and packs them back.
If the user wants to improve the performance of his own smartphone, he must enter the following commands: ro.mot.buttonlight.timeout=0 – to illuminate the buttons after turning on the phone. debug.sf.nobootanimation=1 – disables animation when the phone boots. Many of them are located in the system/build.prop folder.
When all modifications are completed, you will need to archive them with the command $ cd ~/rom; zip -r my-rom.zip *.