Now with instructions for application packages
Sometimes the latest version of an app isn't the best. Bugs and problems can occur, and while rolling back to an older version can be a security risk, sometimes you just have to do it to get things working. Once the basic troubleshooting steps are done and rebooted phone or swiping an app from your recent list won't fix anything, it might be time for (a little) more drastic action. Here's how you can revert to an earlier version of an app—whether it's a regular app or one of Google's newfangled app bundles.
For many of our more tech-savvy readers, this guide won't present much new information, but is still useful for those new to the platform.
We should also note that if you are rolling back to fix an issue, the first step is to notify the developer of the issue via a report. This way, any issue you are facing can be resolved in a future update and you won't be stuck with an outdated version, which could be a security issue.
Installing application packages
To install an app package, select "Download APK package" for the desired app in APK Mirror and the file will be saved locally on your device. Next, you need to make sure that you have the APK MirrorInstaller app installed on your phone. You can get it from the PlayStore or install it from the APKMirror site - that's fine, but the PlayStore is easier.
Once APK MirrorInstaller is installed, you can try opening this APK Bundle file. You can do this through a notification you may have once the download is complete, or you can navigate to the download folder in your file browser. If you have been using Chrome, you can also access it through the three-dot menu -> Downloads.
Opening an application package file from APK Mirror.
When prompted, open the file using the APK MirrorInstaller app. APKMirrorInstaller will give you a bunch of details regarding the app you're installing, like what architecture and DPI you need, but you can ignore most of that, it's just there if you know you need to change something in the installation to suit your needs. device. The default settings will most likely be fine.
Installing an application package using APK MirrorInstaller.
Click "install application". In the latest versions of Android, you will be prompted to allow the APKMirrorInstaller app as a source for installing apps in the form of a simple toggle (shown above). While you shouldn't enable this setting for any app, it's okay to do so for APKMirror. But it is needed to protect against applications that can install malware.
On older versions of Android (up to Android 8.0 Oreo - consider upgrading for your own safety if your phone is that old), you'll have to manually enable a separate switch to install apps from unknown sources. This is usually found under Settings -> Security, or you can search the Settings app for "Install apps" or "Install unknown apps"
In Android 8.0 Oreo and later, this is treated as a per-app permission. Your phone may indirectly ask if you want to change this for a given app, prompting you to enter settings and toggle the Allow from this source setting, at which point you can return to the setup screen and continue. In earlier versions of Android, such as Nougat, you will have to manually toggle the global setting that allows installation from "Unknown sources" in Settings (Settings -> Security -> check or slide the switch for Unknown sources.).
Once permission is granted, you can head back to the APKMirror app which will continue the installation process, or you can start over by trying to launch/install the app you downloaded from your browser or file manager
APKMirror will prepare the installation, after which your phone will ask again if you want to install the application. Click "Install" to continue and you're done. When the APKMirror installer finishes installing the app, you will be prompted to open it, but you must use the version you installed.
If you encounter any problems during this process, the APKMirror installer will let you know, and a large warning will pop up if the app installation fails for any reason.
Why update Google Chrome
Chrome is the most used browser in the world. This popularity is based on the most convenient functionality, which gets better with each new version.
The browser's tools and options are constantly and carefully refined to provide users with maximum comfort of use. Sudden changes are always perceived as difficult, while small and gradual changes are much easier. On average, updates are released approximately every 2-3 months - this is the optimal period for people to have time to master the innovations and be ready for the new version of the browser.
There are no strict schedules for the release of updates; developers create and release them based on the general situation on the Internet, which depends on many factors - the emergence of new functions, identifying problems in the browser itself, and the activity of competitors.
How to update on your phone
On Android devices with standard settings, updating Chrome is done like this:
- We go to the Play Store, find a button with three horizontal stripes at the top left and click on it;
- Here you need to select the “My applications and games” tab;
- Find the Google Chrome icon, find the “Update” button opposite it and click on it.
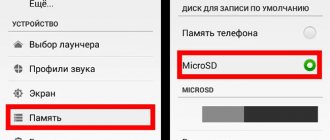
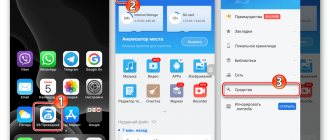
Updating Google Chrome on an Android device
After completing these steps, the browser begins to update, this process takes several minutes.
Starting from version 76, Google Chrome for Android OS can be updated in the browser settings. To do this, click on the “three dots” and select “Update”.
Update Chrome on iPhone:
- Go to the AppStore;
- Scroll down to the “Updates” tab and open it;
- Here we find the Google Chrome icon;
- We specify the password for your Apple ID account and the automatic download of the distribution begins with subsequent installation.
It is recommended to repeat this procedure every 2-3 months, as new versions of the browser are released.
Chrome start page
If the header of the browser interface was updated only cosmetically, then more significant changes took place on the new tab page. They are unlikely to impress you if you have already seen the express panel in Opera, the scoreboard in Yandex Browser, or used extensions for Chrome. However, for Chrome itself, without taking into account extensions, the update will bring at least some progress.
Important: you can return the old square preview elements to this page if you make the following changes in chrome://flags/:
- Set the Enable using the Google local NTP parameter to Enabled;
- Set New Tab Page Material Design UI to Disabled;
- Restart the browser.
When is it possible to do this?
To save money, many manufacturers of technological devices, such as laptops, optimize them only for specific versions of operating systems. And if the device initially ran Windows 10, then installing Windows 7 on it in most cases will be almost impossible. A similar situation occurs with smartphones - rarely does anyone manage to download firmware of an earlier version than the preinstalled one.
The whole reason often lies in the components, namely the installed processors. Manufacturers do not consider it necessary to incur additional costs by optimizing their hardware for all existing versions of Android. Therefore, it turns out that the modern Snapdragon 845 simply will not run on Android 5.0.
However, we are talking about a rollback, which means that a previous version of the operating system was once installed on the smartphone. Yes, this is true, but the file with the old firmware after the next update is simply deleted without the possibility of recovery. That is why you have to resort to complex flashing methods that are not always understandable to the average user.
Complete browser reinstallation
The most radical of the methods. It is worth using if the previous ones did not work, as personal data may be lost. To prevent this from happening, you should synchronize with the cloud, or export your bookmarks as a separate file, which you can then add again to the installed browser.
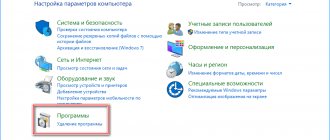
The first step is to remove the current version of the program. You can use the standard Windows tool, which opens through Start > Control Panel > Add or Remove Programs.
After this, it is advisable to also delete the google user profile containing bookmarks and passwords. To do this, you need to enable the display of hidden files and folders, and go to the local user folder. Next, follow the address: AppData>Local>Google, and delete the browser along with all data.