Sergey Efimov
January 6, 2022
Comments (0)
Reliable but completely immobile wired Internet has been replaced by high-speed wireless technologies. It has become possible for phones to connect to the mobile Internet; for computers, laptops and tablets, Wi-Fi communication has become popular. This article examines the features of the procedure on how to enable Wi-Fi on a computer when working on Windows.
Usually, all the necessary preparation of equipment is undertaken by specialists; in the future, to connect to a web resource, you only need to know the name of the network and the security code
Main conditions for connecting to Wi-Fi
To connect to the Internet wirelessly, you must have:
- Special equipment from an organization providing internet services. It can be rented or purchased.
- A personal device from which the network will be accessed.
- Built-in or external Wi-Fi module (usb or PCI).
- Updated network drivers.
An agreement must be concluded with the selected provider, which specifies the operating conditions of Wi-Fi, that is, its speed, limitations, cost, etc.
Driver Update
If the computer is accessed to the World Wide Web via the air and not via cable, then it is equipped with a wireless module. The device can be built-in or externally connected via a USB port.
In order to ensure stable and normal operation of this Wi-Fi adapter in a PC, special software (drivers) is required.
Methods for installing and updating drivers
Usually, a CD with drivers is included in the package with a laptop or desktop PC, but if it is missing, then the latest versions of the software can be downloaded from the equipment manufacturer’s resource.
Many convenient software update applications have also been developed, which can greatly facilitate the search and installation process not only for beginners, but also for experienced users. Windows 7's own tools, such as Device Manager, also allow you to quickly install software.
Using the official resource
The wireless module is already built into laptops, so to reinstall the drivers you need to visit the page of the company that produced the PC motherboard.
In order to accurately find out information about the motherboard used in the computer, you need to follow these steps:
- Press “Win” and “R” at the same time;
- Type "cmd";
- Click “Enter”;
- Enter “wmic baseboard get Manufacturer” into the command line;
- Click “Enter”;
- The motherboard manufacturer will be displayed;
- Type "wmic baseboard get product";
- Click "Enter" again;
- The motherboard model will be displayed.
Having found out information about the board, you need to visit the manufacturer’s page, where you can do the following:
- Type the motherboard model in the search box;
- Click on the magnifying glass;
- Next, click on the found name of your board;
- Then click “Support”;
- Go to the “Drivers” tab;
- If the OS is not automatically detected, then specify it manually;
- Go to the “Wireless” tab;
- Download the current version of the drivers (often the software is archived, so you will then need to unpack it on your computer using, for example, “7-Zip”);
- Start the software installation by clicking “Setup”;
- The OS may detect the initial version of already installed software and prompt the user to simply update the driver, but it is better to follow professional advice and perform a clean installation. To do this, put o;
- Click “Next”;
- Wait for the process to complete;
- Click Done;
- Restart PC;
- The wireless connection icon will appear on the taskbar.
In the case when a Wi-Fi module connected via a USB port is used, the manufacturer’s name is written on the adapter body or on its packaging, so the procedure for installing drivers for it is a little simplified. You can immediately visit the manufacturer’s website and, after downloading, install the appropriate software.
Using apps
Many convenient programs have been developed for automatically updating software on a home computer, which facilitate the process of installing drivers, for example, “Driver Genius”.
The sequence of actions consists of the following stages:
- Immediately after launch, the utility will advise “Start scanning”;
- Wait for the process to complete;
- Check the box for the “Wireless” module;
- Click “Next”;
- Select the Wi-Fi device and click “Download”;
- Wait for the process to complete;
- After this, the utility should automatically return the user to the previous menu, where the “Install” button will be displayed. Click on it;
- After this, a message will appear informing you that a point has been created so that you can restore the OS to its state before installing the software. If an error appears in the system after the installation procedure, the user will be able to reset the latest changes. To do this, at this stage you just need to click “Yes”;
- If the user does not consider it appropriate to create a point at a given time, because it has already been saved previously, then click “No”;
- Wait for the process to complete;
- Restart PC;
- Ready.
Using Device Manager
The following steps need to be taken:
- Right-click on the “My Computer” icon;
- Click “Properties”;
- Enter “Device Manager”;
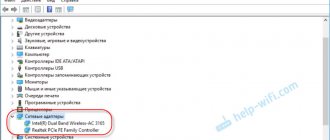
- Expand the “Network adapters” section;
- Call the context menu from the “Wireless” adapter;
- Click “Properties”;
- Enter the “Information” tab;
- Enter the “Equipment ID” column;
- Then, using the ID, you can quickly find suitable drivers on the official source of the company that released the device (the search description was given earlier in this guide).
This option is error-free and the most reliable when installing software for any computer device.
Selecting, connecting and setting up a Wi-Fi adapter
After installing the equipment and technical connection, the user needs to perform a number of actions on the device in accordance with the instructions.
How to find Wi-Fi on your computer and start it:
- Launch the router installation wizard. Select Quick Install.
- After reviewing the characteristics of the modem, move on.
- Check the box: Wireless router.
- Determine the encryption type: static/dynamic IP.
- Enter your personal information. Apply.
- Reboot the router. Check for connection.
Most modern routers have a built-in Quick Setup Wizard.
Introduction
The use of various devices with WiFi is rapidly bursting into our lives; now not only complex equipment like laptops and communicators, but even such simple gadgets as a photo frame are equipped with WiFi.
Setting them up to connect to wireless networks is becoming a challenge, so it's not surprising that technologies are emerging that can greatly simplify the setup procedure. Creating a new wireless network begins directly with the configuration of the access point (wireless router) connecting computers and other wireless equipment to it.
Connection features for different OS
In general, the diagram of how to turn on Wi-Fi on a computer has a standard appearance. There are only a few exceptions depending on the device model.
How to set up Wi-Fi in WIN XP
You need to act like this:
- Enable the module: press the Fn and F5 buttons on the keyboard simultaneously.
- Find the Wi-Fi icon on the quick access panel. Click to open Wireless connection.
- In the list of available networks is the one provided by the provider - select the appropriate name. Enter a password for it.
- Click Connect.
At the beginning of the step-by-step work, it is recommended to check that the network drivers are up to date. Go to the XP computer equipment column and find Network Cards. In the Properties block you can find out their status.
How to enable Wi-Fi on Windows 7
The procedure is not much different:
- Click the Start button. Go to Control Panel, then Network and Internet.
- Open Network and Sharing Center.
- Select the sub-item Change adapter settings.
- Find Wireless installed on your computer. Right-click and click Enable.
Windows 10 is almost completely automated
Enabling Wi-Fi in Windows 8 and 10
Windows 8 is very similar to version 7, and the Internet is turned on in a similar way.
The updated Win 10 OS has some changes, including in the connection establishment procedure.
How to enable Wi-Fi on a computer running Win 10? Methods:
- Through the connection symbol: it is located on the desktop. You need to left-click on it to connect.
- Using the command line. You need to write in it: ncpa.cpl, after which a list of possible connections will open.
- You can also configure the global web in the Computer Settings, where there is a Network and Internet item - the Wi-Fi subsection.
If the module is active, next to Wi-Fi there will be an inscription: Access available. Now you can try to launch the browser and search for something on websites.
How to enable Wi-Fi on Asus laptops
First, activate the module itself by pressing the Fn + F2 buttons to turn it on.
- Using the wireless connection icon or the Control Panel, activate Wi-Fi.
- Select the desired network and enter the security code. OK.
The Wi-Fi adapter on more modern devices is enabled by default. An illuminated star next to it indicates readiness for connection.
Key combination on ASUS laptops
Changes in Windows 10
This operating system has many useful options and design solutions that are not available in older versions of the OS. Moreover, many say that it is also designed for tablets.
PC with Wi-Fi Internet
Main changes in this system:
- design and principle of Internet connection. Now you can organize the design of the system and work on the Internet in a few clicks;
- automatic installation and update of drivers. This feature allows you to avoid program conflicts. This improves the performance of the PC and the system as a whole.
As for Internet options, the new system implements the “Limited Connection” tool. This function allows you to control the amount of Internet traffic consumed by your PC. If the user reaches the limit, the system will notify him about this and offer to disconnect the connection so as not to pay extra money for additional traffic packages. This tool is relevant for 3G, 4G Internet, because providers often offer clients traffic packages of 15-50 GB.
Important! For maximum system performance, you must install all important updates recommended by Windows developers.
Securing Your Wireless Network
The selected provider provides the user not only with the necessary equipment, but also with data for logging into the Internet - this is the name of the secure line and PIN code.
They are written down in the contract, and you can often find out about them by looking at the stickers on the router body itself. However, the factory login and password can later be changed, thereby ensuring better security for personal data.
To configure the router, you need to go to its settings as an administrator:
- Open any browser, enter the address in the top line: 192.168.1.1.
- Log in to the settings using the specified login and password (standard admin or user).
- Find the Wireless and Security tab on the left side of the menu.
- Come up with and write down a new complex code in the corresponding Password/Encryption Key line. Save.
- Reboot the modem. Repeat the procedure for connecting Wi-Fi on your computer.
If for some reason there is no access to the control panel, you can reset the equipment settings using the Reset button on the router and try to enter the main menu again.
For successful and fast connection operation, it is recommended to remove irrelevant network connections
How to set up Internet on a computer via VPN
This connection is used when it is necessary to securely connect remotely to private networks and increase privacy.
To create a connection via VPN, follow the steps:
- We enter the “Network and Internet” section.
- On the left in the list, use the cursor to activate the “VPN” line, and then click on the “Add VPN connection” button.
- We enter the data provided by the network provider and save it.
- To access the Internet via VPN, click on the newly created connection and click “Connect”.
You can connect to the network anywhere; all you need is a smartphone, a modem, or a cable connected by your provider.