Would you like to run Android games and programs on your home PC? This can be done very comfortably using the Bluestacks emulator program. It allows you to fully run all .apk files directly on Windows or Mac! In this manual, we will tell you how to use Bluestacks and answer the most common questions related to setting up the program.
From this article you can learn:
- How to download and install this emulator.
- How to launch it and what settings need to be made at the very beginning.
- How to download and install games/programs.
- How to set up controls and much more.
Setting up BlueStacks
The first thing a user should find out when problems arise with the stability and quality of BlueStax is whether the system requirements of the PC they are using meet those required by the emulator. You can view them using the link below.
Typically, owners of powerful components do not need to resort to performance tuning, but if the hardware configuration is weak, they will need to manually lower some parameters. Since BlueStacks is positioned primarily as a gaming application, it has all the necessary settings regarding the consumption of system resources.
All active users are also encouraged to create backups so as not to lose game processes and other user data that necessarily accumulate while working with the emulator. And connecting to an account will make it possible to synchronize all Google services, including browser data, game progress, purchased applications, etc. All this can be easily configured in BlueStacks.
Step 1: Connect your Google account
Almost all owners of Android devices have a Google account - without it it is simply impossible to fully use the smartphone/tablet of this platform. When deciding to log into your account via BlueStacks, you can do it in two ways - create a new profile or use an existing one. We will consider the second option.
- You will be prompted to connect your account the first time you launch BlueStacks. The process itself repeats the one you carry out on smartphones and tablets. On the start screen, select the desired installation language and click “Start”.
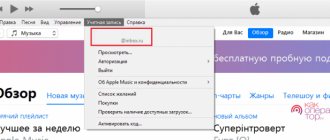
After a short wait, sign in to your account by entering your Gmail email address and clicking Next. You can immediately restore your email or create a new profile.
In the next window you will need to enter a password and click “Next”. You can restore it here.
If the entered data is correct, a notification about successful authorization will appear. Now you can start using the emulator directly.
- You can also connect your account at any other time through Settings.
Please note that you will receive 2 notifications from Google security when you sign in to your account from a new device, one on your smartphone/tablet and one via email.
The BlueStacks emulator is recognized as a Samsung Galaxy S8, so simply confirm that you are the one who logged in.
Step 2: Configure Android Settings
The settings menu here is very stripped down, redesigned specifically for the emulator. Therefore, of these, at the first stage, only connecting a Google profile, enabling/disabling GPS, selecting an input language, and, perhaps, special features will be useful to the user. We won't recommend anything here, as each of you will have your own personalization needs and preferences.
You can open them by clicking on the “More apps” button and selecting “Android Settings” with the gear icon.
Step 3: Set up BlueStacks
Now let's move on to changing the settings of the emulator itself. Before changing them, we recommend installing one of the most demanding applications you use through the Google Play Store and using it to evaluate how well it works with standard settings.
Before launching games, you can also configure their controls, and if you do not want to see this window every time you start, uncheck the “Show this window at the start” option. You can call it with the keyboard shortcut Ctrl + Shift + H.
To enter the menu, click on the gear icon located at the top right. Here, select Settings.
Screen
Here you can immediately set the desired resolution. The emulator, like any other program, can be scaled manually if you hold and drag the cursor on the edges of the window. However, there are mobile applications adapted for specific screen resolutions. This is where you can set sizes that imitate the display of a smartphone, tablet, or simply expand BlueStacks to full screen. But don't forget that the higher the resolution, the more loaded your PC is. Select the value according to its capabilities.
DPI is responsible for the number of pixels per inch. That is, the higher this number, the clearer and more detailed the image. However, this will require increased resource consumption, so it is recommended to activate the “Low” value if you experience problems with rendering and performance.
Engine
The choice of engine, DirectX or OpenGL, depends on your needs and compatibility with specific applications. The best would be OpenGL, using a video card driver that is usually more powerful than DirectX. You should switch to this option if a game crashes or other specific problems.
Installing the application
The easiest way to download Bluestacks for your computer is from the official website. To install it, you do not need to take any special actions or install additional programs. You just need to follow the steps of the Bluestacks app installation wizard. While other applications that emulate Android require the installation of programs such as SDK, java or JDK, Bluestacks does not require anything similar to install and run.
The only thing that is required to install the program is a Google account. Therefore, before installation, you will need to log in to an existing one or register a new one. And accept the terms and license of the application. While running the program installation wizard, you only need to select the location on the disk where it will be installed and the language convenient for using the program.
After the installation is complete, three new shortcuts will appear on the desktop: Start BlueStack, which launches the emulator, Apps, which allows you to download games or programs for Android, and BlueStack, to update the program.
How to enter setup mode
Before making changes to the program settings, check the technical capabilities of the device. To do this, install a demanding game via Google Play. The user checks how the application will work on the default settings. The engine is responsible for this, allowing you to change the technical capabilities. The settings window may pop up before launching each game. To disable this function, uncheck the “Show this window at the beginning” checkbox. If necessary, you can open a window with advanced parameters in the game by pressing Ctrl+Shift+H.
To make changes to camera or motion controls, the corresponding settings open only when you first enter the game. Otherwise, at startup, an area appears at the bottom. The panel has several buttons in the lower right corner. To enter the configuration mode, you will need to click on the keyboard icon called “Open button configurator”. The user can then make advanced changes. Under some circumstances, the settings panel can be enabled on the BlueStacks home screen.
To enter the options menu from the main screen, click on the gear located in the upper right corner. The settings menu will open, where the following categories are highlighted:
- Screen.
- Engine.
- Quick hiding.
- Notifications.
- Settings.
- Backup and recovery.
- Update.
- About the product.
To improve or decrease performance, make changes to the screen and engine settings in the BlueStacks settings. The user is given a choice between DirectX and OpenGL. It depends on your needs and compatibility with the game. OpenGL uses the video card driver. Compared to DirectX, it will be more powerful. It is necessary to choose one of the engines if the game crashes or other problems arise when starting.
In the tab there is an item “Use advanced graphics engine”. This feature should be activated for demanding games. If the item indicates that it is in beta testing, then irregularities in operation are observed. Here you can adjust the number of processor cores required for use in the game. Additionally, you can change the amount of RAM to reserve in the emulator.
The number of cores must be selected based on the capabilities of the processor. Operation may be affected by the load level of applications and other processes. If the settings cannot be changed, then you should enter the BIOS and enable kernel virtualization. The amount of RAM varies, as does the number of processor cores. In this case, it is worth considering the number of brackets installed in a computer or laptop and their hardware size. The BlueStacks emulator limits the amount of available RAM and does not allow you to use more than 50% of the free part.
Useful tips
Configured BlueStacks allows you to use the emulator's functionality to its full potential. At the same time, the very concept of proper configuration is very vague. There are no ideal settings, since everything depends on the performance of the computer and the type of programs used.
Owners of weak PCs are recommended to set the minimum graphics settings, both in the emulator settings and in the game settings. Owners of powerful devices should not save computer resources. This will allow you to achieve excellent visual effects that help you evaluate the capabilities of games and applications.
Motion Setting
Many games require you to control a character. To do this, you need to configure the movement on the keyboard using the D-pad function from the button configurator. By default, the emulator suggests using the WASD keys. To change the settings, you will need to drag the D-pad function onto the gaming area and place it in a convenient location. To assign a movement button, click on one of the sides of the crosshair and click on the desired button. If the stick is small, you can enlarge it by pulling the lower corner on the right.
Setting up camera and mouse controls
On a computer or laptop, you need to control the view with a mouse. In BlueStacks 4, control settings are represented by a panel with icons. The user should select the crosshair from the “Camera, Aim, Shot” function to make changes to the parameters. To configure, drag the icon to implement eye movement.
In the same menu, you should know how to configure mouse control in the BlueStacks emulator. To do this, you need to move it so that the stick appears on the screen. To change the parameters, you should enter the properties of the crosshair. After this, you need to select the “Continuous drag zone from the center” item. Then you should stretch the zone across the screen. During this process, you do not need to touch other buttons. Crosshair sensitivity and speed can be changed using sliders. Now you should go into the properties of the stick and select “Touch”. The procedure is carried out for the left and right mouse buttons.
Controlling the camera on the keyboard in the BlueStacks emulator can be configured using both the mouse and keys. In this case, you need to enter the “Keyboard” tab. In the section, select “Merge WASD”. To pop up the stick, you need to press the W key. The cross should be moved to a convenient place so that it does not interfere with other buttons. For further settings, go to the properties of the stick and select “Touch”. Then calibration is carried out using Calibrate, and the checkmark at the top is pressed. This action will be repeated for each assigned button.
Set up PC for Bluestacks
In the BlueStacks program, we have discussed almost all the important settings for the performance of Android games. There is one parameter left that describes itself - Game Settings . In it you can also select ready-made resolutions using the example of the PUBG Mobile game. Accordingly: SD is the default resolution, HD 1080 P is for computers with an Nvidia GTX 660 or better video card, and QHD 2K is for powerful Nvidia GTX 1060 or more powerful video cards.
Image quality settings in Bluestacks
Now let's move on to setting up the PC. It consists of disabling unnecessary processes of games and programs. Which at this time can work in parallel with Bluestax.
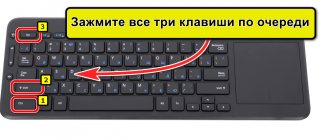
- To do this, you need to launch the task manager. Press together Ctrl + Shift + Esc ;
- Then select the button More details, if it is needed.
Click More
In the Processes tab, the first block contains running programs. They can be stopped by selecting the mouse and clicking at the bottom End task ;
Cancel a task in the task manager - Then select the tab Autoload. You also need to turn off unnecessary programs.
Disabling programs in Startup
This should be enough to speed up the Android games you want to play on your computer.
Setting up the accelerometer in racing
Touching or swiping on a computer is reassigned in the form of clicks and gestures with the mouse while holding the left button. Changing the settings for a game with an accelerometer is done after installing it. The emulator offers to change the controls yourself.
For games where the smartphone is the steering wheel, the computer defaults to keyboard buttons. Therefore, in the settings menu you can see the active areas of the screen. Some racing games introduce dynamic keys in these parts. To activate them, you will need to press these buttons. By default, this is done using the spacebar or arrow keys on your keyboard.
In-game accelerometer settings use the WASD buttons. In this case, W becomes the element of gas use, and S - the brake. If the game allows you to make turns with your smartphone, then on your computer you should enter the “Tilt” function. In the standard settings, the crosshairs indicate the buttons “left,” “up,” “right,” and “down.” If it is difficult to control the arrows, you can reassign them to convenient keys. The procedure is carried out in the same way as for other buttons. By entering the properties of the crosshair, you can change the angle and speed.
Problem #1: no connection or very slow Internet
Almost all modern programs require a mandatory network connection to communicate with the main server and check a licensed copy of the product. This applies to both purchased and free programs. The latter require a connection to load advertisements, which they use to get money for their hard work. And, of course, we should not forget about multiplayer games that cannot work without access to the network.
Therefore, before attempting to play your favorite MMO, be sure to check your Internet access through your browser or the appropriate settings on your PC.
The best option in this situation would be to run a Windows network scan for faults. If this does not give any results, check the functionality of the router. If you have a valid connection, but it is not present in the emulator, check your antivirus exceptions and, if necessary, add BlueStacks to those. It is likely that this is the source of the problem.
Slow Internet can also be a problem.
How to check Internet speed on a computer? There are many online services.
Yandex.Internetometer can check your Internet speed.
Check speed