Unless you customize your computer yourself, the default names for your computer and user account are usually not the long-term ones. You also get a default image from Windows, and you may or may not have a password set.
Either way, there are times when you need to change your account name, computer name, account picture, or computer password. In this article, I will show you how to complete all these tasks on Windows 7, Windows 8.1 and Windows 10.
Windows 10
In Windows 10 and 8.1, you can have a Microsoft account and/or a local computer account. The procedure for changing your picture or password is the same for any account type, but not for changing your account name. If you have a local account, you can change your username locally, but if you sign in using your Microsoft account, you must change it online.
Changing your username
To change the account name for a local account, click Start and type User Accounts . Now go ahead and click on the Change your account name website link.
To change your Microsoft account name, click Get started , then Settings and then click on Accounts .
Click on Manage my Microsoft account and it will load the Microsoft account web page in your browser. Log in and you can change your name there.
Change account image
To change your account picture in Windows 10, follow the steps above: Click on Start , Settings and then Accounts . If you scroll down just below your account name, you will see a section called Your Photo . Click on the View button to select another picture.
You can also click on the Camera Click the button and take a photo if you have a camera connected to your laptop or desktop. This procedure is the same for local accounts or Microsoft accounts.
Change account password
To change your password on Windows 10, you can do so from the same settings screen shown above. Go to Get started , click on Settings , click on Accounts and then click on Sign-in options on the left.
Click on the + Change password button to change your password. Even if you're signed in with a Microsoft account, you can change your password from Windows. If you have a PIN setting in Windows 10, you can change or remove it from this screen.
Change computer name
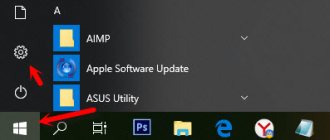
To change the computer name in Windows 10, you can click on Start , then Settings , then System and then click on About the bottom left.
Click on Rename computer Click the button and enter a new name for your computer. You will receive a message asking you to restart your computer for the name change to take effect.
How to change your Microsoft account name
If you log in using a Microsoft account, you must:
- Go to “Settings” using the Win+I combination, then go to the item of the same name.
- Click on the Microsoft account management button.
- The browser will open the Microsoft account sign-in page. Click the “Login” button.
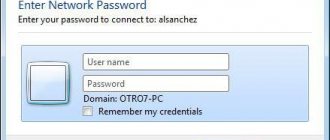
- Enter your email, phone number or Skype login. Click “Next”.
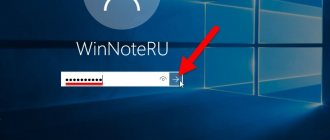
- Enter your password and click on the “Login” button.
- To log out or not – select an action option by clicking on the corresponding button.
- The main page will open.
- Click on your current name with the left mouse button.
- Select the “Change name” option.
- Add new data: last name and first name, enter the captcha (letters, numbers, symbols shown in the picture). Click "Save".
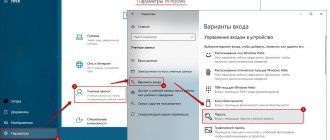
When loading the OS, the welcome screen may display the email that is used to log into your Microsoft account. To remove it, you need to select the “Login Options” tab in the “Settings” - “Accounts” section, scroll down and move the corresponding slider to the “Off” state. in the “Confidentiality” section.
Windows 8
Windows 8 is pretty much the same as Windows 10, but the procedure for accessing these screens is different because Windows 8 doesn't have a fully functional Start button.
While you can click Start and Settings in Windows 10, in Windows 8 you have to click Start, which will open the Start screen, and then start typing. PC Settings ,
Once in your PC settings, it's easy to change your username, password, and account picture. Click on Accounts and then Your Account, change your Microsoft account username and change your account picture .
If you are using a local account, you can change the account name just like Windows 10 through the Control Panel. Click on the Start button and type User Accounts . To change an account password or PIN in Windows 8, open PC Settings, click Accounts and then Sign-in options just like in Windows 10.
The only major difference between Windows 10 and 8 is when you want to change the computer name. In Windows 8, you open PC Settings then click on PC and devices and finally click on PC Information .
Renaming
For the system to work correctly, you will need to give the profile folder a different name. Moreover, you need to change the path to it. This is done quite simply:
- The user must click on the “Computer” icon, find “Local Disk C”, and then open the “Users” tab.
Open the “Users” tab
- Next, you need to select the folder with the account name and rename it. Here, most users do not know what to do, since there is no name change function.
- To avoid this problem, you will need to create another user that has administrator rights. You need to go to “Start”, find “Control Panel” there, and then go to the “Account Management” section. In this thematic block there is a tab “Adding and deleting accounts”, where the user needs to click on “Create a new account”. A very important nuance here is the type of account. You need to uncheck the “Normal access” box and place it next to “Administrator”.
Uncheck the box for “Normal access” and place it next to “Administrator”
- By clicking on “Create an account”, you need to return to the “Users” section. The Rename option should now appear. You need to click on this item.
Go to the “Users” section
Now you can close the window.
Changing path
If the user logs in under a new name, he will find that all settings have changed. Moreover, some of them stopped working. This problem can be solved simply, namely by changing the path to the files.
- You must press the “Win” and “R” keys simultaneously.
- In the “Run” window that appears, you will need to enter the “regedit” command.
In the “Run” window, write the command “regedit”
- The registry editor will open in front of the user
. On the left side you need to find the “HKEY_LOCAL_MACHINE” section, which is divided into many folders. There you will need to find “SOFTWARE - Microsoft”. The user should then click on the "Windows NT" folder and finally find and click on "ProfileList".We follow the indicated path
- This folder includes five smaller ones. You need to click on the one shown in the screenshot below, and then click on “ProfileImagePath”, which is displayed on the right side.
Click on “ProfileImagePath”
- To make changes, you need to double-click the mouse, enter the new path (the recently changed name), and then click “Ok”.
Enter the new path (recently changed name), and then click “OK”
This completes the process of changing the name. Despite the multi-step nature of this action, a Windows 7 user will be able to achieve the desired result and will not make mistakes.
Windows 7
Change account name, password and image
Windows 7 makes it really easy to change everything in one place. Just click on Start and enter User Accounts to bring up the Control Panel dialog box.
Here you can change your account password, account picture, and account name. Easily! To change the computer name in Windows 7, go to Control Panel and click System . You will see a Change settings link at the bottom next to Computer name .
This will bring up another dialog where you will need to click on the + Edit button. You can then enter a new name for the computer.
That's about it. These are simple tasks, but you'll probably forget about them since you won't have to do them very often. If you have any questions, feel free to leave a comment. Enjoy!
Change within the Windows system
- The first thing you need to do is find the “Start” button in the lower left corner, click on it and find “Computer” in the list. By right-clicking on this icon (right mouse button), you need to select “Management”.
Select “Management”
- The window will be divided into 3 columns, in this case you will need the very first one. There you need a “Local Users and Groups” section, which contains 2 folders. In this case, you need to click on “Users”. A list of profiles will open in the second column; you will need to select the one you need, right-click on it and enter the desired name. The final step is to press the Enter key.
Click on “Users”
Now you need to close this window and perform another algorithm of actions.
Change name when logging into OS
After completing these steps you will need:
- Find the “Start” menu and click “Control Panel” in the list.
Go to the “Start” menu and click “Control Panel”
- In the second column, the user will find the “User Accounts...” section, which they need to click on, and then click “Accounts”. Here the user needs to change the administrator name.
Click on “Accounts” and change the administrator name
- In the window that appears, you need to select “Change name...”.
Select “Change your name”
- After specifying the name of your choice, the final step is to click the “Rename” button.
It would seem that this is all, but there is one more stage that cannot be skipped.
Why change the name
Experienced specialists identify several common reasons for this circumstance:
- personal desire. For example, the user got tired of the standard account name and decided to change it. This can be done in the shortest possible time;
- hiding information. If someone already knows about the existing Microsoft account name, and the computer user wants to hide this information, then he can easily change the account name;
- reinstalling the operating system. After completing the task, all parameters of the seven have to be configured again. Changing your username is no exception;
- creating a second account. Often the Microsoft account name has to be changed during the process of creating an additional account;
- setting up your recording parameters. Sometimes, when changing certain items of a Microsoft account, a person also changes the username in order to completely erase information about the previous account.
Appearance of the desktop of the Windows seven operating system, suitable for home and local networks
Note! You can rename the PC username using a standard operating system tool, for example, through the registry editing window.
The main ways to carry out this procedure are presented in the following sections of the article.
Account name on OS Windows 7
Using the command line
The following sequential steps must be followed:
- Click “Start” and type “command line” in the search bar;
- In the list that appears, from the line of the same name, open the context menu and click “run as administrator”;
- Then click “yes”;
- Type the system administrator access code and click “yes” again;
- In the console that appears, type “wmic computersystem where name=”%computername%” call rename name=”new PC name””;
- Click on “Enter”;
- Ready! If the name is successfully changed, a console similar to that shown in the screenshot below should be displayed:
- Restart your computer.