Let's now look at the reasons for the appearance of FastBoot Mode on Android and how to exit it, or log in to perform operations on the device.
Please note that sometimes it is better to seek help from professionals at a service center in order to maintain the functionality of your gadget.
This article is suitable for all brands that produce phones on Android 11/10/9/8: Samsung, HTC, Lenovo, LG, Sony, ZTE, Huawei, Meizu, Fly, Alcatel, Xiaomi, Nokia and others. We are not responsible for your actions.
Attention! You can ask your question to a specialist at the end of the article.
Fastboot Mode on Android – what is this mode and why is it needed?
The functionality of any mobile device is not limited to the capabilities available during daily use - in addition to the main system, there are other software components that serve to debug applications, install various images and manage individual hardware parts of the gadget.
They are called recovery and fastboot. The first lives up to its name, including functionality needed in case of problems with any smartphone modules, and the second is mostly aimed at expanding the options for customizing the device, also supporting flashing and creating backups. Throughout the article, the fastboot mode in Android is discussed, but in fact it is OS-independent software stored in memory and prescribed by the manufacturer, and not by Google. In some sources, this feature is called an “engineering menu”, but in fact, fastboot and these are different concepts, since the transition to the latter is ensured by entering a USSD request into the call bar after loading Android, and acts as part of it.
In some cases, when using a phone, fastboot turns on instead of Android. In this case, you should not immediately consider the device a “brick”, since it is easy to get out of this state. Detailed instructions for opening and closing the utility, as well as using it, are presented along the material.
Purpose and causes
Fastboot is an effective tool for modifying and customizing the Android operating system, which is included in the software package for developers. Its main task is to install custom firmware. However, this bootloader is also used to install backups, various updates, format a memory card, etc.
Select Boot Mode and Fastboot Mode are not internal or external commands. They start earlier than the operating system itself (like the BIOS on Windows). This allows you to configure the system, as well as fix various problems even if Android has crashed.
Despite its versatility and usefulness, turning on Fastboot on its own may be a sign of a software failure. The main reasons for the appearance of this mode on Android include:
- Accidental activation by the user. This tool can be launched manually through the gadget menu.
- Android malfunction. If a smartphone or tablet cannot boot in normal mode, it automatically switches to Fastboot Mode.
- Unsuccessful firmware via Recovery Mode.
- Manually deleting an executable file from the system directory after unlocking root access.
- Exposure to malware. If you have superuser rights on the device, some viruses can block or even delete system files, which leads to the crash of the operating system.
What features does Fastboot mode provide?
As in the case of recovery, if you are satisfied with the current operation of the device, it is better not to “mess” with this section, but if you just look at its functions, nothing bad will happen. Depending on the brand of the device, its welcome screen is represented by a panel for selecting the boot type (recovery, fastboot or normal boot) or a picture of an open Android, instead of which on Xiaomi phones a branded mascot is presented.
At the bottom of the screen – data about the firmware, processor, RAM, storage; the product's name; battery life level, its status; serial number. By clicking on the Start button, having previously established a USB connection, you can control your smartphone using a computer. If the touchscreen does not work, you should use the sound swing and the standby button.
Disadvantages of Fastboot
The mode discussed in the article is inferior in terms of the recovery functionality provided, and especially its custom versions, the most popular among which is TWRP, which receives regular updates and is discussed in more detail here . The most “strong” side of fastboot is the installation of various patches, updates and firmware, but it cannot be used to obtain detailed data on the operation of any phone components.
The key problem is the inability to work without connecting to a PC. The connection must be wired - Wi-Fi, NFC and Bluetooth are not supported.
What to do in case of a system failure?
If the transition in “Normal Boot” is blocked or only “Fastboot Mode” is displayed on the screen, and there is no summary of parameters, then the device system has failed for some reason. Let's look at ways to fix it.
System Restore
To return the gadget to working condition, you can always perform a system restore. During system recovery, all data contained on the device will be formatted, so it is better to protect yourself and first remove the memory card from the device.
We perform the following steps:
- Let's go into recovery mode. This is done by holding the Power key and rocking the volume down or up. This combination depends on the gadget model.
- In the menu that appears, select “wipe data/factory reset” to roll back the settings.
Then you need to wait until the settings are rolled back. This process takes a few minutes.
The device will reboot, after which you can use it for your own purposes. Bookmarks in the browser and installed applications will need to be restored again, as the device returns to factory settings.
How to enter Fastboot mode
Power + Volume Down
The title of this section of the text immediately makes it clear what needs to be done to achieve the goal:
- Turn off the device;
- Press the volume down and power buttons, wait 7-10 seconds, after which you can remove your fingers.
This method works on products from ZTE, Samsung, teXet, LG, HTC. At this point lies a common reason for accidentally switching to fastboot - accidentally holding down two buttons at the same time.
Power + Volume Up
The method is presented in a similar way to the previous one, however, instead of decreasing the sound, you need to use the button to increase it. It is common on ASUS brand devices, where if successful, a message like “ CSC Mode ” will appear on the screen.
Volume Boost + USB Connection
This option is most often found on flagship SONY models, and its key disadvantage is the need to have some device that can be connected to the phone in this way. Operation through adapters is also supported, which is a slight compensation for the inconvenience of the method, which is important if you only have “full-size” USB gadgets.
Power + volume up and down
It may seem surprising, but Motorola, which became famous during the era of the first mobile phones, continues to hold its position in this market today. Its devices are not inferior to modern models despite the long history of the brand and work just as well on Android.
To use it, you will need to turn off the device, hold down all the main buttons and wait for the corresponding menu to appear. Sometimes a standard method is also available.
Via computer
The sequence of actions given below is relevant for all devices and only works when USB debugging is enabled, which is done as follows:
- Open the device settings application;
- Scroll down the list of items, select “System”;
- Tap “About phone”;
- Click on “Build number” 7 times. The number of remaining steps is indicated by a counter, presented in the form of a toast notification;
- Place your finger on the scanner or enter a password if any method of protecting the device is installed;
- When you see the message “You have become a developer ”, go to the initial page of the control panel, and from there to the new section;
- move the toggle switch on top to the active position, and then do the same in the “USB Debugging” column.
Next, you will need to install the ADB Run on your computer. It is distributed free of charge and is compatible with all modern versions of Windows, so there should be no problems at this stage. Establish a connection between your phone and PC using a data cable, which can also serve as a charger, but in reverse! Further actions are as simple as possible - moving between categories using numbers, do the following:
- Turn off the gadget;
- Go to the Reboot tab (4);
- Press "2" to boot into fastboot.
Answers to popular questions
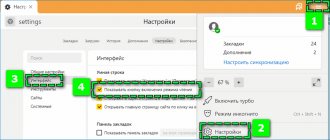
Now you know, to close the Fastboot menu on Meizu smartphones you don’t need any special skills, just read our article. This system mode for working directly with the internal directories of the device can be turned on accidentally when you activate the power and volume down buttons, or in the event of serious problems. But using this mode you can fix the problems that caused it .
Need help solving an important problem? Then ask any question about Meizu and we will answer it!
Hello. Some users of devices with the Android operating system sometimes encounter a “Fastboot Mode” notification after the next reboot of the smartphone. The most unpleasant thing is that deactivating the mode is not so easy, and if you simply turn the device off and on again, there will be no positive result. Let's figure out what Fastboot Mode is on Android, what it's for, and how to exit this “shell” correctly.
How to exit Fastboot mode
Removing the battery
Despite the proliferation of devices with the lid always closed, some companies do not abandon the production of smartphones “classically”, which in this case is an advantage - you can simply remove the battery or lift it from the contact side. The method is completely safe if you do not abuse it. Be sure to insert the battery with the correct polarity, following the precautions indicated on the battery case.
Holding the lock button
Just hold down the power button on the side and do not release it until the device reboots. Usually it takes up to 30 seconds to hold your finger, and as soon as it starts to restart, you can stop holding it.
reboot command
Using your PC, issue the prompt “ fastboot reboot ” (without quotes). If you use ADB Run, then for this action go to the Reboot section (4), and then enter “3”, as in the case of enabling.
Disabling USB Debugging
You may also need to disable USB debugging - this is important for security purposes, since if it is in active mode, anyone who gains access to the gadget can bypass the security methods you have provided by removing the pattern or other protection options . To do this you will need to follow the following steps:
- Go to device settings;
- Select the “Applications” section, then the tab of the same name;
- In the list of programs, find “Settings”;
- Select “Memory”;
- Click on “Reset”, then confirm your intentions in the modal window that appears. If you don't know how to reset your phone to factory settings , read our article;
- Open the Developer Options section at the bottom of the Control Panel home page, disable it entirely, or uncheck USB debugging only.
Minimal ADB and Fastboot
The second method is even simpler. Xda Developers forum you can download the Minimal ADB and Fastboot with all the necessary files. To do this, go to the page https://forum.xda-developers.com/showthread.php?t=2317790 and, by clicking on the link, download the installation exe file.
We launch it and follow the instructions.
We installed Minimal ADB and Fastboot in the root of the same drive C.
Basically, that's all. All that remains is to check the presence of files.
Basic Fastboot Mode Commands
Despite the fact that fastboot is often presented in English, the process of using it is as simple as possible. The following commands are the most common:
- Flash – installation of images, in which the old firmware files are replaced with new components, and downloaded applications are deleted and can be downloaded back through the Play Market;
- Erase – deleting certain directories or all information located in the internal storage;
- Format – formatting of integrated or external media, as well as flash drives, hard drives, and solid-state drives connected via Micro-USB or USB Type C;
- Reboot – reboots the smartphone to a “normal” state.
Sometimes there is a problem in the form of the mode being available only in Chinese. It often applies to budget models and can be solved extremely simply - just find the button responsible for switching localization, or use machine translators. This “trend” is almost never found on phones in the mid- and high-price categories, also leaving the segment of inexpensive gadgets.
Basic Fastboot mode commands
In the future, to work with the device, you will need to connect it via USB to a PC on which the utility of the same name with the mode is installed. Its interface is presented in the form of a terminal and is available in English, but no special knowledge of the language is required - basic words are used that are easily translated into Google. It can be launched via PowerShell using the CD command to specify the file path.
Getting a list of gadgets
To make sure the connection is established, enter fastboot devices . The request will display a list of all gadgets that you can work with at the moment. The plural is used in the sentence for a reason - with the help of the utility you can control several devices at the same time, without forgetting to switch between them.
Reboot
fastboot reboot command mentioned above is used to turn on Android, but you can add fastboot or recovery , which will lead to a transition to the corresponding modes.
Unlocking the bootloader
First of all, you should check the current status of the loader by sending a request to fastboot oem device-info. The actions in this case depend on the year of manufacture of the smartphone - in the case of older models, the fastboot oem unlock command will do, and with new ones, fastboot flashing unlock. If you are very lucky, you should complete this - the bootloader will become available, but if you are unlucky, you will need to enter the code.
The policy of some manufacturing companies is to prohibit self-installation of important software done in this way. These include HUAWEI, which has not provided passwords for such requests since July 2022. If the company’s representatives do not refuse to provide access to this procedure, this is again a major stroke of luck. Otherwise, the chance of which is considerable, you will need a paid HCU Client program or, if you want to save money, carry out actions using Root Manager - open the directory /dev/block/platform/mtk-msdc.0/by-name/ (may differ significantly ), where in the boot file there is code among the mass of data.
There is an option to work with ADB Shell, where you need to open a document and find the desired fragment using regular expressions. It will be displayed in the console if the script is configured in the most correct way, which lies on the shoulders of its developers. In this case, you will need to allow actions with the device via USB.
Bootloader lock
If you want to undo the actions performed at the previous stage, use the fastboot oem lock or fastboot flashing lock , depending on the newness of the device. The system may prompt you to enter a password; in this case, instead of “lock”, you should, without specifying quotes, write “relock” and, after this word, the password.
Recovery fastboot normal what to choose
Hidden ADB commands
adb -d The command is sent only to a device connected via USB. Attention: Will generate an error if more than one device is connected.
adb -e The command is sent to the device in the emulator. Attention: Will throw an error if more than one emulator is connected.
adb -s The command is sent to the device with the specified serial number:
adb -p The command is sent to the device with the specified name: If the -p switch is not specified, the value of the ANDROID_PRODUCT_OUT variable is used.
adb devices List of all connected devices.
adb connect [: ] Connect to the android host via TCP/IP protocol via port 5555 (by default, if not specified).
adb disconnect [ [: ]] Disconnect from an android connected via TCP/IP port 5555 (by default, if not specified). If no options are specified, disconnect from all active connections.
adb push Copy file/folder PC->device.
adb pull [ ] Copy file/folder device->PC.
adb sync [ ] Copy PC->device only new files. Options: -l Don't copy, just create a list.
adb shell Launch a simplified unix shell. Examples of using
adb emu Send a command to the emulator console
adb install [-l] [-r] [-s] Send the application to the device and install it. Example: adb install c:/adb/app/autostarts.apk Install the autostarts.apk file located in the /adb/app/ folder on the drive with: Keys: -l Application blocking -r Reinstall the application, saving the data -s Install the application to memory card
adb uninstall [-k] Uninstalls an application from the device. Keys: -k Do not delete saved application and user data.
adb wait-for-device Wait for the device to connect.
adb start-server Start the service/daemon.
adb kill-server Stop the service/daemon.
adb get-state Get status: offline Off. bootloader In boot mode. device In operating mode.
adb get-serialno Get serial number.
adb status-window Continuous status polling.
adb remount Remount for recording. Required for scripts that change data to.
adb reboot bootloader Reboot into bootloader mode.
adb reboot recovery Reboot into recovery mode.
adb root Restart the daemon as root
adb usb Restart the USB listening daemon.
adb tcpip Restart the daemon listening on the TCP port.
adb ppp [options] Start the service via USB. Note: you should not automatically start a PPP connection. Refers to the tty for PPP stream. Eg. dev:/dev/omap_csmi_tty1 Parameters: defaultroute debug dump local notty usepeerdns
This feature is disabled on released devices because USB support has been disabled in the bootloader. To use fastboot fully, you must have an engineering SPL, or an SPL with the Security flag disabled (S-OFF).
SPL is the second software loader. In combination with IPL, they make up the device bootloader. In addition to booting Android initially, the bootloader also performs various diagnostic functions. One of these functions is to manage data in the device's internal flash memory. Depending on the installed SPL bootloader, the user will be able to flash signed NBH files, NAND flash images and much more. Note that SPL is installed and running, regardless of Android running on top of it. IPL is a bootstrap program. Initial loading/initialization of equipment. About the same as the computer BIOS. You can check if fastboot is available to us by rebooting HTC into the adb reboot bootloader. On the top line, you should see S-OFF (Security Off). If you see S-ON, or you see a background with four rainbow colors, SPL does not support fastboot. You will need to install SPL compatible fastboot.
Attention! When connecting the HTC in bootloader mode, you need to install the Android 1.0 drivers again (I don’t know why it appears this way in the device manager). The procedure is almost the same as described above. The same drivers are installed, only the line selected is not ADB, but FASTBOOT.
fastboot devices List of connected devices in fastboot mode. fastboot flash Flashes an .img file to the device partition.
fastboot erase Erase partition. Sections: boot, recovery, system, userdata, radio Example: fastboot erase userdata Erase user data.
fastboot update Firmware from file file_name.zip
fastboot flashall Firmware boot + recovery + system.
fastboot getvar Show bootloader variables. Example: fastboot getvar version-bootloader Get the bootloader version.
fastboot boot [ ] Download and load the kernel.
fastboot flash:raw boot [ ] Create a bootimage and flash it.
fastboot devices Show a list of connected devices.
fastboot continue Continue with autoboot.
fastboot reboot Reboot the device.
f astboot reboot-bootloader Reboot the device into bootloader mode. You can use the following switches before the fastboot commands: -w erase user data and cache -s Specify the device serial number. -p
Specify the device name. -c Override kernel commandline. -i Specify manually USB vendor id. -b Manually specify the kernel base address. -n
Specify nand page size. default is 2048.
The logcat command can be used from the development machine $ adb logcat or from a remote shell # logcat Each log message in Android has a tag and priority Tag is a string indicating the system component from which the message was received (for example: View for the view system) Priority - has one of the following values (in order from lowest to highest): V – Verbose (Lowest priority). D – Debug I – Info W – Warning E – Error F – Fatal S – Silent (Highest priority, at which nothing is displayed).
You can get a list of tags used in the system, along with their priorities, by running logcat. The first two columns of each message displayed will contain / . Example of a message output from logcat: I/ActivityManager( 585): Starting activity: Intent
To reduce the log output to an acceptable level, you need to use filter expressions. Filter expressions allow you to specify the required combinations and to the system; the system does not display other messages. Filter expressions have the following format: . where indicates the desired tag, indicates the minimum priority level for the selected tag. Messages with the selected tag and priority at or above the specified level are written to the log. You can use any number of : pairs in one filter expression. To separate pairs: use a space.
How to install firmware via Fastboot
At this point, the main use of the fastboot is revealed, which is as simple and understandable as possible thanks to the following instructions intended for beginners. To avoid rendering your phone inoperative, charge it to at least 30%. There is no need to worry if the gadget becomes a “brick”, since it is possible to remove the device from such a situation, but not without difficulties. After making sure that the devices are correctly connected to each other, follow the following instructions, assuming that the loader is already unlocked:
- Write adb reboot bootloader to switch mode;
- Clean up partitions yourself to avoid file conflicts using the command erase, after which you need to enter separated by a space system. Click Enter, then do the same with the directories userdata radio, cache, boot, recovery;
- Move the firmware to the utility folder. If they are presented in several files, enter the commands one by one in accordance with the functionality of each: after the word flash, indicate system and the location of the image where it is located. By analogy, perform these steps with other directories deleted in the previous step. You can make this procedure easier by entering flash-all, having previously created a batch script with this name in the folder with IMG files;
- When posting the firmware in archive format, enter update archive_ name. zip , replacing the name with the real one.
Never install incompatible firmware on your smartphone. You can talk about the availability of certain images for a specific model in the comments under this post or pay attention to the device discussion thread on the w3bsit3-dns.com website.
General information
Fastboot Mode is not part of any specific operating system, but it is often used in the Android SDK environment, since without it it will not be possible to establish a full connection between the gadget and the computer, and at the same time, not only data transfer occurs, but also device configuration. This mode starts before the operating system loads, so you can use it even if Android is not yet installed on your smartphone. It is thanks to this that the fastboot can be used to flash the device, as well as carry out certain interventions in its operation at the software level.
Important! If something goes wrong during operations in fastboot mode, the smartphone may freeze without the ability to turn it on or off normally, and such a freeze cannot be easily eliminated.
Problems and solutions
"Insufficient rights to perform the operation"
The occurrence of this error indicates that the program on the PC is not running as an administrator. It can be eliminated by right-clicking on the application name and selecting the appropriate item, the absence of which indicates the need to log into another account, which may require entering its access code.
When launching applications through “Run...”, opened with the key combination Win+R , instead of “OK” you should press Ctrl+Shift+Enter .
Switching to recovery instead of fastboot
Most likely, you used the wrong key combination on the side panel of your smartphone. Experiment on your own or ask for help from the manufacturer using the officially provided contact information, or to site users in the comments under the post. You may need to hold down the buttons on the bottom side - those that are used to go back, open the desktop, and display a list of open programs.