09/27/2013 mobile devices | files
In general, I don’t know if this article can be useful to anyone, since transferring files to a phone is usually no problem. Nevertheless, I undertake to write about this; in the course of the article I will talk about the following things:
- Transfer files wired via USB. Why are files not transferred via USB to my phone in Windows XP (for some models).
- How to transfer files over Wi-Fi (two methods).
- Transfer files to your phone via Bluetooth.
- Sync files using cloud storage.
In general, the outline of the article has been outlined, let’s get started. Read more interesting articles about Android and the secrets of its use here.
Method 1: Transferring photos via USB cable
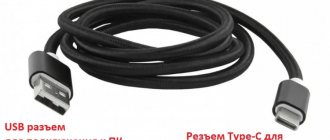
Cable for connecting your phone to a PC
You can not only charge your phone from a computer or laptop. When connected, the appropriate mode for transferring photos or other files is set.
The algorithm is as follows:
- Connect your smartphone to your computer using a USB cable.
- In the connection settings, instead of the “Charging” item, select “Data transfer”.
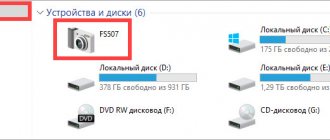
menu options in different smartphones - The computer should display the device as an external drive. It is located in Explorer; connected media are displayed on the left side of the window.
- You can work with photos using standard commands: copy, select, paste and delete. Actions are performed using the mouse or hotkeys.
- When the process is completed, you need to close the explorer and disconnect the phone.
If you are using an Andriod-based phone and a computer using macOS, then you need to install the “Android File Transfer” application on the latter, through which the file system of the smartphone will be visible. The advantage of this method is that while the photos are being transferred, the phone is charging. Connecting iPhone to Windows requires iTunes installed. The data transfer speed depends on the USB standard used.
Reference! If a memory card is installed in the phone, the computer will display two devices.
what steps should be taken in this direction?
Have you been trying to figure out how to send photos from your computer to your phone? – Today, a similar problem can worry people very often, since downloading the necessary files to a PC or laptop is an important task. Probably, you recently returned from vacation and took a bunch of photos on your phone? – Do you need to show all this to your relatives or friends? – Today’s material on the site will help you understand the problem of data transfer, since thousands of portal readers have already been able to solve problems with it. In general, transfer will require five methods, which will be discussed. All the subscriber will need is to figure out exactly what steps should be taken in order to finally transfer the files to a PC or laptop, since there will be plenty to choose from.
In general, the problem of how to send a photo from a computer to a phone is solved in much the same way as vice versa: you just need to have wired or wireless communication systems. Sometimes our good old Internet works too. Today it is supposed to work with wired options, since the speed will be much higher through them. One way or another, let's understand this and solve the issues.
Receiving photos on your phone
Sending data from a mobile phone to a laptop or other computer: 5 ways to transfer photos to a PC
Need to understand how sending photos to your phone from your computer works? – About the same as quite the opposite, since in order to establish a communication connection, you will need to put certain devices into operation. The point is that today the use of one or another option will be correct (we are talking about the data that is described below in the article).
Here, for example, is what can help when transferring data:
- Using a USD Cable
- Using a special cord that comes with your mobile phone
- Using Card Reader
- Using Bluetooth
- Using email
Sending photos from your computer to your phone via a USB cable will be the most convenient option along with a card reader, since both of these systems have a fairly high operating speed.
IMPORTANT: We remind you that sending a photo from a computer to a phone via email is a method that was created for those who do not have any other format options left at all. First, you need to understand what exactly you will need to do: for example, to solve this issue, it would be a good idea to turn on the Internet, select photos, then upload them to your email account and then access it from your mobile phone. You can download photos quickly if your speed allows. But all the same, these are unnecessary problems. It's best to use wired options. Remember that the relevance of the material is high, so you can use it for a very long time. To any reader.
Method 2: How to transfer photos from computer to phone via Bluetooth
Most laptops have a Bluetooth module, which is often used to connect peripheral devices. Mobile phones are also equipped with this module. For PC you will need a Bluetooth adapter. To transfer photos from your laptop to your smartphone, do the following:
- Blutooth must be enabled on your computer and phone. The latter must be visible to other devices.
- Right-clicking on the photo will bring up an additional menu where there is a “Send” item. When you hover over it, a list of methods will appear, including Bluetooth.
- A window will open showing the found devices. Among them you will need to choose your phone.
- A pop-up window will appear on the screen of your mobile device in which you need to confirm acceptance of the photo.
- You must wait until the picture is transferred. It will take some time. The connection should not be interrupted during the download process.
- The photo will be among the files in the download folder unless a different path has been set in the settings.
Healthy! If you often need to transfer data via Bluetooth, it is useful to pair the devices.
This method is also suitable for transferring files from your phone to your computer. In this case, the photo is selected from the phone's memory. The “Share” option is located in the menu, the call of which depends on the version of the system and shell.
Minus! The data transfer speed over this connection is low.
Using the Internet
All photos can be uploaded to a cloud service, instant messengers or social network. Then download them to your PC at any convenient time, even without having your phone at hand.
Method 1: via the cloud
Let's consider two popular repositories: from Google and Yandex. They provide free downloads of files up to 10 GB, which is more than enough for our purposes.
Google Drive
1. Install Google Drive on your phone from the Google Play store.
2. Enter your Google account username and password.
3. After successful authorization, click on the “+” icon in the main menu.
4. Select "Download".
5. Go to the gallery, mark the photos and click “Open”.
The photos will be downloaded from the phone to the disk.
6. On your computer, go to the official website drive.google.com
Log in to the account through which you uploaded the photos on your smartphone.
7. Select the required data with the mouse and hold down the Ctrl key, right-click and select “Download”.
8. The disk will create an archive with the selected photos and download it to the PC in the “Downloads” folder.
Yandex.Disk
1. Install the Yandex.Disk application from the Google Play store on your phone.
2. Log in with your account, that is, enter your Yandex mail username and password.
3. Click on the “+” icon to add files.
4. Select “Picture from Gallery”.
5. Select photos to upload and click “Select”.
All selected files will be downloaded.
6. On your computer, go to the official website disk.yandex.ru and log in using the same data (mail login/password).
7. Select the pictures and click on the “Download” button.
The pictures will be packed into an archive, which will be transferred to the “Downloads” folder.
Method 2: via messenger
Modern instant messengers have both mobile and desktop versions. You can use this function to send photos to yourself and download them to your PC.
Telegram
Add your number to your phone book. Your profile will be automatically added to the “Your contacts” field, click on it.
Or simply open the Favorites folder in the Chats section.
Click on the "paperclip" icon to attach the data.
Select images from the gallery and send them to yourself.
Now install the program on your computer from the official website desktop.telegram.org and download the pictures through it.
Viber
Add your number to your phone book and open a dialogue with yourself in chats.
Or simply select the “My Notes” folder in chats.
Click on the camera icon.
Tag pictures from your gallery and submit them.
Install the desktop version on your PC - you can download it from the official website viber.com. And through it save the images to your computer.
Method 3: via social network
Any social network has the ability to create an album. You can use this function to move pictures to a new album and then download them to your PC.
To avoid errors during downloading, I recommend using the original application (not the web version).
I’ll show you how this is done on the VKontakte social network.
Open the Photos section of the app.
Create a new album using the “+” button.
Click the "Add Photos" button and upload them from the gallery.
On your computer, go to vk.com and log in. Go to the "Photos" section.
Open an image in an album. Right-click on it, select “Save Picture As” and save it in the desired folder.
Method 4: via email
This method is suitable if you need to transfer a small number of pictures.
All you need to do is go to the application to send emails. You can use the built-in Gmail.
Click on the "+" icon to create a new message.
Enter your email address. Click on the "paperclip" icon to attach files.
Select images.
Click on the "envelope" icon to send.
Open your mailbox on your computer and download the files.
Method 3: You can upload photos via cloud storage
Clouds allow you to save photos off-device. The advantage of this approach is the safety and accessibility of files. Using the service account on which the data is located, you can access it from any device. List of data storage services:
- Google Drive;
- Yandex Disk;
- Mail.ru
- Dropbox;
- OneDrive.
Important! The method requires an Internet connection. Both devices will use third-party servers to share photos.
Such services often provide some space for free. Android users have Google Drive among the pre-installed applications, in which you can manage 15 gigabytes without a subscription. You can access the storage from your computer through any browser; just log into your Google account and go to “drive.google.com”.
Example of downloading a file from the mail.ru cloud
Adding photos from your phone is quite simple: launch the application and click the “Add” button. Then select the images you want and confirm your selection with the “Upload” button. You can download the file to your computer using the website, where by right-clicking on the photo, an additional menu is called up. Clicking the “Download” button will begin the download, which then depends on the settings of the browser used.
Using a cloud drive
The most popular and frequently used service for iPhone is iCloud. The information that is uploaded there is stored on remote Apple servers. Each user gets 5 GB of space for free.
Alternative options – other services:
- DropBoX;
- Cloud Mail;
- Yandex.Disk;
- Google drive, etc.
If you use these services for free, you need to take into account restrictions on the amount of information, as well as the limits for downloading one file (usually no more than 2 GB).
5/5 — (4 votes)
Method 4: How to transfer photos over Wi-Fi
To use a WiFi connection, you will need to install one of the additional applications. The Play Store offers several suitable options: WiFi File Transfer, FTP Server, Easy Share, SHAREit, SuperBeam and many others.
They differ in functions and features of use, but since there are a large number of programs, even the most demanding users will be able to choose the right one. In the first file sharing app listed, follow these steps:
- Activate WiFi and connect to an existing network.
- Go to the application and click the “Start” button.
- On your computer, in your browser, go to the address specified in the application.
- To transfer files, you need to select the appropriate item on the right side of the window.
- To upload photos, select the ones you need and click the “Upload” button.
To upload photos, it is not necessary to use a local network; you can use the WiFi Direct function, which will create a connection directly between devices. This can be useful if you don't have a modem at hand. In this case, the program must be installed on both devices participating in the photo exchange. An example of such a program is SHAREit.
An easy way to print a document
The easiest option is to print the received document immediately after receiving it. To do this, however, you need to have your own printer at home. In this case, it doesn’t matter whether it is in color or black and white. It does not matter. The main thing is that all letters and important data on the ticket are clearly visible. If you have such equipment, you can easily print an electronic ticket yourself.
To do this, click on the corresponding icon in the electronic document window or select the word “Print” or “Send for printing” from the menu. After the connection between the PC and the printer occurs, the latter will grab a blank piece of paper and transfer all the information from the electronic version of the ticket onto it. With this document you can hit the road. But how to print an electronic ticket if it is not possible to do it at home?
Method 5: How to transfer photos by mail
When creating a message, you can attach a file to it. This is most often used to send documents, but you can also send a photo.
- You must log into your mail account in the application or on the website through a browser.
- When creating a new message, use the “Attach” button. After clicking on it, an explorer will open through the device’s file system, where you need to select a file.
- The letter must be saved in drafts or sent, in both cases it will be available.
- All you have to do is log into your account from another device, open the letter and download the file.
How to attach a file to a letter
This method has disadvantages: there is a limit on the number of files in a letter, and also on the size of one attached object. In addition to standard email, many instant messengers allow you to send images. When creating a message, you should send a photo instead of text.
Reference! It is possible to send archives by mail, but before doing this you need to make sure that your phone can work with them.
What video formats does an Android smartphone support?
Video players and codecs originally installed on the Android system can only play basic file extensions, such as 3gp, mp4, wmv. The list of formats can be expanded by installing third-party software. Then you will be able to view recordings with the format mkv, divx, mov, flv, rmvb and others.
Questions may arise during the operation.
Michael
For some time he worked in the MTS communication salon. I am well versed in technology, interested in the field of mobile companies and applications
Ask a Question
Question to the expert
What to do if the file and the gadget player are incompatible?
You should download any software that allows you to expand the list of recognized formats. After this, you can start the video again.
How to add the necessary codecs to your phone?
The player on the device may not show the recording even if the formats match. This happens due to codecs. They must be downloaded from a third-party portal and installed on your smartphone.
Why does the recording slow down when playing?
This is due to a weak processor that does not support all resolutions, for example, it will not play a file well in HD or 3D. It's better to convert the video to another format.
These are the main issues related to video recording formats. Usually there are no other problems with media content.
4.8/5 — (25 votes)
Author
Michael
For some time he worked in the MTS communication salon. I am well versed in technology, interested in the field of mobile companies and applications
Method 6: How to reset photos via Airdroid app
For computers there is a desktop program and an online client. You need to install the Airdroid application on your smartphone. The desktop version is better for transferring files because it can be used over a local network. The program runs on Windows or macOS.
Attention! If file transfer does not occur within a local network, then there are restrictions on both the total amount of data and the size of an individual photo.
The user must create an account in the service; to do this, they will need an email address and a strong password. For people who have Google or Facebook, login is available using authorization on one of these services. In the program window you can see a simulated desktop, where each icon provides access to different functions. The image style is similar to that used by Android, so the program will be easy to use.
To view the file system, click on the “Files” shortcut. The program is similar to Explorer, with the difference that there are “Upload” and “Download” buttons on the top panel. These buttons are what you will need to exchange files with your computer. In addition to transferring files, you can:
- send SMS messages;
- manage correspondence in instant messengers;
- use remote access to the camera or screen;
- view notifications.
The service has a basic and premium version. In the paid version, some restrictions are removed and even more options are available. The user pays for a month or a year of using the premium version, after which he can use the full version of the program.
Electronic ticket for Russian Railways train
A detailed description of such a ticket and instructions for purchasing and printing will help answer all the basic questions of a person who has decided to use such a ticket for the first time.
What is it and what does it look like?
An electronic ticket is a full-fledged train ticket, only purchased via the Internet.
After confirmation of payment, it can be saved in .pdf format and printed from the website on A4 sheet.
It contains all the basic information , which is also indicated on the paper form of the ticket purchased through the ticket office:
- last name, first name and patronymic of the passenger;
- departure and arrival stations
- train number;
- departure and arrival times
- price ;
- availability of bed linen included in the price, or lack thereof.
A unique number and barcode are also indicated, by which the conductor can read information about the passenger without checking the list. It guarantees that the ticket is not counterfeit.
Currently, Crimea has become a very popular holiday destination. Read here about the features of traveling to the peninsula by train.
Disadvantages of a paper document
Issuing a paper ticket has some disadvantages, but only for those who are “friendly” with the global network and modern technologies. An electronic ticket, in turn, has a lot of positive aspects.
Disadvantages of a paper ticket:
- may be lost ;
- the purchase requires physical presence at the place where tickets are sold;
- during the purchase, it may take a lot of time until the passenger decides on the carriage and seat, because he does not see the plan in front of him;
- if you buy a paper ticket from Russian Railways partners, a commission ;
- You can also return your ticket only on the spot by contacting the ticket office.
Advantages of electronic:
- stored on the Russian Railways website in your personal account , so you can always print it out again;
- does not require physical presence when purchasing, it is enough to have access to the Internet and a bank card;
- purchased on the website without commission ;
- On almost all trains, when purchasing an electronic ticket, electronic registration ;
- when issuing a ticket, a person can independently examine all the available seats on the train, look at the class of the carriage, and choose the most suitable berth;
- If you cancel your trip, you can return your ticket
Method 7: How to send a picture to a computer via a card reader
For users who use memory cards to store photos, there is another method available. Laptops usually have a built-in SD reader slot. It is not available on your computer; you can use an adapter that connects to a USB port like a flash drive.
Card reader connected to PC
The sequence of actions that should be performed to exchange files:
- Remove the card from your mobile phone.
- Using an adapter or built-in card reader, connect it to the device.
- Using Explorer, get to the pictures, copy or move them to your hard drive.
- Unplug and disconnect the memory card from the computer.
- Insert it back into the phone.
Important! Before removing the card, you need to turn off the phone or disable the media in the settings.
Sending pictures through the telecom operator’s website
It is very convenient to send photos for free using the website of the telephone network operator, if this feature is supported by them. The sequence of actions may look something like this:
- log in to the official website of your operator;
- select the appropriate section;
- compose text and insert a picture;
- indicate the number of the subscriber to whom the message is intended (yours, relatives, friends);
- enter the verification code to send MMS;
- Click "Ok".
This method is very convenient for sending holiday greetings to relatives, friends, colleagues or acquaintances. At the same time, the fact that sending such an MMS message is quite convenient is very attractive.
Method 8: How to download photos to your phone using special applications
Manufacturers strive to differentiate their devices from others. Apple develops software for all its devices in such a way that they can create an ecosystem. The user receives a program through which you can fully control the phone, including exchanging photos.
iTunes or AirDrop are used to synchronize Apple products. Xiaomi has a similar solution, it is called Mi PC Suite. Samsung phones can work with any computer running Windows or macOS through the proprietary Kies application. Without being tied to the manufacturer, similar functions can be found in the previously mentioned AirDroid and SHAREit.
Finding a place where you can print your ticket
If you do not have a printer, you can print your virtual ticket in some other place. For example, this could be an Internet cafe, a photo studio, bookstores, stationery sales outlets, but with equipment for scanning and printing information, documentation from a computer, or a storage device. You can also print your ticket at your place of work if you have access to printing devices.
Is it possible to print a document at the cash register?
A virtual ticket is so called because it exists in electronic form. If you wish, you can print it. But usually you don’t even need to do this. Upon arrival at the airport or train station, it is enough to show only your passport.
If for some reason you decide to print the paid document at the checkout, this will automatically cancel the virtual registration. In fact, you will receive the same paper ticket that you would have received if you applied to the ticket office on your first visit. Therefore, there is no point in performing this procedure.
We emphasize once again that the electronic version of the ticket does not need to be exchanged for a paper document.
Is it necessary to print out the ticket?
A virtual ticket differs from a regular ticket in that it is not issued on letterhead. This is an electronic record that is in the airline’s database.
Ideally, you don't have to print it out. It is enough to show your passport at the airport. However, most people still convert the virtual version to a paper version. They do this for insurance purposes and for personal peace of mind.
Therefore, if you wish, you can print an electronic ticket. Where to do this, everyone decides for themselves. Whether this will happen at home, at work, in a photo studio, Internet cafe or any other place depends on your wishes and capabilities.
How to print a ticket using the order number?
There is another simple option to obtain a paper version of a virtual document. To do this, you need to go to the “Personal Account” of the site where you purchased the ticket. Confirmation of ticket booking, payment and registration come in a single receipt. As a rule, you can find it in “notifications” or “inbox”.
The receipt usually contains the order number. For greater convenience, these numbers are an active link. By clicking on them, you will be taken to an electronic form of the ticket form, which you can print if you wish.
Many companies that are intermediaries for the sale of tickets may also send not the document itself, but a payment receipt with a number. In such a situation, you need to follow the numbers and a link to the intermediary’s website. And from there you can print out an electronic version of the ticket.
Now you know several ways to print an electronic ticket. But is it necessary to do this?
Printing a virtual ticket through the terminal
When checking in at kiosks or self-service terminals, you must select the flight you are interested in, the date, provide personal information from your passport, deposit money and receive a printed ticket. In this case, the information is printed automatically, but only after payment has been made. This numbered ticket is your pass to the aircraft cabin.
However, it is worth considering that this method is not suitable if you require the provision of non-standard types of services. For example, in addition to regular luggage, you want to bring animals with you. The same applies in the case of accompanying bedridden, seriously ill patients, children without parents, etc.