Customize margins in Word
The principle of setting fields in Word of all versions starting from 2007 (including 2016, 2019) is similar. So it doesn't matter which version of Microsoft Office the user has installed on their computer. To configure fields in a document, you must:
- Open the document. Click "Layout".
- Click “Fields” and select the required option.
In Word 2007 and 2010, the margins window is located in the “Word Page Layout” tab.
Dialog boxes and all other menu items are similar (including visually).
Inserting field templates
If it is necessary to insert changing data or documents in the form of a form or sticker, Microsoft Word provides the use of special codes.
Data in the document changes automatically. That is, for example, if the date changes, you will not have to make changes; the date will become different without additional actions.
List of field codes in Word
There is a whole list of codes. Let's look at some of them:
DATE field
Used to automatically insert the date and time.
You need to click:
- Insert tab.
- Find the "Date and Time" button.
- Choose the format you like and change the language to Russian.
- Check the “update automatically” box.
- Next, on the same tab, select the “Express Blocks” group, and in it “Field”. In the list, select the field name “Date”. In the field parameters, put a checkmark in the box next to “Insert date in the last selected format.”
NUMWORDS field
Inserts the number of words in the document.
You need to place the cursor at the insertion location, find “Express Blocks” in the “Insert” tab and click on the “Field” button. In the field name, select NumWords.
PAGE field
Inserts the page number on which the given command is applied.
Place the cursor where you insert the page number. Select the “Insert” tab and find the “Field” button in the “Express Blocks” group. In the list of field names, go down and click on “Page”.
TOC field
Used to insert a table of contents.
In order for it to be correct, all headings and subheadings of different levels must be formatted using Word formatting. To insert, place the cursor in the desired place, in the “Insert” tab, select “Express blocks”. In the “Field” group we find the name of the TOC field.
UserName field
Used to insert the username.
First you need to enter this name. In the “File” tab, go down to the “Options” button. In the window that opens, find the “General” section and the “Microsoft Office Personal Settings” subsection, and change the user name. To insert a field, on the Insert tab, in the Express Blocks group, select the Fields command. In the field name we look for “UserName”.
Formatting Format Keys
Fields can be changed. How to do it? Let's look at making changes using some keys as an example.
DATE field
For the date and time insertion field, you can change their format, as well as select one of the chronological calculations. To do this, select the field and click on the right mouse button. From the list, select “edit field”. Next, select your favorite date and time option.
NUMWORDS field
In this field you can change the format for writing the number of words in the text. To do this, select the field and press the right mouse button. Select “edit field” from the list. Select the desired format.
PAGE field
You can change the appearance of the page number. To do this, you need to select the key and click on the right mouse button and select the “edit field” command. In the window that opens, you can select a different field format.
TOC field
You can change the appearance of the inserted table of contents. To do this, select the field and click on the right mouse button, select “edit field”. In the open window, click the “Table of Contents” button and select the preferred view.
How to set custom fields in Word
There are situations when the size of the fields must be specified manually, rather than selected from the proposed options. In this case you need:
- In the “Fields” window, click on “Custom Fields”.
- In the window that opens, enter the required field size and click “OK.”
- In the “Sample” item you can roughly see how the document will look after printing with the specified settings. And before setting up the fields, you need to choose which pages will be indented. To the entire document or only to subsequent pages.
How to adjust printing margins
You can change the document page layout and margin sizes directly when sending it for printing. To do this you need:
- Click "File" and select "Print".
- Select the required field option.
- There is also a “Custom Fields” item if you need to set arbitrary indents.
Next, the printer settings window (MFP) will open. It is unique for each device model, since the utility is integrated into the device driver for printing.
How to customize margins in Word 2003
Word 2003 is radically different in graphical design from later versions of the text editor. In terms of functionality, there are minimal differences. But the location and names of menu items are really different.
- There the page fields are configured in the “File” section
- Next is “Word Page Setup”.
- Set up the fields and click “OK”
The main drawback of this version of Word is that there are fewer predefined field layouts. Also, it does not support working with .docx files; there are minimal settings for printing a document.
Adjusting Margins Using the Ruler
Using the “Rulers” tool, you can manually, using the mouse cursor, set the size of the fields in a text document directly while editing it. To do this you need:
- Go to the “View” tab and enable the appropriate tool.
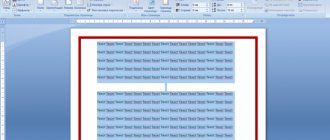
- Next, a graphic ruler will appear at the top of the text area. By changing the position of the sliders, you can precisely set the size of the indent from the sheet borders.
A
How to adjust top and bottom margins in Word? Likewise, using an additional side ruler.
If the simplified interface is enabled in Office settings, the rulers disappear when editing text. The areas where they are located appear when you hover the cursor. If, after turning on the “Ruler”, the vertical one is not displayed, this means that it is disabled in the settings.
- You need to go to “File”, then “Options”
- Then you need to include the corresponding item in “Advanced”.
Afterword
Working with text in Word is an important and everyday task for many users. Since Microsoft cares about the convenience of consumers, all the settings that may be needed are located in one or two mouse clicks, and the interface is thoughtful and concise. Although many complained that the changed main menu caused them difficulties compared to Microsoft Word 2003, after some time of using the modern version of the program these problems are leveled out and disappear. The extremely logical arrangement of elements in this menu makes text processing in this processor user-friendly. In particular, you can set fields in several ways, and all of them are easily accessible.
Setting margins in Word in millimeters or other units
By default, margins in Word are set in centimeters. But if it is convenient for the user to use another measurement system (inches, feet, barleycorn, etc.) or millimeters, then it is necessary:
- Open file"
- Then "Options".
- Go to "Advanced".
- In the “Screen” section, select the required units of measurement.
It should be taken into account that this margin setting affects not only the page parameters in Word, but also the “ruler” markup and tabulation. And it will be used when creating all new documents, not just the current one.
If the user periodically has to work with the metric and English length measurement systems, it is recommended to create two separate templates (select “Save”, specify “Template”, enter an arbitrary name for it)
LiveInternetLiveInternet
—Quote book
Are the sheets constantly falling off the mattress? Every morning I have to tuck it under the mattress again. But.
Well, I found this method on the Internet. Maybe it will be useful to someone. When to process the edges of faces.
-Music
—Categories
- KNITTING (3284)
- Toys (588)
- For women (441)
- Hook (410)
- Hats (286)
- Socks, slippers (196)
- For children (162)
- Dresses (95)
- Crochet video tutorials (94)
- Rugs, blankets (93)
- Knitting video tutorials (87)
- Booties (81)
- Skirts (70)
- Napkins (54)
- Flowers (53)
- Scarves, bibs (44)
- Potholders (30)
- Mittens, gloves (30)
- Swimwear (22)
- For men (16)
- Patterns (107)
- Training and advice (321)
- COOKING (1887)
- Multicooker (109)
- Pancakes, pancakes (85)
- Meat (81)
- Cooking tips (70)
- Cakes (58)
- Drinks (51)
- Everything else (46)
- Soups (41)
- Hot sandwiches (41)
- Bread maker (38)
- Microwave meals (37)
- Jam (35)
- Main courses (34)
- Cottage cheese (33)
- Dough (32)
- Lavash (20)
- Video recipes (15)
- Pizza (13)
- Shish kebab (13)
- Sauces (13)
- Ice cream (4)
- Chicken (180)
- Baking (190)
- Canning (70)
- Snacks (127)
- Vegetables (127)
- Fish (113)
- Salads (198)
- Decorating dishes (15)
- MISCELLANEOUS (899)
- Washing, cleaning, cleaning (154)
- Interior (95)
- Useful tips (95)
- Human rights (69)
- Beliefs, signs (68)
- DIY (66)
- Garden and vegetable garden (66)
- About everything (53)
- Curtains (51)
- Learning (49)
- Fashionable and beautiful (30)
- Photoshop (29)
- Money (22)
- Computer (18)
- Etiquette (17)
- Flowers (16)
- HEALTH (575)
- Traditional recipes (145)
- Beauty salon (132)
- You need to know this (67)
- Information (48)
- Slim figure (43)
- Healthy products (42)
- Hair care (33)
- Gymnastics, massage (33)
- Medicines (21)
- Nutrition, diets (10)
- LEISURE (436)
- Movies (100)
- Humor (67)
- Wisdom of life (66)
- Everything for children (18)
- Aphorisms, quotes (18)
- Games (18)
- Travel (15)
- Books (2)
- Music (132)
- DECOUPAGE (257)
- Theory and MK (179)
- Ideas (31)
- Videos (25)
- Pictures (22)
- HANDCRAFTS (656)
- Cutting and sewing (206)
- Toy decoration (201)
- Various things (116)
- Bags (51)
- For home (34)
- For the garden (25)
- Dog Clothes (11)
- Embroidery (7)
- Surprise with a gift (3)
- EVERYTHING FOR YOUR DIARY (120)
—Subscription by e-mail
—Interests
-Friends
— Regular readers
—Communities
—Broadcasts
-Statistics
Selecting page fields from ready-made sets
Word already has integrated layouts for common text layouts in documents. For example, if you select “Mirror”, then this is the best option for printing in “portrait” orientation.
In this case, the fields on the left and right sides are swapped on each subsequent page.
Near each layout there is a detailed indication of what field sizes will be used when choosing one or another option. But before you set up fields in Word in this way, you need to take into account that the settings will be used for the entire document.
To cancel the action, you can use the Ctrl+Z key combination (if the setting was activated accidentally).
Setting up indents
I use Office 2022 and will show all the steps using it as an example. If you have an earlier version, then it's okay, page settings in Word 2016 and 2013 look exactly the same. If you have a text editor installed in 2007 or 2010, then you will also find the necessary settings without any problems. But in the 2003 version, the interface is significantly different from modern ones, but don’t worry, you can also customize the borders at your discretion. I will talk about this separately.
So, open the file that needs to be edited and go to the “Layout” menu item in the editor of 2013 or later versions. If you are using the 2007 or 2010 version of the program, then you need to go to the “Page Layout” section.
Now open the “Fields” tool. There are several ready-made options in the list that opens:
- ordinary,
- narrow,
- average,
- wide,
- mirrored
Next to each type are written the specific values of the spaces on the left, right, top and bottom of the sheet.
In the mirror version, the top and bottom parts remain unchanged, but the left and right parts are swapped every other sheet to create a magazine or book spread that has internal and external borders.
If we enable this option, then on the first page there will be an indentation of 3.18 cm on the left, and 2.54 cm on the right. On the second page they will switch places: on the left there will be 2.54 cm, and on the right - 3.18 cm.
Setting different margin sizes for even and odd pages
This option for setting margins is most often used for duplex printing, that is, when the text when printed will be on each side of the page.
There are 2 options for setting up margins in Word this way:
- Select the “Mirror” layout (in the “Layout” section, click on “Margins”).
- Click on “Custom Fields”, in the “Page Settings” window, open the drop-down menu in “Multiple Pages”, indicating “Mirrored”. And then you can separately specify indents for even and odd pages.
Setting the sheet size in Word
The first thing you should think about is what physical sheet size you will use. This is usually decided before work begins. However, it may turn out that the size of the sheet you were working with is different from the one you need.
To select the sheet size , perform Page Layout – Page Settings – Size on the ribbon. A menu will open containing a list of the most common sheet sizes. You can choose from this list.
You can also set the print size manually . To do this, click Other page sizes in the menu. Here you can set arbitrary sizes. Why is this necessary? For example, you use a receipt printer. Please: look at the width of the receipt paper roll and set the appropriate dimensions.
Setting binding margins for brochures
If you plan to bind the printed sheets after printing (to form a brochure), then on each page on the left side you need to make an additional indent of 1 - 2 centimeters. How can I make margins in this case so that I don’t have to manually change all the markup in the document? Need to:
- Open the Custom Fields window (from the Layout tab)
- In the “Binding” line, indicate the required indentation, as well as on which side it should be placed.
The layout of the document will then be changed automatically (taking into account the specified text formatting parameters).
Selecting the sheet orientation
Usually the orientation is chosen from two options:
- Portrait - when the height of the sheet is greater than its width. That is, the page is positioned vertically.
- Landscape – the width of the sheet is greater than the height, the page is horizontal
To specify the orientation of the program, find the command Page Layout – Page Setup – Orientation on the ribbon. Make your choice.
