Format "XPS
"(XML Paper Specification) was specially developed by Microsoft to compete with the popular format "
PDF
" (Portable Document Format). Although PC users hardly use XPS these days, it is not obsolete. Sometimes you can still find XPS files.
Before version 1803 of Windows 10, the XPS Viewer was built into the Windows operating system.
In this article, we'll show you how to install XPS file viewer on a Windows 11 computer.
What is an XPS file?
XPS
is a format developed by Microsoft. In this format, along with the text, information such as the appearance, layout and structure of the document is stored. XPS was supposed to compete with PDF, but this was not achieved.
XPS documents have the file extension " .xps
" or "
.oxps
".
XPS Viewer
is the official application from Microsoft for viewing and editing XPS documents. The XPS viewer app is not included in the Windows 11 operating system, although Microsoft has provided the option to add the program as an optional feature in the OS.
XPS format
With the advent of Windows 7, new and advanced data formats gradually began to spread. While XLSX and DOCX formats have become familiar, many other data formats remain unknown to many. This includes XPS.
The XPS file format is a format that is used to sign, view, protect, and save documents. A document of this format is comparable to a sheet of paper. Just as the contents of a simple sheet cannot be changed after printing, it is also impossible to change the contents of an XPS file after saving.
How to Install XPS Viewer on Windows 11
First let's go to " Options"
"through the "
Start
" menu or by pressing the "
Win + I
" keys together.
In the settings window, click on “ Applications”
» — «
Additional components
».
In the section “ Adding an additional component
» Click the «
View functions
» button.
In the search bar of the window “ Add an additional component”
"type "
XPS
", check the checkbox opposite the search result - "
XPS Viewer
" and click the "
Next
" button at the bottom of the window.
Then click “ Install”
».
In the Recent Activity
» We are waiting for the installation of a new component.
What format is this?
Files with the extension “.xps” are documents that are necessary for processing graphics and further printing the result. The format was developed with the direct participation of Microsoft. It is all the more surprising that double-clicking on an XPS file does not open the file, but offers to find a viewer via the Internet.
On a note. By default, the XPS viewer worked on Windows 7, Vista 8 and the first versions of Windows 10. Subsequently, it was decided to exclude direct support for the format due to the presence of more advanced extensions.
Speaking about the “.xps” extension, it should be noted that at one time it was perceived as an alternative to PDF. But, even in the absence of its former level of popularity, the format still remains in demand. It is built on the basis of XML and is lighter in comparison with PDF, and the possibilities of interaction with it are practically not limited by the software.
How to use XPS Viewer on Windows 11
After installation, find the “ XPS Viewer”
" and launch it.
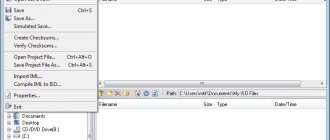
In the application that opens, click “ File”
» — «
Open
».
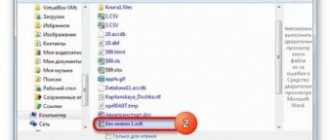
In the opening window we find a file with the extension “ .xps”
"or "
.oxps
" and click the "
Open
" button.
Converting to other formats
Windows 8 has one feature. The problem is that this OS uses the OXPS extension, which the programs described in this article are not able to show. Therefore, to solve this problem, you should convert OXPS to a supported format using a utility such as Microsoft XpsConverter.
If you are unable to convert a file to another format using this program, you can use an online converter or Danet Studio. To convert XPS to PDF, you can use the XPSViewer software, which we talked about just above.
How to Save an XPS Document to PDF Using XPS Viewers
At the top we find the printer icon and click it. In the “ Print”
“Select the printer “
Microsoft Print to PDF
” and click the “
Print
” button.
In the “ Saving print result”
"Select the location to save the file, enter a name and click the "
Save
" button.
How to print an XPS file
If you want to print an XPS document, you can use applications that can create it (Danet Studio, NiXPS Edit). The appearance of printed documents is exactly the same as on the screen. Go to the “File” - “Print” panel, where, if necessary, specify the necessary settings, and then calmly print the document.
Since programs that work with PDF can open such documents, you can use them. After converting the formats, they display the document on the screen, after which printing it is not difficult.
So you got acquainted with such a format as XPS. It can be viewed either using specialized programs, the main ones of which were discussed in our article, or using online services. If you know other good applications for opening this extension, then share information about them in the comments.
Customizing Windows interfaces and applications
2.1.
Quickly open any file in Notepad Quite often I have situations when a file needs to be opened with Notepad (for example *.html, *.csv or new unknown file extensions).
In order to simplify this operation, for all file types I add an additional item to the context menu (right mouse button) Edit with Notepad
.
Show clearly
This item is added by entering the following information into the registry: [HKEY_CLASSES_ROOT\*\shell\Edit with Notepad\command] @=»notepad.exe %1″ To automatically make changes to the registry, you can use this file. To cancel the changes made - this.
2.2. On the desktop, in addition to shortcuts to popular applications and folders, I add 4 more shortcuts
Shutdown after 5 seconds (I make a 5 second delay on purpose so that you can cancel a shutdown activated by mistake)
%SystemRoot%\System32\shutdown.exe /s /f /t 5 Shutdown after 10 minutes (600 seconds) %SystemRoot%\ System32\shutdown.exe /s /f /t 600 System reboot %SystemRoot%\System32\shutdown.exe /r /t 1 Cancel reboot / shutdown %SystemRoot%\System32\shutdown.exe /a I place these shortcuts in the upper right corner of the screen and it looks like this: I take the icons for the shortcuts from %SystemRoot%\system32\SHELL32.dll 2.3. In the Start menu, I add shortcuts to applications and folders that I use frequently
The most common use case: I press the “Start” button with my left thumb. A menu opens (on top of almost any application), and the right hand automatically moves to the top area of the Start menu (if the hand is on the mouse) or presses the “up” or “down” keys on the keyboard, then Enter (if the hand is on the keyboard).
Command to start Outlook in new mail mode
"C:\Program Files (x86)\Microsoft Office\Office14\OUTLOOK.EXE" /c ipm.note
2.4.
I change the appearance of the Windows calculator. I select the “Engineering” view - this leads to the expansion of the application window and the result field approximately doubles in size. I add “Grouping of numbers by digits” - this allows you to quickly (“by eye”) estimate the order of magnitude.
Show clearly
Working with Microsoft XPS Viewer
Let's start with how to create a document of this format. Any program from which you can print a file will help us with this: notepad, Microsoft Word or any other. For example, I'll take Word. For any program, the translation mechanism will be approximately the same.
- So, we took the file we needed and opened it. Click on " File"or, as in my case with the old version of Word, a circle with a picture;
- Select "Seal" “Quick Print” will not work for us, because we need a print manager where we can select a printer. It is important;
- Select “Printer” in the line MicrosoftXPSDocumentWriter. Your name may differ from mine, but it must contain the words XPS and write (in English or Russian);
- Click "OK" and select the file name and the path where it can be found.
Remember that once a document is converted to this format, you can no longer edit it. Therefore, this should be done as a last resort.
Although this is not very convenient, files of this extension, printed using printers that support this format, turn out much clearer and brighter than Word.
Using additional software
1.1.
Launchy www.launchy.net Back in Windows 98, I started using the program launch window (
Start → Run
). I used this combination to run mainly three applications: cmd.exe, notepad.exe, calc.exe.
I put up with the limitations of this functionality until I came across the Launchy utility (they wrote about this utility on Geektimes). The main advantages of the utility include the following:
- the window for entering the launch command appears in the center of the window (now you don’t need to move your gaze to the lower left corner of the screen - this is especially true for widescreen monitors over 21″)
- launch is possible after entering the first letters, as well as by substring
- you can select a list of folders that Launchy will go through and remember the names of applications/files, which can later be launched by entering part of the name
- there is support for skins (the picture below shows the QuickSilver2 skin)
After installation on the system, Launchy is launched using the combination Alt + Space
. In the program settings it is possible to change this combination.
Since I already knew and got used to the combination Win + R
, I wanted to “hang” the launch of Launchy on the same combination.
However, when I try to set Win + R
In the application settings, a notification appears that this combination is already taken.
For those who, like me, would like to run Launchy via Win + R
, you need to disable the processing of this combination by the system.
To do this, the following parameter is entered into the registry: [HKEY_CURRENT_USER\Software\Microsoft\Windows\CurrentVersion\Explorer\Advanced] “DisabledHotkeys”=”R” To automatically make changes to the registry, you can use this file.
To cancel the changes made - this. Alternative: AutoHotkey (thanks toxicdream)
1.2. Punto Switcher
punto.yandex.ru When typing text in Cyrillic and Latin, situations are inevitable when
Hello
, I write like this
Ghbdtn
or like
HELLO
. Instead of rewriting the text in such cases, I use Punto Switcher. Immediately after installing the program, I disable automatic conversion (sometimes it works unpredictably) and launch it manually, using hotkeys:
| Hotkey | Description (example of use) |
| Break/Pause | translates the last entered word into an alternative layout (I use this functionality if I start entering a word in the wrong layout Ghbdtn → Hello ) |
| Shift + Break/Pause | the same as the previous paragraph, but for a selected piece of text (I use this functionality when I need to correct a phrase, sentence or several paragraphs typed in an incorrect layout) |
| Alt + Break/Pause | inverts the case of the selected text fragment ( HELLO → Hello ) |
| Alt + Scroll Lock | transliterates the selected text fragment ( Hello → Privet ) |
| Win+S | calls a quick Yandex search |
Separately, I would like to draw attention to the functionality of the program, which I use almost daily:
| Hotkey | Description (example of use) |
| Ctrl + Win + V | pastes text from the clipboard, removing formatting if it was present (I use this almost daily when copying text from the browser into an email or presentation) |
1.3.
UNIX Utilities unxutils.sourceforge.net I work on Windows, although I am familiar with UNIX systems and the indispensable UNIX command line utilities. To get similar functionality on Windows, I experimented with Cygwin until I came across UNIX utilities ported to Windows.
By placing the utilities I need in the %SYSTEMROOT%\System32\
, I am able to work with them from the command line in much the same way as I worked with them previously on UNIX systems.
1.4. Locate32
locate32.cogit.net This file search engine, despite the fact that it cannot index the contents of files and letters (like, for example, Windows Search or Google Desktop), has a number of advantages: - high speed of searching files and folders on local and network drives - advanced search filters (including RegExp)
Alternatives: Everything Search Engine (thanks ditgeek), MasterSeeker
1.5. AkelPad
akelpad.sourceforge.net When working with text files through the standard Windows notepad (notepad.exe), you are faced with the main drawback - the extremely low speed of working with files that exceed several megabytes in size. I tried alternatives to Notepad, but for the simplest work with text files I settled on AkelPad, due to the following advantages:
- quickly open large files
- quickly search and replace text
- highlighting text with a column
- ability to install additional plugins (syntax highlighting, line numbering, ...)
An additional useful feature (compared to other editors) is the ability to replace the standard Windows notepad.
Internet Explorer browser
All versions of Windows have a standard Internet Explorer web browser, which, if you have the .NET Framework version 3 or higher installed on your system, can also be used as an XPS file viewer.
- We search for “Internet Explorer” through the system search, as described earlier, and launch the browser.
Finding “Internet Explorer” through the system search
- You can simply drag and drop the XPS file from the Windows Explorer window into your browser window.
Open the XPS file in Internet Explorer
Viewing an XPS file in a browser