If you need to combine several hard drive partitions into one volume, then the first thing you need to do is save important data on another medium. Most likely, they will be irretrievably destroyed. If the logical drive you are removing contains an operating system paging file, move it to the primary partition in advance.
Merging partitions can be done correctly not only by OS tools, but also by external programs.
During the procedure for merging hard disk partitions, all programs must be closed. A program or process accessing the hard drive may block access to the system, and the procedure will not be able to start. Do not turn off or restart your computer during the disk change procedure.
How to change disk partitions in Windows
By regular means
In Windows, you can merge disks without third-party programs, but this method has an important drawback. You will lose all data on one of the merged partitions. Therefore, important files must first be moved from it to another partition or to third-party media.
The process of merging local disks consists of two stages. First, you completely delete one of them along with all its contents, then you give the thus freed space to the second disk.
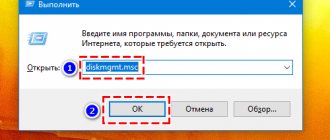
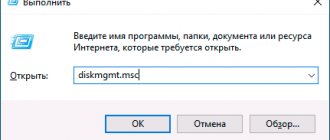
You will need the standard Disk Management utility. To launch it, use the Windows + R key combination, enter the command diskmgmt.msc in the window that appears and click OK. The hard drive partitions will be displayed at the bottom of the Disk Management window.
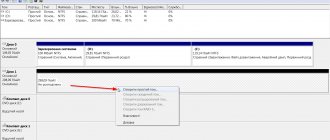
After launching the utility, right-click on the drive you are going to erase (for example, conditional drive D) and select “Delete Volume.” This cannot be done with a system volume on which Windows is installed, since the procedure destroys all files stored in the partition.
Now right-click on the adjacent partition (conditional drive C) to which you want to transfer the freed space, and select “Extend Volume”.
When the Extend Volume Wizard opens, click Next twice. As a result, the selected partition (in our example - C) will receive the entire volume of the deleted partition.
Using third party programs
There is free third-party software that makes managing local drives much easier. For example, the MiniTool Partition Wizard program allows you not only to quickly merge volumes, but also to easily change their size. At the same time, it saves all data. But if you have important files on your computer, back them up anyway, just in case.
So, to merge disks using MiniTool Partition Wizard, run the program and click on the volume (let it be C) to which you want to attach another partition (let it be D). Select the Merge option from the context menu.
In the window that opens, click on the same section (C) and click Next.
Now click on the section (D) that you are going to attach to the already selected one. A field with the name of the folder will appear in the lower half of the window: merged_partition_content. The program will create it on the target partition and copy all files from the remote partition there. If you wish, rename this folder. Click Finish.
For the changes to take effect, click Apply in the left corner of the toolbar. If the program asks you to restart your computer, click OK and wait until Windows restarts. As a result, Explorer will display a disk equal in size to the two combined partitions.
If your goal is not to merge the disks, but only to increase the size of one of them (let's say D) at the expense of the other (let's say C), this can be done in two simple steps. First you need to reduce one partition, and then transfer the free space to the second.
To reduce the volume of disk (C), select it in the main menu of MiniTool Partition Wizard and in the left panel click on the Move / Resize Partition button. In the window that appears, move the slider so that the number next to the Unallocated Space After parameter corresponds to the amount by which you want to reduce the selected partition. Confirm the change.
Next, select the drive you want to enlarge in the main menu (D). Use the Move / Resize Partition button again and expand the volume of the partition using the slider.
Click Apply on the top panel and wait until the program redistributes the entire volume. This may require a reboot.
EaseUS Partition Master Free Edition
Shareware
EaseUS Partition Master Free Edition is a stripped-down version of the EaseUS Partition Master . Free features include the ability to combine sections. The program is intended for use on Windows XP and higher systems.
EaseUS Partition Master Free Edition is also a full-featured disk manager with a wide range of functions for working with disks. To combine logical volumes, the user only needs to take three simple steps:
- Select the disk to be merged, open the context menu above it and select the merge function (Merge)
- In the window that opens, select the disk with which to merge.
- Apply the change.
Advantages of EaseUS Partition Master Free Edition:
- Availability of many useful disk management functions.
- The ability to protect the program with a password so that other computer users cannot use it.
- Ability to copy an entire disk with all partitions.
- Preview any changes before they are applied.
Disadvantages of EaseUS Partition Master Free Edition:
- No support for dynamic volumes.
- Some features require you to restart your computer.
- It is not possible to convert MBR partitions to GPT and vice versa.
How to change disk partitions in macOS
If you have a Mac, you will need the pre-installed Disk Utility program to manage drive volumes. It is located in the Finder menu → Programs → Utilities. Before manipulating disks, be sure to back up important files.
After launching Disk Utility, in the left pane, select the hard drive whose partitions you want to edit and click on the “Partition” button.
A window will appear on the screen in which you can merge the selected volumes or resize them. The utility's interface is very visual: the hard drive is displayed as a pie chart, and its partitions as sectors.
To merge partitions, you need to delete one of them first. To do this, select it and click on the minus sign under the diagram. Remember that all his data will be erased. After this, when an empty sector appears in place of the deleted partition, expand any adjacent volume by dragging the cursor beyond its border. And to redistribute volume sizes, simply move the boundaries of the corresponding sectors.
When you have made all the necessary settings, click “Apply” and wait for the changes to take effect.
How to merge two non-adjacent hard drive partitions
To effectively distribute space on a Windows computer, it may be necessary to enlarge one partition at the expense of another partition, but not adjacent - located relative to the first one, not before, not after, but somewhere in another part of the disk. The standard system tool, the Disk Management , copes with this task only if the disk of a basic type is converted to a dynamic type.
In terms of operating basic disks, the utility's capabilities are very limited: it can increase the size of volumes only due to the unallocated space located after these volumes. And no more. The utility will not be able to increase the volume using the free space in front of it. Not to mention performing merge operations on non-contiguous volumes.
How to combine two non-adjacent hard drive partitions? To do this, you will have to resort to third-party software - the AOMEI Partition Assistant . To solve the problem, a basic edition of the program will be enough, which, by the way, is supplied completely free of charge.
AOMEI Partition Assistant SE
Shareware
AOMEI Partition Assistant SE (Standard Edition) is also a shareware disk manager with a full set of functions for managing logical volumes. The program works in all versions of Windows, starting with XP.
Among the key functions of the free version of the AOMEI Partition Assistant SE program are changing the size of partitions at the expense of other volumes, merging/merging, creating new ones, formatting in different file systems, aligning and splitting partitions. Using this application, it is also possible to create bootable removable media with Windows PE, which allows you to run various programs before starting the main OS.
Regarding merging partitions, in AOMEI Partition Assistant SE this operation is performed approximately according to the same scheme as in the previous case:
- Call the context menu above the partition to be merged and select the “Merge Partitions” item.
- Check the box next to the drive letter that will be merged with the previous one, then click the “OK” button.
- The settings window will close. Click the “Apply” button in the main program window to apply the changes.
Advantages of AOMEI Partition Assistant SE:
- Having a step-by-step wizard makes it easy to complete most partition tasks, including merging.
- Preliminary creation of a list of tasks for sequentially performed operations.
- The presence of many additional functions, including the creation of bootable drives with the AOMEI Partition Assistant SE program on board (will allow the user to work with the disk without installing the OS).
- Many functions are displayed in the main interface, and you do not need to search for them from the menu.
Disadvantages of AOMEI Partition Assistant SE:
- Cannot convert between primary and logical partition.
- Cannot convert dynamic disks to basic disks.
How to merge hard drive partitions in Windows
For this procedure, you can use the built-in system tools " Disk Management
" to merge sections, however, in this case, you need to transfer all the information from section E:, then delete section "E:" and then merge both sections into one. If there is a lot of information on the disk, it will take considerable time. We will discuss this method at the end.
To connect partitions, we use a special disk management program AOMEI Partition Assistant Standard
- You can download it on the official website. This program is available for commercial and home use and is absolutely free.
Attention.
AOMEI Partition Assistant Standard
belongs to a group of programs for working with disk partitions.
If you make a mistake when working with this program, you may lose important information on the disk, so we recommend that before starting to work with the program, you back up all
partitions of your disk in order to save all important information.
How to Merge Partitions Using AOMEI Partition Assistant Standard
Download and install the program on your computer, run it and follow the further instructions.
Right-click on the section.
A menu will pop up, select “ Merge Partitions
”.
We mark the sections that we want to merge and click “OK”. Apply your changes by clicking “Apply”. We confirm the changes. Click “ Yes
”.
The process of merging the partitions has begun, we are waiting for the download to complete. Click “ Fix it
”.
Sections are merged. All information that was on the second partition was automatically transferred to the “C” drive in the “ E-drive”
«.
Merging hard disk partitions using built-in Windows tools
Open the “Start” panel and type “Computer Management”.
Go to “
Computer Management
”.
Right-click on the partition, let’s say “E:” - “ Delete volume
”.
I remind you.
Don't forget to transfer your data from the partition you are deleting, otherwise you will lose it or make
a Backup
.
"YES". An undistributed space has formed, indicated by a black stripe. We use this volume to expand the system partition; you may have another partition, the principle is the same. Right-click on the partition you are going to expand - “ Extend volume
”. "Further". "Further". The sections are connected.
How to merge HDD partitions Video
Programs for combining hard drives
Acronis Disk Director
Acronis Disk Director is the first in this review because it contains one interesting option that significantly speeds up the process of combining a hard drive. In the program interface itself, it is called “Merge Volume”, and the principle of operation is to select several logical partitions, indicate the main one and combine them into one. The file structure and the system itself are preserved, so you can be sure that not a single important object will be accidentally deleted.
At the same time, nothing prevents the Acronis Disk Director user from taking a different route - deleting existing hard drive partitions and leaving only one, to which he can assign the resulting free space. However, you won’t have to use this method with a complex algorithm of actions if you get comfortable with the Volume Merger Wizard. The remaining functions in this software are also designed to interact with the HDD drive, and you will find a more detailed description of each of them in the article at the link below.
EaseUS Partition Master
EaseUS Partition Master operates on approximately the same principle as the previous representative, and there is also a separate option that allows you to combine all existing hard drive partitions into one. However, the developers warn that it is better to make a backup copy in advance, since the integrity of any components may be compromised due to random failures or incorrect user actions. In the Connection Wizard itself, you only need to select the disk itself, mark it with volume markers, assign the primary one and start this operation. During the merge process, try not to do anything in the operating system to avoid errors.
EaseUS Partition Master is available for a fee, and the trial version may not be suitable for the task. However, we still recommend downloading it first and testing it to see if it's worth purchasing. In the review below, you will not only find a link to the official website for downloading a demo version of the software, but you will also be able to explore the remaining options included in the tool.
MiniTool Partition Wizard
The third representative, despite the prefix “Mini” in its name, provides the user with a huge number of diverse tools for managing hard drives. In some ways, the implementation of functions is similar to the standard representation in the operating system, but with expanded capabilities and some simplifications. MiniTool Partition Wizard also contains a separate module “Merge Partitions”, which works in much the same way as in other programs discussed above. Here you select the target partitions, specify the main one and start merging them, which sometimes takes a lot of time, because the total space and the amount of information stored in the partitions are always different.
Otherwise, MiniTool Partition Wizard can be considered the same standard software as the one discussed above. The main features of this solution are free distribution, full support for the Russian language and the presence of Wizards for interacting with logical volumes. We need to talk about Masters in more detail so that novice users know in what cases they should be contacted. There are four different wizards in MiniTool Partition Wizard, and to start, just click on the dedicated button in the menu on the left, selecting the appropriate process, for example, disk cloning. Then all you have to do is follow the instructions displayed on the screen.
AOMEI Partition Assistant
AOMEI Partition Assistant, unfortunately, does not have a separate module that would help you combine a hard drive in just a couple of clicks, but this software contains other useful tools that allow you to manage logical volumes. You can delete the necessary partitions, transferring all important files in advance, and then expand the existing volume, transferring it to another file system if necessary. To do this, you will have to use three different tools, but the task is completed almost as quickly and with a minimum amount of effort.
The AOMEI Partition Assistant interface has been almost completely translated into Russian, so there should be no difficulties at all when interacting with Masters. This software is also distributed free of charge, so you can freely download it from the official website and immediately start using it. We suggest that you familiarize yourself with the remaining functions available in AOMEI Partition Assistant in a full-length review on our website at the link below.
Eassos PartitionGuru
The developers of PartitionGuru pay a lot of attention to the constant development of their software, which is why after some time this tool has grown from a regular tool for monitoring the status of a hard drive into a full-fledged assistant for managing logical volumes and connected media. Here you will find all the functions you need to combine HDDs and you can use them with minimal effort. Anyone can understand the PartitionGuru interface, which is helped by its intuitive design and the presence of the Russian language.
Merging logical volumes almost always takes a long time, and during this process it is not recommended to work in the operating system in parallel. The PartitionGuru feature will also be useful, offering to select the manipulation that will be performed upon completion: for example, the computer will be sent to reboot, put into sleep mode, or turned off. If you are interested in performing additional actions related to HDD or other connected media, PartitionGuru is ideal for this, providing a basic set of tools.
Macrorit Disk Partition Expert
Macrorit Disk Partition Expert software does not have a separate tool that allows you to simply merge logical volumes, but nothing prevents you from using several tools at once to first remove the partition, creating free space, and then attach it to the main partition. Before doing this, be sure to transfer files from other volumes to it if you do not want to lose them when deleted. There is no Russian interface language in Macrorit Disk Partition Expert, so you will have to figure out the items yourself, but this will not be difficult.
Intuitive controls will allow you to quickly free up space on your drive and attach it to the required partition, leaving only that partition. It should be taken into account that the file system will not be changed and no other actions related to its configuration will have to be performed. Macrorit Disk Partition Expert is distributed for a fee, but the functions present in the free version are quite enough to cope with the task.
Paragon Partition Manager
The selection of programs for combining a hard drive is completed by Paragon Partition Manager. Here you will find the same standard list of tools for managing connected drives. They are almost identical to those that are provided by default in the operating system, but they are much easier to use, and certain restrictions are automatically removed. Paragon Partition Manager will perfectly cope with its mission and combine HDDs without data loss.
One of the main features of Paragon Partition Manager is the ability to create virtual drives, which is useful when using virtualization tools. These sections can also be connected or changed in any way, because by default Windows does not allow this. You can download the trial version of Paragon Partition Manager from the link below, and the functions available in it are quite enough to perform connection of partitions and other manipulations with the HDD.
We are glad that we were able to help you solve the problem. In addition to this article, there are 12,719 more instructions on the site. Add the Lumpics.ru website to your bookmarks (CTRL+D) and we will definitely be useful to you. Thank the author and share the article on social networks.
Describe what didn't work for you. Our specialists will try to answer as quickly as possible.
Did this article help you?
NO
How to merge all hard drive partitions into one
- 1. What are disk partitions for?
- 2. Consolidating disks in different operating systems
- 3.Windows 7
- 4. Windows 10: features of unification
- 5. Additional software
The computer has become an object without which it is difficult to imagine everyday life. Each user tries to customize the right assistant to suit their needs, so you may be faced with the task of how to combine hard drive partitions into one.
To quickly resolve this issue, we have prepared detailed instructions for different operating systems and offer you the most effective solution to the problem.
How to connect drives on Windows 7 without losing data
How to merge hard drive partitions in Windows 10
To combine hard drive volumes into one without losing data, there are two ways: use the basic capabilities of the operating system or resort to third-party utilities for administering hard drives. The first case is described below, but it has a couple of disadvantages.
Note! To protect the data of the second volume, you will need to copy it and transfer it to a drive that will not be affected during the process of merging disks or individual memory areas.
The second method is more correct and secure, since it involves using a special utility to connect drives or their volumes. It allows you to save all your data, and in some cases even back up your files if the merge fails.
There are many programs that allow you to create one enlarged partition by attaching two different, but adjacent volumes of a hard drive or solid-state drive. Experts recommend using proven Aomei utilities, as well as MiniTool Partition Wizard Free.
Removing a volume before attaching it to another partition
What are disk partitions for?
In any operating system, the shared memory is divided into several sections. This solution makes it possible to control the amount of memory, regulate the division of all stored information and provide protection against virus penetration. As a rule, the entire amount of memory can be divided into several sections:
- Main disk. This portion of physical memory is used to install the operating system.
- Backup disk. With the help of special programs, a small part is allocated on a shared disk, which is used to store a backup copy.
- Shared disk. Another piece of memory needed to store all other information.
Having backup memory will be useful in the event that there is a need to restore, and a backup copy is used for this.
Consolidating disks in different operating systems
Working with the physical memory of a computer leads to the complete destruction of all stored information, so before you start working with merging, you need to perform several important steps.
To get started and edit a volume, it is important to remember that all information will be completely destroyed. You need to create an exact copy of all the files on your computer and transfer it to an external drive. An alternative solution would be to use cloud storage. Different programs and services may offer different amounts of information storage, so you can choose the most convenient solution for any size of files.
Merging options
Now a few words about how to combine two disks into one in Windows 7 and higher. First, you need to decide exactly how the partitions will be merged. First of all, we can highlight methods of combining with the loss of information or its preservation. Secondly, use standard system tools or third-party software.
It’s worth saying right away that the solution to the question of how to combine two disks into one, using the built-in Windows tools, does not imply the preservation of data that was originally located in one of the partitions (this is not provided at all). Therefore, before doing such things, all information from the partition being deleted (and it will actually be deleted and only then attached to the main disk or partition) must first be transferred to another partition or to removable media. As is already clear, there is no need to talk about the performance of installed programs. When solving the problem of how to combine two disks into one, but so that both the information is preserved and the applications work, it is necessary to use additional third-party tools. They will be discussed separately.
Additional software
In some cases, work on merging disks may be difficult because the user does not have the ability to work on individual sectors. In this case, you can use a special program that will give access to the physical space and allow you to perform all the actions of connecting different volumes.
An excellent example of such a utility is Acronis Director. It can be easily installed on any operating system and will provide access to all system configuration settings. After installing the program and launching it, in the main window you can see all the necessary information for working with disks and volumes. Further actions are of the same nature as in the previous instructions. You need to highlight the volume that you want to clean up and merge in the future, and click the corresponding button to start the process.
Working with merging using a special utility will help you configure your computer in a way that suits you and makes it convenient and efficient to use.
How to merge hard drive partitions? Description of all methods
Let's take a closer look at how to combine hard drive partitions. If your hard drive is divided into several partitions, you can easily merge them using standard Windows tools or third-party programs.
In earlier versions of Windows, dividing the hard drive into partitions made it possible to structure the amount of information that users stored on their computers. And also, some system administrators create separation so that system files and other data are stored in different places.
This reduces the risk of damage from virus software or careless user actions.
In modern OS models, as a rule, only two divisions are used - the main disk and space for backup. Thus, if a serious failure occurs in Windows and everything stops working, your data will not be damaged, because you will always be able to make a recovery using the second disk partition.
If you have too many unused partitions on your PC and you want to remove them, use the following instructions from the article.
Macrorit Partition Expert
Shareware
Macrorit Partition Expert is a disk manager with a simple interface. The program is supported by all versions of Windows, starting with XP.
The user interface of Macrorit Partition Expert is a window divided into two parts - all available disk operations can be found on the left side. Merging disks is carried out in two steps:
- Launch the “Merge Volume” function from the list on the left.
- In the small window that opens, mark the letters of the drives to be merged and click “OK.”
In addition to merging, using the program you can resize, move, delete, copy, format and clear partitions, change the volume label, convert a volume from primary to logical, and check the hard disk surface for errors.
Positive qualities of Macrorit Partition Expert:
- The program interface makes it easy to launch any functions without searching for them in the menu.
- Standard operations, including merging partitions, work in the free version.
- Creating a list of tasks with the ability to view the results before executing them.
- Possibility of installing Macrorit Partition Expert on removable media (i.e. a portable version of the program is provided).
Disadvantages of Macrorit Partition Expert:
- Does not support dynamic disks
- Cannot manipulate disks larger than 32 TB
Preparing to delete a disk volume
Before you merge multiple volumes, there are steps you can take to help preserve your files. Any editing of a partition in Windows results in permanent deletion of files and folders in this volume.
We recommend that you create a backup copy of all files and move it to a removable USB drive. If the amount of information is too large, create a separate profile for it in cloud storage. In most of them you can use up to 20 GB of space for free (Yandex.Disk, DropBox, OneDrive and others).
Fig. 1 - schematic example of dividing a hard drive
Merging partitions in Windows 7
In Windows 7, users can merge disk partitions without downloading additional programs on their computer. All necessary settings can be changed as follows:
- Go to the Start menu and open the Run window. In Windows 7 Home Edition, this key may not be available. In this case, just press Win + R to open the desired window or edit the appearance of the Start menu in the home screen settings;
- In the window that appears, type diskmgmt.msc – a command to open the computer’s disk management window. Confirm the action by clicking on “OK”.
Fig.2 - command entry
- The following window will open. At the bottom of the window, all hard drives connected to the system and their conditional division are displayed. Each division section is a separate volume. It is designated by a letter and has its own file system type and space;
Rice. 3 – display sections in settings
- You need to select the section that you want to delete (merge with the main volume of drive C). Then right-click on it and click on “Delete Volume”. Next, a window will appear with a system message stating that all data on the volume will be deleted and you will not be able to restore it. Confirm uninstallation. Essentially, you're not deleting anything, just erasing the section. All space goes to drive C;
How to delete all HDD partitions and make it unified
To delete hard disk partitions, go to the Windows Disk Management (Start menu) and enter in the search bar, for example, “disk” or “hard drive”. In the results you will see the item “Create and format hard disk partitions”, select it ). Next, in the list, we find the partition that we want to delete, right-click and select the item – Delete volume.
Remember that this will lose data from this partition!
After this, an unmarked area will appear (as in the screenshots above, step 10), indicated in black. Now you can select the disk to which you would like to add unallocated space, right-click again and select Extend Volume.
The Volume Expansion Wizard will appear, click Next. In the next window we need to select the size of the available space. Select and click next, and then Finish.
That's it, now you have deleted the unnecessary partition and added it to another disk. If you have any questions, write them in the comments.
Instructions for Windows 10
The instructions described in this section of the article are suitable for both Windows 10 and all versions of Windows 8. You can merge partitions using the built-in OS tools. As in the previous description of settings, we will need the Disk Management utility. Follow the instructions:
- Go to the search box and enter the word "Management". The desired option will appear in the results. You can also press the Win + X key combination to bring up the quick access menu. It contains a link to access Disk Management;
Fig. 6 – hard drive settings window in Windows 10
- Decide which sections you no longer use. For better orientation, they are designated by letters that correspond to the names of the drives in the “This PC” window;
- If you only want to keep one volume, choose which volume you will attach the rest of the items to;
- Then right-click on the object that you want to delete. And uninstall it;
Fig. 7 - deleting a partition in Windows 10
- Confirm the action, agreeing to data loss;
- Remove partition space;
Fig. 8 - freeing up space
- Now you will see that the section has become empty, but its division remains. Since it is no longer used in the system, its name and other attributes are removed. The object can be combined with the main disk;
- As a result of correctly performing all the actions, you will see that the following message appears in place of the disk section: “Not allocated.” Now you can start merging the sections.
Click on the main section - in most cases this is drive C. In the menu, select volume expansion.
Rice. 9 – element connection
The Settings Wizard window will open. With its help, you can easily divide free space or combine it into one system storage medium.
Fig. 10 - merging sections
Conversion
Most of the operations in this section do not need a detailed description, so it is better to touch on little-known topics, for example, how to convert your current media into a dynamic disk. This allows you to combine spaces on two or more media into one volume, interleave recording on them to improve performance, or duplicate information to improve reliability. Of greatest interest is a spanned volume for recording infinitely massive files and storing large amounts of data. To convert the device to a dynamic disk, select the appropriate menu item, as shown in the screenshot:
- LiveJournal
- Blogger
Fig.3 To convert the device into a dynamic disk, select the appropriate menu item.
The conversion operation follows step-by-step instructions, and the user should not have any difficulties if he has compatible media correctly connected to the computer. It is worth considering that the current OS partition cannot be included in a spanned volume, since the data from the converted drive is necessarily deleted.
Traditionally, Windows uses basic disks, which impose restrictions on storage space and the speed of operations. Other types of media are available only on special, server versions of the OS and are not available for home and professional editions of Windows. Additionally, it should be mentioned that external media cannot be made dynamic - administration in Windows 7 does not allow the use of removable HDDs or flash drives in this capacity.
Working with Acronis Director
Often in the standard Disk Management window, users are faced with the fact that the “Delete Volume” button is unavailable or other functions cannot be performed. This occurs due to group policy restrictions. Perhaps the system administrator has prohibited such actions, or your OS version does not allow you to configure disk partitions and other system parameters.
Using third-party utilities will help solve the problem. Acronis Director is one of the best programs that allows you to configure the disk configuration and bypasses all restrictions on changing the settings of your computer.
We recommend working only with the bootable version of the program, because it will help to avoid errors that may appear while configuring system parameters. The main window of the utility contains all the necessary data about the hard drive. Partitioning information is also provided in this window.
Rice. 11 – main window in Acronis Director
To create one disk instead of several sections, simply select all the partitions that you no longer want to use and click on “Merge” on the left side of the window. Detailed settings of elements will appear in a new window. You must select a volume that will be the primary one and attach other objects to it one by one.
After completing all the steps, you must apply the settings. To do this, click on the “Apply” button, which is located at the top of the utility (on the toolbar).
Thematic videos:
How to merge hard drive partitions in Windows.
Simple Solution to Complex Errors
Merge hard drive partitions FAST!
I'll tell you how to merge hard drive partitions using a simple Acronis Disk Director program. If you still don’t know how to do this, then watch my short video tutorial, where I outlined everything in detail. You will need a few minutes of your time to merge the disks and the Acronis Disk Director application.
Using third-party programs to work with partitions
Using third-party utilities to merge hard drive partitions can be useful in cases where:
- You need to save data from all partitions, but you cannot transfer or copy them anywhere.
- You need to merge partitions that are located out of order on the disk.
Among the convenient free programs for these purposes, I can recommend Aomei Partition Assistant Standard and Minitool Partition Wizard Free.
How to merge disk partitions in Aomei Partition Assistant Standard
The order of merging hard disk partitions in Aomei Partition Aisistant Standard Edition will be as follows:
- After starting the program, right-click on one of the partitions to be merged (preferably the one that will be the “main” one, i.e. under the letter under which all the partitions to be merged should appear) and select the “Merge Partitions” menu item.
- Specify the partitions that need to be merged (the letter of the merged disk partitions will be indicated at the bottom right in the merge window). The placement of data on the combined partition is shown at the bottom of the window; for example, data from drive D, when combined with C, will end up in the C:D drive.
- Click “Ok” and then “Apply” in the main program window. If one of the partitions is system, you will need to restart the computer, which will take longer than usual (if it is a laptop, make sure it is plugged in).
After restarting the computer (if necessary), you will see that the disk partitions have been merged and are presented in Windows Explorer under one letter. Before you begin, I also recommend watching the video below, which mentions some important nuances on the topic of combining sections.
You can download Aomei Partition Assistant Standard from the official website https://www.disk-partition.com/free-partition-manager.html (the program supports the Russian interface language, although the site is not in Russian).
Using MiniTool Partition Wizard Free to Merge Partitions
Another similar free program is MiniTool Partition Wizard Free. One of the possible disadvantages for some users is the lack of Russian interface language.
To merge sections in this program, just follow these steps:
- In the running program, right-click on the first of the sections that are being merged, for example, on C, and select the “Merge” menu item.
- In the next window, again select the first of the sections (if not automatically selected) and click “Next”.
- In the next window, select the second of the two sections. At the bottom of the window, you can specify the name of the folder in which the contents of this section will be placed in the new, merged section.
- Click Finish, and then, in the main program window, click Apply.
- If one of the partitions is a system partition, you will need to restart the computer, during which the partitions will be merged (the reboot may take a long time).
Upon completion, you will receive one hard disk partition out of two, on which the contents of the second of the combined partitions will be located in the folder you specified.
How to merge hard drive partitions in Windows
For this procedure, you can use the built-in system tools " Disk Management
" to merge sections, however, in this case, you need to transfer all the information from section E:, then delete section "E:" and then merge both sections into one. If there is a lot of information on the disk, it will take considerable time. We will discuss this method at the end.
To connect partitions, we use a special disk management program AOMEI Partition Assistant Standard
- You can download it on the official website. This program is available for commercial and home use and is absolutely free.
Attention.
AOMEI Partition Assistant Standard
belongs to a group of programs for working with disk partitions.
If you make a mistake when working with this program, you may lose important information on the disk, so we recommend that before starting to work with the program, you back up all
partitions of your disk in order to save all important information.
How to Merge Partitions Using AOMEI Partition Assistant Standard
Download and install the program on your computer, run it and follow the further instructions.
Right-click on the section.
A menu will pop up, select “ Merge Partitions
”.
We mark the sections that we want to merge and click “OK”. Apply your changes by clicking “Apply”. We confirm the changes. Click “ Yes
”.
The process of merging the partitions has begun, we are waiting for the download to complete. Click “ Fix it
”.
Sections are merged. All information that was on the second partition was automatically transferred to the “C” drive in the “ E-drive”
«.
Merging hard disk partitions using built-in Windows tools
Open the “Start” panel and type “Computer Management”.
Go to “
Computer Management
”.
Right-click on the partition, let’s say “E:” - “ Delete volume
”.
I remind you.
Don't forget to transfer your data from the partition you are deleting, otherwise you will lose it or make
a Backup
.
"YES". An undistributed space has formed, indicated by a black stripe. We use this volume to expand the system partition; you may have another partition, the principle is the same. Right-click on the partition you are going to expand - “ Extend volume
”. "Further". "Further". The sections are connected.
Using third-party software to combine logical drives on Windows 7
Connecting a new Windows 10 hard drive - description of the process
As already mentioned, there are quite a few programs for partitioning, connecting and administering hard drives, but most of them are paid or have very limited functionality. It is recommended to use a free application such as Aomei Partition Assistant Standard.
Note! As in the previous case using standard operating system tools, the partitions must be located next to each other, that is, adjacent. In addition, they must work on the same file system.
To perform the merging procedure, it is necessary that the PC or laptop can boot in Windows PE or PreOS mode. To do this, you need to disable Safe Load in the BIOS. This cannot be done via the command line.
The next steps are:
- Launch the Aomei program and go to its main window.
- Select RMB any of the sections to be combined (left or right - it doesn’t matter).
- Click on the context menu item called “Merge Partitions”.
- Specify the volumes that need to be merged.
- Agree with the choice and go to the main menu of the program.
- Select the “Apply” item (it is located at the top left) and click on “Go”.
- All that remains is to reboot, but before doing so, uncheck the box next to “Enter Windows PE mode to begin the operation.”
- Wait for the restart to complete and do not press anything.
Important! If the process is completed extremely quickly, and the volumes are not merged, then it is recommended to repeat the procedure, but without unchecking the corresponding item at the end of the instructions.
Aomei Partition Assistant Standard interface
This material described how to combine and divide disks on Windows 7, not only using standard software for local administration of drives, but also by resorting to third-party and more functional utilities. All instructions are extremely simple, so even a beginner can handle them.
