Hi all! In this article we will talk about checking RAM in Windows 10 for errors. In general, why check RAM? – In fact, it is checked in two cases:
- You bought a new or used computer or took separate RAM dies and want to check them.
- A blue screen of death often appears on your computer, programs crash, the system hangs and slows down, and there are lags in games.
I have given three methods that I tested on my computer. If something doesn’t work out for you or you have any questions, then immediately write to me in the comments under this article. Go!
Method 1: Standard means
Almost all versions of Windows have a standard program that allows you to test your RAM. The check occurs after the computer is rebooted, since the RAM should be as free as possible, and this cannot be done when the operating system is running.
- We need to run the system utility “mdsched.exe”. This can be done in two ways. First, open the Windows 10 search by clicking on the magnifying glass icon in the lower left corner of the screen and enter this name there.
- The second way is to hold down the button on the keyboard and then click on the letter R. A small window will pop up, where you will need to enter the name of the utility and click “OK”.
- Next, you have two choices - either run the scan right now, or do it the next time you turn on the PC. If you check now, close all applications and save the data you need.
- The computer will reboot and you will see the scan progress on the screen. Do not turn off or touch the computer.
- Once the check is finished, the system will boot and you will see the RAM check score in the bottom right corner of the screen. If you missed this assessment, or it didn’t work out, then you can look at the results in system events. It is launched in the same way through R and the command:
eventvwr
- When the window opens, select the main section “Windows Logs” on the left. Inside we find the “System” subsection. Now we look through the main central window. Typically events are sorted by date and time, and our diagnosis will be at the very top. If the date does not match, then sort the column by clicking on the top “Date and Time” inscription.
- Open the event and look at the test results.
Third party utilities
Windows offers a simple tool for diagnosing and detecting flaws in RAM. To find some types of errors, its algorithms are not enough, and any specialist in the field of computer hardware will advise using at least a couple of applications.
GoldMemory
Advanced domestic development with a focus on experts. The utility was written in Assembler and works from removable media without an operating system. Uses its own read-write algorithms and several testing modes. Works with RAM up to 64 GB. To run the application, you must write it to a bootable USB flash drive. You will have to manage it using text commands - there is no graphical interface in GoldMemory - it will be difficult for beginners to work with it. All commands and keys are displayed on the screen instead of with hints.
MemTest86
An old and time-tested utility, the algorithms of which have been developed and improved for over 20 years. Like GoldMemory, it runs without an operating system from a bootable USB flash drive, but has a simple graphical interface. It features three operating algorithms, supports old and new DDR2-DDR4 modules, UEFI interface, 64-bit mode and Microsoft-signed secure boot.
Write the downloaded image to a bootable USB flash drive, boot from it via the Boot Menu and run the desired test.
MemTest86+
The utility has become a standard among free diagnostic tools for checking RAM. Like its analogues, it runs from bootable media created on the basis of the supplied ISO image. It is not equipped with a graphical interface. After launch, the application automatically begins testing. Progress is displayed in the center of the window at the top, the line is “Test”. Control tips are displayed below.
If problem areas are detected, a line will appear at the bottom with information about such areas.
RightMark Memory Analyzer
A comprehensive tool for testing the RAM subsystem: its latency, bandwidth. It will evaluate the performance of caches of different levels and display comprehensive information about the computer’s hardware.
Conducts a stress test of the entire RAM or individual specified areas. To estimate the throughput, two algorithms for reading from memory and writing to it are used. You can scan individual modules, including from within the operating system.
MemTach
A tiny utility for estimating RAM speed in read and write modes, and access time to memory cells. Works under Windows. Support for the utility has long been discontinued; it is not recommended to work on Windows 8-10 and with memory released in the last 15 years.
SuperRam
An effective memory manager that optimizes interaction with RAM and the swap file when the former is insufficient. And it does this more efficiently than Windows, provided that the rules for unloading applications into the paging file are intelligently manually configured. The “Perform speed test” function contains five algorithms for assessing the speed and stability of the RAM.
AIDA64
A powerful information and diagnostic utility, which includes a module for evaluating three levels of cache and RAM Cache & Memory Benchmark. It will evaluate and display the speed of reading, writing, copying information, and RAM latency. If there are different modules, the result is displayed for the slowest one.
Method 2: MemTest86
MemTest86 is a separate, more advanced utility that allows you to more thoroughly check your RAM dies. Many system administrators, engineers and programmers prefer MemTest86 rather than the built-in Windows utility, as they believe that it is more advanced. The disadvantage of this method is that to check you will need to make a bootable USB flash drive.
- Download the archive from the official website.
- Insert the flash drive into the USB port of the computer.
- Open the archive and run the exe file.
- In the first step, select your flash drive. If you don’t see it, click on the “Refresh Drivers” button. At the end, click “Write”.
- As soon as the flash drive is ready, restart the computer and launch the “BOOT menu” - to do this you need to press the auxiliary button on the keyboard several times. The button may differ depending on the version of your BIOS. Frequently used keys: F11, F12, F8, Esc. If the BOOT-menu BIOS does not start, go to the “BIOS” itself (buttons: Del, F2, Esc, F10), find the “BOOT” section there and install your USB flash drive in the first place. After the procedure is completed, do not forget to return everything to its place.
- Once the program starts, you won't have to press anything. The testing will be carried out continuously in a loop, so at the end you need to press the Esc button yourself to end it. You must pass at least 6 tests. If the RAM has any errors, you will see them below - they will be highlighted in red.
Why do errors appear in RAM?
Memory consists of bits, which are designated either zero or one. The binary system in the PC is trained to perceive this information and translate it into readable data adapted for user perception.
If errors occur, the computer either corrects them or reads the information incorrectly, which leads to malfunctions.
Common causes of RAM errors:
- Accumulation of dust and dirt inside the system unit.
- Internal and external damage, not only to the RAM itself, but also to the motherboard.
- Incompatibility of RAM modules: non-identical sticks cause a conflict within the system, which leads to software failures and sometimes even prevents the OS from starting.
- Factory defects or low-quality components. The solution here is to buy models only from trusted brands.
- Overheating or undercooling of modules.
- Malfunction of the power supply.
Method 3: TestMem5
Another interesting homemade program for testing RAM. At one time it was very helpful. You can download the program from this link. The advantage of this program is that it has completely different algorithms than the previous two options. Once launched, the test will begin immediately. The most important thing is to run the utility with administrator rights by right-clicking on the exe file. Everything is similar here - the more test cycles, the better.
How to fix errors
The simplest solution is to replace the bar that is failing. But this is a radical measure. It is needed if the RAM chips are damaged. Sometimes a regular eraser can help; you just need to wipe the contacts: perhaps they have oxidized. It also happens that errors are corrected by the simplest antivirus application or replacement of cooling.
Find out: How to increase the RAM of a laptop in 5 steps: methods and tips
The operability of the operative is easy to check. You can use either the classic Windows utility or a separately installed application. The second method is preferable when you need to not only find an error, but also eliminate it: many programs can do this.
What to do if a faulty RAM is detected?
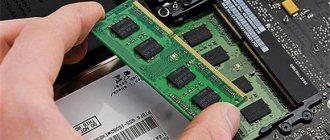
First, we need to find the broken die - to do this, we take out all the RAM. It is enough to inspect them visually. I also had a burning memory. If it is not possible to detect the culprit in this way, then you will have to do everything “at random” - installing one memory stick at a time. We need to pass separate tests for each.
As soon as you discover it, it should be immediately replaced with a new one. If the RAM memory is under warranty, then run with the receipt and take it to the store. If it is already out of warranty, there is no point in repairing it. You need to buy exactly the same die. The most important thing is not to make a mistake and choose the right replacement RAM. The topic is quite scrupulous, so I bring to your attention the video below.
When to check memory devices
It is not recommended to systematically diagnose the random access memory device (RAM) on a computer - this will reduce the service life of the equipment. There are certain symptoms that indicate the need for analysis:
- The appearance of the Blue Screen of Death.
- Significant reduction in computer performance.
- The occurrence of graphic artifacts when processing images on the monitor.
- Emergency closure of powerful programs and games.
- Inability to start the computer. Often accompanied by a short beep.
If you experience any of the following problems, we recommend that you use the instructions below to test your RAM in Windows 10.
Video instruction
If you have figured out what exactly caused your problem, I would be grateful for your comment on the article: perhaps it will be useful for someone.
Sources
- https://www.911-win.ru/article/proverka-operativnoy-pamyati-windows-10/
- https://wind10.ru/sovet/kak-proverit-operativnuyu-pamyat-na-oshibki-v-windows-10
- https://pc86.ru/tips/ram-test
- https://NaladkaOS.ru/windows-10/kak-proverit-operativnuyu-pamyat-na-oshibki.html
- https://kompukter.ru/kak-proverit-operativnuyu-pamyat-na-oshibki-na-kompyutere-s-windows-10/
- https://less-it.ru/how-to/kak-proverit-ozu-na-oshibki
- https://remontka.pro/windows-memory-diagnostics/
Previous post What to do if you forgot your Apple ID password
Next entry How to connect bluetooth headphones to a laptop (connecting a bluetooth headset) - windows 7, windows 10, windows 8, wireless, I can’t connect
View result
If for some reason the program has completed testing, but the result could not be verified (colleagues/family/laziness interfered), use system messages.
- Win + S.
- In the search, type Event Viewer.
- When you first start, you will need to wait a little.
- Find the system column in the log, and there the test results. In our case, “no errors were found.”