The Windows 10 troubleshooter is designed to fix problems with the operating system, and the built-in tool is used to solve common problems. The Windows 10 operating system includes tools that automatically troubleshoot Windows when problems occur.
Troubleshooting Windows will help solve many computer problems that happen sooner or later, for example, the computer has problems with sound, problems with the Internet connection, or problems with other devices.
Using the Windows troubleshooter will help, in most cases, solve the most common problems using the operating system itself.
Troubleshoot Windows 10 in OS Settings
The Windows Troubleshooter will become available to the PC user after entering Settings after updating Windows 10 to Windows 10 version 1703 (Windows 10 Creators Update).
To enter Troubleshoot in Windows 10, follow these steps:
- Go to the Start menu.
- Click on the Settings icon (gear icon).
- Select the "Update and Security" section.
- Enter the "Troubleshooting" section.
Here are the tools that run Windows 10 troubleshooting, in the appropriate category. This is a kind of Windows Troubleshooting Center.
Problems can arise in the operation of any computer, and with the help of standard system tools, problems can be corrected automatically.
Specific methods for solving possible problems in the operation of the OS or hardware are grouped into two areas: “Start and work” and “Troubleshooting”.
The Start and Run section can help you resolve the following issues:
- Audio playback - Troubleshoot audio playback problems.
- Internet Connections - Troubleshoot problems with connecting to the Internet or websites.
- Printer—find and resolve printing problems.
- Windows Update - fix problems that are preventing Windows from updating (here you can read about fixing this problem using the Windows service).
The “Troubleshooting for other problems” section is responsible for fixing problems:
- Bluetooth - Troubleshoot Bluetooth devices.
- Video playback - Find and fix problems playing movies, TV shows, and videos.
- Incoming connections - Troubleshoot problems with incoming connections and Windows Firewall.
- Voice functions - microphone not ready.
- HomeGroup—Troubleshoot problems viewing computers and shared files in a HomeGroup.
- Audio recording—Troubleshoot audio recording problems.
- Keyboard - Find and fix problems with your computer's keyboard settings.
- Equipment and device - troubleshooting problems with equipment and devices.
- Shared Folders—Find and fix problems accessing folders on other devices.
- Power - Find and fix problems with your computer's power settings to save power and increase battery life.
- Search and indexing - Find and fix Windows Search service problems.
- Windows Store apps—Troubleshoot issues that may prevent Windows Store apps from working properly.
- Network adapter—Troubleshoot problems with wireless and other network adapters.
- Blue Screen - Troubleshoot errors that cause Windows to stop or restart.
- Troubleshoot compatibility issues - Find and fix problems with older programs running on this version of Windows.
As you can see, in Windows 10, a large number of tools are available to solve possible problems in the operation of the operating system, and to resolve issues related to the incorrect operation of computer hardware.
Why is Windows 10 not responding?
Signs of Windows 10 not responding include unresponsive programs. , or you can't click anything on your computer.
The reasons may vary. Your computer may freeze or become unresponsive when there are not enough system resources, as too many running applications and services can slow down and even cause your computer to freeze. And conflicts on your computer can lead to the problem unless infected with malware.
But don't worry. We will help you solve the problem and return your computer to normal.
Windows 10 Troubleshooting Example
First, select a problem category. In this example, I selected the network adapter.
Select a category and a “Run troubleshooter” button will appear. Click the button to launch the system tool.
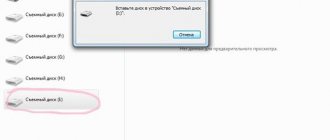
The next window prompts you to select a device for diagnostics. Diagnostics and troubleshooting are carried out automatically.
Once the diagnostics are complete, the troubleshooter will offer an option to resolve the detected issues.
If the troubleshooter finds a problem, agree to the suggested solution. If necessary, run additional checks to look for problems. Perhaps the problem will be resolved after fixing this problem.
How to start the process
There are two ways to run diagnostics: through the computer control panel and directly. The transition to automatically eliminating problems associated with system startup will be discussed separately in the next paragraph, “Examples of using the wizard.”
Using your computer control panel
- Launch Control Panel from the Start menu.
Opening the control panel - Go to the Troubleshooting section.
Go to Troubleshooting section - You can also go to the Troubleshooting tab by typing control.exe /name Microsoft.Troubleshooting in the Run program for quick access.
Run the command control.exe/name Microsoft.Troubleshooting - On this page you will find a short list of programs and services that can be repaired through the troubleshooting wizard. To open the full list, click on the “View all categories” button.
Go to View All Categories - Select any item from the list to begin the recovery process.
List of things you can use automatic troubleshooting for
Directly
This method is best used if you need to fix some built-in or third-party program. Find the file that launches the application, right-click on it, and in the menu that opens, select “Fix compatibility problems.” After this, diagnostics will begin that will help you fix the problem or at least find the cause of the breakdown.
What to do if the wizard does not work
If the wizard stops launching after installing third-party programs or updates, uninstall them and check if it works after that. If this does not help, or programs and updates were not the cause of the wizard’s failure, then you need to roll back the system to the nearest restore point in order to get the computer in the state when the wizard was working fully.
- From the start menu, open the “Recovery” tab.
Open the “Recovery” tab - Start the recovery process by clicking on the appropriate button. Please note that you will need administrator rights for this action.
Click the “Start System Restore” button - Select the point you want to roll back to and begin the recovery process.
We mark to what point we need to roll back
If you do not have a restore point, or the rollback did not help the troubleshooting wizard, then there are two options left: restoring the system from an image or reinstalling it. But these are drastic methods, so first consider using third-party programs to replace the standard troubleshooter.
Fixing Windows problems
The Microsoft Fix it Portable program was created by the operating system manufacturers, is completely free and helps solve about thirty of the most common system problems with just a couple of clicks.
“At this point in time, this Windows troubleshooter has been retired” is the verbatim message on the official Microsoft Fix it page. Therefore, the information in the article below, unfortunately, is no longer relevant (I will give a link to another working similar tool).
I would like to immediately reassure many users - the program does not check the authenticity of the Windows license, at least I did not notice.
Fixing Windows problems can be done online by simply going to the official website of the corporation, but it is more convenient to use Microsoft Fix it Portable - you can save it on a flash drive and repair the system on any computer.
By the way, even if you are sure that your operating system is working properly, it never hurts to check.
So let's get started...
Computer diagnostics at startup
Surely most of you are familiar with the picture of a blue screen at startup. The text on it begins with the words “There is a problem on your PC...”.
A picture familiar to most
Why does it start
One of the most common reasons for such a failure is incorrect installation of system updates. Perhaps you did not have enough patience and turned off the computer when the message “Do not turn off. Updates are being installed” or this happened due to a voltage drop. In any case, this inscription is not accidental, and at the moment the system requires an update adjustment. For those users who are afraid to get involved in the system themselves, we recommend taking the computer to a service center. But if you want to try to do this with improvised means, we follow the following instructions.
How to disable
For subsequent steps, we will need to boot through safe mode.
- Click on the notification area (lower right corner) and select the “All settings” tile.
We need the “All parameters” tile
In the window that opens, we need the “Updates and Security” item.
“Updates and Security” item
Now select “Recovery” and in “Special boot options” click on “Restart now”. We wait.
Select “Special boot options” and reboot
When we boot the computer, we enter safe mode. Select “Advanced options” and here the “Download options” tile. As is clear from what is written on the screen, we need to press F4 to boot into safe mode. Click.
Everything is described in sufficient detail on the screen.
Identifying network and internet problems
Before you start solving network problems through system tools, make sure that there are no network failures on the part of the Internet service provider. Try rebooting your modem and/or router. If the problem persists, then you should turn to the simplest way to solve network problems.
In the lower right corner, look for your connection icon, right-click on it and select “Diagnostics problems” from the context menu.
Select your problem type
After selecting your problem type, simply follow the on-screen instructions.
One of the most common causes of network problems is an outdated network device driver. In this case, you need to update it.
- Right click on the Start icon. Select "Device Manager".
Select "Device Manager"
You need to select the network adapter you are interested in
In the list of available adapters, we look for one that responds to the Internet connection (in the picture this is the second Realtek).
In the context menu, select “Update driver”, and in the window that opens, agree to automatically search for updated drivers.
Select the first menu item
Now follow the instructions on the screen and close the setup wizard when finished.