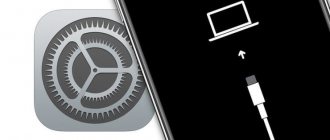
Most users of Apple products, mostly beginners, are not aware of the existence of the DFU mode. At least until the iPhone works flawlessly and does not require urgent restoration. After certain actions, especially after flashing and jailbreaking, the iPhone begins to glitch and fail to perform basic functions. We are talking about absolutely any version of the gadget: be it the old but peppy 5S or the brand new 11 Pro.
When it comes to restoring the original firmware, there is no other way than putting the smartphone into DFU mode. In the article we will figure out how to launch this function on all current devices, what kind of mode it is, what problems there may be and their possible solution (for example, what to do if the device is “stuck” in DFU).
What is it and in what situations may it be needed
DFU (full name Device Firmware Update) is one of the emergency modes on an Apple device. This function is necessary if the user encounters difficulties in updating the iOS operating system (which happens quite often and can happen to any user). This mode is needed when installing Jailbreak or crashing from Cydia (a local application store similar to the App Store in regular iPhones).
But these are not all the capabilities of the “DFU” mode: in addition, by returning the gadget to its normal state and completely restoring it, you can correct system errors that could lead to crashes, lags and incorrect operation. Also, if the device cannot be restored using conventional methods, then the only way out is to use the special function of restoring the original firmware.
When might this mode be needed?
- The device does not start (except when water gets in);
- Standard launch methods do not work;
- Another Recovery Mode did not solve the problem;
- The device does not charge (except for a battery failure);
- The computer does not detect the device in iTunes.
During the recovery process, the smartphone does not load the operating system; not only the Apple logo, but also any other image is not visible on the display. The gadget in this state does not respond at all to pressing the lock key, changing the volume and “Home” (on the iPhone 8 and other models below). Even if you press “Home” and “Power” at the same time, nothing happens.
What exactly happens during the reinstallation of the so-called “Device Firmware Update”?
- Firmware for bootloader components;
- Start of content changes and start of the loader;
- Module firmware;
- Dividing files of the entire system into folders (in other words, direct and full access to the contents of the iPhone as on Android devices);
- Full and final firmware of the created system partitions.
To summarize, we can say that this mode will save you in many critical situations and will allow you to restore life to the device. The main thing is that the iPhone does not come into contact with water and is not drowned. Then this is a completely different problem and you cannot do without a trip to a certified service center.
Part 1: What is iPhone/iPad/iPod DFU mode
The question arises: “Does DFU mode delete everything?” Answer: absolutely not. DFU mode is short for Device Firmware Update, which establishes a connection between the iPhone/iPad/iPod and the computer. For example, you need to enter DFU mode first if you want to jailbreak your iPhone. Once you put your iPhone, iPad or iPod into DFU mode, your Apple device will be able to communicate with iTunes and then easily update iOS or jailbreak the device. Moreover, DFU mode is a powerful feature with which you can successfully return your unresponsive screen to normal.
So what's the difference between iPad DFU mode and recovery mode? Well, DFU mode allows users to put the iOS device into the iTunes interface. But it doesn't load the iOS operating system or bootloader like recovery mode does. The easiest way to differentiate DFU mode from recovery mode is to compare the icon on the screen. You may see a black screen only when you enter DFU mode, while recovery mode offers a black screen with the iTunes icon. In addition, DFU mode is built into the hardware, so you cannot remove this feature manually.
What is the difference between Recovery Mode and DFU?
It is easy to get confused in these two modes, since both of them are emergency modes. In fact, the difference between them is colossal: they use fundamentally different recovery methods. In a nutshell, “Recovery” is more “gentle” compared to “DFU”. Here are a few obvious differences:
- In “RM” mode, when connected to a computer or laptop, the iPhone display has an icon of the running iTunes program and a USB cable icon. In “DFU” the iPhone is like a brick, it does not show any images, the screen is all black, and the gadget does not respond to any keys;
- Using Recovery Mode, the user rolls back the device to the initial (previously created) point, which is very similar to rolling back Windows on a PC. System components and files are not involved in any way - the settings are adjusted and some parameters are restored. In DFU, everything is different - this is a bootloader mode, where the gadget is restored, completely rebooted and flashed the system. All necessary components are created new;
- DFU is resorted to only when RM is unable to help with the problem;
- “Recovery” mode is the calibration of the iPhone using the iOS operating system itself, and DFU is a system bypass;
- To get to “Device Firmware Update”, you will need a computer with iTunes installed. And for Recovery Mode, having a PC is not necessary.
Additionally. Set up a connection to iTunes via Wi-Fi.
After connecting your iPhone to your computer via iTunes for the first time via USB, you can set up a Wi-Fi connection. To activate a Wi-Fi connection, you need to connect your iPhone in the usual way - with a cable, open iTunes and click on the device icon in the upper left corner.
Go to the Review menu and scroll down to Options. Now check the box next to “Sync with this iPhone over Wi-Fi” and select synchronization of music, videos, movies and other files, then click “Apply” and “Sync”.
After this, the iPhone will connect to iTunes via Wi-Fi. But provided that the device is connected to a power source and to the same Wi-Fi network as the computer.
Once you've finished using iTunes, you can safely exit the program and disconnect the cable from the computer; no additional actions are required for a safe software disconnection, as is the case with a USB drive.
Read this before resorting to using DFU
As a rule, DFU is used in emergency cases, as it is a powerful tool for restoring an iPhone. It is not necessary in all cases - make sure that there is no other less radical way to return the gadget to working condition. We invite you to find out what alternatives exist that will save the iPhone owner from installing the system from scratch and losing personal data.
First, try to force reboot the device. This can be done by pressing keys on the following models:
- iPhone 6s and below: Press and hold the Home and Lock keys at the same time for a few seconds;
- iPhone 7 – press the Home key and the lower volume button together;
- iPhone 8 and older (up to the latest models): click on the top volume button, then press the volume down button once, and then hold down the lock key for a few seconds. Release when the Apple logo appears on the display.
Secondly, try running Recovery Mode if the forced boot did not help. In this emergency mode, data is not deleted, and restoring the gadget is not difficult. One of the ways to enter the device into this mode is to perform the same actions as when rebooting, only you need to connect the device to the PC via a USB cable. Naturally, the iTunes utility must be preinstalled.
How to put iPhone into DFU mode
In fact, there is nothing complicated - you just need to simultaneously press certain keys at the right time.
Very important note! After the recovery process is completed, the gadget will be updated to the latest version of iOS firmware (the maximum available on this device), and all information will be erased. Before starting the procedure, do not forget to make a backup copy in iCloud or check the functionality of this function so as not to lose access to photos, documents, saved passwords and other personal information.
If the tips above did not help, then select a suitable model from the list below and download the iTunes program from the official Apple website (or another available utility that is suitable for these purposes).
How to put iPhone 6 and below into DFU mode
Follow this instruction:
- Connect the gadget to the PC via a USB cable;
- Launch the iTunes program;
- Hold down “Home” and lock at the same time for several seconds until the iPhone screen goes completely dark (about 10-15 seconds);
- After the display goes dark, release the Power button, but do not release the Home button for approximately 15 seconds.
To find out that the procedure was completed successfully, iTunes will notify the user with a message that the gadget is currently running in recovery mode. Confirm the action by clicking OK.
How to put iPhone 7 and 7 Plus, iPhone 8 and 8 Plus models into DFU mode
Smartphones iPhone 7/8 and iPhone 7 Plus/8 Plus are the only devices in the Apple line that received their own modification that launches the “DFU” mode.
- Connect 7/8 or 7 Plus/8 Plus devices to your Windows or Mac computer;
- Turn on iTunes;
- Turn off the gadget in the usual way by holding the lock button and dragging the bar to the right on the screen and wait until the picture goes out;
- Hold the side lock key again, then start holding the volume down button, which is located on the left side of the case, for 10 seconds;
- Stop holding the Power key and continue holding the Volume down key for about 5 seconds;
- Next, make sure that the device does not start as a result of these actions. If the iPhone remains inoperative, it means that the DFU has started. You will be notified of this by a message stating that iTunes has detected the phone in recovery mode. Restore your gadget from Apple by clicking OK.
If the apple icon lights up during the process, you will have to enter the device into DFU mode again from the first step. This may happen because you held down the keys for longer than the specified time. During the entire process, the screen should be black and not turn on.
If the iTunes logo with a picture of a USB cable is displayed, it means that you have launched Recovery Mode. No problem, just disconnect the device and try entering the gadget into the “DFU” again.
How to put iPhone X and older models into DFU mode
In the absence of a mechanical and touch-sensitive Home key on iPhone X and newer models, all other buttons are used. And here is their sequence needed to transfer the gadget to “DFU”:
- Turn off the iPhone using the standard method - hold down “Power” and the lower volume key;
- Connect the gadget to your Windows or Mac PC using a suitable USB cable;
- On the left side panel, hold down the volume up button for a few seconds, then release it;
- Likewise, hold down the volume down key and release it after a few seconds;
- Next, immediately start holding the lock key for about 10 seconds. The phone should not start;
- Continue holding the Power button and press Volume Down for about 5 seconds;
- Stop holding the lock button, but do not release the bottom volume key for ten seconds;
- When a notification appears on the computer screen that the iPhone has entered recovery mode, it means that the procedure was successful and you did everything correctly.
As in the previous instructions, any model should not be run during the entire process. If this happens, then you made a mistake. No problem - do the steps above again and repeat the steps more carefully.
How to exit DFU mode
Now let’s figure out how to terminate the “DFU” regime. If you have finished setting up your device (restored the firmware or launched Jailbreak) or simply tried to enter the mode, here are instructions on how to exit this mode. Below in the article there will be a small recommendation on how to easily and quickly exit this mode on any iPhone model. So, follow these steps to return the device to working condition:
- On iPhone 6 and lower models: Press and hold the “Power” and “Home” buttons for a few seconds (10-15 seconds is enough). Stop holding the keys when the apple icon lights up on the screen;
- iPhone 7 and 7 Plus, iPhone 8 and 8 Plus models: Press and hold the bottom volume down button and the lock key until the Apple logo appears on your device;
- iPhone X and older smartphones: hold volume up, release, then hold volume down, release, and then simply press the lock button until the coveted apple icon lights up on the screen.
How to get any iPhone out of recovery mode? It's very simple: force reboot your iPhone. How to do this on the required model is written above in the article. This is the simplest solution to this problem to get your gadget back to working condition without having a computer stuck in DFU.
As you can see, there is nothing complicated about putting your smartphone into emergency mode. All you have to do is find out what iPhone model you have and select it from the list, and then just press the buttons correctly and follow the specified interval. If you cannot perform these steps on your own or doubt that you are doing them correctly, contact the service center, where specialists will restore your gadget to working order in a matter of minutes!
Share link:
Part 2: When to use DFU mode
Many people don't know what is the best time to use DFU mode or in what cases DFU mode can work. Below are typical situations where you can put your iPhone, iPad, or iPod into DFU mode. As a result, the next time such cases appear on your iPad, you can use iPad DFU mode to solve the problems yourself.
- Downgrade the firmware/version of your current iOS
- Jailbreak or jailbreak your iPhone/iPad/iPod
- Remove expired iOS beta
By putting your Apple device into DFU mode, you can easily fix system errors and change custom firmware on your iOS device.
