All servers created by Windows servers on UltraVDS are by default immediately available for connection via the standard RDP protocol (Remote Desktop Protocol) - the usual “Remote Desktop Connection” in Russian-language editions of Windows. This article will describe how to connect to a newly created virtual server on UltraVDS from various devices (operating systems). If you require any other connection method (RAdmin, TeamViewer, etc.) after a successful RDP connection, you can configure it just like any other software.
The article is quite long due to the fact that it describes in detail, step by step, how to connect from each of the most popular systems, so we brought up the hot links for navigation:
Connecting to a virtual server from a desktop version of Windows (XP, 7, 8, 8.1, 10)
When using a standard Windows operating system, to connect to the server, you need to open the following path: Start -> Programs -> Accessories -> Remote Desktop Connection Or simply press the Win+R
and type
mstsc
In the window that opens, you must specify the IP address of the VDS server created for you. If you ordered a server with several IP addresses, you can use any of them to connect. The IP address of your server is listed next to your server in your personal account in the “My Servers” section.
After entering the server IP address, click the “Connect” button and you will see a window with authorization fields. Here you need to log in as a new user:
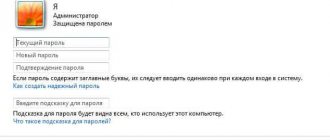
When creating each new server, the system automatically generates a random password for the Administrator user. This password is also displayed in your personal account near your server:
In some editions of Windows there is a strange thing: if the password from the server is copied and pasted into the authorization field before connecting, then when you try to connect, nothing will happen, and the RDP client will again show the authorization window as if the credentials were entered incorrectly. In this case, you must enter the password manually
(capital letters are large, small letters are small, in the English keyboard layout).
Connecting to a remote desktop is a very convenient thing, with its help you can transfer files from your computer to the server and back simply by copying and pasting them, the same with text on the clipboard. You can also transfer from your computer any included USB devices and network printers/scanners to the server. To do this, when you first connect to the server, select “Show options” in the lower left corner.
In the window that opens, go to the “Local Resources” tab and select the parameters you require:
When connecting to the server, you may see information about
an untrusted security certificate
. The reason for this is that the server encrypts the transmitted data with an SSL certificate, which it generated automatically. This notification does not indicate a security problem, but only alerts you that the connection is encrypted using a certificate that was not issued by an authorized authority.
Check the “Don’t prompt me for connections to this computer again” checkbox here and click “Yes.”
Carrying out the setup
The setup begins by calling “System Properties”.
- To enable and configure the remote desktop, call “Properties” of the “My Computer” directory.
- Click on the link “Setting up remote access”.
See also: Making a bootable USB flash drive for Windows 8
- Go to the “Remote Access” tab.
- Move the trigger type switch to the position as in the screenshot, and check both available options.
- Click “Apply” to make changes to the registry and close all windows by clicking “Yes”.
When following the suggested steps, do not worry about safety. The computer is not at risk of data interception, because when transmitted via the RDP protocol, it is encrypted. Also note that remote access using Windows 8 is carried out only between PCs belonging to the same workgroup.
To rename it, in the system properties, click “Change settings”.
Then click “Change”.
Enter the group name in the lower text form and save the changes. The computer will then need to be rebooted to activate the changes.
Connecting to a VDS server with Mac OS
For Mac OS, Microsoft releases an official RDP client that works stably when connected to any version of Windows OS.
You can download it from iTunes here: https://itunes.apple.com/ru/app/microsoft-remote-desktop-10/id1295203466?mt=12 The program interface is simple and intuitive. Before you start, you need to configure the connection parameters. To do this, we create a new one:
In the connection settings window, specify an arbitrary name, for example, “Server on UltraVDS”, the IP address of the created server and authorization data (Administrator login and password automatically assigned to the server) - this data is displayed in your personal account.
After exiting the settings window, everything will be saved automatically and in the list of connections you will see the newly created one:
Double-click on it and you will connect to your server. When connecting to the server, you may see information about an untrusted security certificate. Why such a notification appears and what it means is described above.
By adding your server's self-signed certificate to the trusted ones or simply accepting it once, you will see the Windows desktop of your virtual server.
Connecting to a VPS server from a smartphone or tablet on iOS (iPhone or iPad)
Before connecting to the server, you need to download the Microsoft Remote Desktop application from the Apple Store (this is the official RDP client from Microsoft): https://itunes.apple.com/ru/app/microsoft-remote-desktop-10/id1295203466?mt=12
Launch the application after installation and click on add a new connection:
In the window for creating a new connection, you must specify the IP address of your virtual server and authorization data, which are displayed in your personal account (more details about where they are indicated above).
When connecting to the server, you may see information about an untrusted security certificate. The reason for this is described above. Select "Don't ask again for this PC" and click "Accept."
If the authorization data and server IP address were entered without errors, you will successfully connect to your server.
Enabling RDP from group policies in the Active Directory domain
If you need to enable RDP access on a large number of computers at once, you can use group policies (GPO). We assume that all computers are included in a Windows domain.
- Launch the domain GPO management console gpmc.msc ;
- Create a new (or edit an existing) group policy and link it to the target OU with computers or servers;
- Switch to policy editing mode and go to the GPO Computer Configuration -> Administrative Templates -> Windows Components -> Remote Desktop Services -> Remote Desktop Session Host -> Connections section;
- Find and enable the policy Allow Users to connect remotely by using Remote Desktop Services, installing it in Enable;
- Update group policy settings on clients;
- After applying this policy, you will be able to connect to all computers via RDP (the policy will apply to both desktop clients with Windows 10 and Windows Server). If necessary, you can more precisely target policies to computers using WMI GPO filters.
- If Windows Defender Firewall is enabled on computers, you need to allow RDP traffic for the domain profile in the same GPO. To do this you need to activate the rule Windows Firewall: Allow inbound Remote Desktop Exceptions (located in the section Computer Configuration -> Administrative Templates -> Network -> Network Connections -> Windows Firewall -> Domain Profile).
More information about setting up Windows Firewall rules via GPO is described here.
Connecting to a virtual server from an Android smartphone or tablet
First of all, you need to download and install the Microsoft Remote Desktop program from Google Play (this is the official RDP client from Microsoft): https://play.google.com/store/apps/details?id=com.microsoft.rdc.android&hl= en
Launch the application after installation and click on add a new connection
In the window for creating a new connection, you must specify the IP address of the created VDS server and authorization data (where to get them is described just above).
When connecting to the server, you may see information about an untrusted security certificate. The reason for this is described above. Select the “Don’t ask me again for connections to this computer” checkbox and click “Connect”.
If the authorization data and server IP address were entered without errors, you will successfully connect to your server.
Connecting to the server via RDP from Ubuntu
RDP is a closed protocol from Microsoft; it, in turn, does not produce RDP clients for Linux operating systems. However, there are still various working versions from various manufacturers. We recommend using the Remmina
. For Ubuntu users, there is a special repository with various application packages, including Remmina and RDP. Installation is carried out in 3 simple commands, which are entered one by one in the Terminal:
To install the Remmina package
sudo apt-add-repository ppa:remmina-ppa-team/remmina-next
Install updates
sudo apt-get update
Install the RDP protocol plugin
sudo apt-get install remmina remmina-plugin-rdp libfreerdp-plugins-standard If you have already installed or launched an existing version of Remmina, then it must be restarted. This can be done by rebooting the computer, or by executing the following command in the same terminal: sudo killall remmina If the process was not started, an error message will appear: process not found, which also suits us.
Open the search menu and find the freshly installed Remmina package there
Click on add a new connection and fill in the fields with the data for connecting and authorizing to your server (where the data for connecting to your particular server is located is described above):
After saving, your server will always be available in the list of connections for quick access. To connect to it, double-click on the line of your server.
When you first connect to the server, you may see information about an untrusted security certificate. The reason for this is described above. Just click "OK" and you will see your server desktop.
What it is
Remote Desktop is a technology that allows you to connect to another computer connected to the Internet or local network using the RDP protocol. Initially, the technology was available only for server operating systems, but in an effort to please users and the specialists servicing their computers, developers with Microsoft began introducing RDP into Windows XP. Windows 8 is no exception, in which this function has become even more advanced.
Due to the fact that the remote desktop is used by a small number of users, RDP is blocked after installing Windows 8 in order to increase system security. Therefore, setting up RPD begins with activating this feature. But first a few words.
Make sure that after you turn on the computer you are connecting to via the network (for example, your home or work computer), it does not go into sleep mode. It breaks the connection, making it impossible to access remotely using the tools integrated into Windows 8. You will also have to password-protect the account whose desktop you want to see remotely, because the form with the password should not be empty.
Connecting to Remote Desktop (RDP) from Debian
RDP (Remote Desktop Connection) is a proprietary protocol from Microsoft; they, in turn, do not produce RDP clients for Linux operating systems. But there are still various working versions from various development companies. Remmina
RDP client . To install the Remmina application and the RDP plugin for it, you need to open the package installation manager:
Here, enter “Remmina” in the search bar and select all the results for installation:
Installation takes literally 3-4 seconds, after which you can immediately use the application. Find it in the main menu and run it:
Before starting work, you need to create a new connection for convenience in the future:
In the window that opens, you must set the correct RDP connection parameters and authorization data (specified in your UltraVDS personal account):
After saving, your server will always be available in the list of connections for quick access. To connect to it, simply double-click on your server line.
When you first connect to the server, you may see information about an untrusted security certificate. The reason for this is described just above. Just click "OK" or "Accept" and you will see your server desktop.
What should I do if I immediately get an error when trying to connect to a Linux OS?
By default, all servers created on UltraVDS only allow RDP connections from computers (clients) running network-level authentication.
Some Linux RDP clients may not support this authentication. In this case, before connecting to the server via RDP, you must cancel this requirement on the VDS server itself. UltraVDS has the ability to provide emergency access to the server if you cannot connect to it, which is what we will use to disable the requirement for mandatory authentication. To open emergency mode, go to your personal account on the “My Servers” page and click on the screenshot of the required server
In the window that opens, you must activate the user authorization option. This is done by pressing the key combination Ctr+Alt+Del, but since such a combination cannot be transmitted via the web, a special button was placed on the top panel of the window:
Next, enter the administrator password and press Enter:
You will see the standard Windows desktop. Here, click the “Start” button, find “My Computer” (This PC) and right-click on it:
Select “Properties” from the menu to open the system information window
In the menu on the left you need to find the button for managing remote desktop settings (Remote settings).
The last step is to uncheck the box
from the “Allow connections only from...” parameter and click “OK”.
How to enable RDP access using PowerShell?
You can enable RDP access on Windows using a couple of PowerShell commands. This is much faster:
- Launch the PowerShell.exe console with administrator rights;
- Enable RDP access in the registry using the Set-ItemProperty cmdlet: Set-ItemProperty -Path 'HKLM:\System\CurrentControlSet\Control\Terminal Server' -name "fDenyTSConnections" -value 0
To disable RDP access, change the value of fDenyTSConnections to 1 . - Allow RDP connections to your computer in Windows Defender Firewall. To do this, enable the predefined rule: Enable-NetFirewallRule -DisplayGroup “Remote Desktop”
- If you need to add a user to a group in a local RDP access group, run: Add-LocalGroupMember -Group “Remote Desktop Users” -Member 'a.petrov'
To check that the RDP port is open on the computer, use the Test-NetConnection cmdlet:
Test-NetConnection -ComputerName deskcomp323 -CommonTCPPort rdp