Finally, the final version of the free hypervisor from Microsoft has become publicly available. I'll tell you how to install and configure Microsoft Hyper-V Server 2022 to easily create and manage virtual machines. Traditionally, everything is not as simple and convenient as it could be. Initial preparation for comfortable work is required.
You can learn how to set up MikroTik from scratch or systematize your existing knowledge at. The author of the course, certified MikroTik trainer Dmitry Skoromnov, personally checks laboratory work and monitors the progress of each of his students. Three times more information than the MTCNA vendor program, over 20 hours of practice, and forever access.
Introduction
The release history of Hyper-V Server 2022 turned out to be unusual and even somewhat dramatic, like all the latest releases from Microsoft. Let me explain for those who are not in the know. The 2019 server itself was released in October 2022 with some critical bugs. I don’t remember the details of the problems, but in the end the release was withdrawn. A month later they released it again and it seemed to be successful.
It was possible to download all versions of the 2019 server from the Microsoft website, except for the free version of Hyper-V. I followed the topic and kept waiting for the iso image with Hyper-V Server 2022 to appear, but it never came. Moreover, in the Evaluation Center there was a note that the release was postponed for now, wait, everything will be soon.
And so we waited. On June 15th, I saw news that Hyper-V Server 2022 was available for download in the Evaluation Center. I went in and checked. Indeed this is true. An ISO image has appeared that can be freely downloaded, which I successfully did.
By the way, the image of hyper-v 2022 was circulating on the Internet, since after the first release back in October 2022, it was available and many downloaded it. But there were some bugs. From what I've read, people have indicated that rdp access to the hypervisor was not working. I couldn’t check this because the installation on the server simply did not work for me. It either didn’t install at all, giving an error during the installation process, or then crashed into a blue screen. I do not remember exactly. I didn’t bother to figure it out, but installed the previous version. As it turned out, not in vain.
The main disadvantages of virtual servers
But, despite how many advantages server virtualization gives the same system administrator or end user, such programs also have some significant disadvantages.
Firstly, you can’t jump over your head. That is, the virtual machine will use the resources of the physical server (computer), and not in full, but in a strictly limited amount. Thus, for the virtual machine to work properly, the initial hardware configuration must be powerful enough. On the other hand, buying one powerful server will still be much cheaper than purchasing several with a lower configuration.
Secondly, although it is believed that several servers can be combined into a cluster, and if one of them fails you can “move” to another, this cannot be achieved in Hyper-V. And this looks like a clear disadvantage in terms of fault tolerance.
Thirdly, the issue of transferring resource-intensive DBMSs or systems like Mailbox Server, Exchange Server, etc. to the virtual space will be clearly controversial. In this case, obvious inhibition will be observed.
Fourthly, for the correct operation of such an infrastructure, you cannot use only virtual components. In particular, this applies to domain controllers - at least one of them must be “hardware” and initially accessible on the Internet.
Finally, fifthly, server virtualization is fraught with another danger: failure of the physical host and the host operating system will entail the automatic shutdown of all related components. This is the so-called single point of failure.
Pros and cons of Hyper-V
I’ll tell you a little why I constantly use hyper-v along with other hypervisors (mainly KVM). In general, I like this hypervisor, so I decided to carefully consider the issue of installation and initial configuration for further use as needed. The advantages of hyper-v in general and the free version in particular are the following:
- Supports all popular OS . There are no compatibility problems; there is no need to install any drivers or tools separately. Hyper-v support is present in all Windows systems, in the Linux kernel, I don’t remember exactly which version, but all modern systems have it, in the freebsd kernel, starting from version 10. That is, you just take the installation disk and install the system on hyper-v, nothing more is required from you.
- Many different ways to backup virtual machines. These can be simple scripts, free programs, or full-fledged paid versions of large companies specializing in backup software. I pay special attention to this. For me, this is the most significant advantage of Hyper-v.
- A standard hypervisor control panel that can be installed on a computer running Windows. Web access has been added to it through the windows admin center. I'll tell you more about this later.
- Hyper-V Server is based on a popular server system that is clear and convenient to work with. For example, to download or pick up a file from a hypervisor, you just need to share a folder on it in the standard way, as you do in any Windows system.
- Hyper-V can be installed on pseudo-raids , such as the built-in raid controller from Intel, or you can build a software raid using the Windows OS itself.
- Fully functional free version , although without convenient controls.
- Convenient work with snapshots out of the box. You don't have to think about file formats like you do with KVM. There is only one in Hyper-V and it supports snapshots perfectly.
This is my personal opinion, based on experience working with small and medium-sized companies, where there are no special requirements for the reliability and availability of services. Where several servers with virtual machines are used, there is not always a windows domain. Of course, in addition to the pros, there are also cons. The first and main disadvantage for me is the initial setup. You can't just install Hyper-V Server and start using it. It is necessary to perform some incomprehensible and non-obvious actions on the host and managed machine. Next you will understand what I mean. But having overcome this obstacle, you can safely use a virtual infrastructure based on the free hypervisor from Microsoft.
The second disadvantage is that there is no way to forward USB into a virtual machine. Sometimes this is very inconvenient and forces you to use something else instead of Hyper-V. I don’t understand why Microsoft can’t fix this after so many years. The request is very relevant and topical, especially here, where 1C with USB keys is widely used.
Reasons to use virtualization
Virtualization allows you to perform the following operations.
Running software that requires older versions of Windows or operating systems other than Windows.
Experiments with other operating systems. Hyper-V greatly simplifies the creation and removal of various operating systems.
Testing software on multiple operating systems using multiple virtual machines. Thanks to Hyper-V, they can be run on a desktop or laptop. These virtual machines can be exported and then imported into any other Hyper-V system, including Azure.
Installing Hyper-V Server 2019
You can download the free Hyper-V Server from the Microsoft website from a special page with trial versions, which also includes free hypervisors - https://www.microsoft.com/en-us/evalcenter/evaluate-hyper-v-server- 2019. Unfortunately, registration is required, but this is standard practice.
I strongly recommend downloading the English version and selecting English during the installation process. This will save you from unnecessary errors and make it easier to configure and solve problems in the future. Don't be lukewarm about this recommendation, but actually do it.
Then you perform the installation in the standard way, like any other Windows system. Boot from the iso image and follow the steps of the installer. There are no nuances or problems with installing hyper-v server, so I won’t focus on this. I will pay attention only to the very end of the installation. I got this window:
At the same time, I could not do or choose anything. I pressed ctrl+alt+delete and a prompt appeared to set an administrator password. I did this, the installation completed, a window with a standard management interface loaded:
If for some reason you close this window, you can open it again from the command line using the sconfig . This completes the installation of Windows Hyper-V server 2019. Let's move on to the settings.
Administration issues
The advantages of this approach, not to mention the security system and cost reduction, even when virtualizing servers with Windows Server, should first of all be appreciated by system administrators who maintain these machines or local networks.
Very often the stumbling block becomes the creation of system backups. Usually, when creating a backup, third-party software is required, and reading from optical media or even from the Internet takes longer compared to the speed of the disk subsystem. Cloning the server itself and the virtual machine can be done in just a couple of clicks, and then quickly deploy a working system even on “clean” hardware, after which it will work without failures.
In VMware vSphere, server virtualization allows you to create and save so-called snapshots of the virtual machine itself (snapshots), which are special images of its state at a certain point in time. They can be represented in a tree structure within the machine itself. Thus, restoring the functionality of the virtual machine is much easier. In this case, you can arbitrarily select restore points, rolling the state back and then forward (Windows systems can only dream of this).
Setting up Hyper-V Server 2019
We immediately perform the initial setup of Hyper-V Server 2019 through the standard management console:
- Specify a working group if you are not satisfied with the standard one.
- We change the server name to something more meaningful and understandable.
- Add another administrator. This must be done to have another admin account other than administrator. In the future, I recommend that all settings and connections be made under this account.
- We allow remote control, including ping.
- I leave automatic updating to your discretion. I usually turn it off and do everything manually.
- I recommend immediately checking for updates and installing them.
- We enable Remote Desktop with all versions of the client.
- Specify network settings. The default is dhcp, I recommend setting the address statically.
- Adjust the time if the default is not correct.
- Telemetry settings cannot be completely disabled. This is microsoft. One should not be surprised, given the innovations in the latest versions of the system.
We quickly went through the basic settings of hyper-v server 2019. Now we would like to immediately start installing virtual machines, but, unfortunately, this cannot be done yet. It’s probably possible somehow through the powershell console, but it’s too tedious and complicated. We need to somehow connect to the server using a convenient control panel. For now, we only access to rdp, but this is not enough.
We have several options for managing Hyper-V. I will first consider the 2 most convenient of them:
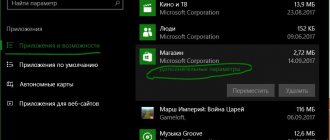
- Installing Windows Admin Center to manage the server through a browser.
- Installing standard system snap-ins on a computer running Windows 10 to connect to Hyper-V 2019.
And at the very end I will show you another one. Let's start by installing Windows Admin Center.
What is virtualization?
Let's start with the simplest thing - the definition of the term that describes virtualization as such. Let us note right away that on the Internet you can find and download some manual on this issue, such as the “Server Virtualization for Dummies” reference book in PDF format. But when studying the material, an unprepared user may encounter a large number of incomprehensible definitions. Therefore, we will try to clarify the essence of the issue, so to speak, on the fingers.
First of all, when considering server virtualization technology, let's focus on the initial concept. What is virtualization? Following simple logic, it is not difficult to guess that this term describes the creation of a certain emulator (similarity) of some physical or software component. In other words, this is an interactive (virtual) model that does not exist in reality. However, there are some nuances here.
Install Windows Admin Center to manage Hyper-V 2022
First of all, you need to download Admin Center from the link - https://docs.microsoft.com/ru-ru/windows-server/manage/windows-admin-center/understand/windows-admin-center Decide for yourself which version to download - trial or stable. I usually set it to stable.
Now we need to transfer the downloaded file to the hypervisor and install the control panel. Previously, we allowed connections to Windows Hyper-V Server 2022 via rdp. Let's connect to it so that it is convenient to execute commands on the hypervisor itself.
By default, the hypervisor has a firewall enabled, which blocks external connections. You can either disable it completely and enable it using commands in the cmd :
netsh advfirewall set currentprofile state off netsh advfirewall set currentprofile state on
Or allow some remote control commands, which will also allow you to transfer files to hypervisor via smb. The following commands must be entered not in the usual console, but in powershell . To do this, type the powershell command in the standard console, which loads after connecting via rdp, and then the commands themselves.
powershell Set-NetFirewallRule -DisplayGroup 'Windows Management Instrumentation (WMI)' -Enabled true -PassThru Set-NetFirewallRule -DisplayGroup 'Remote Event Log Management' -Enabled true -PassThru Set-NetFirewallRule -DisplayGroup 'Remote Volume Management' -Enabled true -PassThru
We will need these permissions later when we connect standard system settings to manage Hyper-V Server 2022.
We go to any hypervisor disk through a regular Windows Explorer and transfer the downloaded WindowsAdminCenter1904.1.msi installer there. We use the administrator account as authorization.
We return to the hypervisor, go to the C:/Soft folder and run the transferred file.
The Windows Admin Center installer starts. Everything is simple there, you can use the default values. I personally check the box Allow Windows Admin Center to change the settings of trusted sites for this computer and Redirect traffic from HTTP port 80 to HTTPS port. After installation, you can go to https://10.20.1.14 in your browser.
To open the page, enter your hyper-v server administrator credentials. We select a single server, enter the administrator data again and connect to the server control panel. Then, I think, you’ll figure it out for yourself. I will not dwell in detail on the description of the functionality of Windows Admin Center.
In the Virtual Machines section, you can create a virtual machine and run it. The only thing is, don’t forget to download the installation ISO image to the hypervisor. You can go to the same folder where you downloaded the admin center installer. The only thing I'll stop at is this. Let's create a virtual switch so that the virtual machine can access the network.
To do this, go to the Virtual Switches and click on the Create .
Specify the name of the switch and its type. Due to the translation of Admin Center into Russian, it is difficult to grasp the essence of the names, so it is better to download the English version. I have already installed the Russian one, so I will tell you based on it. There are 3 types of switches:
- Personal (private) for communication only between virtual machines, without access to the hypervisor and the network behind it.
- Internal is almost the same as personal, only the hypervisor can also have access to the switch, but there is still no access to the external network.
- External is essentially a regular network bridge, which includes the real network interface of the hypervisor. This type of switch is used to allow virtual machines to access an external network.
In my example, I only have one network interface on the hypervisor. I will create one switch of type External.
It turned out like this.
Now this switch can be used in virtual machines to access an external network.
In principle, this is where you can finish setting up Windows Hyper-V Server 2022. If you are satisfied with the functionality of Windows Admin Center, use it. Overall, it has everything you need, but I don't like it. The interface is very slow, you have to log in twice to connect. I am not always able to open the virtual machine console through a browser. There are some errors and freezes.
I prefer to use classic snap-ins to manage the hypervisor. If you, like me, prefer them, move on to the next method of connecting and managing Hyper-V Server 2022. To do this, we need a computer or virtual machine with Windows 10. You can install it directly on the same hypervisor. Sometimes I do this for convenience. It turns out to be an autonomous hypervisor with everything necessary for management.
Windows sandbox
Windows Sandbox is a new feature in Windows 10, released in version 1903. Windows Sandbox uses Hyper-V technology to provide Windows 10 Sandbox.
Sandboxing allows you to spin up an isolated, temporary desktop environment where you can run untrusted software. The sandbox is great for demos, development, testing, troubleshooting, or working with malware. If you close the sandbox, the entire software with all its files and state will be deleted permanently. These are Windows 10 virtual machines, the advantage of them is that they are built into Windows 10, so they use the existing OS, which provides faster startup, better performance and ease of use without losing security. The Windows Sandbox experience can also be customized using configuration files. This way you can add additional software and tools to your Windows Sandbox.
Remote connection and management of Hyper-V Server 2022 through snap-ins
We go via rdp to the hypervisor and configure the firewall rules, if we have not done so before. You can either completely disable it via cmd :
netsh advfirewall set currentprofile state off
or allow only what is needed via powershell :
Set-NetFirewallRule -DisplayGroup 'Windows Management Instrumentation (WMI)' -Enabled true -PassThru Set-NetFirewallRule -DisplayGroup 'Remote Event Log Management' -Enabled true -PassThru Set-NetFirewallRule -DisplayGroup 'Remote Volume Management' -Enabled true -PassThru
Now let's move on to the client system. Let me remind you that in my case it is Windows 10 Enterprise. You need to log in to it using an account with the same parameters that was created on the hypervisor. Add the same user and work under him. This is a prerequisite for connecting to the management of the server itself, its services, disk subsystem, etc. To connect only to manage the hyper-v role, it is not necessary to have the same account as the server; at the end I will tell you how to do this.
First of all, let's create an entry in the hosts with the name of the hyperv server. In my case this entry looks like this:
192.168.175.19 hyperv2019
Make sure you ping the hypervisor by name from the client machine. We continue setting up the host to connect to hyper-v server 2019. Launch cmd as an administrator and go to powershell. We execute the command:
winrm quickconfig
If, like me, you received the error:
Error code: -2144108183 0x80338169 The WinRM firewall exception will not work because one of the network connections established for this computer is shared. Change the network connection type to either domain or private and try again.
This means that one of your network connections has public status, which is unacceptable.
This needs to be fixed. In my case, this network connection was not used and I simply disabled it. If you use it, you can make it a private network through Settings .
Once there are no public networks left, run the command again. Everything must be in order.
winrm quickconfig
Enter the following command, which allows management of remote systems:
winrm set winrm/config/client '@{TrustedHosts=»hyperv2019″}'
In this example, hyperv2019 is the name of my hypervisor.
When copying the above command, pay attention to the single and double quotes. They may change when you copy/paste. You will end up getting an error while executing the command. If necessary, edit them manually.
Now we need to change one more parameter. Launch the dcomcnfg.exe by running this command in cmd. The Component Service Management snap-in opens.
We carry out the sequence of actions indicated in the picture. Next you need to install the standard equipment for managing hyperv. To do this, go to Control Panel -> Programs -> Turn Windows features on or off. Hyper-V Management Tools there and install them. We wait for the installation to complete and try to connect to the remote server:
If you did everything correctly, you will connect to the server and you will be able to manage it.
I'll tell you about one more nuance. You can connect to a remote hyper-v server even if you are not working under an account that has administrative rights on the hypervisor. When connecting, it is possible to enter the parameters of another user. But for this feature to work, you need to perform a number of actions on both the server and the client. First, you need to change one setting in the local computer policy. gpedit command in cmd . The Computer Local Policy Management snap-in opens. We follow the path: Computer Configuration -> Administrative Templates -> System -> Credential Transfer -> Allow the transfer of new credentials with “NTLM only” server authentication. Turn it on and add an entry:
wsman/hyperv2019
Next we execute the commands in powershell. Don't forget to run the console as administrator:
Set-Item WSMan:\localhost\Client\TrustedHosts -Value "hyperv2019" Enable-WSManCredSSP -Role client -DelegateComputer "hyperv2019"
Now we need to make some changes on the hypervisor itself. We connect to it via rdp, go to cmd, launch powershell and execute the commands:
Enable-PSRemoting Enable-WSManCredSSP -Role server
After this, you can work as a normal computer user, but at the same time connect to hyper-v server 2022 under a different account and manage it.
The hardest part was done. Now we can freely connect and manage the hypervisor. I forgot to mention how to connect to managing the server itself, that is, how to view the list of disks, services, read logs, etc. This is done very simply. Log into the computer under the same account that is the administrator on the hypervisor. Launch the standard Computer Management snap-in, select the local computer, right-click and select Connect to another computer:
Write the server name and connect to it. All sections of computer management are available to you, except Device Manager. For some reason I can’t connect to it, an error occurs. I didn’t understand in detail what was wrong and how to fix it. If I need to look at devices, update drivers, etc., I do it through the Windows Admin Center. If anyone knows how to enable access to the device manager through a snap-in, please tell me in the comments. I haven't solved this issue since the 2012 version. True, I didn’t try very hard, or rather, I didn’t try at all to find a solution
Use of third party software products
Nevertheless, even despite the means by which Windows servers can be virtualized, many experts consider this technology to be somewhat ineffective and even overly complicated. It is much easier to use a ready-made product, in which similar actions are performed based on automatic selection of parameters, and the virtual machine has greater capabilities and flexibility in management, configuration and use.
We are talking about using software products such as Oracle VirtualBox, VMware Workstation (VMware vSphere) and others. For example, a VMware virtualization server can be created in such a way that computer analogues made inside a virtual machine work separately (independently of each other). Such systems can be used in training processes, testing any software, etc.
By the way, it can be separately noted that when testing software in a virtual machine environment, you can even use programs infected with viruses that will only show their effect in the guest system. This will not affect the main (host) OS in any way.
As for the process of creating a computer inside a machine, in VMware vSphere server virtualization, as well as in Hyper-V, is based on the “Wizard”, however, if you compare this technology with Windows systems, the process itself looks somewhat simpler, since the program itself can offer some kind of templates or automatically calculate the necessary parameters of the future computer.
Setting up virtual switches
Before we start installing virtual machines, we will prepare a network for them. I will not talk in detail about the nuances of networking in hyper-v. This is not the topic of the current narrative. Let's just create a network bridge for virtual machines. In the management snap-in, select “Virtual Switch Manager” on the right, select the “External” type. Specify the name of the switch. I recommend giving meaningful names to make it easier to manage later. If this is a bridge to a local network, then name the virtual switch local.
Save your settings. You will see a warning that your network connections will be reset. It's okay, agree. A new virtual network interface will be created with the same settings as the physical one. But there is one important nuance here. If your server received network settings via dhcp, then it will most likely receive a new IP address. Keep this in mind.
Equipment selection
One of the clear and undeniable advantages of virtual servers is the reduction of material costs for creating a fully functional hardware and software structure. For example, there are two programs that require 128 MB of RAM for normal operation, but they cannot be installed on the same physical server. What to do in this case? You can purchase two separate servers of 128 MB each and install them separately, or you can buy one with 128 MB of RAM, create two virtual servers on it and install two applications on them.
If anyone has not yet understood, in the second case the use of RAM will be more rational, and material costs will be significantly lower than when purchasing two independent devices. But the matter does not stop there.
Creating virtual machines
We are almost finished setting up Windows Hyper-V Server 2022 and are ready to start installing virtual machines. You just need to download the iso image to the hypervisor. Everything is very simple here. We open the remote disk in Explorer on the control machine through the standard Windows capabilities of machines, create an iso folder and download the desired image.
I also recommend immediately downloading some kind of file manager for easy navigation through folders on the hypervisor itself. It's better to use the ported version. You can launch this manager via the command line by connecting via rdp.
Now you are ready to create virtual machines. Make a few test ones, and then we will learn how to backup them.
NAT networks
One of the features that was very painful in the past was the network.
With the introduction of the NAT switching option in Hyper-V Virtual Switch, you can now easily connect all your virtual machines to the network your host is connected to. In Windows 10, you will get a default switch for connecting your virtual machines. If this is not enough or you want to use a virtual NAT switch on the Hyper-V server, you can use the following commands to create a virtual switch and NAT rule. You can learn more about Hyper-V NAT networks here.
Backup of Hyper-V virtual machines
Earlier I already talked about the HVBackup program for backing up virtual machines. It works great with Windows Hyper-V Server 2022, the article above is completely up to date. For the program to work, you must install .Net Framework 3.5 using the powershell command:
Install-WindowsFeature NET-Framework-Core
And then everything follows the given instructions. If you don’t want to bother with a console program, scripts, and scheduler, but want to quickly backup a hyper-v virtual machine, you can use the free Veeam Backup & Replication Community Edition program. It allows you to backup up to 10 virtual machines. You can learn more about the functionality and limitations of the free version by following the link.
The program, of course, is monstrous, weighs a lot, takes a long time to install, but there are no problems. Everything is configured easily and clearly through the program interface. Installation requires .Net Framework 4.6. You can install it yourself in advance, or the veeam installer will prompt you to do it.
After installation, run the program. Add a new server:
Specify that this is a Standalone Hyper-V server, add credentials and wait until the required components are installed on the hyperv server. After this, you can create a backup copy of the virtual machine. To do this, select a hypervisor, a virtual machine and either make a backup immediately or create a scheduled task.
Next, specify various backup parameters, including the location where it will be made. I will not dwell on this in detail. Veeam has excellent documentation and an intuitive interface. An example of a good product. Because it is available under Hyper-V, I love the latter. There is a real lack of Veeam analog for KVM or Xen.
Security benefits
As a rule, the server structure itself implies the presence of several devices to perform certain tasks. In terms of security, system administrators install Active Directory domain controllers and Internet gateways on different servers rather than on the same server.
In the event of an external intervention attempt, the gateway is always the first to be attacked. If a domain controller is also installed on the server, then the likelihood of damage to AD databases is very high. In a situation with targeted actions, attackers can take possession of all this. And restoring data from a backup is quite a troublesome task, although it takes relatively little time.
If we approach this issue from the other side, we can note that server virtualization allows you to bypass installation restrictions, as well as quickly restore the desired configuration, because the backup is stored in the virtual machine itself. True, it is believed that server virtualization with Windows Server (Hyper-V) in this view looks unreliable.
In addition, the issue of licensing remains quite controversial. So, for example, for Windows Server 2008 Standard it is possible to run only one virtual machine, for Enterprise – four, and for Datacenter – a generally unlimited number (and even copies).
Easy management of Hyper-V Server 2019 via 5nine Manager
There is another way to manage the Hyper-V Server 2019 hypervisor - use the free version of 5nine Cloud Manager Free. I’ll say right away that I started describing this method out of inertia, since I’ve been familiar with products from 5nine for a long time and I liked them. But I didn’t really like what I saw this time, but nevertheless, I decided to share with you because I studied the product.
Previously, the 5nine Manager program for managing Hyper-V was different. I talked about it in a separate article. Now this program does not exist at all, but instead 5nine Cloud Manager . It is more bulky and slow. Requires SQL server for installation. The free edition of express will do. You need to install the server part separately, a separate management console, and a separate agent on the hyper-v server.
Everything has become much more complex in structure, but in general, if you don’t want to bother with the steps described above, you can try with 5nine. In general, the process is simple and is done with the mouse and wizards by clicking next, next, next. To make everything clear, I’ll tell you step by step.
- Download and install Microsoft SQL Server Express or hypervisor.
- Download 5nine Cloud Manager. You install the server part of the application on the hypervisor, which works with the sql database, and install a console on the control machine to connect to the server part.
- Connect using the console and install a free license, which will be sent in a letter after registering on the program website. The license is valid for a year, then I don’t know what to do with it, will I have to renew it or will it work as is. In previous versions of the program it worked as is, there was no need to renew it.
- Place the console on the hypervisor and now connect directly from the hypervisor via rdp. I didn’t do this right away because it was impossible to add a license from the hypervisor. An error popped up. This is probably due to the fact that the hypervisor does not have a gui, but the wizard needs it after adding a license. If we could fix this somehow, it would be easier. Previously, everything could be done immediately on the hypervisor.
Now in more detail and with pictures. Download and install Microsoft SQL Server Express on Hyper-V from the Microsoft website. Select the same language as in the hypervisor. The default installation will do. The installer can be passed in the same way as I showed earlier, via \\hyperv2019\c$.
Next install 5nine Cloud Manager, the server part. In the installer it is called 5nine Management Service.
The installer itself will find the locally installed database. For authorization in the database, use the Windows system account of the user from whom you installed SQL Server Express. I left all other installer settings as default.
Now go to any windows client system that has access to the hypervisor and install the management console there.
Connect through this console and add the license that should have been sent to you by email along with a link to download the program.
After you add the license, you can go to the hypervisor, install the console there and connect. After installation, the launch shortcut will be located in C:\Users\All Users\Desktop. I launched from there. When you launch it, collapse everything that is open. The login window will be in the background. I didn’t notice this right away and couldn’t understand why the program wouldn’t start. In fact, it works fine on the hypervisor itself, except for connecting to the virtual machine screen. There will be an error here , but everything else seems to work.
Next, you need to add the hypervisor to the panel and wait until the agent is installed.
After installing the agent, the hypervisor with virtual machines will appear in the panel.
Of course, everything turned out not as convenient as we would like, but overall the program is functional. All basic actions with virtual machines can be performed in it. It's a pity that you can't get by with just a hypervisor. It would be convenient if everything worked on it.
Restrictions
Programs that depend on certain hardware will not run properly in a virtual machine. For example, these are games or applications that require GPUs. Applications that use timers shorter than 10ms, such as real-time music mixing applications or latency-sensitive applications, may also have problems.
Additionally, if Hyper-V is enabled, problems may also occur with latency-sensitive, high-precision applications running on the virtual machine server operating system. This is due to the fact that when virtualization is enabled, the virtual machine server OS also runs on top of the Hyper-V virtualization layer, just like guest operating systems. However, the difference between a virtual machine server operating system and a guest OS is that it has direct access to the hardware, which allows applications with specific hardware requirements to run correctly.
Recently, users are increasingly hearing about such a concept as “virtualization”. It is believed that its use is cool and modern. But not every user clearly understands what virtualization is in general and in particular. Let's try to shed light on this issue and touch on server virtualization systems. Today, these technologies are cutting-edge because they have many advantages both in terms of security and administration.
Online courses on Mikrotik
If you have a desire to learn how to work with Mikrotik routers and become a specialist in this field, I recommend taking courses in a program based on information from the official MikroTik Certified Network Associate . In addition to the official program, the courses will include laboratory work in which you will be able to test and consolidate your acquired knowledge in practice. All details on the website. The cost of training is very affordable, a good opportunity to gain new knowledge in a subject area that is relevant today. Course Features:
- Practice-oriented knowledge;
- Real situations and tasks;
- The best of international programs.