The performance and optimization of a desktop computer or laptop directly depend on the technical characteristics of the hardware controlled by the operating system. Users often encounter a problem when their computer begins to slow down during operation. In the Windows OS, perhaps one of the most common causes of freezes is the incorrect operation of the Superfetch service. It is worth learning more about what this service is and what it is used for.
SysMain - what is this Windows 10 service?
Service Sys Main, also known as Superfetch, is a service designed to optimize and speed up the operating system. This process is carried out by loading frequently used files, folders and programs into RAM so that they start faster. This process is called caching.
SysMain service on a computer running Windows 10
While the computer is running, the service continuously accesses the disk in the background to read data that is loaded into RAM. This cycle of actions speeds up not only the memory, but also the computer as a whole. However, too frequent accesses load the disk, causing it to run slower.
Note! Using this service is effective on computers equipped with hard drives (HDD) and a small amount of RAM. If the device is equipped with solid-state drives (SSD), then this function is useless, so it is better to turn it off.
Improved performance under load
The benefits of OS optimization occur in situations where hardware resources are in short supply. Memory compression is aimed at the scenario where all memory is occupied and you have to flush it to disk, losing performance when swapping.
The greatest effect of the technology occurs when a lack of memory is combined with a significant disk load.
Memory compression brings more benefit to slow, swap-sensitive drives - HDD and eMMC. It is more difficult to load a solid-state drive to capacity, but if you succeed, then getting rid of unnecessary I/O operations will not be superfluous.
Why does SysMain Windows 10 load the disk?
Why Wsappx loads the Windows 10 processor - how to disable it
The service built into the operating system can load not only the disk, but also the processor. This is usually due to the fact that a large number of different programs and applications are installed on the computer. This software is capable of changing system parameters.
Note! Another reason why the SysMain node service loads the Windows 10 disk is that the system is damaged by malware and components that were downloaded to the PC with cheats, cracks and patches.
An increase in the load in the task manager indicates that the computer does not have enough RAM. To solve the problem, the user can try increasing the page file. To do this, you need to clean boot the operating system, and then check how the PC will boot and operate. If this method helps solve the problem, then you need to remove or disable some third-party applications, and also clean your hard drive.
Update drivers for your PC components
It is also recommended to update all drivers for your PC components to the latest level. This can be done either manually by downloading drivers for your devices from the developer’s website, or by using semi-automated products such as “DriverPack Solutions”, “Driver Easy”, “Driver Genius” and others.
If you run the listed programs, they will scan your system for outdated drivers, determine a list of new drivers to download, download and install them. All you have to do is wait. The disadvantages of these products include an abundance of advertising and bundling, during which, in addition to drivers, Yandex Browser, various antiviruses and other unnecessary software can be installed on your system.
This is also interesting: the host process for Windows services uses memory and CPU.
How to detect disk overload
Windows Search - what is this service, description
If the computer takes a long time to process information and it is almost impossible to work on it, the user is recommended to go to the task manager. To do this, you need to use the hotkey combination “Win + X” or “Ctrl + Del + Alt”.
A full window will be displayed on the screen, where there will be a list of processes; you will need to click on the “Details” tab. Next, you need to tap on the “Disk” column header. A list will be generated in descending load order. The first positions are the busiest.
How to calculate PC disk overload
If the load is caused by the work of one program, then it is necessary to close it or try to optimize its operation, and ultimately delete it. Simultaneous downloading of several files from a torrent can greatly load the disk.
Note! If the culprit of the slowdown is an antivirus program, then you should install another product or deactivate it while working.
Setting up ReadyBoost
After doing all the above, go to the properties of the flash drive. In the ReadyBoost tab, opposite the “Use this device” item, check the box. Use the slider to set the amount of memory you need. Click “Apply”, “OK”...
Windows will create the ReadyBoost.sfcache file on the flash drive. Where our cache will actually be archived (this file is encrypted and, even if lost (flash drive), no one will ever see the data from it)…
As you can see, a little less than half of the space on the removable disk is occupied, approximately 2.5 GB...
That's basically it. After such simple manipulations, your flash drive began to work as RAM. Which is added to your computer and serves as a cache...
How to disable the SysMain service in Windows 10
Why does svchost exe waste memory in Windows 7 - what is a host process
There are several ways to disable the Superfetch service on a computer running Windows 10:
- through local services;
- using the command line;
- Windows PowerShell.
It is worth familiarizing yourself with the implementation features of each method in more detail.
Via local services
If the operation of a service heavily loads the memory and processor, then it is worth deactivating it at least temporarily. Through the local services of the administration section it looks like this:
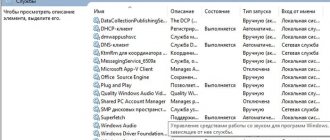
- The user needs to click on the Start icon located at the bottom of the screen on the left side. A drop-down window will appear where you need to enter the word “services” in the search bar. From the search results, run the classic program.
- The screen will display a large list of services that the operating system is equipped with. Find the line “Superfetch” and right-click on it. From the context menu, select the “Stop” option.
- In the next step, the user needs to open the service’s context menu again and select the “Properties” option.
- In the “Startup type” field, you must select “Disabled” from the available options. For the changes to take effect, you must click “Ok”.
Deactivating SysMain through services
Important! Experts strongly recommend restarting your computer for the new settings to take effect correctly.
Using the command line
You can also enable and disable the built-in service through the command line, which must be launched as an administrator. Instructions for deactivation on Windows 10 are as follows:
- Click on the “Start” icon, then type “command line” in the search bar and press “Enter” to start the search. As a result of the search, the desired directory will be displayed; you need to hover the mouse cursor over it and right-click. Select “Run as administrator” from the drop-down list.
- A full-fledged administrator window will appear on the screen. You will need to enter the command “sc config SysMain start=disabled” into it. To run the command, be sure to press “Enter” on your keyboard.
Using the command line to deactivate services
It is also necessary to restart the computer for the specified parameters to work correctly.
Using the Registry Editor
Deactivating a built-in service is also possible through the system registry. The step-by-step algorithm of actions is as follows:
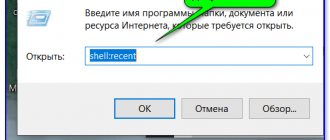
- Using the hotkey combination “Win + R”, launch the “Run” program on your computer. Enter the “regedit” command in the window line, then press the “Enter” or “Ok” key on the keyboard.
- The system registry will be displayed with a large number of directories. The user needs to go to the path: HKEY_LOCAL_MACHINE\SYSTEM\CurrentControlSet\Control\Session Manager\Memory Management\PrefetchParameters.
- In the next step, you will need to double-right-click on the “EnableSuperfetch” parameter and set it to “0”. For the changes to take effect, they must be saved by clicking “Ok”.
How to disable SysMain using the registry editor
Note! Finally, the user just has to close the registry editor and restart the computer.
Change the Windows registry value
It can also help to get rid of the Windows 10 disk loading by the SysMain service by changing a number of registry parameters in the Windows 10 OS. You will need to do the following:
- Press the Windows + R buttons;
- In the window that opens, type regedit and press enter;
- In the Registry window, navigate to the following path:
- In the right panel, find the “Start” parameter, hover the cursor over it, right-click, and click on “Change”; Find “Start” in the list and select “Change”
- Instead of the value “2”, put “4” there and click on “Ok”;
- Close the registry window and restart your PC.
Changing the paging file size
The computer manages to quickly perform operations and respond to external manipulations thanks to RAM. The hard drive is a data storage that the RAM is periodically forced to access. Built-in and third-party programs that run on the computer are loaded into RAM.
Note! As practice shows, its volume is not always enough for the PC to work quickly. That is why Microsoft developers created paging files, which are small sections of the hard drive that are accessed by RAM much more often.
Instructions for changing the file size on a computer with the Windows 10 operating system look like this:
- Each user, depending on the tasks assigned, can manually increase or decrease the paging file. To do this, he needs to use the hotkey combination “Win + Pause”. From the drop-down list of available tools, select the “Advanced options” line.
- In the next step, you will need to go to the “Advanced” section, and at the bottom in the “Performance” block, select the “Options” line.
- Next, you again need to click on the “Advanced” tab and in the block with the amount of memory, click on “Change”.
- Opposite the line “Automatically select the size of the paging file,” uncheck the box and below, independently register the amount of memory in the PC. Be sure to save the changes by clicking “Ok”.
Changing the paging file size
Note! After completing all of the above steps, all that remains is to check the response of the service. If it loads PC resources again, then it is better to specify “Size according to system choice” in the parameters.
Windows 10 is equipped with a large number of built-in services and tools that, when used correctly, optimize and speed up your PC. Superfetch is no exception. If you follow the instructions, you will be able to increase the speed of your PC yourself.
Should I disable the SuperFetch service?
Do I need to disable this option to optimize PC performance? It is definitely worth deactivating the service under the following conditions:
- You have less than 1 GB of RAM. This volume is not enough for stable operation of the service.
- You have noticed that a large amount of RAM is consumed and at the same time performance has deteriorated during active operations with RAM.
- You regularly use a large number of applications that consume a lot of PC resources.
- Your RAM and hard drive are very worn out. In order not to overload them once again due to the active operation of the SuperFetch service, disable it.
If SuperFetch does not consume a lot of resources and the computer is working in good mode, there is no need to disable the option. To help you make your choice, we will also consider the pros and cons of using the service.
What if this doesn't solve the problem?
If disabling SuperFetch (SysMain) does not solve your problem, then something else may be causing the problem.
If you are still experiencing 100% disk utilization, you may need to upgrade to a larger hard drive or opt for an SSD drive. SSD drives are now very affordable and their data transfer speeds are much faster than traditional hard drives.
If you're having CPU usage issues, check out other CPU troubleshooting tips to help identify the cause. this eats up all your CPU resources.
Controlling sata drivers
If you haven't installed a dedicated IDE driver, your SATA drives may not work properly. Go to “Device Manager” through the Win X submenu and find the “IDE Controllers” subsection. If the list says “Standard SATA...” and there are problems with the drives, it is better to install a special driver from the manufacturer of the laptop or computer motherboard.
:/> Installing mac OS on a PC: creating a flash drive, installation, configuration
To do this, go to the manufacturer's website and look for SATA or AHCI drivers for your model. Download the provided file and run it. If you download an archive from the site, unpack the files into a folder, in the manager, click on “IDE Controller” and select “Update Drivers”. Point to the folder in the “Search on this computer” dialog and wait for the process to complete.
If reinstalling specialized drivers fails, try disabling the use of MSI. This technology is used in the standard controller, but may not be supported by your equipment. To turn off MSI:
- In the manager, open the controller properties.
- Go to the "Details" tab, open "Let to device instance" and leave the output value open.
- Hold Win R and type regedit to launch the registry.
- In the editor, open the node: HKEY_LOCAL_MACHINE/ System/ CurrentControlSet / Enum, then use the path that is given in the open value for the controller. Then go to Device Parameters/ Interrupt Management/ MessageSignaledInterruptProperties.
- Click on MSISupported and enter 0 as the value.
Visual indicators of memory compression
The Microsoft article doesn't mention the SysMain service at all, but its connection to memory compression is easy to figure out experimentally. In addition, the document was published before the release of the first stable version of Windows 10, and only a year later, in version 1607, visual information about compressed memory was added to the task manager.
When the SysMain service is enabled, you can open Task Manager on the Performance tab and in the Memory section, verify the use of compressed memory, and also see more information by hovering over the Memory Structure area.
Also, in Process Explorer you can see the Memory Compression process in the System process tree (this was the only visual way at the time Windows 10 was released). Finally, using PowerShell, you can get the current memory compression status with the Get-MMagent cmdlet.
If the SysMain service is disabled, the compressed memory does not work, as can be seen from the same indicators.
Windows defender
This is a separate conversation. It is better not to disable this service. But you can change its settings in the Windows 10 scheduler. The fact is that the service periodically starts scanning files. Removing a job from the scheduler or changing its settings can help reduce the impact of this service on system performance. At least I managed to achieve a positive effect.
So, we launch the taskschd.msc snap-in in a similar way through Win R and find it there on the left in the Windows Defender tree. He has several tasks. It only makes sense to touch and scan.
You can try to remove it completely if you are sure what you are doing, or you can change the settings.
At a minimum, you can change the setting to shut down a process if it runs too long. The default value is 3 days! This means scanning can take 3 days before the system forces it to stop.
Imagine how slow the computer can be all this time. So I reduced this value to one hour.
https://www.youtube.com/watch?v=iT5TGDfUYew
If a service does not cope with the planned task in an hour, the OS kills the process, and the performance will decrease for a maximum of an hour.