E-mail is a fast and reliable way to transmit text, graphic, audio and video information. It is difficult to imagine a field of activity without the use of mail. Even if there is one, a simple Internet user still needs an email address: entering an email address opens access to advanced features of various sites. However, with installing and configuring an email client on a smartphone running on the Android platform, difficulties may arise that will be difficult to deal with without knowing a few points.
How to connect the Imap SMTP service on Huawei and Honor - instructions
February 25, 2015
Setting up an email client on an Android smartphone.
As you already know, setting up Gmail on an Android smartphone is not difficult. You just need to specify your mailbox and enter your password, and Android will do the rest for you. But with boxes in other mail services, things don’t always work out as smoothly.
Let's look at setting up mail using the example of an email client in MIUI firmware. Setting up other programs for working with mail will be almost identical.
In the first step, you need to enter the name of the mailbox and password, and also select the protocol for receiving mail. There are mainly two protocols supported by email services: POP3 and IMAP. The first protocol is the most common and allows you to simply copy mail stored on the server to your phone. The second protocol does a little more and allows you to work with mail directly on a remote server. If the email service you use supports both options, it is better to choose IMAP.
After the settings have been entered, all you have to do is click on the “Login” button. Ideally, the program itself will select all the necessary settings and connect to your mailbox. But in practice this does not always happen. If the connection is unsuccessful, then you need to click on the “Manual” button and enter all the necessary data yourself. You can find them in the help section in the web interface of your mailbox.
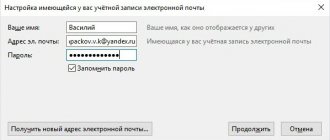
Pay special attention to the username. Sometimes you need to indicate the full name of the mailbox here, and sometimes only its first part, which comes before the “@” symbol. For example, this is what the settings for mail.ru look like:
Using a smartphone without email cannot be called complete. Moreover, the full functionality of most sites on the Internet is not available without an email client, because an email address is required to register an account.
Let's try to figure out how to set up email on Android from the most popular providers. Let us immediately note that the main emphasis will be on the function of assembling letters from other accounts, and other individual settings, such as the arrangement of elements and the appearance of the client, are entirely at your discretion.
Select the built-in Andro mail app >
First, you should update your Gmail app to the latest version.
Open the Google Play Store app on your phone or tablet.
Enter “Gmail” in the search bar, then click the Update button.
Note: If the update is not available, you already have the latest version installed.
Open the Gmail app.
Tap the menu icon in the top left corner and select Settings > Add account > Exchange and Office 365.
Important: DO NOT select “Outlook, Hotmail and Live” if you only want to sync your email and not your calendar/contacts.
Enter your full email address and click Next.
Enter your password and click Next.
Follow these steps for your account type:
Outlook.com users: Skip this step
For Exchange and other accounts, you must ask your IT admin or email service provider for server settings and manually configure the account.
For an Office 365 work or school account, you may see the Request Redirection screen. Click OK.
On the Incoming Mail Server Settings screen, change the server to outlook.office365.com.
Follow any prompts you may receive for security or device permissions, sync settings, etc.
If you have an Office 365 work or school account, you may also be asked to approve Remote Security Administration and approve additional security measures. In this case, click OK or Activate.
Go to the mailbox you just set up. If you see the message Mail sync needs troubleshooting, open it and click Use another mail app.
If you don't see this message and your emails are syncing, skip this step.
Expand the Android notification panel by swiping down from the top of the screen.
If you see a notification Failed to sync your calendar and contacts, tap it. Click the Allow button to grant access. Ready!
Note: If you don't see an error notification, check your calendar and contacts sync.
If you can't add your email account to the Gmail app, set it up manually.
Open the Gmail app. Select Settings > Add account > Other.
Enter your full email address and click Manual Setup > Exchange.
Enter your password and click Next.
Specify the following server parameters (if available):
Incoming mail server settings
DomainUsername Make sure your full email address is displayed. For example: yourname@outlook.com.
Password Enter the password to access your mail.
If your email account ends in @outlook.com, @hotmail.com, @msn.com, or @live.com (this also includes all other accounts hosted on Outlook.com), enter eas.outlook.com.
If you're using a work or school account hosted by Office 365 for business, enter outlook.office365.com.
Note: If you are setting up an Exchange account but do not know the name of your Exchange Server, contact your administrator.
Port Use 443 or 993.
Security Type Select SSL/TLS or make sure the Use a secure connection (SSL) check box is selected, then click Next.
Outgoing mail server settings (SMTP)
If you are using an Outlook.com account, enter smtp-mail.outlook.com.
If you have an Office 365 for business account, enter smtp.office365.com.
If you have Exchange email accounts, check with your email service provider or system administrator for the server name.
Security Type Select the TLS option.
Port Number Enter 587. Click Next.
If instructions or permission prompts appear, follow the instructions they require. You may also be prompted to set your sync options and display name.
Note: If you use Office 365 for business, you may need to provide enhanced access controls. In this case, click Activate.
Now go to your inbox. If you see an “Action Required” message, follow these steps:
Note: If you don't see this message and all your mail is synced, you don't need to do this step.
Tap a mail message to open it.
Tap the Use another email app link to enable syncing with the Gmail app.
Are you trying to sync your calendar and contacts?
Depending on your version of Android, additional steps may be required to properly sync your calendar and contacts.
Expand the Android notification panel by swiping down from the top of your device screen.
If you see a notification that says “Unable to sync calendar and contacts,” tap it.
Note: If you don't see a sync error notification, your calendar and contacts should be syncing.
Gmail will request access. Click Allow and follow the onscreen instructions. Ready!
Note: Syncing your mail, calendar, contacts, and tasks may take a few minutes. If your device can't connect to your account, make sure you entered your email address and password correctly.
You can manually configure your account to use IMAP or POP instead of Exchange ActiveSync. In this case, only email will be synchronized with the phone. Calendar and contacts are not synchronized. What are POP and IMAP?
Open the Gmail app. Select Settings > Add account > Other.
Enter your full email address, such as yourname@hotmail.com, and click Manual Setup.
Select Personal (IMAP) or Personal (POP3).
Enter your password and click Next.
Important: If you receive a security error, close the Gmail app and follow the steps again.
If you are prompted for options, use the following values for the available options:
Incoming mail server settings
DomainUsername Make sure your full email address is displayed. For example: yourname@outlook.com.
Password Enter the password to access your mail.
For IMAP accounts in Outlook.com, enter imap-mail.outlook.com.
For POP accounts in Outlook.com, enter pop-mail.outlook.com.
For any work or school account in Office 365 for business, point to outlook.office365.com.
If you have Exchange email accounts, check with your email service provider or system administrator for the server name.
For IMAP, enter 993.
For POP enter 995.
Security Type Select SSL/TLS or make sure the Use a secure connection (SSL) check box is selected, then click Next.
Outgoing mail server settings (SMTP)
If you are using an Outlook.com account, enter smtp-mail.outlook.com.
If you have an Office 365 for business account, enter smtp.office365.com.
If you have Exchange email accounts, check with your email service provider or system administrator for the server name.
Security Type Select the TLS option.
Port Number Enter 587. Click Next.
Follow the appropriate steps when prompted further, including security permissions and display name settings.
You can now use your mail through the Gmail app for Android.
Open the Samsung Email app and tap Add Account if this is your first time setting up email.
Otherwise, select Settings > Add Account.
Add an account” />
Enter your email address and password. Click Login.
Note: If the app detects your email service, a different screen may appear.
If you're prompted to select an account type, select Microsoft Exchange ActiveSync to sync contacts and calendars.
Click Yes or OK to confirm the settings and permissions. The interface you see may depend on the type of account you're setting up.
If you have two-factor authentication enabled, verify your identity using the method you choose.
Syncing your mail, calendar, contacts, and tasks may take a few minutes.
If you see the message Mail sync needs troubleshooting, open it and click Use another mail app. If you don't see this message, skip this step.
If you still can't add an account, follow the steps in Manual Setup in the Samsung Email app.
Open the Samsung Email app. Select Settings > Add Account.
Enter your full email address and password. Click Manual Setup.
Select Microsoft Exchange ActiveSync.
Specify the following server parameters (if available):
Incoming mail server settings
DomainUsername Make sure your full email address is displayed. For example: yourname@outlook.com.
Password Enter the password to access your mail.
If your email account ends in @outlook.com, @hotmail.com, @msn.com, or @live.com (this also includes all other accounts hosted on Outlook.com), enter eas.outlook.com.
If you're using a work or school account hosted by Office 365 for business, enter outlook.office365.com.
Note: If you are setting up an Exchange account but do not know the name of your Exchange Server, contact your administrator.
Port Use 443 or 993.
Security Type Select SSL/TLS or make sure the Use a secure connection (SSL) check box is selected, then click Next.
Outgoing mail server settings (SMTP)
If you are using an Outlook.com account, enter smtp-mail.outlook.com.
If you have an Office 365 for business account, enter smtp.office365.com.
If you have Exchange email accounts, check with your email service provider or system administrator for the server name.
Security Type Select the TLS option.
Port Number Enter 587. Click Next.
If instructions or permission prompts appear, follow the instructions they require. You may also be prompted to set your sync options and display name.
If you're using Office 365 for business, you may need to provide enhanced access controls. In this case, click Activate.
You can configure your account to use IMAP instead of Exchange ActiveSync. In this case, only email will be synchronized with the phone. Calendar and contacts are not synchronized. What are POP and IMAP?
Open the Samsung Email app.
Select Settings > Add Account.
Enter your full email address and password. Click Manual Setup.
Select an IMAP account or a POP3 account to sync email only.
If you are prompted for options, use the following values for the available options:
Incoming mail server settings
DomainUsername Make sure your full email address is displayed. For example: yourname@outlook.com.
Password Enter the password to access your mail.
For IMAP accounts in Outlook.com, enter imap-mail.outlook.com.
For POP accounts in Outlook.com, enter pop-mail.outlook.com.
For any work or school account in Office 365 for business, point to outlook.office365.com.
If you have Exchange email accounts, check with your email service provider or system administrator for the server name.
For IMAP, enter 993.
For POP enter 995.
Security Type Select SSL/TLS or make sure the Use a secure connection (SSL) check box is selected, then click Next.
Outgoing mail server settings (SMTP)
If you are using an Outlook.com account, enter smtp-mail.outlook.com.
If you have an Office 365 for business account, enter smtp.office365.com.
If you have Exchange email accounts, check with your email service provider or system administrator for the server name.
Security Type Select the TLS option.
Port Number Enter 587. Click Next.
Follow the appropriate steps when prompted further, including security permissions and display name settings.
You can now use your email via the Samsung Email app.
Which email should I choose?
Before you set up mail on Android (Mail-Android), you should know that there are many sites on the Internet that will provide you with an email box with great enthusiasm. But beauty and convenience are not the most important thing in this matter, because not all clients are equally reliable: some are suspected of reading personal information from letters, some are malfunctioning, etc.
Most users of the Internet community recommend paying attention to the following email clients:
In order to register a mailbox, just go to the main page of any of the above resources and select the “Mail” section. As for a smartphone, before setting up mail on Android, you must have a proprietary application from a particular client. You can download the official utility from the same Play Store.
Next, we will analyze each client in more detail.
How are email clients different?
Before you set up email on Android, you need to decide on the client. If you already have an existing mailbox, then simply install the corresponding application on your smartphone. If you just need to create an email account, then the Internet space offers a wide selection of mailers. List of the most popular:
- Gmail;
- Yandex;
- Mail@Mail.ru;
- Outlook.
Setting up an Android phone - step by step instructions
This is not a complete list of programs designed to perform mail functions. Why do users prefer these applications? What are their amenities and are there any disadvantages?
Gmail email client
Google client author. As a rule, this application is installed on Android smartphones as a standard mail application. It is convenient because you do not need to download the program additionally.
What is the convenience:
- regular updates;
- support for all the most common email protocols and services;
- possibility of connecting several electronic mailboxes.
The disadvantages include:
- instability of operation on weak smartphones;
- Quite heavy (more than 100 MB), especially for a budget gadget.
For information! The overall rating of the Gmail mailer in the Play Market application is 4.4. Users note the convenience of the software and ample opportunities.
Yandex mail client
Yandex.Mail is a universal client that can work uninterruptedly not only with the service of the same name. You can easily connect several email accounts from different platforms to it. The advantages include:
- work offline;
- activation of functions by swipe;
- automatic setting.
The disadvantages are not defined. From which we can conclude that the application is really high quality.
The Yandex.Mail email client is one of the most popular among users
Mail client Pochta@Mail.ru
A domestic product from Mail.ru Group that allows you to receive, store and process information in various file formats. Among the conveniences, users note:
- automatic mail setup on Android;
- opening the function menu for each letter by swiping left;
- the ability to enter a name that will be seen by the recipient upon receipt of the shipment;
- You can add email accounts for other services.
Among the disadvantages is the impossibility of working without the Internet.
Gmail
Before setting up mail on Android, it’s a good idea to look at the list of installed applications. In 95% of cases, there will be an email client from the famous search engine Google, that is, you won’t have to download and install anything.
Naturally, the box is primarily designed to interact with its own service. If you previously had to work with the Android operating system, then you probably already have an account from Google mail, and if not, then registration will not take much time. All you need is your full name, age and place of residence, and the rest of your profile can be filled out later.
The search engine provides its clients with 15 GB of cloud space for use. Enough for clips, audio and other documents. In addition, the mail has excellent spam protection and various filters for proper sorting of incoming correspondence, so not a single letter will be lost.
What you need to set up email on Android
Setting up email on Android will not take much time if the user knows:
- email address and password, if one has already been created;
- ways to set up mail;
- differences between different email clients (for those who will be opening an email account for the first time).
No modern field of activity can do without email.
Important! An account and an email are different concepts, although a mailbox address is often used to create an account.
Collecting letters
The GMail email client is distinguished by its reliability, pleasant and functional appearance, as well as smart filters for working with letters, so it can be called the optimal choice for the owner of a gadget on the Android platform.
To collect emails from other accounts, you must perform the following steps:
Before setting up mail for Android in the Gmail service, it’s a good idea to know that the client does not delete letters from other accounts, but only duplicates them, but this point can be changed in the settings.
"Yandex. Mail"
Another convenient box for the Android platform. The client comes installed by default on most budget gadgets supplied to Russia from the Middle Kingdom. The application was distinguished by its stable operation, well-designed push notifications and quite nice appearance.
In addition, the client is ideal for users who work with a huge amount of correspondence. Even if the mailbox contains more than 1000 letters, smart search will find exactly what you need. So keep this in mind before setting up mail on Android.
The Yandex service intelligently identifies each letter or group with a distinctive label, which makes it possible to distinguish them from the crowd. There is a classification according to the topics and importance of postal correspondence. Moreover, the client has good protection against spam, although slightly less effective than GMail.
The address book
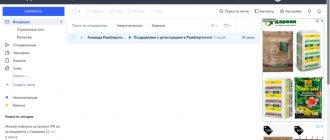
It's time to talk a little about the Contacts feature. Rambler has an address book where you can add your recipients so that you always have a database of addresses with whom you often contact at your fingertips. To access your contacts, click the person icon to the right of the button to write a new letter.
All email addresses with which you corresponded on Rambler are collected here. Contacts that occurred, but which you did not manually enter into your address book, fall into the “Automatic” section. The remaining recipients are added to the “Your contacts” category. To add a contact to the list, click the “New Contact” button.
You can also import addresses from several mail services into the Rambler address book: Yandex, Mail.ru and Qip.ru. This minimizes the time spent manually adding addresses.
Spam filtering
The Rambler client has an anti-spam function built into it. Although it does not work very efficiently, the developers periodically add new addresses to the blacklist database, which helps the service filter. Also, if you yourself want to mark one of the letters as spam, you can easily move it to the appropriate folder using the top menu.
In addition, you can mark the letter as unclaimed and without moving, as a result of which the sender's address will be added to the spammers list after verification.
Collection of correspondence
Setting up Yandex mail on Android to collect letters is quite simple. Click on the drop-down menu icon in the upper right corner and select “Settings”. Then tap on the words “Add account” and in the list o.
Next, enter the third-party client login (mailbox) and password. Then you need to decide on the type of account to connect: POP3 or IMAP. Almost all Internet gurus recommend using the IMAP type. Because this option allows you to work with correspondence in real time, that is, all changes that will be made to the letter will be immediately reflected on all accounts. Roughly speaking, a POP3 connection is intended only for downloading new messages, while the IMAP protocol allows you to work with correspondence without interrupting the connection on another server.
As for the specific ports and security type of each individual third-party client, the service should configure everything automatically, so there will be no problems here. The only thing that can be added is to select the frequency of checking other mailboxes: every 15 minutes, 30 minutes, etc.
Setting up Mail.ru mail via IMAP
The Russian mail service warns that the security of transmitted and received information is guaranteed only if Android version 2.3 and higher is used. However, it is currently difficult to find a device that still runs on such an outdated version of the operating system.
Setting up the application begins immediately after its launch:
- On the start screen, enter your email address in full format, including the “@” sign and domain address (mail.ru).
Enter your email password
in the line below Next, select the manual type of parameter settings. The system will ask you to select an account type. In this case, click on the “IMAP” button. The previously entered email address will be displayed on the screen; below you will need to enter the following data:
- Server: imap.mail.ru.
- Port: 993.
- Security type: SSL/TLS.
- Leave the prefix blank.
Tap "Done". A page similar to the previous one will be displayed. Write on it:
- Server: smtp.mail.ru.
- Port: 465.
- Security type: SSL/TLS.
Tap “Done” again .
This completes the main part of setting up Mail.ru via IMAP. Next, the system will display a window in which you can:
- specify the frequency of checking for new emails (the default is 15 minutes);
make the email account the main one (outgoing messages will be sent through it); mark receipt of notifications about incoming letters; activate account synchronization with the server; Allow or disable automatic downloading of attached files when using a Wi-Fi network.
The application will display a message indicating that the setup is complete. If you wish, you can enter a custom name for your account – it will be displayed in the “sender” field for outgoing messages. If the line is not changed, the system inserts the email address.
"Mail.Ru"
A fairly well-known domestic client, distinguished by aggressive marketing. Before setting up Mail.ru mail on Android, you should know that many people call this service a virus, due to the abundance of annoying advertising and installation of applications without the user’s knowledge. Nevertheless, the client is used and even considered one of the best in our market.
The mailbox interface is quite simple and intuitive. The rest is also at the proper level: a good spam filter, labels on letters, etc.
Collecting letters
To manage the collection of correspondence, you need to open the settings in the special agent “Mail.Ru” (downloaded from the Playmarket), where in the menu click on the “Add account” line. Then you need to enter the third-party mailbox details (login and password) and connection type (POP3 or IMAP). The agent will do everything else automatically. All you have to do is select the frequency of checking other accounts and select the name of a separate folder for correspondence that came from a particular client.
Similar articles
The IMAP service is a protocol for managing an email account on a server. Previously POP3 was used. For mail services to work correctly on your phone, you need to perform the correct settings. Let's look at how to enable IMAP SMTP service on Huawei and Honor.
What is IMAP, SMTP?
IMAP has a simple protocol for sending mail and is used to receive messages. While SMTP is responsible for sending them. The entire process is controlled by the MTA system. The ports are:
The control protocol is required to store messages on the server. This function is useful especially in cases where the user actively uses the mailbox from different devices - laptop, phone, tablet. This also allows multiple people to use one email account at once. For example, a workbox with open access for certain people who will be able to make changes - download, reply, move, delete, etc.
The only disadvantage of the system under consideration is the increased consumption of Internet traffic. The protocol operates all over the world, but requires an open port 25 to work. However, not all providers allow it to be used - some block the output. Then contact your provider to solve the problem, or use port 587.
Where to enable
Let's learn how to connect the IMAP SMTP service on Honor and Huawei. In fact, activating services is not difficult. The procedure is carried out through the settings of the mail application. For each service, the instructions will be different, it depends on the settings and names of menu items. Let's look at the popular ones:
How to check the warranty and authenticity of a Huawei or Honor phone using Imei
Additionally, you can configure the program via POP3. It involves saving emails on your device. If desired, you can set up filters that allow you to instantly sort incoming messages. Outgoing messages will also be saved exclusively on your PC. But, copies of letters will still be stored on servers. In the parameters, specify the POP3 protocol, only in the address tab for incoming messages specify pop.yandex.ru - provided that you are setting up Yandex.Mail.
Which email to choose
The choice of email application depends on the user's personal preferences. On most Android devices, the Gmail client from Google is installed by default, in which case you don’t have to download another one, and when you create an account, you get the opportunity to use all Google services, including Google Drive, where you can store various types of information up to 15 GB for free. If you don’t like the products from the Good Corporation, you can choose the equally popular and convenient Yandex (the service also offers the possibility of cloud data storage, as well as many different interesting tools), Mail.ru or any other that suits your taste.
Before you create an email on your tablet, you need to download and install a special application. All the best official clients of email services are present in the Play Market, so there will be no problems with this. You can choose any one you like based on interface, functionality and other characteristics. For one mail, it is enough to select a specialized utility for the Android OS from the application store, tailored specifically for the mailer you use. If you have several mailboxes, it is advisable to download a universal email client, for example, MyMail, K9Mail, Aqua Mail or any other; they are present in abundance in the Play Market. With this option, you will have the opportunity to receive letters from all those mail services where you are registered. Let's look at how to create and configure email on a tablet running Android using popular services as an example.
Having problems? Contact us for help
This article was updated on August 13, 2022 due to your feedback. If you need more help setting up email on your Android device, please detail your question in the comment box below so that we can resolve the issue in the future.
You can contact Microsoft support for questions about setting up Office 365 or Outlook.com email.
If you have a work or school account based on an Office_365_for_business or Exchange account, contact Help Desk or your Office 365 administrator.
Post Views: 113
You're having setup or synchronization problems, or other problems with Outlook.
How to set up mail on Android
If you already have an account for any service, it will be enough to download and install the client and simply log in after launching it; if not, then you can create a mailbox in a matter of minutes. Setting up email on Android devices is no different; the principle of operation is the same for all email service utilities. To create a mailbox, you will need to select the “Create a new account” option in the menu and enter the appropriate data in the form fields. As a rule, the application independently determines the necessary settings and connects to the service, but if this does not happen, you will need to manually configure the mail transfer settings.
This is easy to do; all input data is provided by the mail service. Using the POP3 protocol to transport mail, the client delivers messages to devices without synchronization with the service; all mail changes will be made only in the application, while on the server the data will remain as is. When installing the IMAP protocol, mail is synchronized, that is, all manipulations with letters in the application are reflected on the server.
Setting up Yandex mail
The Yandex client on Android is convenient, creative in design and easy to navigate. For maximum user comfort, there is a swipe action system. It is also possible to add additional accounts. After installing the client from the Play Market on the device (the process occurs automatically after clicking the corresponding button on the store page), the user needs to log in or register. If the application does not determine the settings on its own, you will have to configure it manually. The procedure may also be necessary if you are using a universal client. You just need to select the installation manually, specify the type of protocol you need and fill in the fields for incoming and outgoing email servers.
Basic settings of Yandex mail on Android using protocols:
The login and password fields are filled out individually; this is your Yandex account data. From the moment the setup is completed, the mail will begin to fully function.
Setting up Mail
One of the most popular email services, Mail.ru, is as easy to set up as Yandex. You can use both a native client and a universal one, the user is not limited in this. As in the previous case, install the utility from the store, select manual configuration and enter the necessary data in the fields. Setting up Mail.ru mail on Android devices is done in the same way, only the server addresses will be different, for incoming messages - pop. mail.ru (POP3 protocol) or imap.mail.ru (IMAP protocol), for outgoing – smtp.mail.ru. The remaining settings, port and security type will be the same as in the case of Yandex. Next, you can configure the synchronization parameters with the My.mail.ru service, the frequency of checking letters and other details, and also enter the name in the appropriate field that will appear in the “from whom” column when sending messages.
Setting up Google mail
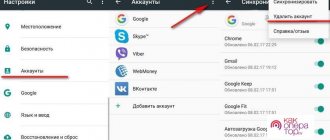
Google's mail app is almost always already installed on Android, so you're unlikely to need to install it. If you do not yet have an account, you will need to register, where you will be asked to enter your credentials. It is possible to add other accounts, for which you should select the appropriate option in the settings, select the one you need from the list of email clients, and then enter your credentials. After such manipulations, mail from other mailboxes will be available in Gmail.
All email clients perform automatic mail setup from Google. The incoming mail server will be imap.gmail.com, and the outgoing mail server will be smtp.gmail.com. In this case, Gmail settings can be changed. By default, the IMAP protocol is used, but as a result of synchronization, battery costs, traffic consumption increase, and some devices even have heating problems. If you want to switch to POP3, you can do this by going to Mail Settings, where in the “Forwarding and POP/IMAP” section, check the boxes next to the items “Enable POP for emails received from now on” and “Disable IMAP”.
Enabling IMAP in Yandex
In order for the IMAP protocol to become active on your Yandex mailbox, you need to log into your Yandex account and go to mail. Then click on the gear at the top right and select “All Settings”. In the left menu there will be a section “Mail programs”, you must enter it and there you can activate IMAP for mail on Yandex.
On company-managed or provided devices
Once you begin the registration process, you should complete it completely, as pausing for a few minutes will usually terminate the process and require you to start over. If the process fails, you must return to the Company Portal app to try again.
- Open Google Play Store
.
Find and download the Intune Company Portal
. - If you're prompted to create a work profile during the enrollment process, see Create a work profile and enroll your device in Intune. Otherwise, enroll your Android phone or tablet as described in Enroll your Android device in Intune.
Note:
If you are prompted for multi-factor authentication, see Review your security information.
- Open the Outlook for Android app. If you were prompted to create a work profile, add your account using an instance of Outlook with a work profile.
Notes:
Once your device is registered, managed applications, including Outlook, can be installed in several ways:
- independently using the corporate portal application;
- automatically during the registration process;
- yourself using a managed Google Play service.
- Click the button Beginning of work
.
- If your account is found, click the button Continue
.
Note:
If your account is not found automatically, enter your business email address, click
Add an account
, and enter your password when prompted. - Enter your email account password and click To come in
.
- Your organization may also have controls in place that require registration to continue. Registration allows you to verify your identity so that your device can be verified by your organization. If you are prompted to register your device, click Register
.
- If your IT administrator has configured additional policies, you may need to click Activate
Activate
again .Note:
Once you open Outlook, your next steps will be determined by a variety of factors, including your company's policy settings and whether you've previously accessed corporate resources on your device. Follow the instructions on the screen.
Now you're ready to get started in Outlook for Android. To get the most out of Outlook, check out these other articles:
Optimizing the Outlook mobile app for your phone or tablet
Outlook for Android Cheat Sheet