MGTS - Moscow City Telephone Network. How to enter the settings of the MGTS router? To log into the admin panel, use a familiar address - 192.168.1.254. You may have already tried it. But something doesn't work out. Many users have problems logging in. They specify a standard login and password - it doesn’t log in. What to do?
The provider that uses this type of router uses GPON technology. The connection takes place using a separate optical line. Thus, high-speed Internet (up to 1000 Mbit) and telephony services are provided. Next, we’ll look at the full connection and configuration process.
Connecting MGTS GPON to a computer
Let us clarify that GPON is not a model of a specific device or even a series of devices, but a technology for delivering the Internet to the client. The prefix G means that the maximum connection speed of this technology reaches one gigabit per second. With this type of connection, the wires from the provider are supplied directly to the client in his apartment or house, and are not a single system, as is the case with ADSL. This way, the client himself is less likely to encounter failures on the line, and also does not suffer from network congestion.
GPON is a type of routers from completely different manufacturers that support this technology. They are equipped with more powerful components that ensure fast packet transfer and cope with the load, having a good processor and sufficient internal memory. This type of equipment connects to a computer in the same way as a router that is familiar to everyone, since the models do not differ in appearance. For a universal guide on this matter, read the material at the link below.
Read more: Connecting a router to a computer
Another additional step when connecting is checking the operating system settings. You should make sure that one of the network adapter settings is set to the required value. To do this, open IPv4 in properties and check the type of obtaining IP addresses and DNS servers. These two protocols must be set to "Receive automatically". The setting will be especially relevant for those users who later select the connection type PPPoE or Static IP through the router’s web interface, since the IP address and DNS server are entered manually. Read more about this configuration step in Windows below.
Read more: Windows Network Settings
How to connect and configure a router
In order to start using the device, you need to properly connect it to the equipment and ensure its connection to the fiber optic lines. We present you a step-by-step connection guide:
- Find the device's power supply inside the box with the router. Insert the plug into the corresponding connector on the rear panel of the unit, and the unit itself into an outlet with an operating voltage of at least 220 volts.
- Prepare the fiber optic cable by identically connecting one end to the outlet and the other to the router socket.
- Attach the plug of the Internet cable to the connector of the computer or laptop intended for the network card, and the other end of the cable to any of the LAN ports. Make sure the cord is securely seated in the device you plan to tune from.
- Look for activity lights on your router; the one that shows the LAN connection should be lit.
If the light does not light, make sure the network card is working, and then try again. If you encounter additional difficulties, contact your provider's technical service; specialists will help you connect and test the connection with detailed instructions.
After the equipment is operational and access to the World Wide Web is possible through a home, wired network, you need to set up data exchange via the Internet via Wi-Fi.
The article may be useful - payment for MGTS via the Internet.
Login to the web interface
The MGTS company supplies specialized device models called ONT from different manufacturers, which are equipped with the same firmware, which makes their configuration the same. The same applies to logging into the Internet center, which must be done without fail, because the further configuration procedure is carried out through the web interface. You will find thematic instructions for authorization in another article on our website by clicking on the following heading.
Read more: Login to the web interface of routers from MGTS
The appearance of the interfaces of ONT models may differ slightly, depending on the firmware version installed by the manufacturer. We will take the most popular and standardized menu presentation as an example, describing the following configuration steps through it. You just need to read the instructions in detail and find the necessary items in your web interface, taking into account the features of its appearance.
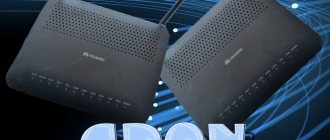
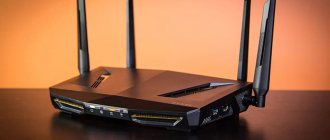
SERCOM RV6699
The router can operate at both 2.4 GHz and 5 GHz frequencies. During installation, installers lay a fiber optic cable to the router installation site, installing a separate outlet if necessary. They can also, if necessary, leave a network cable so that the user can connect the computer or set-top box themselves.
An important feature of the router is its web interface. To access it, the user needs a web browser and a personal account on the provider’s website. But it has almost all the necessary functions, including fine-tuning connection settings and connecting new devices.
Through a 2 mm optical cable used when installing the router, the user can connect additional options and services. In addition to standard IPTV, it is possible to connect a security alarm, as well as a landline phone, while maintaining its number.
Quick setup
Let’s briefly touch on the topic of quick network configuration, since the Wizard present in the settings will definitely be useful for novice users and those who are not interested in manually changing parameters by searching for them in the web interface. To start quick configuration, open the “Setup Wizard” section and launch it by clicking on the button specially designated for this.
Follow the on-screen instructions to select your region and internet service provider. If the provider has been successfully identified, which happens in most cases, no additional steps will need to be taken. All that remains is to move to the “Internet Connection” section to enter authorization data for connecting when using the PPPoE protocol.
If the provider provides a Static IP, the IP address itself, the subnet mask, and additional parameters are specified instead. The form is filled out in accordance with the recommendations from the provider itself, so we do not give precise recommendations in this regard. If you are unsure what information to enter in the fields, review the documentation, instructions from the company, or contact technical support directly for guidance.
Unfortunately, the current latest firmware version allows the Setup Wizard to only provide a wired connection, meaning the access point will still not be available, and the LAN settings will remain in their default state. If you need to further configure these technologies, proceed to the individual manual configuration steps.
How to log into the MGTS router at https://192.168.1.254?
Before proceeding directly to setting up a wireless signal on the MGTS router, you must:
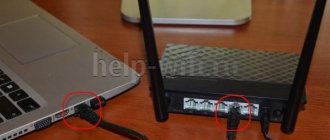
- Connect the cable from the provider to the GPON port of the router
- Telephone cord - in POTS1, TEL1 or PHONE1
- Ethernet cable from computer to LAN connector
To enter the router settings, launch the browser and go to https://192.168.1.254. We will be presented with a login page. In order to get into the control panel, use the login and password admin-admin.
If this pair does not match and you cannot log in, it means that someone has already done the configuration before you. And most likely changed the “admin” value to something more complex. The solution to the problem is to reset the settings using the “Reset” button. It is small and recessed deep into the body. Therefore, you need to take some sharp object, such as a pin, and hold it for 10 seconds. After the reboot, the MGTS router will be accessible to the standard address with default login information.
Manual configuration of MGTS GPON
Not all users are suitable for using the Setup Wizard, since sometimes it is not possible to find the required parameters that the provider recommends. Often you also need to change the state of the local network and Wi-Fi, which also happens manually. We have divided the interaction with each section into stages, and you can immediately jump to what you need and start setting up.
Step 1: WAN Settings
First, let's look at the WAN parameters, which will be useful for those who were unable to configure them when following the previous recommendations. There are also a number of auxiliary options, which will also be discussed later.
- To begin, in the web interface, move to the “Network” section by clicking on this inscription in the top panel.
- There, select the first category “WAN” and proceed to configuration. First, set the default route to “Specified” to independently select the parameters of the protocol used. Specify the “Interface Type” as “PPPoE” or “IPoE”, thereby replacing the standard “Bridge” value, depending on the provider’s instructions. VLAN is enabled only according to the personal preferences of experienced users who know what a virtual local network is for. The “PPP” block is activated if the PPPoE protocol was first selected. In it, enter your username, password and activate a permanent connection. Static IP owners should enter the values in the “WAN IP” block by activating the “Fixed IP” mode. If you receive a dynamic IP address from your ISP, simply go ahead and save the changes.
- At the bottom of the current tab there are control buttons. Using them, you can choose whether to add the current settings to the connection table or whether to completely clear the entire form. If you have saved several different interface options, switch between them as necessary, marking the corresponding items in this table with markers.
- Sometimes a 3G modem is connected to the router or a transition to a mobile tariff plan from MGTS is made. Consequently, then a router that supports GPON loses its relevance, but this does not negate the fact that 3G itself can be configured through the category of the same name.
- By going to the “3G” menu, activate this protocol, enter the PIN code for access and set additional values that your Internet service provider should have told you about when providing such a tariff plan.
These were all the parameters responsible for the WAN connection. Now it is recommended that you make sure that the Internet is available when connecting your computer to the router via a LAN cable. To do this, first look at the status of the Network icon on the taskbar, and then open any browser and go to different web pages to see how quickly they load.
Step 2: LAN Settings
The local network setup stage will be especially important when connecting several devices to the router via a LAN cable and activating a wireless access point. There is nothing complicated in configuring a LAN, because in most cases you just need to check the default settings, making sure that they are set correctly.
- In the same “Network” section, move to the “LAN” category to get to the main menu. Make sure the router's IP address is 192.168.1.1 or 192.168.0.1 and the subnet mask is 255.255.255.0. If you want to clone a MAC address using computer data, indicate this in the next block, after selecting the connector to which the PC is connected.
- The next menu is “DHCP” - the name of the technology that automatically assigns a free IP address to connected clients so that no conflicts arise when using the network. If your provider's tariff plan requires DHCP activation, select the “DHCP Server” operating mode, specify all active interfaces and set a range of IP addresses, if this was not done automatically. Please note that the router’s IP address should not fall in this range in any way, since it is always assigned to this particular equipment.
- In the Static DHCP category, you have the option to assign a specific IP address to a device by its MAC. This is often required for further configuration of the firewall or other purposes. Reservation occurs by filling out just two fields. First specify the IP itself, and then bind the target to it by MAC address. Add a rule to the table and you can move on to creating the next one if necessary.
- The last section is called “LAN IPv6”, and its configuration is only required if the user has decided to switch to the IPv6 protocol. Often this is done only by experienced users, knowing what parameters will need to be set in the future, so we will not dwell on this procedure in detail.
Step 3: Wi-Fi Settings
Let's move on to the process of setting up a wireless network. Most models of MGTS GPON routers have an access point initially enabled, but the user may need to change the Wi-Fi name or enter a new access key. It is in such cases that we recommend that you read the following instructions.
- In the same “Network” section, go to the “WLAN” category.
- The first menu is called “Basic Settings”. Here, by checking the box next to the designated item, you enable or disable the Wi-Fi interface. If the router supports the dual standard 2.4 and 5 GHz, you can choose the second option, which switches to a freer frequency and eliminates difficulties with network stability. Leave the channel width and sideband at their default state. The channel number is also determined automatically, so you usually do not need to change it. Make sure that the transmitter power is set to 100% mode, and you can also specify the maximum number of clients that will be connected to the wireless network at the same time.
- The next important section is “Security”. Here, mark the “Basic” item for the “SSID Type” parameter with a marker and move below. It is recommended to choose the last encryption type from the list, that is, the most modern and secure. The use of 802.1 authentication is disabled by default. The standard format for a public key is “Passphrase”. Next, in the “Shared Key” field, set a password to access Wi-Fi, consisting of at least eight characters. This completes the standard procedure for setting up Wi-Fi security. Before moving on to the next step, do not forget to click on “Apply”.
- Three virtual access points can be created as additional SSIDs. They are often used for clients of different levels or separate the guest network from the home network. Activate the required number of virtual networks by checking the appropriate boxes, and specify the standard Wi-Fi settings for them, which we already discussed above.
- If you prefer to make your wireless network open, but do not want third-party users connecting to it, go to the "Access Control List". Here you can select the rule behavior mode, allowing connections only for devices added to the list. Naturally, you need to create the list yourself. To do this, determine the MAC addresses of the targets and add them to the table. This technology works in the same way in the opposite direction, that is, a prohibiting rule is set and certain computers or mobile devices are blacklisted.
- It is recommended that only experienced users access the “Advanced” category. If you do not have sufficient knowledge of the meaning of all the items present here, leave all the default values and simply move on to the next step.
- The option to quickly connect to a wireless network (“WPS”) is also activated by default. You can change it or immediately through this menu connect to any mobile device or, for example, a laptop.
- The last menu “Wi-Fi Scanner” scans free channels, from which the appropriate one is selected for use. This process occurs automatically, which allows the router to switch to optimal channels, thereby increasing the stability of the network.
All changes should take effect immediately after saving the settings, but if this does not happen, restart the router, and then proceed to testing Wi-Fi.
Step 4: Advanced Options
In most web interfaces of MGTS GPON routers, additional parameters are displayed in a separate section so as not to create panels in the main menu and not to complicate the process of understanding the items for the user. Sometimes an ordinary user also needs to edit the settings there, so let's take a quick look at how this happens.
- Go to the "Advanced" section and open the "Routing" category. This technology is used to add a static route when optimizing the receipt of packets from a specific web service or server. As is clear from the description, only experienced users encounter the addition of such rules.
- A simple and primitive principle of traffic routing is called RIP (Routing Information Protocol). It is used only in small networks and is configured separately by system administrators; accordingly, in usual realities, the user should only make sure that this protocol is disabled in order to avoid conflicts during normal Internet surfing.
- In the NAT settings, all parameters are also changed only by experienced users. This is where you create a virtual server, bind NAT to IP, add exceptions, and configure settings when using a router in a DMZ.
- If you use different WAN and LAN settings for certain interfaces, create groups to simplify configuration editing. Simply adjust existing ports by moving them into the table, initially by activating the grouping itself.
- In the “Other” category, it makes sense to edit only the “Limit the number of clients” item. You can independently set the maximum number of users connected to the router who will receive simultaneous access to the Internet. Sometimes this helps distribute traffic without losing connection speed.
Step 5: Using Services
The firmware of the type of router we are considering today provides additional functions in the form of customizable servers. A novice user is unlikely to be attracted to such features, but experienced users may be interested in them.
- Go to the "Services" section, where select the first category "IGMP". Enabling IGMP Proxy technology allows the system administrator of a network device to monitor the flow of information processed by each client. If you want to monitor traffic, activate this option and assign appropriate parameters to it.
- Initially, the “UPnP” protocol is activated, which allows smart devices located within an apartment or house to connect to the router’s wireless network to exchange data with a user application or receive information from servers. If a device is connected via LAN in this way, be sure to indicate this in the appropriate category of the web interface in order to provide it with traffic.
- All owners of dynamic DNS purchased from a separate provider will need to configure this technology in a separate menu. Here, indicate your service provider, host name, select an interface and log in to your existing profile, following the instructions from the official website.
- Using MGTS GPON routers, you can transfer files over the network using an FTP server. Activate this option in one of the categories of the “Services” menu, and then proceed to the configuration of the server itself. This feature will only be useful to experienced users who have their own servers.
Step 6: Configure the Firewall
The penultimate stage associated with configuring the router is to configure its security by editing the parameters of the built-in firewall. Pay attention to this instruction for those users who are interested in setting traffic filtering rules, blocking URLs, and enabling parental controls.
- Go to the “Firewall” section, where select the first category “MAC Filtering”. To set restrictions or permissions for packets to pass through physical addresses, first set the behavior of the policy itself, and then set the direction and add MAC addresses. All existing rules are immediately saved in the table. They are available for editing or deleting.
- Filtering by IP addresses and ports operates in a similar way, but instead of physical addresses for the policy, the data just mentioned is entered and then added to the table.
- URL filter is one of the standard firewall options of different routers. With its help, you can block sites by keywords or full addresses so that none of the clients can access certain web resources.
- Approximately the same thing is done in the “ACL” menu, but here the restrictions are set by IP addresses. If you want to block specific IPs, select the direction, set the control and enter the address.
- By default, all items responsible for protection against DoS attacks are activated. In a separate menu, experienced users can independently set a limit on the number of transmitted packets or completely disable specific rules, but this is recommended only in situations where there is an understanding of the functioning of the technologies.
- The last section is called “Parental Controls”, and its purpose is clear to everyone. You can enable control, set an Internet access schedule, and set the target's physical address to create a restriction. At the same time, work with a table is supported, which means that each client is allowed to set his own schedule. Please note that in this case the system time must be set correctly, which we will discuss in the final step.
Step 7: Maintenance
All that remains is to figure out a few parameters of the router, after which its configuration should be considered complete. In this step we will talk about system settings.
- Go to the "Maintenance" section. In it, the first menu is called “Password”, where the user can change authorization data to limit access to the web interface to other network clients.
- In the “Update” category, the official firmware for updating the router is downloaded, previously downloaded from the official website. There is also a subcategory “Save/Restore”. Use these options to help you back up your router settings as a file and, if necessary, restore all settings in just a few clicks.
- We have already said that the time needs to be adjusted in order for access control to function correctly when parental controls are enabled. Manually enter each value, and also indicate the parameters for winter and summer time (there is no transition in Russia). Then click on "Apply".
- “Diagnostics” checks the functionality of the router and the availability of network access. For example, set the interface and enter www.google.com to check if the device can communicate with this site.
- Once the setup is complete, all that remains is to reboot the device, which can also be done through a separate menu in the web interface. There is also a button for restoring factory settings, which sometimes needs to be done if the configuration was initially set incorrectly.
We are glad that we were able to help you solve the problem. In addition to this article, there are 12,719 more instructions on the site. Add the Lumpics.ru website to your bookmarks (CTRL+D) and we will definitely be useful to you. Thank the author and share the article on social networks.
Describe what didn't work for you. Our specialists will try to answer as quickly as possible.
FAQ
When trying to configure routers on their own, users often have the same questions.
Q. What router parameters can be changed?
A. Can change all settings available for the account. The only remark is that if the user has no idea what this or that menu item is responsible for, changes should not be made. In this case, it is better to contact specialists.
Q. Is it possible to damage the router during setup?
A. Setting up the router cannot lead to critical malfunctions. However, if you set some parameters incorrectly, you may lose access to the provider's network. This does not apply to reflashing the equipment yourself. Installing firmware by inexperienced users can result in equipment failure, especially if the firmware is not firmware.
Q. Why can't I access some setup features?
WiFi
To configure Wi-Fi on the Sercomm RV6699 2.4 and 5 GHz router, go to the “Wireless Network” section on the “Settings” tab. Open “Basic Settings” in the menu on the left.
For each frequency you need to make settings separately. Set the network name (SSID). The operating mode and other parameters can be left unchanged. Change them only if necessary and when you understand what you are doing. Click the “Save” button.
Now go to the “Security” section.
Here you need to set a password in the field below. Authentication select WPA2-PSK. Leave the remaining parameters as in the screenshot. Save your changes.
After that, click “Apply” at the top of the page. This must always be done after changing parameters for the changes to take effect.
Answers on questions
Among the most frequently asked questions to the MGTS support service are the following:
- Is it possible to replace the provider's router device with your own with optimal settings?
The company installs equipment that best suits the subscriber’s needs (services, tariff plan). Therefore, such a replacement is not encouraged. - Why is it not possible to remotely log into the router to configure it via the Internet?
The company's policy provides for maximum security, so access to the external network router is usually blocked in the settings. If absolutely necessary, the settings can be changed independently or in agreement with support specialists. - What Wi-Fi security technology should you use?
WPA2 technology with AES encryption provides maximum security. For access from legacy devices, you may need to enable WEP or use TIP encryption. It is recommended to use them in case of emergency due to their greater vulnerability. - How to correctly set the key for a wireless network?
It is recommended to select a key of at least 10 characters in length, alternating lowercase and uppercase characters of the Latin alphabet and numbers. The key should not be associative (words, memorable dates, etc.), since a random set is more resistant to hacking using brute force attacks.
Source
How to find out the MGTS password for a wireless connection? Even if it's not yours...
How many devices in your apartment connect to one wireless connection provided by the router? As soon as you add each new gadget to the network, you save the password and never use it again - the equipment automatically searches for and joins your home network. On the one hand, it is very convenient, but on the other hand, it gives rise to a common problem - the wi-fi owner has forgotten the password for his own network. But don’t worry, the problem is not critical, and you can solve it without informing the technical support specialist about your forgetfulness.
ZTE MF30
This router combines a unique ratio of price, quality and functionality.
Photo of zte mf30 router for connecting to the Internet from MGTS
You can buy a router of this model on the market starting from 2100 rubles.
So, for this amount, subscribers will be provided with the following functionality:
- the ability to combine several devices (up to 5) into a single network using one router;
- the device is compact, so the router can be used and connected without an additional power source;
- work using a 3G module, through which the Internet is distributed and the network is localized between participants;
- subscribers can work through a secure network using WEP, WPA or WPA2 technologies.
- These technologies allow you to restrict access to those users who do not know their Internet passwords. The subscriber does not have to worry that his network will be broken or a stranger will connect to it;
- Since the router is very small, it is very convenient to use even for pocket carrying. This is convenient because the subscriber can put the router in his pocket and easily connect it to access the Internet;
- the presence of a special slot for connecting an external memory storage device, for example, micro-SD. This allows you to use the router as you would a storage drive.
Attention! In addition to the positive aspects of the router, you need to consider some disadvantages. Thus, the zte mf30 router has a weak 1500 mAh battery, which allows the device to operate for only 6 hours without recharging.
The device also has a weak built-in antenna without the ability to amplify it.
As for the zte mf30 case, in terms of external characteristics and button placement, it is similar to standard routers that are sold on the market.
So, on the side faces there are buttons for control, and at the bottom there is a port for USB and for recharging.
The device also has 4 indicators:
1. Charge the battery;
2. Signal level;
3. Work;
4. Network mode.
Table with indicators of the zte mf30 router
It must be remembered that in the latter mode, when the indicator flashes red, data will be transmitted from the 2G network. If it lights up red, it means that the user is registered in the 2G network.
If the indicator flashes green, this means that data is being transmitted from the 3G network.
And if the green color on the indicator is constantly on, the subscriber has been successfully registered in the 3G network.
Official method
Before venturing into the garden, I came across the official method for changing the password from MGTS itself:
- To change the password or Wi-Fi network name, you need to go to your MGTS personal account, the “My Network” section.
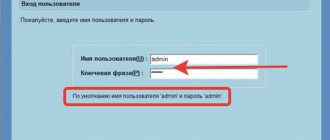
- The original factory password is duplicated on a sticker on the bottom of your ONT router (if you haven’t changed it, but suddenly forgot) or on the packaging box.
- If everything is really bad, call their support service. The current phone number is 8 (495) 636-0-636 (if the number no longer belongs to MGTS, be sure to indicate in the comments).
Where to buy a router
An MGTS subscriber does not need to buy a GPON or ADSL router, since the company provides the equipment upon connection.
Problems with setting up or replacing devices (if their functionality does not completely satisfy the end user) are resolved through the support service.
And only if a solution is not found, the solution may be to buy a router. Today there is no information on router sales on the provider’s official website. Accordingly, they can only be purchased in online stores or on portals like Avito or Yula, where devices are sold by private individuals.
You should be aware that installing your own router and configuring it at the subscriber’s discretion, without coordination with technical support, may not comply with company policy. As a result, the client's account is likely to be blocked with further lengthy proceedings.