Don't know how to log into your Asus router via the web interface? I’m afraid that if I say that logging into your personal account occurs at router.asus.com or 192.168.1.1 and authorization occurs through the login and password admin-admin, then many may not understand exactly how to do this. So let's talk about everything in order. First, let's figure out how to connect it to a computer via wifi, then log into the administrator system and configure WireLess. And at the end you will find a visual video that shows in detail the entire process of entering the settings of the Asus router through its web interface of your personal account.
These instructions are relevant for Asus router models RT-N12, RT-N11P, RT-G32, RT-N10, RT-N10P, RT-N10U, RT-AC51U and others with a black-blue admin panel.
Web interface for logging into the Asus router
So, before we can log into the ASUS router through its web interface, we need to perform a number of steps and set a couple of configurations on the computer from which the setup will be done. Namely:
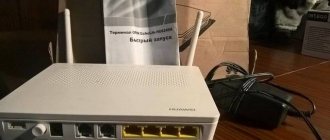
- Connect the power adapter to the router and plug it into a power outlet
- Enable "Power" button
- Reset Asus settings to “default” using the “Reset” button - it is small, located next to the antenna and recessed deep into the case. To press it, use a pin or pencil.
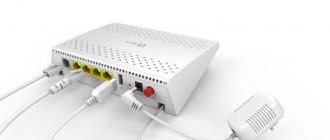
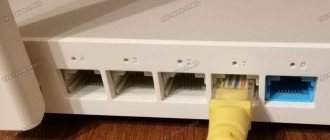
- Remove the Internet cable from the computer and insert it into the blue WAN connector on the router body
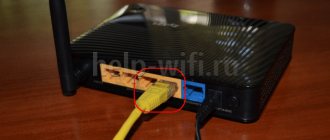
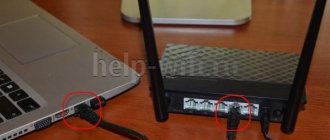
- Take the twisted pair cable that came with the router and connect it to the PC in place of the Internet cable. Insert it with the other end into the yellow LAN port on the router - any of the 4.
After that, go to the computer settings and find “Network and Sharing Center” in the Windows “Control Panel”:
(Start - Control Panel - Network and Internet - Network and Sharing Center - Change adapter settings)
Here we find “Local Area Connection”, right-click on it and go to the “Properties > Internet Protocol Version 4” section.
We check the boxes to receive all data “automatically” and save the settings with the “OK” button.
What is your opinion: is WiFi harmful?
Yes
22.91%
No
77.09%
Voted: 36453
Recommendations: Ensuring an uninterrupted Wi-Fi signal
For better signal transmission between the router and network devices connected to it, you should make sure that Asus is located:
- In a centralized location to ensure maximum wireless coverage.
- Away from metal obstacles and direct sunlight.
- Away from transformers, powerful motors, fluorescent lamps, lamps, microwave ovens, refrigerators and other equipment to prevent interference.
It is also important to always update the firmware - to do this, you need to check the official Asus website from time to time for a new version.
router.asus.com - how to log into your personal account Asus 192.168.1.1?
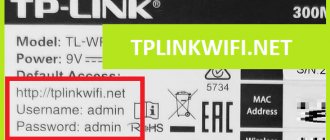
After this, you can already log into the router. Any device has a sticker, which Asus places on the bottom of the case. You can, of course, check me and look at its contents, but I can say with my eyes closed what it says:
- Connection address - 192.168.1.1 or router.asus.com
- Login - admin
- Password - admin
Did you guess right? Otherwise! More than a dozen copies of such equipment had to be installed. If you did everything correctly in the previous step on your PC, then when you enter “https://router.asus.com” or “https://192.168.1.1” into the address bar of your browser, you should be taken to the web interface of your Asus personal account . Now you can proceed directly to setting up the router, which is covered in a separate detailed article - read on!
Factory reset
This can be done in two ways: software and hardware.
To perform a soft reset, you need to know your login information:
- We go to the web interface of the router.
- In the “Advanced Settings” section, select the “Administration” section.
- Select the “Manage Settings” tab.
- Opposite the inscription to factory settings, click the “Restore” button.
For the hardware method, you need to take an unbent paperclip or pin and press the Reset button on the back wall for 10 seconds. But this may not be enough.
Therefore, there are several additional ways to perform a hard reset:
- With the router turned off, press and hold the WPS button while pressing the power button. Wait until the power indicator starts blinking. When it stops, release the WPS button, after which the router will reboot automatically.
- In some models, after the above steps, an automatic reboot does not occur and you need to do it manually.
- For Lyra models, instead of the WPS button, you need to hold the Pair button, which is similar in action, and for Lyra Voice, you need to hold the Set button.
After this, you can log in using admin – admin.
I can't log into the router at Router.Asus.Com
Now let’s talk about what to do if you do everything according to the instructions, but you can’t get into the Asus panel. To begin with, I advise you to immediately look at how your Internet adapter is configured on your computer or laptop. This is either a network card into which the cable is inserted, or a wireless module. Depending on what you are connecting through.
Nowadays, mostly everyone uses the Windows 10 operating system. Therefore, I will show you how to check these parameters in it.
- Go to the “Network and Sharing Center”.
- Open the link “Change adapter settings”
- You will see two adapters - “Ethernet” and “Wireless Network”. If the one we need is gray, then we activate this device - right-click the mouse and click “Enable”
- Now we also call up the menu window and open “Properties”
- Here in the list we select “Internet Protocol Version 4”. And check the boxes for “Obtain an IP address” and “DNS server in automatic mode.”
Connection
To receive a response from the domain or network address that is responsible for the configuration, both the router and the device from which the configuration will be changed must be on the same network. This can be done in two ways: wired (using a cable) and wireless.
The instructions we give in the article are universal; they apply to the entire range of routers of this brand. For example, ASUS RT-G32, ASUS RT-N12 VP B1, ASUS RT-AC51u and others.
Cable
To do this, you will need a device with a LAN port, for example, a computer or laptop, and a patch cord. One side of the cable is connected to the network connector on the motherboard, the other to the LAN connector of the router. A wire from the provider must be connected to the WAN port of the Asus router; others should not be connected.
Wireless
Here the list of devices suitable for connection is greatly expanded. Thanks to the ubiquity of wireless adapters in various gadgets, you can set up an Asus router even from the refrigerator, as long as it has a browser. Possible techniques may include:
- Computers with a Wi-Fi adapter - built into the motherboard, connected to a USB or PCI-E port.
- Laptops with a built-in network card (or external via USB).
- Smartphones.
- Tablets.
- TV set-top boxes for Android or tvOS
All you need to do is connect to a wireless access point by entering your username and password, and open a browser or application to configure it. If a large list of points is available and it is difficult to determine the correct one, look for the one with the strongest signal and Asus in the name.
The latter is only true for cases where no preliminary settings, including those from the provider, have yet been made.
Login and password admin are not suitable
Finally, if the authorization page still opens for you, but the standard ADMIN login and password indicated on the label does not work. What to do? This tells us that they were also replaced during the previous network setup. Unfortunately, only a full reset to factory settings will help here.
In conclusion, I recommend reading the official instructions in the Asus customer support section.
Possible problems and solutions
The main problem is the lack of connection to the admin site and the inability to change the settings of the Asus router. There may be several reasons:
- In the properties of the wireless adapter on the PC, the IP is set to manual. It needs to be changed to automatic.
- It is the current device that is experiencing connection problems. You need to check the availability of the settings portal from another gadget.
- A wired or, conversely, wireless connection does not work without prior configuration. Try both options if possible - connect your computer to the router with a cable or use a wireless connection with your smartphone.
- Reset settings using the above method.
- Try all admin addresses listed in this article.
- The account login and password may have been changed. If the user does not remember them, they also need to be reset.
If all else fails, the problem may be hardware. A simple user cannot solve it. It is better to contact a service center, where the device will be repaired or offered an adequate replacement.
Setting up via mobile application
Asus Router is a very useful program for your phone. It allows you to connect to your Asus router and configure it even when you don’t have a computer or laptop at hand. You can install it on both Android and iOS. It is worth noting that not all routers are compatible with it; it is better to check the official website and check your specific model before installation.
Once launched, the application will report that it has found a compatible device and will offer to set it up immediately.
It will determine the exact model and IP address to enter the settings program.
After this, you can enter your username and password and click the “Login” button - the device will be configured automatically.
In addition, the application has several other quite useful functions:
- Backup router settings for quick transfer in case of an unintentional change or software failure. A “snapshot” of the system is saved in the smartphone’s memory.
- Firmware update via phone.
- Monitoring the distribution of hardware resources - processor and RAM load.
- Network vulnerability test - the most common vulnerabilities are checked and recommendations for eliminating them are given.
- FTP server management. Only for devices that support this function - mainly those with a USB port included.
- Samba is a file sharing client that is located on an external drive connected to USB.
- The “Share connection” item – quickly sends the login and password of the access point via a social network or messenger to a trusted person.
- Incoming and outgoing traffic consumption graph - consumption control, does not recognize encrypted content, and therefore is only useful in numerical terms.
- Experimental WI-Fi ECO function - reducing antenna signal power to save energy consumption. The effectiveness is questionable, since it additionally promises a lower level of radiation influence on the body.
Here you can also set speed limits for each connected client, change DNS addresses to intelligently block unwanted sites and dangerous advertising, and also change the admin login parameters.
The application can be protected with a password or configured to log in using a fingerprint for those devices that support this method of user authentication.
Guest network
In general, it is a useful thing to divide a group of users into several local wireless networks. Go to the “Guest Network” section. There will be one network in each band. If you click the “Enable” button, it will add another one. By clicking on it, you can make configurations:
- Network name (SSID).
- Authentication method – set to WPA2-Personal.
- Key as password for access
- At the end, you can specify the time for accessing the Internet.
Parental control
Here you can set the Internet usage time, and also protect your child from malicious adult sites.
- This section is located immediately in the left menu or in the “ AirProtection” tab. Turn on the mode with the slider.
- First you need to select a device to which more stringent rules will be applied. Click on the arrow in the “Client Name” field. To add multiple devices, click on the cross (Add/Delete).
- To configure the “Time and Schedule” schedule, and to filter sites, you can go to the adjacent tab. They are both located in the upper right corner of this window.
- There are several modes for blocking Internet content:
- Adults - everything is clear here.
- Instant messages and communication – correspondence on social networks.
- P2P – for online games.
- Streaming and entertainment - various video hosting sites such as YouTube.
Change Password
As stated earlier, you can change your router admin login information in the “System” tab of the “Administration” menu item.
Let us remind you that the password must be quite complex and not be guessed by trying standard words. You will need to enter the new password twice, and then click the “Apply” button at the bottom of the screen.
In addition, the password can be changed in the mobile application. To do this, on the main screen you need to tap on the “Security Check” item.
Here you need to select the line “Password for wireless access” and change it.
How to connect an Asus router
Actually, connecting is one of the simplest operations before setting up an Asus router. We will need the cable that comes with the kit. It is usually blue. The connectors are connected just to connect the PC to the router. It is used for initial connection and network setup when there is no Wi-Fi yet. It is worth noting that many modern models have a ready-made guest wireless network, which is available immediately when turned on. It greatly simplifies setup, since you don't have to physically connect cables; you just need to connect to the guest network and configure the router in your own way.
The cable usually looks like this, but can be of different colors and is most often blue
To connect the PC and the router for initial setup, you must use one of the LAN ports. They are usually marked in yellow, numbered and signed. That is, we insert one end of the cable into the router’s LAN, and the other into the network card connector of the PC or laptop.
We will also need to physically connect to the Internet provider's network. Most often this is a regular network cable connected to an apartment or house. The router has a WAN connector for it, which can be indicated in blue.
In some cases, you can connect to the provider using a 4G modem. But for this, the router must have a USB connector and the ability to support 4G. That's all, two network cables and one for the power adapter must be connected. Everything is ready before you go directly to the settings of the Asus router.
Additional settings
The basic settings of the router are enough for it to work correctly. However, nowadays more and more users want to get the maximum useful functions on their equipment. And products from ASUS fully meet these requirements. In addition to the basic parameters, it allows you to make a number of additional settings that will make using the Internet and local network more comfortable. Let's take a closer look at some of them.
Creating a backup connection via USB modem
On routers that have a USB port, it is possible to configure such a function as a backup connection via a USB modem. It can be very useful if there are often problems with the main connection, or when using the router in an area where there is no wired Internet, but there is 3G or 4G network coverage.
The presence of a USB port does not mean that the equipment will be able to work with a 3G modem. Therefore, when planning to use it, you need to carefully study the technical characteristics of your router
The list of USB modems supported by ASUS routers is quite extensive. Before buying a modem, you need to familiarize yourself with this list on the company's website. And after all organizational measures are completed and the modem is purchased, you can begin to configure it directly. For this:
- Connect the modem to the router's USB connector. If there are two connectors, a USB 2.0 port is more suitable for connection.
- Connect to the router’s web interface and go to the “USB application” section.
- Follow the 3G/4G link.
- In the window that opens, select your location.
- Find your provider in the drop-down list:
- Enter your username and password.
The parameters are changed by clicking the “Apply” button. Now, if there is no connection in the WAN port, the router will automatically switch to the 3G modem. If you don’t plan to use wired Internet at all, later versions of the firmware have a “Dual WAN” function, by disabling which you can configure the router exclusively for a 3G/4G connection.
VPN server
If the user has a need to gain remote access to his home network, it is worth using the VPN server function. Let’s immediately make a reservation that older budget router models do not support it. In more modern models, to implement this function, you will need a firmware version of at least 3.0.0.3.78.
To set up a VPN server, do the following:
- Connect to the router’s web interface and go to the “VPN server” section.
- Enable the PPTP server.
- Go to the “More about VPN” tab and set the IP pool for VPN clients.
- Return to the previous tab and one by one enter the parameters of all users who will be allowed to use the VPN server.
After clicking the “Apply” button, the new settings will take effect.
Parental control
The parental control function is increasingly in demand among those who want to limit the time a child spends on the Internet. ASUS devices have this feature, but only those that use the new firmware. To configure it, you need to:
- Connect to the router’s web interface, go to the “Parental Controls” section and activate the function by moving the switch to the “ON” position.
- In the line that appears, select the address of the device from which the child accesses the network and add it to the list by clicking on the plus.
- Open the schedule by clicking on the pencil icon in the line of the added device.
- By clicking on the appropriate cells, select time ranges for each day of the week when the child is allowed access to the Internet.
After clicking the “OK” button, the schedule will be created.
The capabilities of ASUS routers are far from exhausted by reviewing the functions presented in the article. Only in the process of constant study will it be possible to truly appreciate the quality of the products of this manufacturer.
We are glad that we were able to help you solve the problem. In addition to this article, there are 12,719 more instructions on the site. Add the Lumpics.ru website to your bookmarks (CTRL+D) and we will definitely be useful to you. Thank the author and share the article on social networks.
Describe what didn't work for you. Our specialists will try to answer as quickly as possible.
Router Security Services
Like any modern router, Asus has a whole section dedicated to system security settings. They are located in the Firewall menu
- URL filter - here we can specify a list of words that should not be in the domain of the sites visited. You can specify masks for all possible unwanted resources with dubious content that will be blocked.
Or vice versa, create a white list of sites that network users can access. And access to everyone else will be denied
- Network services filter - blocking, according to a schedule, the operation of certain groups of programs running on user computers. Each application or several at once uses a specific port to communicate with the Internet. By the number of this port you can systematize their access to the Internet.
