Despite the fact that Samsung is one of the leaders in the mobile market, its devices are not always highly reliable. In this regard, users are often faced with a choice: take the device to a repair service or start repairing it - in particular, reflashing it - themselves.
As practice shows, many people believe that changing the firmware of a smartphone on their own is almost impossible; you should definitely contact a specialist. Actually this is not true.
Almost any Android smartphone or tablet can be flashed yourself. For example, using the Odin software. How to flash firmware via Odin? This will be discussed in this material. The article will describe how to install firmware via Odin, using the example of a Samsung Galaxy S3 device.
You may be interested in: Tenfold zoom in a smartphone – coming soon
Important
It’s worth noting right away that any incorrect actions when working with the Odin program can harm the device. Sometimes this damage can be irreparable - the gadget can turn into a useless set of chips.
Therefore, users carry out all operations with firmware at their own peril. To minimize the risk from flashing, you should independently study the processes that occur during this operation in your smartphone and on your computer. Basic programming skills and basic knowledge of processes in electronic devices will not hurt for this.
Let's sum it up
Unfortunately, there is no universal recipe on the Internet on how to solve the problem with NAND Write Start freezing in Odin.
I repeat, it seems to me that it is worth trying a different version of the firmware or Odin. Also check whether the phone/flash card is properly prepared for the firmware, and whether there is a prohibition on writing.
Add a comment Cancel reply
This site uses Akismet to reduce spam. Find out how your comment data is processed.
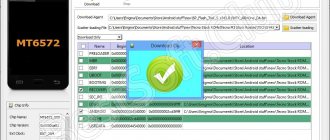
Various utilities are used to flash Android devices. For example, all devices with Mediatek chips are sewn through the FlashTools utility. As for smartphones and tablets manufactured by Samsung, the main program for flashing and rooting them is. Sometimes a situation may arise when everything is done according to the instructions, but Odin gives some kind of error. We will talk about the meaning of these errors, as well as the main ways to solve them.
Setting up interaction between PC and smartphone
You will be interested: Will there be an Autonomous Runet?
Before installing the firmware via Odin, you need to install drivers on your computer. There will be no problems installing them. Samsung programmers took care of this.
To install Samsung drivers, you need to download proprietary software from the company's official website. For older versions of smartphones, you need to install the Kies kit, for new ones - Smart Switch PC.
The only thing that may cause inconvenience during operation is the fact that other software will be installed along with the drivers, which will not be needed to flash the smartphone. It is also worth considering that flashing Samsung firmware via Odin simultaneously with Kies can lead to errors during flashing, and this can lead to damage to the smartphone. Therefore, after installing the necessary drivers, the Kies program must be uninstalled.
Samsung has also developed an automatic driver installer, Samsung USB Driver, which can be used instead of installing Kies to work with Galaxy S3 firmware via Odin.
The driver installation procedure is standard; you just need to follow the installer's instructions.
You may be interested in: The demo version is... Explanation of the concept and application features
↑ There are four main rules for flashing Samsung.
- Firstly, the firmware is carried out only with a charged battery (at least 50%) on the phone and an uninterrupted power supply on the computer device.
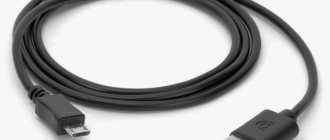
- Secondly, you cannot remove the USB cable when flashing Android firmware.
- Thirdly, the USB cord must be original and not damaged - now it is very important to use the exact USB cord that was included with the smartphone, since if non-original parts are used, there is a danger of the phone breaking.
- Fourthly, Russian-language folders should not be specified in the path directly to the firmware (you should write “C: samsung” or “C:” there).
If you ignore these rules, your phone may become a “brick” - the creators of the “Odin” application warn about this.
Using the application is quite simple, as Odin has an intuitive interface. After the utility is launched, a number of buttons appear with the names of subsections of the built-in memory.
Each process is logged - its contents can be viewed in a separate window. This solution helps prevent accidental errors when installing the operating system.
Activating the "Download" mode
Samsung firmware can be flashed via Odin only if the device is in Download mode. To put your device into this mode, you need to:
- turn off the device;
- hold down the physical “Volume -” button (do not release);
- hold down the physical “Home” button (do not release);
- Hold down “Volume -” and “Home” and press the physical “Power” button.
Three buttons must be held until the word “Warning!” lights up on the device screen. To confirm entering Download mode, you need to press the physical “Volume +” button.
The device is ready to work with firmware via Odin if a green robot (Android OS brand name) is drawn in the center of the screen on a black background, underneath it is written “Downloading... Do not turn off target!”, and in the upper left corner there is the inscription “Factory mode” , product name, custom binary download, current binary".
It is important that the device’s battery is charged at least 60% before switching to download mode. It is better if the charge percentage is more than 90% for unexpected cases.
Now you can install Samsung Galaxy firmware via Odin.
Single-file firmware
The first thing you need to do to install the firmware after all the manipulations with the drivers and smartphone is to download Odin and the firmware file, unpack them into a separate folder on the local drive C.
It’s worth remembering once again: if Samsung Kies is installed, it must be removed. You can do this through the control panel in the “Programs and Features” section: select Samsung Kies and press the “Uninstall” button.
As soon as the program is unzipped and unnecessary software is removed, you should run the Odin3.exe file as an administrator. You can do this as follows: right-click on the file and select “Run as administrator.”
Once the smartphone is in download mode, you need to connect it to the PC using the USB port located on the motherboard (usually located on the back panel of the computer).
As soon as the smartphone connects to the computer and the Odin program recognizes it, the field scale of the specific ID:COM port in the program (located just above the middle of the window) will fill in blue, and the message “Added!!” will appear in the “Log” section of the notification window. with the same port number as specified in the ID:COM field.
Setting up Odin when installing single-file firmware
You may be interested in: How to print a map from Yandex: instructions
You need to add a single-file firmware image to the program. To do this, click on the “AP” button (if the Odin version is before 3.09, then this button is called “PDA”). In the window that appears, specify the path to the firmware file, select it and click the “Open” button.
As soon as the firmware file is downloaded via Odin, the program will begin checking the MD 5 sum of the selected file. When the verification is completed, the name of the file containing the firmware image will be displayed in the AP (PDA) field.
Then you need to go to the “Options” section, which is located next to “Log”, and determine the necessary parameters. When working with single-file firmware, all checkboxes in this section must be unchecked except for “F.Reset Time” and “Auto Reboot”.
The best thing to do
Searching the Internet for information can be a waste of time. Therefore, I immediately advise:
- Go to the authoritative 4PDA forum. Link - https://4pda.ru/forum
- Click on Registration and register - there is nothing difficult, you need to specify your login, password, and email.
- Open the Android section with Samsung firmware. Link - https://4pda.ru/forum/index.php?showforum=325 (maybe the link will change in the future).
- Find your model. Describe your problem - what you did, how you tried to solve it.
- They can help you. But they will definitely point you towards a solution. Rather than doing anything on your own, it is better to consult with specialists.
Start image installation
All settings for the firmware image are completed, all that remains is to press the “Start” button (the button at the bottom of the Odin window) and wait until the information from the image is written to the smartphone’s memory sections. To monitor the firmware process, you can use the section scale located at the top of the Odin window above the ID:COM section, and in the “Log” field you can monitor the operations being performed in text format.
As soon as the firmware is completed, the inscription “PASS!” will appear in the upper left corner in the square. on a green background, which indicates the successful installation of the image into the smartphone system.
You can disconnect the device from the USD port and start it by long pressing the power button.
It is important to note that when working with single-file firmware via Odin, in most cases the user’s personal data on the smartphone is not affected in any way.
Multi-file firmware
If the device needs to be restored after serious malfunctions or special software needs to be installed on it, then multi-file firmware should be used. This method of flashing a device is used in service centers, but ordinary users can also use it.
When working with multi-file firmware, you must first perform the same steps as described in the “Single-file firmware” section.
The difference between multi-file firmware is that you will need to load not one, but several boot images into Odin. Moreover, each of the files contains a section in the name into which it must be loaded into Odin. This is a small tip for users.
How to upload an image to the desired column? Click on the appropriate button (BL, AP, CP or CSC), specify the path to the desired file (look for a hint in the file name) and click the “Open” button.
As noted above, in Odin version 3.09 and higher, the names of the buttons are different. To avoid getting confused about the names of the buttons and file affiliations, you can use the table below.
| Button in Odin version before 3.09 | Button in Odin version 3.09 and higher | Image file name |
| Bootloader | B.L. | APBOOT(BL)_XXX.tar.mb5 |
| PDA | AP | CODE(PDA)_XXX.tar.mb5 |
| PHONE | C.P. | MODEM(PHONE)(CP)_XXX.tar.mb5 |
| C.S.C. | C.S.C. | CSC_XXX.tar.mb5 |
Once all the images are loaded into Odin, you should start working on the “Options” tab (next to “Log”). It should also uncheck all the boxes except “F.Reset Time” and “Auto Reboot”.
All that remains is to click the “Start” button and wait for the installation of images into the device system to complete (the indicator is the inscription “PASS!” on a green background at the top of the program window).
Origin of the term
Firmware used to be the name given to the contents of a computer's memory. There were no hard drives then; memory on magnetic cores was used. Such machines were called ROM (read only memory). The memory consisted of U- and W-shaped cores with a small gap of 1 mm into which the wire was laid. In one position the wire meant “0”, in the other “1”. The wire was pulled manually using a “pencil” device that resembled a needle. And this dreary and painstaking work was called “firmware”. The result was almost always errors, which could only be corrected by cutting the wire and placing it in the desired position (1 or 0). This was called flashing.
Over time, the word took root in mobile technologies. At the turn of the millennium, programmers and engineers began to use slang to say “reflash the device” instead of “reinstall the system.”
Firmware in PIT file format
Flashing with a PIT file can only be used if the smartphone or tablet has serious performance problems. In other cases, this flashing method should not be abused. PIT firmware is combined with single-file or multi-file.
First, you should download the firmware files using one of the methods described above, then go to the “Pit” tab to work with the PIT file (located next to “Log” and “Options”). When you go to this tab, a warning will appear from the Odin developers about the dangers of working with this type of file. If this fact does not stop you, click OK.
In the tab that opens, you need to click on the “PIT” button and specify the path to the file in the window that opens. In the “Options” tab, only the “Auto Reboot”, “Re-Partition” and “F.Reset Time” items should be checked.
All that remains is to click “Start” and wait for the firmware installation to finish.
Individual firmware components
The Odin program is multifunctional and allows you to work not only with entire firmware, but also with its individual components: kernels, modems, recovery, etc.
As an example, we will consider the process of installing TWRP recovery. The step-by-step instructions look like this:
- Download the installation image.
- Run the program.
- Connect the smartphone in Download mode to the computer via the USB port on the motherboard.
- Click the "AP" button in Odin and specify the path to the installation file.
- In the “Options” tab, leave a checkmark next to the “Auto reboot” item.
- Click “Start” and wait for the installation to complete.
In this case, recording the image occurs almost instantly. Once it is completed, you need to disconnect the device from the PC and turn it off by long pressing the power button.
The first launch after installation must be done through TWRP recovery, otherwise the system will automatically install the factory firmware.
To get into the installed recovery, you need to hold down the “Volume +”, “Home” buttons on the switched off device, and then, while holding the keys down, press the “Power” button.
User reviews
As follows from reviews of Android firmware via Odin from most users - both experienced and newbies - the above methods for installing firmware and its individual components are relevant for most Samsung tablets and smartphones. Although this does not mean that they are universal for absolutely all mobile gadgets. Therefore, before installing new firmware on your device, it is worth studying which software is best to do this with.
At the same time, it is important to never forget that working with any firmware is always a risk. There is a risk of damaging the device if done incorrectly. A risk that can result in both success and failure, a stupid loss of a gadget. Therefore, in some cases, it is better to entrust the Samsung Galaxy S3 firmware via Odin to service center specialists.
Source
↑ How to flash Samsung via Odin
Why is the One program necessary?
Thanks to this application, it becomes possible to restore the operation of a smartphone after OS errors. In particular, if the phone does not want to turn on, then you can try installing new firmware. Also, thanks to this program, you can install custom versions of operating systems to get new options or to make the device work more stable. Initially, the development of the “Odin” application was carried out for specialists who worked in service centers.
Now, thanks to detailed instructions, even inexperienced Samsung phone users can use the program. It is important to note that in order to flash the device, strict adherence to the instructions is required, otherwise problems will occur.