Windows 10 supports Miracast technology by default. It's a great way to transfer videos, photos and music between all your devices. The technology was a real godsend for me, because before that I used wires and cables, sent files between devices, copied them to flash drives and used other approaches. All methods made the work slower and video transmission more inconvenient. If you know how to enable Miracast on a Windows 10 PC, working with your media library becomes much easier.
Miracast in Windows 10 can be downloaded to your computer for free when it comes to updating Wi-Fi drivers. However, the function itself is built into the operating system and is supported by receiver devices and smartphones. Therefore, you do not need to download Miracast on Windows 10 in the form of separate programs and applications. Even Intel, which previously released a separate solution in the form of the WiDi application, has now completely switched to Miracast support.
How to enable Miracast on Windows 10
Miracast is one of the technologies for wirelessly transmitting images and sound to a TV or monitor, easy to use and supported by many devices, including computers and laptops with Windows 10, if you have an appropriate Wi-Fi adapter.
Connect to a TV or wireless monitor via Miracast.
In order to enable Miracast and transfer images to the TV via Wi-Fi, in Windows 10, just press the Win+P keys (where Win is the key with the Windows logo, and P is the Latin key).
At the bottom of the list of display projection options, select “Connect to a wireless display” (see below for information on what to do if there is no such option).
The search for wireless displays (monitors, TVs, etc.) will begin.
Once the desired screen has been found (note that most TVs require you to turn them on first), select it from the list
Once selected, the Miracast connection will begin (may take a while), and then, if everything went smoothly, you will see the monitor image on your TV or other wireless display.
If Miracast doesn't work on Windows 10.
Despite the simplicity of the steps required to enable Miracast, often not everything works as expected. Next are possible problems when connecting wireless monitors and ways to eliminate them.
The device does not support Miracast.
If you don't see the "Connect to a wireless display" option, it usually means one of two things:
- The existing Wi-Fi adapter does not support Miracast
- Required Wi-Fi adapter drivers are missing
The second sign that the problem is one of these two points is the display of the message “The PC or mobile device does not support Miracast, so wireless projection from it is not possible.”
If your laptop, all-in-one PC, or computer with a Wi-Fi adapter was released before 2012-2013, we can assume that the problem is the lack of Miracast support (but not necessarily). If they are newer, then it is more likely the problem is with the wireless network adapter drivers.
At the same time, even if there are no official drivers for Windows 10, you should try those provided for versions 8.1, 8 or 7 - Miracast can also make money on them.
Cannot connect to TV (wireless display).
The second common situation is that the search for wireless displays in Windows 10 works, but after selecting it, it takes a long time to connect via Miracast to the TV, after which you see a message that the connection failed.
In this situation, installing the latest official drivers for the Wi-Fi adapter can help (as described above, be sure to try), but, unfortunately, not always.
Moreover, I don’t have clear solutions for this case, I only have observations: this problem most often occurs on laptops and all-in-one computers with 2nd and 3rd generation Intel processors, that is, not on the newest equipment (accordingly, the Wi-Fi used in these devices -Fi adapters are also not the latest). It also happens that on these devices, the Miracast connection works for some TVs and does not work for others.
From here I can only assume that the problem with connecting to wireless displays in this case may be caused by incomplete support of the Miracast technology variant that is more used in Windows 10 or on the TV side (or some nuances of this technology) on the part of older equipment. Another option is the incorrect operation of this equipment specifically in Windows 10 (if, for example, in 8 and 8.1 Miracast turned on without problems). If your task is to watch movies from your computer on your TV, then you can set up DLNA in Windows 10, this should work.
Comments (11)
Hello, I got an error (you cannot view protected content on this device). please help, I wanted to stream and display the image from my phone to obs. This error occurs on other devices. There is little information about this on the Internet, there were tips on updating or installing other drivers for wi-fi, I installed it and still got the same error. laptop lenovo 310-15isk. what does this mean
Please tell me. If I tap on connect in the start menu on my laptop, a blue window opens and the message: The device does not support the Miracast standard, so wireless projection to it is not possible. Is it possible to fight this? You need to display Android on your laptop screen.
LG 49UJ630V TV (web OS, updated) with Mirocast support (screen share, listening mode enabled) PS i7, Asus Z87-K (updated chipset driver), checked 2 adapters (tl-wn7200nd, tl-wn725n, updated drivers) win 10 64 (updated) when pressing the win+P keys there is no “connection to a wireless display”, through “parameters - devices - adding bluetooht or another device - wireless display or docking station” the TV does not find anything, it sees files on the computer, but a wireless one is needed display what am I doing wrong? Help
And I have the same problem. The computer is connected to the router with a hose, and the router distributes WiFi to other devices, including TV (Sony KDL-55...). So, if I select any video (audio) file on the PC in Explorer, and through the menu I transfer it to the device (TV), then I get what I want. But through the menu described in the article (Win+P), and through “Transfer media to device” in Edge, this result is not given... they search for a long time for the device and say that there is nothing suitable... How is that? It transmits from Explorer, but from browsers it says that it may not support Miracast...?
This situation arose in Win 10 after updating from version 1607 to 1703. This issue should be fixed in a future SP3 update. This is what Microsoft support told me. but there is no 100% guarantee. as they say *it’s written on the fence…*
After reinstalling Windows 10, miracast stopped working. What should I do?
I had this. I did the following: I completely removed the Intel drivers for the WiFi adapter, then I stole all the Intel WiDi components from the system, rebooted, and the OS automatically installed the driver. Everything worked.
How do I enable Miracast, Windows 10 operating system, Android mobile smartphone. There is support everywhere, I need a little instructions on how to set it up, I can’t figure it out myself.
On your computer, click Start and search for the Connect app. After the application is launched, a window will appear with information about waiting for a third-party device to connect. Now take your smartphone and in “settings” select “Display”, then “Image transfer”. A list of devices to which the image can be transferred will appear. Select your computer from them.
I want to make sure that the image from the phone display is displayed on the monitor. Can I do this via Miracast if I have a laptop with Windows 10 and Windows Phone from Microsoft?
There should be no problems with a smartphone; now almost all mobile devices are compatible with the Miracast standard, but problems may arise with a computer. Old laptops are not equipped with support for this technology. If you have a more or less new computer, there will be no problems.
June 2022 update:
Now we recommend using this tool for your error. Additionally, this tool fixes common computer errors, protects you from file loss, malware, hardware failures, and optimizes your computer for maximum performance. You can quickly fix problems with your PC and prevent other programs from appearing with this software:
- Step 1: (Windows 10, 8, 7, XP, Vista - Microsoft Gold Certified).
- Step 2: Click “Start Scan” to find Windows registry issues that may be causing problems with your PC.
- Step 3: Click "Fix All" to fix all problems.
Run the DirectX Diagnostic Tool (dxdiag)
- You can exit the DxDiag page.
- Then right-click Start, select Windows PowerShell to open the PowerShell window.
- Copy and paste the command below into the Powershell window, then press Enter to ensure you have the correct version of your network adapter driver installed:
- If the returned Ndis version is higher than 6.30, your computer is equipped to support Miracast from a network location.
- You can exit the Powershell window.
Changing the wireless adapter to Auto
You can solve the “Your PC does not support Miracast” problem by resetting the wireless mode selection to Auto. Here's a quick guide on how to do it:
Step 1: Press Windows + R buttons to open the Run dialog box. Then enter devmgmt.msc and click OK to open Device Manager.
Step 2: Expand the Network Adapter drop-down menu, right-click the wireless network adapter and select Properties.
Step 3: Go to the Advanced tab, select the Wireless Mode Selection property and set it to Auto.
Step 4: Click OK and wait until the network connection is restored.
Then restart your computer and check if you can use the Miracast feature.
Reasons for incorrect operation
There are times when Miracast mode does not work correctly or even refuses to work at all. This happens for two reasons:
1. The WI-FI module does not support Miracast due to the lack of drivers or their obsolescence.
2.Different versions of protocols, and therefore different signal processing speeds. This results in a long connection .
Make sure Wi-Fi is turned on on both devices.
While this is obvious, many users have resolved the issue by discovering that the Wi-Fi component was disabled on one (or both) of the devices involved in the Miracast connection attempt.
Because it uses Wi-Fi Direct, it doesn't necessarily require both devices to be connected to the same network, but you do have to make sure Wi-Fi is turned on on all devices.
- To make sure Wi-Fi is turned on on your Windows 10 PC, press Windows + R to open the Run dialog box.
- Then type or paste “ms-settings:network-wifi” and press Enter to open the Wi-Fi tab in the Network & Internet Settings menu.
- If you're on the Wi-Fi tab, make sure the switch associated with Wi-Fi is turned on.
Failed to connect to wireless display
If your computer detects an external display via Miracast, but you get a "Unable to connect" error when you try to connect, try the following steps:
- Restart both devices (both computer and TV/projector);
- Check whether the Miracast function is enabled in the TV/projector settings, try moving the laptop closer to the wireless display (to eliminate the influence of Wi-Fi signal interference);
- Try updating the Wi-Fi driver on your computer.
In my case, manually connecting the wireless display as a new device helped. To do this, in Windows 10, go to Settings -> Devices -> Add Bluetooth or other device.
Select Wireless Display or Dock.
Wait until the scan finishes. Your TV with a wireless adapter should appear in the list. Select it. After some time, your wireless display will appear in the list of devices.
Press the Win+P key combination and try connecting to your wireless display again. The connection should be established successfully.
equipment requirements
As stated earlier, you must be running Windows 7 or later. The ideal option is to use “ten”, since Microsoft concentrated only on improving and supplementing this OS. Since a wireless connection is used, the laptop or computer must have a Wi-Fi module with installed drivers. On a personal computer with Windows 10 without Wi-Fi, the technology is built-in, but you will not be able to use it, since the necessary equipment will not be found.
Make sure that the TV or other device to which you are going to broadcast images (music) supports Miracast. To check Windows for support for this technology, follow the instructions:
- Press the WIN+R combination on your keyboard and enter the word dxdiag, Press the Enter key.
- You will be taken to the diagnostic tools window. You need to click on the “Save all information...” button at the bottom.
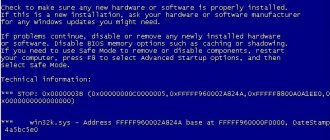
- You will be prompted to save the text file. Select a location on your computer and then open the document using Notepad. Find the line that is shown in the image and make sure that it says Available.
- On the computer that will be used as a receiver, you need to go to the settings, and then on the “Projection…” tab, make sure that the technology is supported.
If you want to use your phone or tablet as a screen, make sure that it is visible to other devices, and then in the “Wireless screen” section, activate the function
Please note that not all Android devices support Miracast. The user must have a device running Android 4.2 or later, but much depends on the manufacturer
Some brands do not include this function in their mobile operating system build.
Wireless connection methods
Wi-Fi Miracast, WiDi and AMD Wireless Display
You probably remember what Wi-Fi Miracast and WiDi (Intel Wireless Display) are from the previous article. We hasten to please you: these technologies are supported not only by smartphones, but also by mobile computers. However, not all, but only those equipped with Intel Core i3/i5/i7 processors of the second and subsequent generations.
WiDi and Miracast support is implemented differently in different versions of Windows. Namely:
- 2nd generation Intel Core i3/i5/i7 processors can use WiDi version 4 features only on Windows 7 and 8.1. Windows 10 does not support WiDi and Miracast.
- Third-generation processors support WiDi 4 only in Windows 7, “eight” and “ten” support Miracast.
- Fourth generation processors switched to support WiDi version 6 (modern). In Windows 7 and 8.1 - no restrictions. In Windows 10 - only if you have a Wi-Fi adapter released after 2013. Computers with older wireless adapters and Windows 10 can only use Miracast.
- Processors of the fifth and sixth generations support WiDi 6 without restrictions.
Laptops based on AMD processors are also capable of transmitting images to the TV via Wi-Fi. The technology they use is called AMD Wireless Display. This, so to speak, is an analogue of WiDi, developed by AMD for wireless connection of its devices and Miracast-compatible TVs.
AMD Wireless Display is officially supported by Windows 8, 8.1 and 10 systems. To check whether the processor is compatible with this technology, the manufacturer recommends the proprietary AMD Catalyst Auto Detect utility.
Connecting to a TV
To transfer an image from a laptop to a TV screen using any of the above standards, an access point is not needed. It is only necessary that both the laptop and the TV receiver support Miracast (as you already know, if such an option is not available on the TV, an external adapter can make up for it).
So, before establishing a connection, let’s make sure that Wi-Fi is turned on on both devices. Next we activate the Miracast function on the TV. Which menu it is in should be indicated in the instructions. Next we move on to the laptop.
If you have Windows 10, press Win+P on your keyboard to open the Project menu. If you want the desktop to be displayed on both the computer and TV, select “Repeating”; To display the picture on TV, select “Second screen only.”
If you have Windows 8.1, open the Charms bar, go to “Devices” - “Projector” and select the “Wireless Display” option. After this, the TV will work as a monitor.
To connect via WiDi, Intel previously offered users its own tool - the Intel Wireless Display utility, but it is no longer available.
AMD Wireless Display has always used only the Windows interface described above.
DLNA is another technology that allows home network devices to share multimedia content without complex settings and wires. However, not only without wires - one or both paired devices can be connected to the network via a cable. Unlike Miracast, DLNA does not provide the ability to link them directly.
A TV connected to a laptop via DLNA will not replace the monitor - it will play only those multimedia files that the user selects, and the desktop, shortcuts and everything else will remain on the laptop display.
To connect a mobile computer to a TV via DLNA, three conditions must be met:
- Both devices are part of the same local network. No Internet connection required.
- TV technology support.
- A modern operating system (Windows 7-10) installed on a laptop, or separate software for creating a DLNA server. For Windows XP and Vista users, for example, Windows Media Player versions 11-12 are suitable.
How to transfer multimedia to TV using Windows
After making sure that the computer and TV are connected to the same network, open the folder where the multimedia file is stored, right-click on it and select the “Transfer to device” option. In the list of devices, select your TV.
Most often this is enough to start playback. In case of problems, do the following:
- Change the network connection type to private.
- Open Advanced Sharing Options for your private network and enable network discovery, automatic setup on network devices, and file sharing.
- Make sure that access to the laptop drives is not blocked by a firewall.
Creating a DLNA server
If you want all the media content stored in the Music, Pictures, Videos, etc. libraries to play on your TV, spend a few minutes creating and configuring a DLNA server.
- In Advanced Sharing Options, open the All Networks section and click Select Media Streaming Options.
- Next, click “Enable Streaming.”
- In the settings section, specify the name of the library in which the multimedia is stored (by default, the user’s root folder is registered here), and in front of the playback device (TV), check the “Allowed” box.
- If you want, you can specify the type of content that will be played on TV. To do this, click the “Customize” button next to it and change the desired parameters.
This completes the creation and configuration of the DLNA server. Now laptop folders containing multimedia files will be displayed on TV.
By the way, proprietary technologies for connecting mobile devices and computers to a TV, which we wrote about in the previous article, are also primarily based on DLNA standards. For LG it is “Smart Share”, for Sony, in particular Sony Bravia, it is “VAIO Media Server”, for Samsung it is “AllShare”, for Apple TV set-top boxes it is “AirPlay”. Their advantages over regular DLNA are a wider range of capabilities.
To connect a laptop, for example, to an LG TV, you just need to install the free proprietary LG Smart Share application. If you have a TV of a different brand, you can easily find similar software on the manufacturer’s official website. Installation and configuration of such programs is very simple, the system requirements are low.
Error? What to Do If the Above Methods Don't Work
This is the only method to project your Windows screen to a TV via Miracast. If it doesn't work, then check the following:
- Update all device drivers to ensure your PC's Miracast driver and your TV-connected device are both updated.
- Check if you have an active internet connection. Wi-Di and Miracast don't need an internet connection, but some of the devices that support Miracast (like the Amazon Fire Stick) need internet connectivity to be functional.
- If your PC continues to play audio while the screen has the video, there's an easy fix. Go to Start > Settings > Sound > Playback and choose the Miracast TV/adapter as the default device.
- Identify if either your Windows PC or your Miracast TV/adapter is the problem. Use your smartphone to cast its screen via Miracast to the TV, and via Miracast to your Windows PC. For the Windows PC, go to Start > Connect to open the Miracast screen receiver function.
Checking connectivity
It will not be possible to establish a connection if at least one of the devices does not have the ability to use Miracast built into it. Almost all “thin” TVs have a built-in adapter. But it’s still worth checking its availability. For this:
- Open "Settings" on your TV;
- The Miracast item can stand alone or be hidden in a section related to the Internet.
If this category is not in the settings, it means that this technology is not included in the package. In this case, an external Miracast adapter is additionally purchased. It can be connected via HDMI or USB port.
Miracast is not initially supported on PCs running Windows 7. You need to update your operating system to at least 8.1. If for some reason this is not possible, read on.
To qualify, your computer must have the following installed:
- Operating system – Windows;
- Processor – at least third generation Intel;
- Availability of appropriate video graphics;
- Wi-Fi adapter Intel or Broadcom (ВСМ 43228 OR 43252).
You can check whether Miracast is supported on your computer like this:
- Open the Run window (key combination Win + R);
- Enter “dxdiag” in the line and click “OK”;
- Click on the “Save all information” button and save the file;
- Open the document and look for “Miracast”.
After this, 2 situations are possible:
- “Miracast: Available, with HDCP” and “Miracast: Supported” – the computer supports the technology;
- “Miracast: Not Supported” – the function will not work.
You can check technology support by watching the following video:
Installing the necessary software
Miracast requires installation of Intel Wireless Display software on the 7. If the PC specifications are not suitable, then after installing the program, an incompatibility message will appear. When nothing prevents the program from working, it starts and begins scanning the space for gadgets for synchronization.
Wireless connection methods
Wi-Fi Miracast, WiDi and AMD Wireless Display
You probably remember what Wi-Fi Miracast and WiDi (Intel Wireless Display) are from the previous article. We hasten to please you: these technologies are supported not only by smartphones, but also by mobile computers. However, not all, but only those equipped with Intel Core i3/i5/i7 processors of the second and subsequent generations.
WiDi and Miracast support is implemented differently in different versions of Windows. Namely:
- 2nd generation Intel Core i3/i5/i7 processors can use WiDi version 4 features only on Windows 7 and 8.1. Windows 10 does not support WiDi and Miracast.
- Third-generation processors support WiDi 4 only in Windows 7, “eight” and “ten” support Miracast.
- Fourth generation processors switched to support WiDi version 6 (modern). In Windows 7 and 8.1 - no restrictions. In Windows 10 - only if you have a Wi-Fi adapter released after 2013. Computers with older wireless adapters and Windows 10 can only use Miracast.
- Processors of the fifth and sixth generations support WiDi 6 without restrictions.
Laptops based on AMD processors are also capable of transmitting images to the TV via Wi-Fi. The technology they use is called AMD Wireless Display. This, so to speak, is an analogue of WiDi, developed by AMD for wireless connection of its devices and Miracast-compatible TVs.
AMD Wireless Display is officially supported by Windows 8, 8.1 and 10 systems. To check whether the processor is compatible with this technology, the manufacturer recommends the proprietary AMD Catalyst Auto Detect utility.
Connecting to a TV
To transfer an image from a laptop to a TV screen using any of the above standards, an access point is not needed. It is only necessary that both the laptop and the TV receiver support Miracast (as you already know, if such an option is not available on the TV, an external adapter can make up for it).
So, before establishing a connection, let’s make sure that Wi-Fi is turned on on both devices. Next we activate the Miracast function on the TV. Which menu it is in should be indicated in the instructions. Next we move on to the laptop.
If you have Windows 10, press Win+P on your keyboard to open the Project menu. If you want the desktop to be displayed on both the computer and TV, select “Repeating”; To display the picture on TV, select “Second screen only.”
If you have Windows 8.1, open the Charms bar, go to “Devices” - “Projector” and select the “Wireless Display” option. After this, the TV will work as a monitor.
To connect via WiDi, Intel previously offered users its own tool - the Intel Wireless Display utility, but it is no longer available.
AMD Wireless Display has always used only the Windows interface described above.
DLNA is another technology that allows home network devices to share multimedia content without complex settings and wires. However, not only without wires - one or both paired devices can be connected to the network via a cable. Unlike Miracast, DLNA does not provide the ability to link them directly.
A TV connected to a laptop via DLNA will not replace the monitor - it will play only those multimedia files that the user selects, and the desktop, shortcuts and everything else will remain on the laptop display.
To connect a mobile computer to a TV via DLNA, three conditions must be met:
- Both devices are part of the same local network. No Internet connection required.
- TV technology support.
- A modern operating system (Windows 7-10) installed on a laptop, or separate software for creating a DLNA server. For Windows XP and Vista users, for example, Windows Media Player versions 11-12 are suitable.
How to transfer multimedia to TV using Windows
After making sure that the computer and TV are connected to the same network, open the folder where the multimedia file is stored, right-click on it and select the “Transfer to device” option. In the list of devices, select your TV.
Most often this is enough to start playback. In case of problems, do the following:
- Change the network connection type to private.
- Open Advanced Sharing Options for your private network and enable network discovery, automatic setup on network devices, and file sharing.
- Make sure that access to the laptop drives is not blocked by a firewall.
Creating a DLNA server
If you want all the media content stored in the Music, Pictures, Videos, etc. libraries to play on your TV, spend a few minutes creating and configuring a DLNA server.
- In Advanced Sharing Options, open the All Networks section and click Select Media Streaming Options.
- Next, click “Enable Streaming.”
- In the settings section, specify the name of the library in which the multimedia is stored (by default, the user’s root folder is registered here), and in front of the playback device (TV), check the “Allowed” box.
- If you want, you can specify the type of content that will be played on TV. To do this, click the “Customize” button next to it and change the desired parameters.
This completes the creation and configuration of the DLNA server. Now laptop folders containing multimedia files will be displayed on TV.
By the way, proprietary technologies for connecting mobile devices and computers to a TV, which we wrote about in the previous article, are also primarily based on DLNA standards. For LG it is “Smart Share”, for Sony, in particular Sony Bravia, it is “VAIO Media Server”, for Samsung it is “AllShare”, for Apple TV set-top boxes it is “AirPlay”. Their advantages over regular DLNA are a wider range of capabilities.
To connect a laptop, for example, to an LG TV, you just need to install the free proprietary LG Smart Share application. If you have a TV of a different brand, you can easily find similar software on the manufacturer’s official website. Installation and configuration of such programs is very simple, the system requirements are low.
How do I enable, disable or remove the Microsoft Wi-Fi Direct Virtual Adapter?
Well, you don't need to turn it on manually. Unless someone turned it off before you. In this case, it will be displayed in the device manager with an arrow icon. You need to click on the virtual adapter and select “Enable device”. If you don't see it in Device Manager at all, turn on "Show hidden devices" in the View menu (screenshot above).
But even if there is no Microsoft Wi-Fi Direct Virtual Adapter, just try to enable the function that uses it, the same hotspot. Most likely it will appear after this (you need to update the hardware configuration).
How to disable? There is no need to manually disable, or even more so remove, this virtual adapter from Microsoft. But if you really want to, you can try to do this in the same device manager. Just right-click on the adapter and select “Disable device.”
Commands like netsh wlan set hostednetwork mode=disallow are useless; they do not affect the Wi-Fi Direct Virtual Adapter.
How to delete? You can delete it in the same device manager. But this does not make much sense, since after a reboot this adapter will be installed again. In principle, this is how it should be, since it is responsible for the operation of important functions in Windows 10. And without it, these functions simply will not work.
To prevent this virtual Wi-Fi Direct adapter from appearing in the device manager, just disable the mobile hotspot (in the settings, in the “Network and Internet” section - “Mobile hotspot”) and disable projection to this computer. This can be done in the settings, in the “System” section – “Project to this computer”. You need to set it to "Always disabled".
How is this technology used?
Miracast is supported by modern Windows operating systems (7, 8, 10). It is designed to broadcast images or sound to other devices via Wi-Fi. For example, you can redirect the video stream from the monitor screen to the TV, duplicating the picture. You can also select the screen enhancement feature. In this case, the desktop will be divided between 2 or more monitors. This is especially convenient if you simultaneously work on your computer in several programs that do not fit on the space of one monitor.
Miracast supports audio files in LPCM, Dolby AC3 and AAC formats. More than 50 video file formats are also supported, including those for broadcasting to mobile devices. The maximum possible resolution is 1920x1080 pixels. Thus, you can easily broadcast the image to other monitors and TVs in FullHD format.
Windows 10 already provides this feature, so setting up Miracast is easily done in Windows itself. Also, the Intel WiDi function is often found on TVs and other media devices. This is an alternative technology from . The company has stopped its further development, but WiDi can be used if it is present on your monitor. Miracast technology will be indispensable if you want to give a presentation or play your favorite computer game on a large TV. The quality of video and audio is at a high level, comparable to transmission via an HDMI cable.
Advantages and disadvantages of Miracast technology
To begin with, let's look at a few positive and negative aspects that determine the user's choice in one direction or another.
The absence of wires has already been said. It goes without saying that there is no connection between a computer or laptop and a TV. In most cases, it is this aspect that influences the user’s decision to use Miracast Windows 10 technology. How to enable it on all compatible devices? Yes, it’s very simple - using a regular router and a wireless network. In addition, if you delve a little deeper into the essence of the question of how to enable Miracast Windows 10 and then configure it for the most comfortable experience, it is not difficult to make sure that this technology is cross-platform and is not limited only to the use of Windows-based computer systems.
Quite simply, you can connect any other devices to the TV. For example, smartphones and tablets running Android or iOS operating systems. Finally, when transmitting a signal using such a connection, there is no loss of picture quality. However, with all the advantages of this technology, some disadvantages cannot be ignored. First of all, the disadvantage is that only the picture that is currently displayed on the transmitter device is positioned on the television panel screen. Although all devices connected to each other should work stably, in practice you can notice quite frequent failures when establishing a communication session between devices.
Controlling sound when using Miracast
When properly connected, sound should automatically transfer from source to receiver. Volume control is usually necessary on the receiver. If you stream video from your phone to a TV, then change the sound directly on the TV. If there is no sound, check whether it is turned on on the receiving device, or change the volume switch on the source. Problems may be due to incompatibility, since Miracast is not correctly supported on all TVs, mobile phones and tablets.
How to set up on laptop and PC
The function is present in most modern laptops and computers. The main thing is to figure out how to configure it and connect the PC to another screen.
Settings
There are many ways to customize Miracraft. The user can choose the most convenient option for him. Regardless of the method used, the result will be the same.
Keyboard shortcut
Enabling and configuring Miracast using a keyboard shortcut takes literally a few minutes. How to enable Miracast on a laptop with Windows 10 is shown in the instructions:
- Activate the wireless network on your PC. You should also enable this feature on your TV or connected device.
- Press the Win+P key combination on your laptop or computer keyboard (works on the on-screen keyboard as well).
- This will bring up the Projection side menu. At the very bottom of the panel that pops up, you need to click on “Connect to a wireless screen.”
- After which the display will show that a search is in progress for devices available for connection. When it ends, select the required display from the displayed list.
- As soon as the connection is made, the computer desktop image will be displayed on the second screen.
System parameters
To set up a wireless connection between two displays, you need to do the following:
- Go to the Start menu and go to Settings. This can also be done using the key combination VIN+I.
- Go to the "Devices" panel.
- Through the side menu, go to the “Connected devices” tab. Here it is possible to connect a PC to a new one by clicking on “Add device”.
- After this, the system will search for available gadgets. You must select the one you need from the list that appears.
Via WiDi
There are other technologies similar to Miracast. One of them is WIDI. It is also supported by modern TVs and screens. But unlike Miracast, it requires installing additional “Intel Wireless Display” software to work.
Widi is good because it can be used to connect to a laptop even a TV that does not have a Wi-Fi adapter. The connection in this case goes to the receiver, which in turn has a direct connection to the screen.
Possible problems and solutions
There are a number of common problems that users encounter. The most common of them will be described below.
There is no message “Connecting to a wireless display”
When accessing the projection menu, some users do not see the display that opens the monitor selection menu. The explanation is quite banal - there is no Wi-Fi module on the computer or the drivers are not installed, accordingly, Miracast thinks that the connection is impossible, so it does not display this line. You can either install the driver for the wireless module and make sure that it is recognized by the system, or buy an external Miracast module. The latter is an analogue of external Wi-Fi adapters. It is installed in a USB port, and allows you to establish communication with another device that already supports this technology.
Can't connect to TV
There are situations when you cannot connect to TV. First, make sure that it has a Wi-Fi module and supports Miracast. Secondly, the TV must be discoverable. Also make sure that the signal is strong enough, since concrete walls in rooms can greatly jam Wi-Fi.
We recommend updating your Wi-Fi driver or TV OS (if possible). Download the installation from the official website of the wireless module developer. Standard driver updates in Windows do not always work correctly. There are no universal solutions, since there are a huge number of TV models with Miracast. According to the observations of individual users, connection problems most often occur on outdated processors (2-3 generation). They do not always recognize the necessary drivers, and they do not support Windows 10, which is necessary for stable operation.
Antivirus/firewall prevents connection
To prevent data theft and the impact of malicious software on the system, of course, the system has a built-in firewall. Almost all users also install an antivirus. Such software can mistake ordinary harmless programs for a potential threat and, accordingly, block their activities. This may refer to establishing a connection between a computer and another device using Miracast.
As an experiment, we recommend disabling the firewall and the antivirus you are using, and then try connecting Miracast again. If the process is completed successfully, then you need to add traffic from Miracast to the exceptions. If you have a third-party antivirus (Dr Web, ESET, NOD32 or Kaspersky), of course, we recommend completely disabling the firewall. The antiviruses described are quite capable of ensuring computer security on their own.
Connection problems
When trying to establish a connection between a Windows 10 laptop and a signal receiver via Miracast, various types of failures often occur. One of the most common problems is that the transmitting device cannot find the wireless display. The reason for this kind of malfunction most likely lies in the fact that Miracast technology is not supported by the receiver (TV, laptop). You can also try updating the software; you probably just need to install the latest version of the software.
If the display is still detected, but an error occurs during the connection, then either the devices are incompatible with each other at the hardware level, or old drivers are installed on the transmitter. There are other possible reasons.
Since the Miracast standard is relatively young, problems arise quite often, even if the equipment seems to be completely new and the technology is supported for it. In any case, if an attempt to connect devices over the air fails, there is always an alternative in the form of a more reliable and stable wired connection.
Laptop - set-top box - TV
Happy owners of Smart TVs can connect their laptops to them in many ways. If one doesn't fit, there is always an alternative. And owners of ordinary, especially old television receivers, sometimes have to suffer: either the required adapter is not on sale, or the connection does not work.
In this case, the best solution would be to buy a set-top box with SMART functions, like Apple TV or Android Box. It’s not very expensive, and it also eliminates the hassle of connecting other equipment to the TV forever.
In a recent article we talked about ways to connect a mobile phone to TV. But the telephone is not the only device capable of broadcasting an image to the TV screen. There are others - for example, laptops. And they have no less opportunities in this regard. So, today we’ll talk about how to connect a laptop to a TV via Wi-Fi and wired interfaces.
What to do if you have problems with Miracast
The Miracast connection sometimes breaks, takes a long time or takes forever to establish. There can be two reasons: the receiver is damaged or the drivers are not installed. In the first case, you will have to replace the module, in the second, you need to manually install or update the drivers. You need to complete the following steps on your computer:
- To do this, go to the website of the company from which the Miracast receiver is made and find the latest drivers for your operating system. Open Device Manager.
- Find the Miracast adapter in the list and click on the “Update Drivers” button. Select manual search and specify the path to the previously downloaded file. Complete the installation process and try syncing again.
On your TV, in the Miracst section, you need to find the Upgrade function and use it. Please note that the TV must be connected to the Wi-Fi network at this moment.
Click on the Upgrade button to update Miracast
Video: how to update and use Miracast
Miracast makes communication between devices easier. You will no longer need wires, flash drives and routers to watch movies and play games on large TVs and monitors.
Wireshark
DOWNLOAD
Wireshark is more than just a Wi-Fi analyzer. This is the best analyzer of any network connection and traffic monitor. Based on my experience with Kali Linux, there is no better tool for listening to traffic. There are even separate large training courses for this program.
But for those who just need to measure the signal strength, this will clearly be more than enough. It’s easier to download the previous program or something from the list below. Wireshark is still a Swiss knife for professionals.
Connecting MiraScreen/AnyCast adapter to TV
If you haven’t yet connected your Miracast adapter to your TV, now I’ll quickly show you how to do it and let’s move on to connecting devices. The adapter connects to one of the HDMI ports on the TV. The adapter's power can be connected to the USB port of the TV (if it has one), or to an outlet via any power adapter (preferably 5V/1A).
Turn on the TV (if it was turned off). If the adapter's splash screen does not automatically appear on the TV screen, then in the TV settings you need to select the HDMI input to which the Miracast adapter is connected as a source (each HDMI port on the TV has its own number). This can usually be done through a separate menu, which is opened by pressing the SOURCES or INPUT button on the TV remote control.
The desktop (if you can call it that) of our adapter should appear on the TV screen. I have MiraScreen MX Wireless Display.
Next, it is advisable to configure the MiraScreen adapter. The main setting is connecting to the router via a Wi-Fi network. This is necessary for the DLNA connection to work and to display images on the TV from iPhone, iPad and computers on Mac OS (broadcast via AirPlay). Here are detailed instructions for setting up: 192.168.203.1 – setting up a Miracast adapter. What should I do if I can’t access the MiraScreen and AnyCast settings? Windows and Android devices connect to the adapter directly, not through a router.
Almost all of these adapters have two operating modes:
- AirPlay and DLNA (DLNA icon and Apple logo are drawn).
- Miracast (Android and Windows logo).
The selected operating mode is highlighted on the desktop.
These modes are switched by pressing a single button on the adapter itself.
Or through the control panel (link to instructions above), but the button is more convenient. We pressed the button once and the operating mode changed. We select the desired mode depending on which device we want to broadcast the image from.
We connect the tablet and TV for wireless image transmission
All we need to do is turn on Wi-Fi on the tablet, turn on Miracast on the TV and connect the devices.
Enable Miracast/Intel WiDi on LG TV
I will show the example of an LG TV. If you have a TV from another brand, this function may turn on a little differently. In the menu, it may be called differently.
Turn on the TV and press the SETTINGS button on the remote control to enter the settings.
In Settings, go to the Network tab and select Miracast/Intel's WiDi.
Next, turn on Miracast. Simply set the switch to On.
That's it, you can leave the TV for now. But don't turn it off.
Enable “Wireless Screen” on your tablet or Android smartphone
We take our tablet (in my case) and go to settings.
In the settings, immediately turn on Wi-Fi and go to the Screen tab. On the right, select Wireless screen (Miracast).
Turn on Miracast by setting the switch at the top to the On position. Below, your TV should appear. Its name will be there. To start wirelessly transferring images to your TV, simply click on the TV's name.
We return to the TV. There should be a request to connect the device. Simply confirm the connection by selecting Yes. If you want this device to connect in the future without prompting, then check the box next to “Connect automatically without prompting.”
Next will be the connection status, check and devices will be connected. The image from the tablet will appear on the TV.
All is ready! You can use it.
To turn off broadcasting images to TV, simply click on the TV name again and select OK.
Reconnect according to the instructions.
Advantages and disadvantages
Among the advantages of the technology, users note the following points:
- Ability to transmit images and sound without using cables.
- No need to transmit the signal through a router. Devices are synchronized using a different technology and create their own communication channel, which no one can interfere with.
- The image transmission speed is very high. Even when playing complex games you will not feel any lag or drop in FPS.
- The technology heavily compresses files. So even very voluminous documents will be transmitted in a minimum amount of time.
- Supports 3D video broadcasts.
- Miracast is a very easy-to-use feature with a simple interface. Any user can enable and use it without additional instructions.
- This function is built into almost all modern devices, computers and laptops, televisions, for example, brands LG and Samsung.
Among the shortcomings, only one is noted, namely, the maximum quality of image or video transmission reaches only 1920x1200. This indicator does not make it possible to transmit video in UltraHD quality. But the average user will almost never encounter this problem, since devices that support such a high resolution are rare and are very expensive.
Peculiarities
Miracast technology is a Microsoft development. It was built into the Windows 10 operating system. However, starting with version 2004, released in May 2022, it is not installed by default and must be installed separately.
In Miracast, video transmission occurs via Wi-Fi (using the IEEE 802.11n standard) without an HDMI cable. In this case, the router does not participate in data exchange, so there are no signal delays, data passing through the router does not interfere with image transmission, and there is no additional load on the router.
Maximum video quality is 1920x1200.
Miracast standard functionality
Using the Miracast standard, you can wirelessly mirror the display of your phone or PC to a TV (projector, monitor). The image from your phone's screen will be accurately transferred to your TV, which allows you to conveniently view previously captured photos and videos. At the same time, using Miracast with fast games is not very convenient - the picture will lag behind what is happening on the screen.
The standard allows you to transfer images from a smartphone or tablet to your TV
Miracast is based on the Wi-Fi Direct standard, which allows you to connect secure connections between devices without using a router. The technology has a shell independent of the manufacturer of a particular device that natively supports video streaming up to 1080p and 5.1 surround sound. The established connection is encrypted using WPA2 technology, allowing you to transmit secure video of the Blu-ray and Netflix level.
The peer-to-peer nature of the Miracast connection means that mirroring can be done securely without an Internet connection. Apps and content are streamed directly from your device, rather than through an internet service like the Google Chromecast alternative.
Content streamed directly to your TV
For companies, Miracast can make video conferencing, slide shows, and group product design easier. For home use, the technology is known to offer a great way to stream videos and photos to your TV. We'll tell you how to enable it.
What is Miracast
The technology appeared relatively recently - in 2012, but almost all modern TVs already support it. Using Miracast, Windows 7 replaces it with an HDMI connection. Uses a direct wireless connection using Wi-Fi Direct. This means that no router or router is required - communication occurs directly between devices. However, initially Miracast was not provided for Windows 7. This creates some connection difficulties, which I figured out when helping a friend set up video streaming from a computer to a TV.
How to enable Miracast on Windows 10?
If you have a Miracast-enabled TV and a Windows 10 computer, how do you enable the two devices so that they can communicate? Let's try to analyze this issue in detail.
Let's look at the Miracast function itself on Windows 10: a small number of potential users know what it is. Not all people have brand new equipment at home that supports these capabilities.
Miracast is a product of the Wi-Fi Alliance, the largest manufacturers of wi-fi equipment. This function is used only on new operating systems: in particular, we are talking about Windows number 8 and 10. A person connects his TV to a new computer without the use of additional cables - the connection is made thanks to the Miracast wireless function.
Connection: step-by-step instructions
Before making the connection, you should refer to the instructions on how to enable wifi direct in Windows 10. Information can be found in the operating system assistant (help) or on any resource dedicated to this topic.
To connect a wireless Windows 10 monitor, make sure that wi-fi adapters are enabled on both devices. Next you should take the following steps:
- To call up the service activation menu, press the key combination “Win” and “P”.
- In the content menu, select “Connect to a monitor wirelessly.”
- The computer will begin searching for devices with the Miracast function active and display a list on the screen.
- Select your monitor and pair the devices.
The next option to connect the function would be:
- Through the “Start” button, go to “Settings”.
- Click on “Add device”.
- You must select Miracast.
- A scan will take place and a list of compatible devices will appear in which you need to select yours.
If the computer is made on an Intel chipset, then the Intel Wireless Display (WiDi) adapter is responsible for miracast operation. Setting up a connection through it is not difficult. You just need to follow the prompts to get it working.