Hi all! Recently my router broke and I had to look for a replacement. Since I understand that this device will be with me for many years, I approached the choice thoroughly and seriously. As a result, out of 20 models, I chose the Giga router from Zyxel Keenetic. Since there is no clear information or good review on the Internet, I decided to write my own.
In general, today we will inspect it, connect it, configure it and test it. If you have any additions or questions, write in the comments. Also, if you are already the happy owner of this router, then write your review there.
Unpacking and Inspection
The router is in this beautiful box. By the way, I don’t recommend throwing away the box right away if you don’t want to have problems with the warranty. It also contains a lot of important information that you may need in the future.
Inside the box, a standard set awaits us: a network cable, a power supply, the device itself and a user manual written in Elvish. Why in Elvish? – yes, because the average user will not understand a ton of technical concepts that are described there. I will try to write in ordinary rural language.
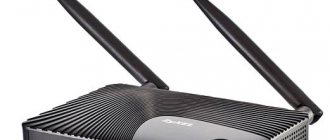
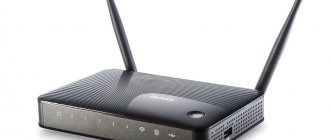
Giga Keenetic was specially designed so that it can be easily placed in the middle of a beautiful room - the design is simple, classic, suitable for any interior. Now let's take a closer look at it.
Firmware update
When you enable the automatic router update function, the presence of a new firmware version will be displayed in the “About the system” section of the web configurator.
It is also indicated by the blinking of the FN indicator if there have been no changes in its initial values.
Instructions:
- click on the inscription: “Update available”;
- in the next window, click “Install update” and confirm your intention by clicking the “Confirm” button.
While downloading the update, the router must not be disconnected from the power supply or the provider’s networks.
Once the update installation process is complete, the router will reboot.
Performance and Features
I bought the Keenetic Giga router primarily because of its fairly powerful processor. If anyone doesn’t know, new routers most often use the WPA2 encryption method, which can greatly slow down the speed - because the router needs to constantly encrypt and decrypt data packets. Inside there is a MediaTek MT7621AT processor with two MIPS1004Kc cores at 880 MHz.
Plus, it should perform well with a large number of connected devices - after all, each connection needs to be processed as quickly as possible. The device can simultaneously distribute two networks in two bands: 2.4 and 5 GHz. I'll tell you briefly:
- 4 GHz is the most common frequency. It has an average speed and a long range, but if there are a large number of neighboring routers, it can start to emit noise or pick up interference.
- 5 GHz is a more noise-resistant frequency. Suitable for gaming and connecting Smart TV due to high speed. But there is one drawback - the range is lower than that of 2.4 GHz.
You can read more about frequencies here.
As you understand, both of these frequencies are needed, as they have their own pros and cons. You can set your own names and passwords for each network. However, devices connected to different networks will be able to exchange data between the two networks. All this is achieved through the latest wireless module – MediaTek MT7615DN.
It has an AC1300 class that can boost speeds up to 400 Mbps (802.11b/g/n) when using the 2.4 GHz frequency, and has speeds of 867 Mbps (802.11a/n/ac) when using the 5 GHz frequency. Similarly, there is support for MU-MIMO - a technology that allows you to transmit data simultaneously in several streams.
I recommend reading about MIMO in more detail here.
We also have 4 antennas with a gain of 5 dBi, which should be enough for a 4-5 room apartment. The only downside I can note is that the antennas cannot be unscrewed. Therefore, if you want to strengthen them, you will have to disassemble the router and disconnect the antennas from the board, which is not very convenient.
All local ports have a speed of 1000 Mbps. Likewise, the WAN (Internet) port has a similar speed.
| Exact model name | KN-1010 |
| CPU | MT7621A 880 MHz, 2 cores |
| RAM | 256 MB DDR3 |
| Flash memory | 128 MB |
| 2.4 GHz standards | 802.11 b/g/n |
| 5 GHz standards | 802.11ac/b/g/n |
| Maximum speed at 2.4 GHz | 400 Mbit |
| Maximum speed at 5 GHz | 867 Mbit |
| Multi-streaming | MU-MIMO |
| Number of antennas | 4 |
| Transmitter power | 20 dBm |
| Antenna gain | 5 dBi |
| USB | 2.0 and 3.0 |
| LAN ports | 4 x 1000 Mbit per second |
| SFP port | 1 |
| Internet port | 1 |
| Mobile Internet | There is support for 3G/4G USB modems |
| DSL | Only using (ADSL2+/VDSL2) Keenetic Plus DSL |
| Nutrition | DC 12V 2.5A |
| Dimensions | 21.4 × 15.4 × 3.3 cm |
| Modes | Router, WISP client/media adapter, access point, repeater |
VPN server L2TP/IPSec
Just 6-7 years ago, a 30 Mbps VPN gateway was a noisy piece of hardware in a rack-mountable steel case and sold for about $800. Today, the 100-Mbit Keenetic Omni for only $40 allows you to create PPTP, L2TP/IPsec, IPSec, OpenVPN and even SSTP VPN tunnels at speeds of up to 30 Mbit/s, and the more expensive Keenetic GIga model promises up to 300 Mbit/s in IPSec. Let's check this and test the speed of the VPN connection created by these routers.
There are nuances in setting up PPTP on kinetics, read the instructions specially written for this. But I recommend that you don't use PPTP and just set up L2TP/IPSec - it's a more reliable protocol and everything works out of the box.
As you can see, L2TP/IPSec even on the younger Keenetic Omni produces almost 30 Mbit/s, that is, it is really hardware accelerated, as Keenetic claims, although the router’s processor load is 100% and the Web interface can barely open. Is it a lot or a little? For 2-3 employees to work with electronic documents and for monitoring network devices, this is more than enough, but for a team of 10-15 people it will not be enough.
A completely different matter is Keenetic Giga, whose dual-core processor hardware accelerates pure IPsec to a theoretical 400 Mbit/s. Here the speed will be enough to work via RDP at a resolution of 1920x1080, connect remote databases, synchronize backups of small servers and download FullHD media files or 4K with compression. To put it simply, you are more likely to be stuck with a slow Internet provider tariff than with the capabilities of the Keenetic Giga VPN server. And Keenetic Giga’s processor load, even in this test, does not exceed 48%, so all other services continue to work like clockwork.
In addition to PPTP and L2TP/IPsec, all kinetics have pure (site-to-site) IPsec, virtual IPsec Xauth PSK server (natively supported on iOS and Android), and even OpenVPN. In addition, we were interested in a relatively rare and fresh version of SSTP, but before talking about it, let’s consider the proprietary cloud service KeenDNS.
Additional chips
- DLNA server – we connect a hard movie to USB and watch it on a TV, phone, computer.
- FTP – file server.
- SMB v.1/2/3, AFP 0 – the ability to remotely access printers.
- Print server – here I think everything is clear.
- IPv6 (6in4) – the ability to use new generation IP addressing.
- Parental controls, filtering, telemetry protection, Yandex.DNS, SkyDNS - I’ll tell you more about this thing below.
- BitTorrent client Transmission – connect your hard drive and download torrent files to it.
- VLAN – virtual local network.
- VPN server (L2TP/ IPSec, PPTP, OpenVPN) – if you need a free VPN, you can see my selection here (you can use these settings in this router).
- Entware is a repository for Linux applications.
- Keenetic Plus modules - many additional utilities that help manage and control the network on the router. They can be freely removed or installed on the router firmware.
Appearance
Before we start connecting, let's look at the appearance of the device and get to know it better. I advise you not to skip this step so that you do not get confused in the future.
- Reset button – to reset the settings to factory settings, you just need to hold it down for 10 seconds. This procedure is worth doing if you took it from a friend, acquaintance or bought it secondhand.
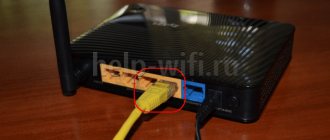
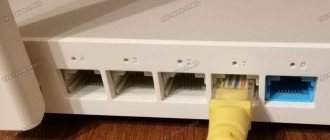
- 4, 3, 2, 1 – LAN ports for connecting local devices: computers, laptops, TVs, printers, CCTV cameras – in general, all devices that will be in your home.
- Internet ports - you can use any of them, but separately. One is designed for connecting to twisted pair, and the second (SFP) is for connecting to fiber. I repeat once again that they work separately and cannot be used at the same time!
- Input for the power supply - there is no need to turn it off at night or for some time. The device can work continuously all the time.
Next, let's turn it over and look at the indicators that will help you in case of any connection problems.
- Power – the device is turned on or off.
- Internet – whether there is an Internet connection or not.
- “FN1” and “FN2” are special indicators that can be manually assigned in the settings. By default, they respond to connections to USB ports.
- Wi- Fi – I don’t think it’s worth writing about “it’s on or it’s not on.” If it blinks quickly, it means data is being transferred via a wireless network. If it blinks rarely, then there is a connection via WPS. So if you are hacked via WPS, you will see it!
- Wi- Fi button – helps you quickly connect via WPS. If you simply press this button once, the WPS connection mode will start. If you hold it down for 3 seconds, you can disable or enable the entire WiFi network.
Now let's look at the sidebar.
- Buttons “FN1” and “FN2” - they can be reconfigured to any function in the settings. But by default they will safely disable the USB drive or modem.
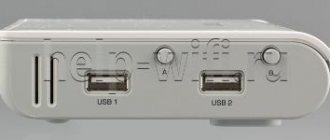
- USB (Blue) is USB 3.0 with a speed of 90 MB per second. USB (gray) is USB 2.0, which is most often used to connect USB modems.
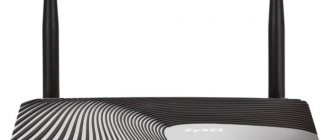
- Side antennas – 4 antennas in total.
Two (three, four) Internet channels with automatic switching
In general, Keenetic supports more than two Internet providers, if you wish - you can configure at least four of them, and the router will switch between them if the provider’s connection drops or the money on the balance simply runs out. Please note that a physical wire break is not at all necessary for the router to understand that there is no Internet and turn on the backup.
Setting up two Internet providers is done instinctively: in the “wired connection” section, select the main provider, and then add another one according to the “one provider per network port” principle. The new provider is considered a backup by default, and to monitor the operation of the main channel, the port availability method in resources such as Facebook or Google is used. But for your own network, it is much more important that your services are available in remote branches, because it is not uncommon for Google and Facebook to work, but Khabarovsk not. Therefore, we select the connection test method - regular Ping (ICMP echo) to our IP address. If the ping does not pass within 10 seconds (time and frequency are configurable), the router considers that the provider has broken down and switches to a backup one.
From my own experience I can say the following: if your work is related to the Internet, then two providers are a Must Have! Especially if they are somewhat local and incomprehensible, because a loss of communication for 3-4 days is, unfortunately, a common occurrence.
Connecting to a router
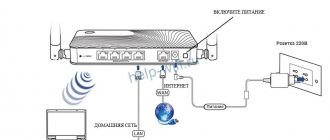
To connect to the Internet you can use 4 methods:
- Connect the cable from the provider to a regular WAN port (3).
- Connect the optical cable from the provider to the SFP port (3).
- Use a USB 3G/4G modem and connect it to the USB port on the side (11).
- Use aDSL connection to your telephone line. To do this, you can use Keenetic Plus DSL and connect to a USB port. If you have another aDSL modem, then you need to configure it in “Bridge” mode and connect to the WAN port (3).
Now you need to connect all local devices - this can be done in two ways:
- Use a network cable and connect to one of the LAN ports.
- Use Wi-Fi.
To set up, I will connect my laptop to the LAN port using the network cable that comes with the kit. But you can connect to it from your phone, tablet or from the same laptop via Wi-Fi. The network name and password for it are on the label under the case.
Setting up the Internet via a 3G/4G modem + list of supported modems
The settings of most mobile operators in Russia are already built into the Giga firmware, so in principle you don’t need to do anything special: turn on the router and connect a modem to it via the USB connector. After a few seconds, the router will start distributing Wi-Fi, using the modem as a signal source. You can check the connection in the tab with the image of the planet - in the 3G/4G section.
View information on connecting the modem
The list of supported modems can be viewed directly on the official Keenetic website by following the link.
Login to settings
Once you have connected to the device's network, you can begin configuration. To do this, you don’t need to install anything and you just need to go to the router’s Web interface. Open any available browser and enter my.keenetic.net into the address bar. You can also use one of the addresses: 192.168.1.1, 192.168.0.1 or 192.168.10.1.
NOTE! If after logging in you are asked to enter your username and password, then most likely someone has used it before. Find the reset button (1) on the router and press it for 10 seconds. The device must be turned on.
Digital television IPTV on Keenetic Giga
To set up IPTV on the Keenetic Giga KN-1010 router, open the Internet section > Wired :
In the “Connection and VLAN” subsection you will see port icons, and below are the services that are configured for them. Select the port to which the IPTV set-top box is connected to watch digital TV from Rostelecom, Beeline or Dom.ru, click on the arrow and set it to TV-Set-top box . Like this:
In cases where the provider uses an additional virtual network - VLAN - to operate digital interactive television, you need to enter the number of the vilana used in the “Television” field. After that, click on the Save button and check the operation of IPTV.
Wi-Fi setup
To do this, select “Home Network” on the left. Next you should see two networks: 2.4 GHz and 5 GHz. For each, you can set a separate name and password. You can even set the same values. To improve reliability, it is best to use the “WPA2-PSK” encryption type. Here you can also set a work schedule - for example, turn off the network at night. On the other hand, the device can safely work at any time.
Phone app
You can also set up the device from your phone - to do this, go to the AppStore or Google Play and find the “My.Keenetic” application. Install and launch it. You can also receive a download link via the QR code, which is located on the bottom of the device or on the box.
The settings are made in the same way, so I won’t talk about them in detail. The phone's settings are a bit limited, but the program is quite convenient for control. You can monitor who is connected to your device, as well as the speed of the Internet and Wi-Fi. And of course, make minimal changes - for example, change the Wi-Fi name and password.
Remote access
Method 1
Find the section where "KeenDNS" is located. Select a domain name. Next, indicate “Operation mode” - it is best to indicate “Via cloud”. Be sure to check the “Allow access from the Internet” checkbox and save. At the very end, you will be able to access this router through the previously selected DDNS - this method is good if you have a gray IP.
Method 2
- Install the phone application and connect to the device's Wi-Fi.
- We go to the settings via the Web interface.
- On the left, select “Management”, and then “General Settings”. We enable the cloud service.
- In the list, add a device that will have remote access - for example, your smartphone or tablet, connected to the Wi-Fi network at the very beginning.
NOTE! If this component is not there, then go to “System Components” and install “Keenetic Cloud and KeenDNS Cloud Service Agent”.
Authorization via SMS
This point will be interesting for law firms. By law, all public networks belonging to legal entities and individual entrepreneurs must undergo authorization via SMS. This router allows you to do this by connecting to third-party services. I have already written a separate article on setting up SMS authorization and you can read it here.
Testing
First, let's look at the test results when using different connection types. As we can see, the winners are “IPoE” and “PPPoE”, which do not use encryption. This speed should be enough for many years to come.
Well, the most important thing is testing the Wi-Fi network. For tests, I used regular file transfer, as well as a program for testing speed on a local network.
If anyone needs it, here is a link to instructions for testing Wi-Fi and local network.
It’s clear that the 5 GHz frequency is in first place. 2.4 GHz stays around 180 Mbps. This is understandable, since we use a channel width of 20 MHz. You could try manually setting the setting to 40 MHz, but then the tests might turn out to be implausible. However, when using a wider channel, the device may catch more interference.
Router functionality
The device has one of the widest range of features in its price segment. A useful feature is MU-MIMO technology, which allows you to simultaneously send data to multiple users via different streams. Additional advantages of the model:
- Beamforming is a network acceleration mechanism that, in combination with MU-MIMO, significantly improves the quality and speed of data processing;
- Multi-SSID and guest network allows you to create several separate local networks in parallel;
- access control based on MAC addresses and IP addresses limits or opens the ability of certain devices to connect to the network based on specified parameters;
- DHCP automatically transfers IP addresses and other information to network devices to operate on the network;
- NAT is a technology for simplifying and preserving IP addresses, aimed at ease of operation;
- UPnP combines several network protocols that are responsible for automatically configuring connected devices;
- A firewall or firewall provides reliable security for the local network.
The Giga model (KN-1010) is one of the best options to buy in its class. The device is capable of providing a high-speed and high-quality connection to a Wi-Fi network. An extensive coverage area and a large number of connected devices allows you to organize an access point for a spacious apartment or business office.
