There are often questions on the Internet that say, after resetting to factory settings, the phone requires a Google account, what to do, and whether it is possible to bypass the protection. Why is this happening? After the initial setup, the smartphone is linked to a profile based on the Apple ID principle. If the user does not yet have a mailbox, he is prompted to create one. In the next step, the mobile device is linked to the account. If you want to do a full Reset, the system will require you to log in to your old Google profile after loading. If you remember your username and password, there will be no difficulties. If not, then problems arise with the use of the smartphone. The question arises, how to reset your Google account on Android. You won't be able to create a new profile because the device is tied to the old account. If you enter incorrect data several times, the device is completely blocked.
Why is there a problem logging into your Google account?
As you know, Google pays great attention to user privacy and security, as well as protecting user devices from third-party interference. Considering the large percentage of thefts of Android phones, which attackers simply reset to factory settings and sell in online stores, Google decided to introduce an anti-theft feature. With version of Android OS 5.1 (Lollipop), the “Factory Reset Protection” (FRP) function appeared on Android phones, translated as “protection from resetting to factory settings.” Now, after resetting the device to factory settings, the phone will require a password from the previous Google account that was on the phone before the reset. You will not be able to access your phone without entering your password.
Since then, phones from Sony, HTC, Lenovo, Moto and other popular brands have been equipped with this function. Therefore, after resetting the phone to factory settings, FRP will no longer allow the user to easily change the Google account associated with the phone. The phone becomes useless to the thief, which makes stealing such gadgets unprofitable.
However, this same function becomes a big problem for ordinary users who legally bought their phones on the used device market. If the previous owner didn't delete their account from the phone before giving (or selling) it to you, you will be faced with the problem of unlocking the phone after resetting it. A message will be displayed indicating that the device has been reset and that you need to log in to your Google account.
To activate FRP, two prerequisites are required:
- The device is logged in with a Google account.
- Screen lock is set to anything other than None or Swipe.
If any of these conditions are not met, FRP is automatically disabled. Thus, to avoid the trap of resetting your phone, you must remove all Google accounts from the phone before selling (transferring) it. And set the screen lock to “None” or “Swipe” (swiping your finger across the screen).
The error described above can be prevented by deleting your Google account before resetting your settings.
This mini-instruction will be useful if you are selling a device and want to perform a hard reset, removing traces of use. The buyer will be able to use the phone by connecting his Google account at the first launch of Android.
Attention ! When you disconnect your Google Account from your phone, you remove access to Gmail, Google Play, Google Assistant, and other apps associated with your account.
In order to reset your Google account, you need to follow the following sequence:
- How to recover a deleted Google account on your phone
- Go to Settings .
- Go to Accounts (or Accounts and Archiving ).
- Select an account to remove from the list by clicking on it.
- Click on the Delete account (or Delete account on Samsung).
- After clicking on the duplicate button Delete account. entry will be deleted ONLY from the current device (at the same time, it will be available online).
- We switch the phone to developer mode. To do this, select “OEM Unlock”
After this, you will no longer have Google account errors when resetting your settings.
But what if the system still asks you to log into your Google profile? Read on.
Why reset your Google account?
There are often questions on the Internet that say, after resetting to factory settings, the phone requires a Google account, what to do, and whether it is possible to bypass the protection. Why is this happening? After the initial setup, the smartphone is linked to a profile based on the Apple ID principle. If the user does not yet have a mailbox, he is prompted to create one. In the next step, the mobile device is linked to the account.
If you want to do a full Reset, the system will require you to log in to your old Google profile after loading. If you remember your username and password, there will be no difficulties. If not, then problems arise with the use of the smartphone. The question arises, how to reset your Google account on Android. You won't be able to create a new profile because the device is tied to the old account. If you enter incorrect data several times, the device is completely blocked.
Help from a friend
Before moving on to studying methods that are quite complicated for inexperienced users, we recommend using the simplest of them and contacting the seller or the person from whom you received your Android phone. Ask him for a Google login to log into your device, and if he provides it to you, delete your Google account after successfully logging into your smartphone.
All you have to do is create your own account, link it to your email address and fully use the functionality of the gadget.
Bypass lock using standard Android keyboard
If the previous method did not help you and you were unable to log in, you can try another way. Reboot your device and return to the step that requires you to log into one of the profiles.
- Focus your selection on the data entry window so that the virtual keyboard appears.
- Long press the "dog" or "at" (@) symbol.
- A gear sign should appear, select it and tap on Android Keyboard.
- You need to go back and find the “Task Manager” item here. Select it.
- After your actions, a Google search bar should appear. Select "Settings" and click on us in the results that appear.
- We go, as in the previous method, to the “DRM licenses” section and delete them all.
After this, instead of deleting your account, you can choose to reset your device settings to default. In this case, you will not need to re-enter your account information or create a new one.
Bypass Google Account via “Keyboard Settings”
During the initial setup, go to the Wi-Fi connection page, then reset FRP Lock according to the instructions:
1. Select any network, open the keyboard by clicking on the password entry field2. You need to call up the settings in the keyboard, how to do this depends on the keyboard, if there are several options:
- Press Spacebar
- Click “Change language”
- Hold down the “Swype” icon
- Press and hold the numeric keypad icon (123)
- Press comma
3. Once in the keyboard settings, you need to go to another window, for example, call up the help window (hidden in the upper right corner under the vertical ellipsis)4. Immediately after moving to a new window, click on the “Recent Applications” button, a search engine line should appear there (if it doesn’t appear, try further moving through the windows until it appears)5. Click on “Search” and enter “Settings”, select the “Settings” application
6. Open "Backup & Reset"7. Oh and click on “Reset”8. After reboot, your phone/tablet will be free from Google FRP Lock!
- How to recover an Instagram account
Google account bypass
It should be noted that the situation is complicated by the fact that in the context of a large number of companies producing smartphones based on Android, and an even larger number of models, there is simply no single universal solution for all devices. Therefore, we will now look at several proven options.
How to avoid the reset problem
To avoid getting into an unpleasant situation, do not forget to take advantage of the opportunity provided by the developers. To do this, before performing a reset, go to “ Settings ”, select the “ Accounts ” section (maybe “ Accounts ”), find “ Google ”, open it.
Next, call up the menu by clicking the three dots in the upper right corner, select “ Delete account ” (on some models, the action selection is called by long pressing on the account field). Now we need to put our device into developer mode (USB debugging) and activate the “ OEM Unlock ” item:
Five ways to bypass Google account protection
Method No. 1
The first step is to remove the SIM card and then turn on the smartphone. Next, select the desired language and ignore the SIM window (the “ skip ” button). In the next window where you need to enter a phone number or email. mail, press and hold the @ until the settings button appears, first press it, and then “ Android keyboard settings ”. After this, press the “ back ” touch button at the very bottom of the display, then press the submenu button there with a long press (you may also have to press the “ home ” button, it’s different on all devices) until the Google search line appears:
In the search bar that opens, write the word “ settings ”. Once in the settings section, select “ Backup and reset”
", and then disable "
Auto-recovery " and " Save backups " (and in this order), after which we reset the settings:
Method number 2
Another universal method that can help in a difficult situation when it is not possible to access the Internet or settings or it is also impossible to perform other actions.
What should be done:
We insert the SIM card into the locked phone, from which we will delete the drone account. Then, call this number from another device. We accept the call and select the “ Add new call ” action, after which we enter any numbers in the dialer:
Now we need to enter our Google account, for which we know the password (or create a new one). After that, we save the contact to this account:
After the completed manipulations, reboot the smartphone.
Method number 3
We insert a SIM card into the smartphone that we will unlock and call this number from another phone. Next, as described in the second method, click on + (i.e. add a new call), and drop the call. After this, the keyboard will open, use it to enter the following combination: *#*#4636#*#* (see in the screenshot):
Immediately after entering the last character, an automatic transition to a new window with information and advanced settings will occur. Now click on the arrow located in the upper left corner of the screen and go to the standard device settings, select the “ Restore and reset ” section, disable “ Data copying ” and “ Auto recovery ” (maybe “ Backup ” and “ Data recovery ”), then perform a factory reset (or hard reset):
It remains to wait for the procedure to complete, and after that we log into our Google account via Wi Fi.
Method number 4
You can try to enter the standard settings in another way: on the main screen, press and hold the “ Home ” button, and when the Google icon appears, “tap” on it and go to the search bar, press, the keyboard appears, type the word “ Settings ”:
And then, as described in the third method: “ Restore and reset ” -> deactivate archiving and recovery -> reset all settings, reboot.
Method number 5
Please watch a video that tells you how to bypass your Google account after resetting the settings using the QuickShortcutMaker , which will help provide quick access to the settings of a locked smartphone, as well as to the menu of applications installed on it:
We talked about the simplest and most popular methods that can help resolve the issue without harming the device. You can find a lot of other methods on the Internet, but do not forget that if you are not confident in your actions, then there is a danger of causing even more damage to your gadget. Therefore, if you have saved the receipts and the warranty period has not expired, then the specialists at the service center will help you completely free of charge.
*Note: if the described actions did not bring the desired result, do not rush to try everything at once. It makes sense to wait from one to three days, and then proceed to the next attempts, because this is exactly the period provided by the developers for unlocking the device.
Was the information provided useful to you? Have you encountered such a problem? If yes, then tell us how you managed to bypass Google account on Android. That's all for me, good luck!
Google has quickly grown from a small search engine to a giant infrastructure whose components run on our PCs, smartphones, tablets and even TVs. Google tirelessly collects information about us, search queries are carefully logged, movements are tracked, and passwords, emails and contact information are stored for years to come. All this is an integral part of modernity, but we are quite capable of changing it.
It's no secret that any device running Android (at least one that is certified by Google) contains not only components assembled from AOSP, but also an impressive number of proprietary Google programs. These are the same Google Play, Gmail, Hangouts, Maps and a bunch of other applications, including a dialer and a camera (starting with KitKat).
For all these components there is not only no source code, but also no explanation at all about the principles of their operation. Many of them are initially designed to collect certain types of information and send it to Google servers. This is, for example, the behavior of GoogleBackupTransport, which is responsible for synchronizing the list of installed applications, passwords and other data, GoogleContactsSyncAdapter, which synchronizes the list of contacts, or ChromeBookmarksSyncAdapter, whose job is to synchronize browser bookmarks. Plus collecting information about all queries in the search engine.
There's nothing wrong with the synchronization itself, of course, and it's a great mechanism that allows us to set up a new phone in a matter of minutes, and Google Now even manages to give us useful information based on our data (sometimes). The only problem is that all this destroys our privacy, because, as Snowden showed, under the hood of the NSA (and, most likely, a bunch of other services) is not only some evil empire called Microsoft, but also Google, and also many others.
In other words: Google will merge us all without any problems, and it’s not a fact that its employees, sitting in their offices with masseuses and dogs, are not laughing at the names from your contact book (everything is encrypted there, yes), drinking 15-year-old pu-erh from Yunnan Province. Or maybe to hell with Google? Let's take their Android and let them go through the forest?
The latest version of the custom KitKat-based firmware for my smartphone weighs 200 MB, however, in order to get a real experience from the smartphone, I also have to flash the gapps archive on top of it, the size of which is 170 MB. Only after this will I receive a system similar to that pre-installed on Nexus devices, with all the goodies in the form of a desktop integrated with Google Now, a screen lock based on a face shot, a camera with support for spherical shooting and a kilogram of Google software, from Google Play to Google Books.
I repeat once again: all this is closed software from Google, which in a good way cannot be distributed at all without their knowledge (that’s why it is not in custom firmware like CyanogenMod), but since it is quite easy to extract it from the firmware of Nexus devices, you can find it on the Internet a huge number of similar archives, including severely truncated ones. In order to release an Android smartphone with a set of gapps on board, the manufacturer must send it for certification to Google, which, after evaluating the quality and performance of the smartphone, will either give the go-ahead or kick it (but this does not stop the Chinese at all).
This is how Google Apps get to your smartphone. Of the users, 99% either use pre-installed applications or install them themselves on absolutely clean and completely anonymous firmware. And then, from the moment you enter your username and password, synchronization and downloading of information begins.
To figure out how this happens, let’s unpack the same archive with gapps and take a look inside. We are interested in the /system/app and /system/priv-app directories; during installation, their contents are copied to the directories of the same name inside the smartphone. The second directory is new to KitKat and houses applications that use system APIs that are marked “private” and not available to regular applications.
In the /system/app directory we will find a large number of different Google applications, easily recognizable by the name of the package: Books.apk, Chrome.apk, Gmail2.apk and so on. Each of them will share information differently, but that's totally fine (yes, Google will know you're reading Paulo Coelho through their app!). The greatest danger here is GoogleContactsSyncAdapter.apk, which is only responsible for sending a list of contacts to the remote server. We write down the name in a notepad and move on.
Most of the files from the /system/priv-app directory are the services and frameworks necessary to run this whole synchronization and surveillance machine:
- GoogleBackupTransport.apk - synchronizes data from installed applications, Wi-Fi passwords and some settings;
- GoogleLoginService.apk - connects the device with a Google account;
- GooglePartnerSetup.apk - allows third-party applications to access Google services;
- GoogleServicesFramwork.apk - a framework with various auxiliary functionality;
- Phonesky.apk - Play Store (oddly enough);
- PrebuiltGmsCore.apk - Google Services, as the name suggests, is the core of the entire gapps suite;
- Velvet.apk is a search engine from Google that includes a desktop search bar and Google Now.
In essence, this is the part of Google Apps that is responsible for leaking our private information. Let's try to get rid of all this.
The easiest way to unlink a smartphone from Google is to use the standard system settings. The good thing about this method is that it does not require root rights, installation of custom firmware, or custom recovery. Everything can be done in any stock firmware without losing access to your account and applications like Gmail (if necessary). However, no one will vouch for the efficiency, since it is quite possible that some gapps components will continue to send data.
The main location for synchronization settings is the “Settings -> Accounts -> Google ->” menu. Here you can disable things like syncing contacts, application data, Gmail, Play Music, Google Keep, and more. All you need to do is simply uncheck the desired menu items. Next, go to the “Settings -> Backup and reset” menu and uncheck the “Data backup” and “Auto recovery” items.
The Google Settings application, which is part of Google Services, is also responsible for many synchronization settings. With its help, in particular, you can disable Google’s access to your location (“Access to geodata -> Access to my geodata / Sending geodata / Location history”), disable sending personal data to the search engine (“Search -> Personal data”), disable Google Now (“Search -> Google Now”) and disable remote control (“Remote control -> Remote device search / Remote lock and reset”).
In the same “Google Settings,” by the way, you can disable any application that uses your Google account for authorization. We are talking not only about the software installed on the device, but also about all applications ever used, including websites. For example, I found a lot of sites on this list that I haven’t visited for at least a couple of years.
If you are not going to use Google services at all, it will be easier to disconnect your smartphone from your account completely, that is, simply delete it through the settings: “Settings -> Accounts -> Google ->> Menu button -> Delete account.”
Hacker #182. All about Bitcoin
If the stock firmware has root rights, you can get rid of Google Apps by simply deleting them from the smartphone. As I already said, they are all stored in the /system/app and /system/priv-app directories. For example, in the case of KitKat, the list of Google applications in the first directory will be like this:
- Books.apk - Google Books;
- CalendarGoogle.apk - Google Calendar;
- Chrome.apk - Google Chrome;
- CloudPrint.apk - cloud printing system;
- Drive.apk - Google Drive;
- GenieWidget.apk - news and weather widget;
- Gmail2.apk - Gmail;
- GoogleContactsSyncAdapter.apk - contact synchronization;
- GoogleEars.apk - Google Ears (similar to Shazam);
- GoogleEarth.apk - Google Earth;
- GoogleHome.apk - home screen with integrated Google Now;
- GoogleTTS.apk - speech synthesis system;
- Hangouts.apk - Google Hangouts;
- Keep.apk - Google Keep;
- LatinImeGoogle.apk - keyboard with gesture support;
- Magazines.apk - Google Magazines;
- Maps.apk - Google Maps;
- Music2.apk - Google Music;
- PlayGames.apk - Google PlayGames;
- PlusOne.apk - Google+;
- QuickOffice.apk - QuickOffice;
- Street.apk - Google Street;
- SunBeam.apk - SunBeam live wallpaper;
- Videos.apk - Google Movies;
- YouTube.apk - YouTube.
The /system/priv-app directory, in addition to those listed earlier, also contains the following files:
- CalendarProv >The Gapps kit for KitKat, among other things, also includes a proprietary camera with support for spherical shooting and a proprietary desktop with integrated Google Now.
But that is not all. Google Apps depends on several frameworks, which are located in the /system/framework directory. These files are com.google.android.maps.jar, com.google.android.media.effects.jar and com.google.widevine.software.drm.jar. There are also many libraries in the /system/lib directory that are used exclusively by Google applications. It is not at all necessary to remove them, but it is possible. Just to clean up the trash. You can find a list of them on the website ][.
In previous (and future) versions of the system, the contents of Google Apps are different, so before deleting, I recommend downloading gapps of the desired version from goo.im/gapps, unpacking it using WinRar and viewing the contents. You should also take into account the dependence of some applications from the market on Google applications, I will talk more about this later.
This is only a part of the libraries included in the gapps kit
The previous method can be significantly simplified if you simply install custom firmware on your smartphone without Google Apps. In this case, the smartphone/tablet will be crystal clear without any connection to Google. The disadvantage of this method is the absence of Google Play, but you can either replace it with a third-party application store (more on that below), or use the following method, which involves installing a stripped-down version of Google Apps.
This method of partially decoupling from Google is a kind of compromise. It does not solve the problem of surveillance - at least without the settings from the first method - but it allows you to avoid cluttering the system with a bunch of useless software that will hang in the background and eat up memory. The idea is simple - install custom firmware and upload a minimalist version of gapps on top of it, which includes only Google Play.
There are many such minimal gapps assemblies on the Internet, but I would recommend using the time-tested BaNkS Gapps, namely the “month-dateGAppsCore4.4.2signed.zip” file. They work on any smartphone, are ART compatible and include only the basic gapps files, a list of which is given in the "What are Gapps" section, framework files, as well as several libraries. Essentially, it's Google Play, synchronization tools and nothing else.
Changing the search engine to DuckDuckGo
Even after completely disabling synchronization, the “built-in” Google search bar will remain on the home screen. In the stock firmware of some manufacturers (Samsung, for example), this is just a widget that can be easily removed from the screen. In pure Android and devices from many others in the home screen, but it can be removed by disabling all search from Google (along with Google Now) using the menu “Settings -> Applications -> All -> Google search -> Disable” or by installing a third-party launcher. Next, just download DuckDuckGo from the market or another application store and add the widget of the same name to your home screen.
The second and third methods involve completely getting rid of Google Apps, including Google Play and the ability to log in using a Google account, so we must find a way to simply and conveniently install applications that would not force us to download them ourselves, and then dump them on a memory card and install manually. One of these ways is to install a third-party market.
At the moment, there are three more or less viable alternatives to Google Play. These are Amazon Appstore, Yandex.Store and 1Mobile Market. Each of them has its own advantages and disadvantages, which mainly come down to the number of applications and payment methods:
- Amazon Appstore is the most famous application store after Google Play. Contains more than 75 thousand applications (compared to 800 thousand on Google Play), the quality of each of which is manually checked, just like iTunes for iOS. You can pay using a credit card or Amazon Coins, which are given as a gift for purchasing a Kindle Fire tablet or as a gift from another user. One of the most interesting features of the store is the daily free distribution of one of the paid applications.
- Yandex.Store - store from . Contains more than 85 thousand applications, each of which is scanned by Kaspersky antivirus. It doesn’t particularly stand out, but it has a killer feature in the form of the ability to pay for purchases using the Yandex.Money service or a mobile phone account.
- 1Mobile Market is the largest third-party repository of Android applications, including more than 500 thousand software. It differs from others by the presence of exclusively free applications (not to be confused with pirated ones), which is why it allows you not to go through the account registration stage and maintain anonymity.
Applications in all three markets have the original digital signatures of the application developers, which allows them to be used simultaneously. An application installed from one market can be updated without problems from another, and if deleted, it will disappear from the list of installed ones in all of them. However, you will have to buy them separately.
Amazon Appstore
Yandex.Market
1Mobile Market
Bypassing Google account using the “@” icon
Remove the SIM card and start the device. Select your language and in the next window click on the pass. Then, the system will ask you to write an email.
- Press and hold @ on your keyboard until the settings button appears.
- Go to the menu, go to the keyboard settings item.
- Go back and go to recovery and reset.
- Disable automatic recovery, then backup and reset Google settings.
Same thing just different
- Press the @ button (Google KeyBoard) and select settings
- Next, click the “Show running applications” button and write “settings” in the Google search bar
- Selecting the settings application
- In the settings, select the “Backup and reset” section and perform a reset
Google Search
To remove the account confirmation request without using PC programs, you should, as the device owner already knows, go to the system settings. Below are two more ways to do this without extra effort. The first of them is at the stage of logging into a linked account. The user will need:
- Tap on the login input field.
- Find the system button with the @ symbol on the Google keyboard that appears and hold it.
- Until a window with a gear icon appears.
- Click on it and as soon as “Voice Search” opens.
- Use the physical phone button to go to the list of running processes and click on the Google search bar located at the top of the screen.
- Enter the word “Settings” in it and open the corresponding system menu.
- Great! Now all that remains is to select “Restore and reset”; the user already knows how to proceed.
Performing a reset through the recovery menu (for Samsung)
The instructions, which usually work with early Samsung phones, can also help.
What should be done:
- Simultaneously press the “Power”, “Volume Up” and “Home” buttons (located at the very bottom of the screen);
- Hold these buttons until the loading indication appears on the smartphone screen;
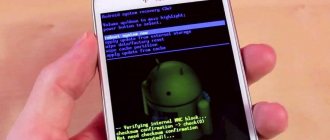
- In the Recovery menu that opens, use the volume button to select the “Wipe data/Factory Reset” option and press the confirmation button (Power);
- In the confirmation window, select “Yes – Delete all user data” and press the power button again to confirm;
- Next, select “Reboot system now”. The Google account confirmation screen may disappear after resetting the phone.
Let's sum it up
You can bypass Google account verification directly from the initial settings window at the stage of entering your login or connecting to a wireless network. Other options are to call the phone and, without resetting, go to “Settings” or link a new profile. Finally, the user can perform a hard reset using Adb Run and SP Flash Tool.
Thank the author and share the article on social networks.
First version of the Andro platform >
Bypassing Google Account via “adding another call”
This option is used if there is no Internet connection or it is impossible to open the phone settings menu in any way. Insert the SIM card into the phone that needs to be freed from your Google account. Turn it on, then call from another number to a locked smartphone, accept the call, call up the additional menu and add another call. Enter a random set of numbers and add this combination to your contacts. Link the number to your Google account and, if necessary, create a new one and reboot your device.
conclusions
There are a large number of options for resetting your Google account on Android.
If you figure everything out, it will be very simple to do. The main problem in bypassing a Google account is the problems with accessing the settings menu, which is why you have to do so many manipulations.
If one of the above methods does not help, then try waiting a few days before trying again.
Read on topic: What to do if your phone is hacked
Using Adb Run
You can bypass Google account verification using this wonderful PC program in all respects. After downloading (download - clouds.androidp1.ru) and installing it, the owner of a phone with FRP must:
- Connect the phone, wait for initialization and launch the program, then select Reboot Android from the list of available options by entering the number 2 in the text line and pressing Enter.
- Next, follow the same path to the Reboot Bootloader command and go to Fastboot menu.
- Select input mode Manual.
- What to do if you lost your Pyaterochka card, Help me out? How to get a new one
- And run Manual mode Fastboot.
- In the command line that appears, enter fastboot oem clean_frp and apply the command by pressing Enter again.
- Wait for the notification of successful completion and reboot the phone into normal mode using the “On/Off” button.
- If after entering the command nothing happened, apply a chain of additional ones: in the same field, enter fastboot erase persistent .
- Apply and wait for the request to be processed.
- Then - fastboot erase frp .
- And fastboot erase config .
- Once the process is completed, reboot Android.
In this way, the phone owner is almost guaranteed to be able to remove notifications about the need to confirm a Google account; if the method does not work, you need to move on to the next one, more complex, but also effective.
Bypass Google Account via Fastboot
Fastboot is useful for quickly updating firmware without having to use recovery mode. If your Android device supports Fastboot, then you can try performing an FRP reset through it.
To do this you will need:
- Computer
- Installed Android drivers
- Download Fastboot to your device
- Put the device into Bootlader mode
- Then you can enter the following commands: fastboot oem clean_frp or run the following command fastboot erase persistent, fastboot erase frp, fastboot erase config
Removing Google account (FRP) from the phone
So, to solve this situation, you will need to completely remove your Google account from Android. This can be done by simply resetting settings, DRM licenses, or using a third-party Dev.Settings utility. Resetting and erasing licenses is carried out in the standard option of System Settings, so first you need to bypass activation and get to the settings.
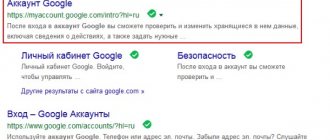
Via Google search
- Turn on the device and follow the language selection option.
- Select your language, and then hold the Home button.
- This click should activate Google search at the top.
- There we enter “Settings” and click on the drop-down list below. If everything is done as it should, you will open this option.
- By the way, you can launch the panel at the beginning, where there is an “Emergency call” button: click on it and go to the dialing menu, then press “Home”.
Via keyboard
- Get to the point where you are prompted for mail, click in the input field, which will bring up the keyboard (this will be a standard application).
- On it, long press and click on the dog symbol “@” - this should cause the “Gear” to appear.
- Go to it and in the menu click on “Android Keyboard”.
- We go a step back, where the “Task Manager” option appears - click on it.
- This action will launch the “Google Search” panel at the top - then we do everything as in the previous method.
Bypass Google Account via “Send/Share”
- We go through the initial device setup menu and connect to the Wi-Fi network
- Enter the e-mail and try to select it, the message “Send / Share” appears, select this item
- Open via SMS application
- In the to whom field we enter the number 112 and in the body of the letter we write some text again and send it
- A notification will appear that the SMS was not delivered, select this message
- At the top there will be a “Call” button, click on it
- In dialers, erase number 112 and enter *#*#4636#*#*
- A menu for testing the device will open, click on each item, one of them will redirect you to Android Settings
- In the settings, go to the “Reset and Recovery” section and do a full reset
How can I sign into my Google account on my device if I have access to settings?
Some users tried to recover their forgotten Google account data using an SMS message. In this case, it is possible to log in, but after some time after completing the settings, the device reboots again and it is no longer possible to log in. If you're still at the stage where you can access your device's settings, you're in luck. The following instructions will help you remove your account from your device and create a new one.
- Open Android settings.
- Find the item “Accounts” or “Accounts”.
- Click on it and select your Google account.
- Then find the button that is responsible for deleting your account and click it.
Confirm deletion. Now you can reboot your device without fear of encountering the system message “ Log into one of the profiles of the owner of this device . ” You can also add a new profile in the same section. To do this, click the “Add account” button. Now you will definitely write down important data from your account in a separate notebook, which will always be in one place.
- Recovering a deleted application on an Android smartphone
Adding a Google Account
What to do if there is no access to the system?
The following instruction is an undocumented method to bypass the Android device locking algorithm - FRP Lock. To implement it, you will need a regular Micro-SD flash drive (the volume is not important). It needs to be inserted into your smartphone.
- Another important feature is the need to insert a USB flash drive while the device is turned on. If the battery location and case features do not allow you to do this, you will need an OTG cable. With its help, you can connect a flash drive to the connector intended for charging the battery.
- When you insert the flash disk into the desired cell, a system message will appear on the smartphone screen. In it, the system asks the user if the default memory on the device needs to be changed.
- Click “Yes”. The system takes us to the settings section, where we need to select the default memory.
- Select "Applications and Media" in this window. The device will again take us to the “Applications” section, which are located in the “All” tab.
- Find the “Settings” application here and click on it.
- In this window, scroll down and find the “Run” button.
- The system displays to us the desired device settings. Here again select “Accounts”.
- Select the desired account and click the “Delete” button. Confirm your actions.
- Next, go back and select “DRM licenses”. In the next window, also select “Reset DRM” and confirm your actions.
Resetting DRM settings
Now reboot your device. Make sure that the " Sign in to one of the device owner's accounts " no longer appears. Create a new Google account and record the data from it in a safe place.
Bypass Google account of devices with Mediatek chip via “SP Flash Tool”
Install the drivers, SP Flash Tool and download the scatter file from your firmware (you can download the full firmware, unzip it and take the scatter from there)
Important! We need a scatter file from the current firmware! If you have Android 5.1 installed, then scatter from Android 6.0 may not work!
1. In scatter-loading, specify your scatter
2. Go to the Format tab - Manual Format Flash
3. Now you need to indicate at what address Google FRP Lock is recorded, to do this, open your scatter.txt with any text editor (NotePad++ will be more convenient) and run a search (Ctrl+f) find frp, it should find something like this:
4. Now we transfer the value “linear_start_addr” from scatter.txt to “Begin Adress [HEX]” in the SP Flash Tool, also “partition_size:” to “Format Length[HEX]”, name [HEX] is where Google FRP Lock is located
5. Click Start and connect the switched off phone to the PC, wait until the cleaning is completed
What is FRP
FRP is a factory reset protection that first appeared in Android 5.1 Lollipop. How it works:
- The user is left without a phone (loses, gets stolen).
- The device is found, but cannot be unlocked.
- In an attempt to get rid of the blocking, perform a Hard Reset through the Recovery menu.
- When enabled, the system requires you to log in using the main Google account used to work with the company’s services.
In this way, Google protects personal data from theft. However, users who do not know about FRP and do not remember their account login/password perform a hard reset and then cannot use their device.
To avoid this situation, read the article about deleting a Google account from a gadget.
Authorization during a call
Another way to remove the request to confirm your Google account is to link another account to your phone directly during an incoming call. This can be done in a couple of minutes - faster than going through the IMEI recovery procedure. To bypass the request, the user will need:
- Call a “locked” phone, accept the call and, without hanging up, go to the “Contacts” menu.
- Click on the “Add” button.
- Select create a new account.
- Specify its type - it’s easy to guess that it will be a Google profile.
- Enter the login and password for your work account in the appropriate fields - or create a new one, not forgetting to save the authorization data.
Important: at the stage of creating an account or logging into an existing call, you can end it by pressing “Reset” on the smartphone from which it was made.
Official way
If Google account confirmation is required by a phone that was given or purchased second-hand, the easiest way to remove intrusive messages and register your profile on the device is to contact the donor or seller and ask him to enter or send him a login and password. Having entered them in the primary settings window, the user can then go to “Settings” and delete the previous owner’s Google account, and then link his own - this is easier than disabling application optimization when turning on Android.
Tip: if several profiles were attached to your smartphone, it is strongly recommended to erase them all - this will avoid leakage of confidential data, and in addition, will eliminate messages about actions performed by the account owner.
If you have your own phone and, after an incorrect reset, refuses to accept your credentials, you should make sure that they are entered correctly and proceed to the other methods listed below.
In addition, the user can take the device to a service center and entrust the matter to specialists - however, bypassing Google account verification is no more difficult than clearing the cache on the phone, and in order not to waste time, it is better to perform the described manipulations on your own.
Bypass Google account via SD card
This FRP reset takes place thanks to a pop-up message about the connected memory card, from which you can get to the system settings, proceed in order:
- Insert the memory card into a working phone
- In the notification, click OK, you will be taken to the storage settings
- Click on "App Data"
- Go to the "All" tab and find "Settings", click "Start"
- Settings open, select "Backup and reset"
- Now click on “Reset DRM” and confirm deleting the keys
- Go back to Backup & Reset and perform a factory reset
- Wait for your phone to turn on, now you are free from FRP Lock.
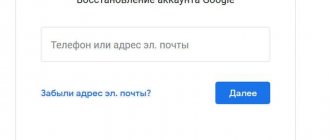
Sign in to one of the device owner's accounts
Sign in to one of the device owner's accounts . After any hard reset to factory settings, the user may catch an error on Android related to the Google account - “ The device has been restored to its default settings .” Any attempt to enter a known correct login password for a previous account ends with the warning “ Log in to one of the accounts of the owner of this device .” For many, the task is complicated by the fact that the account has never been linked to this phone, and entering data from another account is impossible from the very beginning. We will tell you how to quickly fix this bug.
Why can't I log into my Google account after a reset?
The latest versions of Android have introduced too many security options. In particular, the “Login to one of your accounts...” notification is the first step in protecting your device from theft. That is, a thief will not be able to steal, perform a Hard Reset and use it quietly; even the usual flashing of the device will not help him. This warning appears especially often in the line of devices from Samsung, Alcatel, Lenovo, ZTE, BQ, Huawei, Fly, etc. Another aspect of the requirement to enter a previous account is the synchronization of all data (phone book, call log, browser, etc.).
Removing Google account (FRP) from the phone
So, to solve this situation, you will need to completely remove your Google account from Android. This can be done by simply resetting settings, DRM licenses, or using a third-party Dev.Settings utility. Resetting and erasing licenses is carried out in the standard option of System Settings, so first you need to bypass activation and get to the settings.
Via Google search
- Turn on the device and follow the language selection option.
- Select your language, and then hold the Home .
- This click should activate Google search at the top.
- Enter “ Settings ” there and click on the drop-down list below. If everything is done as it should, you will open this option.
- By the way, you can launch the panel at the beginning, where there is an “ Emergency Call ” button: click on it and go to the dialing menu, then press “ Home ”.
Via keyboard
- Get to the point where you are prompted for mail, click in the input field, which will bring up the keyboard (this will be a standard application).
- On it, long press and click on the dog symbol “ @ ” - this should cause the “ Gear ” to appear.
- Go to it and click on “ Android Keyboard ” in the menu.
- We go a step back, where the “ Task Manager ” option appears - click on it.
- This action will launch the Google Search at the top - then we do everything as in the previous method.
Via MicroSD flash drive
- While the phone is running in the “ Account Confirmation ” state, insert the USB flash drive into the phone.
- Important (!) This method is suitable for those who do not need to remove the battery. Otherwise, you will need an OTG cable through which you can connect the flash drive to the device.
- Afterwards the message “ Change default recording memory ” should appear and click OK. Sometimes recognition can take up to an hour - wait!
- Afterwards, the storage view will open, select “ Application and multimedia data ” there.
- We look for the same “ Settings ” in the list, open them and select “ Run ” at the bottom.
How to delete your account yourself
- How to reset Google account on Huawei/Honor phone: new way to bypass FRP
After you go to the “ Settings ” menu, try two options there that should erase your account data:
- Go to the “ Backup and Reset ” option. In each model, the path may be slightly different, for example there will be the item “ Backup and reset ”.
- First of all, check if there is an option “ Reset DRM licenses ”. If there is one, we erase all licenses. There is nothing wrong with this situation, and you can restore the DRM option.
- Go back and perform the “ Factory Reset ” itself directly. If you have the opportunity to specifically select erasable options, then select only “ Delete accounts ”.
Afterwards, the phone will restart, and the request to synchronize with your account should disappear, or it will be confirmed without problems.
Using the Dev.Settings program
If none of the above helps you, then you can try the Development Settings application. This program performs direct entry into the settings at startup. All you need to do is download its apk file to your phone and install it on your phone. An OTG cable or MicroSD is useful for this. Here are detailed instructions on this matter.
Download the archive, unpack Dev Settings.apk onto a regular USB flash drive. We boot the phone (wait for at least the language selection to load), connect the flash drive via OTG (it is advisable to use a minimum length wire, with a long one you may not be able to see the flash drive) with the Dev Settings.apk file on it. We wait. The file manager will automatically launch in a few seconds. In it we see our Dev Settings.apk, install it (most quickly after a Hard Reset, when you try to install the apk, you will see the message “ Installation blocked ”, Click on configure and check the box next to “ Unknown sources ”). Install the APK and launch it immediately. Select the Backup and reset menu at the bottom and click Reset data . After which the phone will go into reboot (reboot), erase everything, and after reboot the Google account WILL NOT BE REQUIRED.
UPD!!!: If OTG detection does not work for you and the file manager does not open, do not be upset, as this solution is considered a firmware bug. There is an option that the manufacturers have already released a patch for it and you already have it installed. After some update. You need: find the earliest Android 5.1 firmware on your device and install it. Do a reset, and after resetting, try connecting the USB flash drive again, maybe it will work.
Conclusion
All of these solutions are the simplest and help solve the “Log in to one of the accounts of the owner of this device” error in most cases.
In particularly severe cases, many forums advise flashing the device’s firmware via a computer, using special utilities and drivers. There is some logic in this, but there is also some risk - when installing a custom assembly, you may lose the warranty on the device. Therefore, it is better to contact a specialist if you have never encountered this process yourself, because you don’t really want to turn your phone into a brick. DOWNLOAD:
| DevSettings.rar | [FA size[File size - 17.3 Kb]12 01:32 |
Other ways to bypass Google account verification
Method 1: Using APK Tool
One of the freelance ways to bypass the check is to use a small APK (Android Package Kit) utility.
Using an APK can be a bit tricky - installing the app on your phone is not that easy. This is due to the fact that installation on different devices may have its own nuances. However, in general the process looks like this:
1. Select the APK version to use. The following options are available:
- FRPHijacker Tool (for Samsung),
- FRP Bypass APK,
- DG Unlocker Tool
- GSM Flasher ADB Tool.
2. Download one of the applications to a USB flash drive: this will make it easier to launch the FRP bypass utility.
3. Connect the USB flash drive to your phone via an OTG cable. Here are instructions on how to do it.
4. Install APK from USB flash drive.
5. After this, you can access the Android settings and disable Google account verification.
Method 2: Using a SIM card
- We take out the SIM card from the mobile device and launch it.
- We skip the notification about the absence of a SIM card and select the interface language.
- In the form where you enter a phone number or email address and hold the @ for a few seconds.
- In the settings menu that appears, select Android Keyboard Settings .
- Back and Home buttons we activate the Google search engine (it should appear on the home screen of the device).
- In the search, type the query Settings and go to the appropriate section.
- Disable the items Auto-recovery and Saving backups .
- We reset the settings again (perform a hard reset ).
Method 3: Bypass FRP Without Internet Connection
- We install a SIM card in a locked smartphone and call it from another mobile phone.
- Answer the call and click on the Add new call .
- In the form that opens, enter any set of numbers.
- Click the Save , select Google and create a new account.
- Reboot the device.
Method 4: Code to Bypass Account Verification
- Insert a SIM card into a locked smartphone
- We call the phone from another number.
- Add a new call by pressing the “+” button.
- Enter the code *#*#4636#*#* into the window that opens.
- If all actions are performed correctly, a menu with settings should appear.
- Click the Recovery and Reset and disable Data Copy and AutoRecovery.
- Restore factory settings again and reboot the phone.
Method 5: via email and SMS
- Let's connect to the Internet.
- We try to enter an e-mail and press the button to send it via SMS.
- In the window that opens, send any message to the number 112.
- You will receive a notification about an error in sending a message, next to it there will be a call button.
- Click on it and enter the code *#*#4636#*#*.
- When you call, Android will redirect you to settings
- Through the settings we perform a hard reset .
Method 5: separated by comma
After resetting the settings and starting the system, when you see the FRP page where you need to enter the previously registered Google account, press “,” (comma) on the keyboard until the settings pop-up window appears.
- Click Google Keyboard Options (gear icon).
- Tap the three dots in the upper right corner and select Help and Feedback.
- Go to any category and select part of the text by holding your finger on some line.
- You will see a web search icon.
- Click on it and in the search field that appears, click “Settings”.
- You will then enter the system's Settings application. Go to “For Developers” (if this option is not in the list, then go to “System” - “About phone” and click on “Build number” 7 times).
- Go back and open Developer Options.
- Scroll down a bit and you'll see "OEM Unlock" or something similar. Activate it.
- Hold the Power button to restart your phone.
- Now, when you boot, you will see the “Add Account” page in the FRP window.
- The profile with which the phone is synchronized has been deleted. All you have to do is enter new data and you will be logged into the system.
FRP protection: benefits and harms
FRP protection is automatically triggered after a hard reset. On the one hand, this is good: an attacker will not gain access to the data. He receives, in fact, a “brick” that is useless without access to the Android OS and the contents of the phone.
On the other hand, an access error may occur when you restore settings yourself. What if you can't remember the data or the device doesn't want to accept it?
The following will tell you how to bypass Google account verification.
Note : There may be differences in how to bypass FRP on different device models (Samsung, Pixel, HTR, Lenovo, etc.) and Android versions, but in general these instructions will be useful if you follow them step by step.
You don't remember your login
If you were the one who filled out your profile when you bought a new phone, then you probably use the same name for your own mailbox. You can also remember it in Google Account Recovery. For this:
- In the first login troubleshooting window, note that the user has forgotten the name used during registration;
- Choose a reset method - using a backup mailbox or a phone number linked to Google;
- Enter the first and last name you wrote down during registration.
After filling out the captcha, you can send a message. If the data is entered correctly, the recovery should complete without problems.
Sources used:
www.mobileoc.ru, it-doc.info, softdroid.net, konekto.ru, googlechro-me.ru, recoverit.ru, lifehacki.ru