If, when you boot your computer, errors such as “bootmgr is missing / corrupt, BCD 0xc000014c” or similar are displayed, then all this indicates that the bootloader has crashed and needs to be restored. Let's look at the main reasons why this happens, what to do and how to prevent damage to the boot area in the future using Windows 10 and 8.1 as an example.
Reasons for the problem
There are several reasons why a computer may not start. The main ones include:
- Hard drive malfunction (bad sectors, errors) or SSD.
- The SSD is incompatible with the current computer configuration. In this case, as a rule, the problem makes itself felt every day.
- Unexpected system failures. These include: power surges, sudden shutdowns, conflicts and failures of programs and drivers.
If you have to restore the bootloader often, then take the time to find the “culprit”. This is the only way to forget about the problem for a long time.
Causes of Bootloader problems
If you cannot load the required service, it means there is a problem with the files. There are several possible reasons for this development of events:
- activation of some applications that complement the operation of the operating system of a personal computer;
- infection of boot documents with viruses, trojans, malware;
- malfunction of the portable media due to the physical condition of the device.
If the Boot Manager of the Windows operating system does not allow you to boot, you need to try one of the following options.
Automatic method (requires bootable media)
Each version of Windows 10 and 8.1 has an automatic tool to fix startup problems. In most cases it is enough, but not always.
- Create a recovery disk or bootable USB flash drive with Windows. It is advisable to use the same bitness of the operating system that is currently installed on the computer.
- Boot from the drive. The easiest way is to use the "Boot Menu". Called by one of the “F9-F11” keys when the computer starts.
- Select a language and in the installation window click on “System Restore”.
- Navigate to Troubleshooting.
- Click on Startup Repair.
After this there are two options:
- A restart will occur and the system will start. The next time you boot, don't forget to change the device priority in the BIOS. The first one should be the hard drive or SSD with the OS. Otherwise, the error “no bootable device” will appear.
- A message with the text “restore failed” will be displayed. Then move on to other methods.
If this does not help, then open the command line through the “Troubleshooting” section. Enter the following:
bootrec/fixmbr
bootrec/fixboot
bootrec /rebuildbcd
And restart your computer.
What is a Bootloader and what role does it play in the system?
The Windows operating system from the Microsoft developer is located on external or built-in media, where an additional tool, the Boot Loader, is simultaneously installed. The process takes place regardless of the data storage option, on disks (MBR, GPT) or the type of basic set of operating system applications (BIOS or more advanced EFI/UEFI).
Main functions:
- preparing software elements for the process of activating the operating system kernel;
- loading the kernel (from user-specified media or via network transfer);
- transferring Administrator capabilities (managing kernel system files) directly to the computer after activating the OS.
The interaction between the operating system and the data loader block works the same on all devices running through the Windows 10 platform (laptops, desktop computers, laptops, mobile phones and tablets).
Automatic method (no boot disk)
There is also a way to restore the "BCD" bootloader without a boot disk. To use it, immediately when you turn on the PC (after pressing the power button), press the “ F8 ” key until a blue window with additional parameters appears.
- Enter the "Troubleshooting" menu.
- Open Advanced Options.
- Click on "Startup Repair".
This is perhaps the simplest method, but it does not always work.
Windows 10 won't boot - how to restore bootloader
Good time!
Despite the fact that Windows 10 has become a very reliable system (at least compare with Windows XP.), however, it is not immune to various problems. One of the most common and painful is refusal to boot.
Most often, Windows 10 does not boot after you have installed a second OS on another disk partition, perhaps updated the system, or connected another hard drive (or SSD). In rare cases, the problem occurs due to incorrect operation of the antivirus.
In this article I will show you several ways to restore the bootloader and bring Windows 10 back to life. I think the information will be relevant for most novice users.
You might find this article about ways to restore Windows 10 (a kind of mini-instruction) useful. Link to it: https://ocomp.info/vosstanovlenie-windows-10.html
WinPE or bootable distribution with Windows 10
Now we will work with the command line. There are two options on how to use it. The first is to use the OS distribution. The second is to use the WinPE build.
WinPE - ready-made free assemblies with Windows and a set of programs for PC diagnostics. They are downloaded and written to a flash drive via “Rufus”, “UltraISO” or other programs. After recording, the system boots directly from the drive. In this regard, it becomes possible to carry out any manipulations, including diagnosing the hard drive, creating backup copies, checking RAM, working with the command line, and much more. I always have this flash drive ready, it helps a lot in difficult situations. Of the trusted authors, I can recommend “Sergei Strelec”.
Instructions:
- When using a boot disk or flash drive with Windows 10, boot from it, select “System Restore” - “Troubleshooting” - “Command Prompt”. As they did before.
Enter the commands one by one:
diskpart
list volume - will display a list of all partitions, remember the drive letter on which the Windows files are located. You can focus on its size. Usually it is not “C”, but some other letter.
exit
Now enter bcdboot C:\windows - where “C” is the letter that was calculated with the “list volume” command in the previous step.
- When booting from WinPE, open the command line through the Start menu or with the combination “WIN + R - CMD”.
Enter bcdboot C:\windows - where “C” is the drive letter of the OS.
After you see a message indicating that the download files were successfully created, you can restart your computer. Everything should work.
Another way to restore Windows 10 boot using the command line
This method requires the Bootrec . Unlike the previous utility, this utility does not restore bootloader files, but restores the boot record. That is, it restores the MBR - the first sector on the HDD. It is very important for the operating system that the MBR is intact and intact. When a computer starts, its BIOS first of all looks for the MBR in order to launch the operating system from it. For this example, let's launch the command line, as in previous examples. The utility in question has two main commands /FixMbr and /FixBoot The first command is necessary to fix the MBR, and the second creates a new one. First of all, let's consider the situation when our MBR is damaged. To do this, enter the first command in the console.
The image above shows that the operation was successful, which means that the MBR has been restored.
Now let's consider a situation where the first method does not work, that is, we will create a new MBR sector. To do this, we will use the second command.
From the image above you can see that the new MBR sector has been created successfully.
The examples show how easy it is to restore the MBR sector using the Bootrec console utility. If you have a problem starting Windows 10, we recommend using this example first.
We clean the system from malicious software before restoring the bootloader
If the bootloader crash is caused by malware, then this malicious code must be removed before recovery. In this situation, Dr.Web LiveDisk . This is a rescue disk that has many tools for restoring your computer, as well as treating it for viruses. You can download Dr.Web LiveDisk on its official website www.drweb.ru. This Live CD is based on Linux and is free. This disc is distributed as an ISO image that can be burned to either an optical disc or a USB flash drive. After burning the image to disk, launch Dr.Web LiveDisk.
In the start menu, select the first item and continue downloading Dr.Web LiveDisk. After a few seconds, the Linux-based OS should start, which is actually Dr.Web LiveDisk.
With this operating system, you can completely clean your computer of viruses and even backup all information.
Also useful is the fact that this OS has full Internet support and a built-in Firefox .
Extended list of commands
Enter the command line via the installation disk or WinPE build. How to do this is written above. Then type diskpart, followed by list volume and exit. We look through the list of sections.
In UEFI and GPT systems, a hidden partition with the FAT32 file system and an approximate size of 90-400 MB will be displayed. The BIOS and MBR will contain a partition in NTFS format with a capacity of about 500 MB. Remember his name or "N" number (Volume 0, 1, 2, 3, etc.). Also remember the drive letter where the Windows files are located.
Now we run the following commands:
- select volume N - where “N” is the number of a hidden volume with a capacity of 90-500 MB, which we learned earlier.
- format fs=fat32or format fs=ntfs - format the selected partition. Use the appropriate command depending on the starting file system type. If it was FAT32, then fat32, if it was NTFS, then ntfs.
- assign letter=J - denoted by the letter “J”.
- exit - close
- bcdboot C:\Windows /s J: /f ALL (where “C” is the Windows partition, J: is the letter given to the hidden volume). Remove the “/f ALL” switch if it doesn’t work, the final version will look like this - bcdboot C:\Windows /s J:
- Second command option: bcdboot C:\Windows. Use this if the first one didn't work.
If you have multiple copies of Windows installed, repeat this command for the second OS, specifying the new file location.
- diskpart
- list volume
- select volume N - where “N” is the number of the hidden volume with the assigned letter “J” and a volume of 90 - 500 MB.
- remove letter=J - remove the letter “J” so that it does not appear in the computer explorer.
- exit - close
Restart your computer normally.
Why do you need a Windows bootloader and what causes its problems?
The Windows 10 bootloader is a software area consisting of system files and the boot record of hard drive partitions. The latter “holds” a list of operating systems (if there are several of them) and a service menu for Windows boot options. Windows bootloader system files also include a boot (service) menu, called up by pressing F8 or automatically if the OS does not start.
Causes of Windows bootloader problems
There are several reasons why the Windows boot loader may not work correctly.
Inconsistent installation of multiple versions of Windows
Incorrect installation sequence of operating systems will cause a mess in the operating system selection menu. For example, you need several versions of Windows: 2000, XP, 7 and 10. This creates the following structure:
- Previous version of Windows.
- Microsoft Windows 7.
- Microsoft Windows 10.
By selecting a previous version of Windows, you will be taken to a submenu of the Windows 2000/XP operating systems:
- Microsoft Windows XP Professional.
- Microsoft Windows XP Home Edition.
- Microsoft Windows 2000.
This is due to the fact that the format of Windows boot menu files and entries was seriously changed after the release of Windows Vista. Essentially, the Windows boot loader has been reorganized, completely redesigned.
The BIOS firmware also does not have functionality that allows you to build a list of operating systems and the priority of launching them at its own level, and not from the PC drive.
If you put the Windows versions in reverse order—starting with the latest rather than the earliest—you'll end up with a broken list or nothing but the earliest version of Windows. You can’t do this without special programs from the LiveDVD/USB package or an installation/emergency flash drive. Therefore, do not create unnecessary problems for yourself.
Accidental deletion of service data from disk
To delete boot record data without reorganizing the partition structure on the drive, you need special programs. In 95% of cases, the user simply does not have them, and many are too lazy to master them. Why spoil something that already works?
Some programs, on the contrary, allow you to recover disk partitions accidentally deleted by the user. This is, for example, the Paragon Partition Manager application. But these programs only work if the data is intact - for example, volume D: was deleted or “expanded” (at the expense of drives C: and/or E:) from drives C:, D: and E:, but there were no files on it touched.
Errors when working with the OS and programs
Even the most hidden service files and table records, securely hidden from users, can be affected by:
- frequent “rollbacks”, incorrect Windows recovery;
- frequent installation and removal of new programs (up to hundreds of applications per month);
- using third-party “wizards” to clean the disk and registry of system debris in aggressive maintenance mode.
The latter include jv16 Power Tools, CCleaner, Auslogics Boost Speed, etc.
Even the most hidden service files and table entries, securely hidden from users, can be affected when using third-party “wizards” to clean the disk and registry of system garbage
Physical wear of the disk
The appearance of Bad sectors indicates that the drive will soon come to an end.
Bad sectors are bad sectors on disk space, reading data from which takes hundreds of milliseconds (the norm is up to 10 ms). In this case, writing occurs as usual, but reading data can take indefinitely. When the data reading delay increases to 1–2 seconds, the sector is considered “dead” and marked as unusable, and in return, a new one, previously active, is assigned from the reserve area (8 MB on most hard drives and a different size on solid-state drives and more modern hard drives). not used. Depletion of the supply of replacement sectors leads to gradual failure of the drive.
The following measures are used as temporary software repairs:
- The drive is analyzed for Bad sectors, their location is determined and disk space is “trimmed” so that they do not fall into the working area of the disk. All remaining disk space is marked as unallocated area and excluded from further work. Analyze the drive using the HDD Scan (or Victoria) program. Next, they calculate which gigabyte the first Bad sector is located on. An area of space up to this gigabyte is partitioned and formatted using the standard Windows XP/Vista/7/8/8.1/10 setup program.
- An attempt is being made to repair the disk. The HDD Regenerator, Victoria and their analogues have the functions Remap (reassignment, exclusion of Bad sectors forever so that they are no longer encountered) and Restore (low-level formatting - complete erasure of Bad sectors in order to temporarily “revive” them, reducing the data reading delay to 400–500 ms). However, if sectors “fall out” in some place, they will soon fail again, and the disk will again be inaccessible. In this case, only the first method will help.
A reassuring diagnosis is a collection of Bad sectors, scattered not throughout the entire disk, but in approximately one place. Then you can eliminate the “affected gigabytes” by creating the C: drive and first installing the system on it - and then create other partitions (volumes) on the drive using the disk and partition management tool built into Windows 8/10. In this case, the size of the drive will decrease not by a third or a half, but by non-working gigabytes of space.
Viruses and other malware in the system
No further clarification is required here. Windows is reinstalled (or the boot is restored), then additional anti-virus programs are installed - they take turns (to be sure) scan the logical drives, as well as folders and files on the PC. Deep search with advanced heuristics is highly recommended. These are, for example, NOD32, Kaspersky Anti-Virus, Avast and other applications.
Errors when updating Windows builds
For example, if you had Windows 10 1511 (initial) build, and you “rolled” the 1607 Anniversary Update or 1703 Creators Update onto it, if problems are not fixed, anything can break. This includes logging into Windows 10 under your name, and Windows 10 refusing to start when you select it from the list of operating systems.
"EasyUEFI" program for UEFI and GPT
You can also restore the bootloader in UEFI systems using the WinPE build from “Sergei Strelec” with Windows 10. If you don’t have it, get it. Very helpful in emergency situations.
- Boot the OS, click on “Start” and go to “Programs - BCD Editors - EasyUEFI”.
- Launch the application from your desktop.
- Go to "Manage EFI System Partition".
- Navigate to "Rebuild EFI System Partition".
- Designate the disk on which you want to restore the boot.
- In the "boot partition" mark the disk with Windows service files.
- In "system partition" check the system partition.
- Click "Rebuild".
Restart your PC.
Problems with mouse and keyboard after restoring Windows
In addition to hardware problems (sudden malfunction of the mouse and keyboard), drivers and Windows system libraries on the C: drive, responsible for the operation of the mouse and keyboard, are damaged. This may be a consequence of both viruses picked up over the network and accumulated errors.
Do the following in order:
- reconnect the USB mouse to a different port. Do the same with the additional keyboard. It doesn’t matter whether it’s wired or with a wireless module; it works in a tablet or laptop using built-in Bluetooth. Restart the Bluetooth adapter or reconnect the wireless module;
- check if the mouse and keyboard work in UEFI firmware;
- try connecting another mouse and keyboard via an older interface - PS/2 (PS2-USB adapters can be used in modern PCs, laptops and tablets). If the USB controller (functional unit of the USB port) is faulty or the built-in keyboard is faulty, then contact the nearest computer service center;
- reinstall the drivers. This can be done through the Windows Device Manager. Try to get into it: it is extremely rare for both keyboards and mice to fail at the same time. If we are talking about a laptop, netbook or ultrabook, then the mouse pointer is controlled by the built-in sensor (touchpad), and its left and right buttons allow you to navigate through the menu and launch programs and components. Right-click on Start and select Device Manager. Check the "Keyboards" and "Mice and other pointing devices" sections. Reinstall the drivers (removal and subsequent installation) by giving the commands “Uninstall” and “Update drivers” using the menu called up by the same right click. If the mouse and touchpad fail, the menu is called up with the key combination Shift + F10, and the corresponding commands are selected and confirmed using the arrows and the enter key;
First of all, the driver update mechanism from Microsoft is used
- Check the operation of anti-virus programs that may be working for you. Thus, Kaspersky Anti-Virus blocks the keyboard - this is due to protection from keyboard Trojans and spambots that independently type and send messages, and keyloggers that read and send to attacker servers any information entered by the user. Temporarily disable your antiviruses by removing them from the startup list and restart Windows 10;
- disable Windows 10 Fast Startup mode. To do this, open Control Panel and select the Power Options section. Click on the “Power button actions” button, then “Change settings that are currently unavailable” and uncheck the box next to “Enable fast startup”;
To disable fast system startup, uncheck the box next to “Enable fast startup”
- try keyboard and mouse drivers from Windows 8 - “eight” is compatible with “ten”;
- disable the AHCI Mode function in BIOS/UEFI;
- Uninstall drivers for any non-functioning devices and check for Windows 10 updates.
Video: how to enable or disable AHCI Mode in BIOS
Fixing Windows 10 boot problems is easier than doing the same with a previous broken version of Windows. The times when users searched long and painfully for a way to restore Windows are a thing of the past. Using proven methods and methods, you can return the OS to working condition without much difficulty.
- Author: Georgy Kuleshovsky
Blogger, copywriter (including rewriter) Rate this article:
- 5
- 4
- 3
- 2
- 1
(8 votes, average: 4.3 out of 5)
Share with your friends!
"EasyBCD" program for BIOS and MBR
The assembly from Sergei Strelets also includes another excellent program - EasyBCD. To restore the boot record, you need to go to the “Backup / Restore” menu, and click “Run”.
After these steps, a message indicating successful recovery of the boot BCD area will be displayed at the bottom of the window.
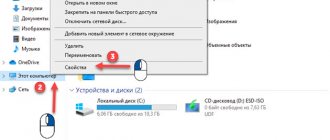
Creating a Windows 10 Recovery Disc in Control Panel
Windows 10 provides an easy way to make a recovery disk, or rather a USB flash drive, through the control panel (the method for CDs and DVDs will also be shown below). This is done in a few steps and minutes of waiting. I note that even if your computer does not start, you can make a recovery disk on another PC or laptop with Windows 10 (but always with the same bit depth - 32-bit or 64-bit. If you don’t have another computer with Windows 10, the next section describes how to get by without it).
- Go to the control panel (you can right-click on Start and select the desired item).
- In the Control Panel (in View, set “Icons”), select “Recovery”.
- Click "Create a recovery drive" (administrator rights required).
- In the next window, you can check or uncheck the “Back up system files to a recovery drive” option. If you do this, a significantly larger amount of space on the flash drive will be occupied (up to 8 GB), but it will make it easier to reset Windows 10 to its original state, even if the built-in recovery image was damaged and requires inserting a disk with missing files (since the necessary files will be on the drive).
- In the next window, select the connected flash drive from which the recovery disk will be created. All data from it will be deleted during the process.
- And finally, wait until the creation of the flash drive is completed.
Custom view of the updated version of Explorer
Done, now you have a recovery disk, by booting from it into the BIOS or UEFI you can enter the Windows 10 recovery environment and perform many tasks to resuscitate the system, including rolling it back to its original state if nothing else helps.
Note: You can continue to use the USB drive from which you made the recovery disk to store your files if necessary, as long as it does not affect the files already located there. For example, you can create a separate folder and use only its contents.
Running Command Build in Windows 10
Bootice program (universal)
Bootice is a universal program suitable for all types of systems. Included in the WinPE build.
How to use it:
- Open the program, select the desired disk and click on the “ Parts Manage ” button.
- In the table, select the hidden section. Traditionally, with a capacity of 90–500 MB and the NTFS or FAT32 file system.
- Assign it any " Assign Drive Letter ", such as " U ".
- Close “Bootice”, open the command line “ WIN + R – CMD ” and enter two commands in turn:
cd /d U:/efi/microsoft/boot bootrec /rebuildbcd
- All available versions of Windows are displayed and you are prompted to add them to the download list. Type " Y " and press " Enter ".
- Done, restart your computer in standard mode.
How to reinstall Windows 10 (without losing data)
Hello!
Reinstalling Windows is almost always a headache for inexperienced users, especially if there are a lot of necessary documents on the disk (and there are always a lot of questions asked on this topic.).
In order to somehow structure these questions, I combined them into this one note, in which I will give several of the most typical ways to reinstall 10 without losing documents, pictures, music and other “goods” on the disk.
It is worth noting that in this article I will assume that your hardware is working properly, and all “problems” with the current OS are software in nature (for example, you accidentally deleted some system files, installed the wrong driver, were infected with a virus, etc.).
Now closer to the topic.