Often, when a user opens a new account in what he thinks is an unnecessary service, he does not think about the data he enters. So, over time, he discovers that he would like to change his name. This rule also applies to Google account holders. This article will show you how to change your Google Account name without deleting it. We'll show you how to change it not only in your account, but also in your mail, so that when you send an email, the recipient receives it with the name you specified.
Registration in the application
The first step is to create a separate account to work with the application. Google Play Market will be available to all users only after completing a simple registration procedure. To do this, you need to provide access to the mobile Internet. Otherwise, the software will not start working, and the registration will not be processed.
How to change your Play Market account to Android? More precisely, how can you register in the corresponding application? This can be done without much difficulty. Even a novice user can master this procedure.
To register you will need to follow the instructions:
- Find the Play Market on your mobile phone and launch it.
- In the window that appears, select “New Account”.
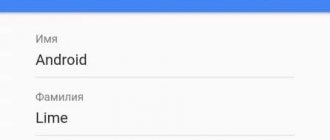
- Fill in the fields that appear. Namely: the user's first and last name, Google email address and login password.
- Confirm actions.
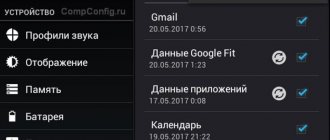
- Synchronize certain services from Google with your account. You can skip this step and return to it at any other time.
This completes the registration process. In fact, it comes down to registering a new email with Google and linking it to the Play Market. Registration is free by default.
What is Play Market?
Those who have just purchased their first Android-based gadget do not wonder how to change their Play Market account; they are more interested in what exactly this store is.
Thanks to this add-on, the owner of a smartphone or tablet gets unlimited access to the largest collection of applications. Here everyone can find an application to their liking.
For the convenience of users, thousands of programs are divided into categories: games, education, personalization, finance, etc. Also, the application moderators constantly monitor fashion trends in the world of technology and collect collections of applications for every taste.
Access to applications opens after entering your login and password. Next, you can start searching for free or paid applications. And if the program was accidentally deleted, the saved download history will help restore lost applications.
Another undoubted advantage of the Play Market is the preliminary scanning of applications for viruses. Downloaded files will not infect personal data. The site also contains user comments. Based on them, you can understand whether the application is suitable.
How to change your Google account username
The most important thing when creating a Google account is to choose the right name. If the account owner, for some reason, needs to change it, then doing so will not cause any difficulty.
Thanks to the instructions, you can rename your account very quickly. But don’t forget that you can only change your name using a computer; there is no such function in mobile phone applications.
Renaming a user
There are several options for changing your name in your Google account. Both methods will be discussed in more detail later in the article.
Method 1: mailbox
Thanks to Gmail, any user can correct their name at any time. To do this, follow these steps:
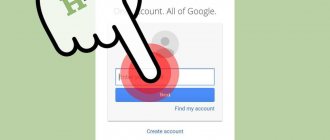
- Go to your browser and open the main Google mail page. Log in to the required account.
Go to “Settings”, which is located at the top right of the window that appears.
In the center of the tab, find the line “Accounts and Import” and click on it.
Opposite the “Send emails as:” item, click on the “Change” button.
In the context menu, enter the name you need and press the “Save Changes” button to confirm your actions.
Changing your Google username
Let's move directly to the process of changing the name in your Google account. There are two ways how this can be done.
Method 1: Gmail
Using a Google mailbox, any user can change their name. For this:
- Go to the Gmail home page using a browser and log into your account. If there are several accounts, you need to select the one you are interested in.
- Open Google “Settings”. To do this, find the gear icon in the upper right corner of the window that opens and click on it.
- In the central part of the screen we find the “Accounts and Import” section and go into it.
- Find the line “Send emails as:”.
- Opposite this section is the “Change” button, click on it.
- In the menu that appears, enter the desired username, and then confirm the changes with the “Save Changes” button.
Method 2: “My Account”
An alternative to the first option is to use a personal account. It provides options for fine-tuning your profile, including a custom name.
How to add or change your profile photo
- On your Android phone or tablet, open the Settings app.
- Select Google Manage Google Account Personal Information.
- In the Profile section, click Photo . If necessary, sign in to your account.
- Click Add Profile Photo . Take a photo or choose from existing ones, then arrange it so that the desired fragment is in a square frame.
- Click Accept .
Why change your account on your smartphone?
Before asking yourself the question of how to change your Play Market account, it is important to understand why you need to change it at all.
A Google account is more than just an email service. On Android-based devices, account data synchronizes all the work of a smartphone or tablet: sorting mail, highlighting contacts, and so on. Thanks to cloud downloading and virtual storage, personal data can be downloaded to any device.
However, why do you still need to know how to change your account in the Play Market? The answer is simple: if the phone came from friends or relatives, or was purchased second-hand, then a Google account may already be installed on it. And then information about the other user will be stored on your phone.
The downside of full synchronization is that the former owner of the phone can keep track of the current one, if you don’t know how to change your Play Market account to Android. If this is not done, then personal data may fall into the hands of fraudsters.
How to change personal information
Additional Information
You can change your name as much as you like, but no more than three times per minute. This restriction does not apply to accounts created less than two weeks ago.
If a name is not specified, the previously created alias is used instead. If you delete it, you won't be able to create a new one. This is not the same nickname that you can enter on your About page. Go to the About page to change the nickname listed there.
The date of birth you have on your Google Account cannot be deleted. However, you can change it and choose who can see it.
How to change on your phone
To change your Google account password on Android, log into your profile. To do this, you can log in to any service, such as Google Play, Google+, Gmail.
Through Google settings
Go to the menu on your phone or tablet and find a button labeled “Google Settings.”
Owners of Samsung phones will not find it. You need to go to the “Settings” of the device and select “Google” there.
In the “My Account” section, click on “Security and Login”.
At the top of the window that opens, make sure that the mailbox for which you are going to change the password is selected. Then click on the “Change” button in the field with the appropriate name.
Select one of the installed browsers you want to use. To make a similar window appear in future times, click “Only now.”
If you, like me, have not accessed your profile through a browser on your smartphone, then you need to do this now. Enter your login and click “Next”.
After that, enter a new combination and repeat it in the field below. To make it reliable, use small and capital letters, numbers and permitted symbols. For example, 95!Li4nfHG. To save, click on the “Change” button.
Through an installed browser
There is another way to change your Google account password. To do this, we will immediately use the installed web browser. Launch it.
Fill in the password field and continue.
Your profile window will open. In it, select “Security and Login”.
Then click on the line that says “Password”.
Confirm that this is your account and click “Next”.
Enter a new combination in the field provided, check that it is reliable, repeat it and click “Change”. The password change is now complete.
Protecting your account on your Android device
For the correct operation of your phone or smartphone and the protection of personal data, it is recommended to change the password for your gadget account every few months. To do this, just follow the simplest instructions on the official website. The password must consist of a random combination of numbers and upper and lower case letters.
Depending on the firmware of your phone or smartphone, some phone settings may differ. But how to change your Play Market account on Samsung, Lenovo and other brands of phones remains almost identical.
Today we have to figure out how to change your account in the Play Market. In addition, you need to figure out what program we are talking about. Modern mobile devices have a lot of possibilities. To implement some, you sometimes have to use additional software. What should everyone know about Play Market? What features of registering and changing an account will you need to pay attention to? Can certain difficulties arise while working in the application?
Instruction steps.
1)
First, you need to select the “Settings” sub-item in the “Menu”, in which you need to select the “Accounts” inscription and click on it. Now the user will see all the accounts listed by the system that are synchronized with the device.
2)
On the top panel you need to activate the “Add account” button and select from the suggested “Google”.
Scan your device
Follow the instructions to complete setting up your new phone number. You could also delete messages by mistake. If your phone was accidentally stolen or you deleted your messages and files by mistake, the software will quickly retrieve the messages. The scanning process may take several minutes. When you see any message during the scanning process, you need to pause the process.
What happens with a specific email address as the default?
Once the process is completed, you will see that all messages on the device contain the one that is on the device. You can also search for a specific file in the search field. The recovered files will be restored to your computer. However, when you start a reply instead of a new message, it depends on a different setting.
3)
In this case, the system will ask the user the following: “Do you want to add an existing account or create a new one?” You need to select “Existing” at the bottom and click on it.
5)
After all the manipulations, you need to touch the “Login” button and after some time during which the system connects to your account (which is warned about in the request for a short wait), you will be able to use the capabilities of the long-awaited connection.
Using Factory Reset
Instead, it checks which email address the message you're replying to was sent to. Tap Profile Photo, then select Take Photo or Select Photo. The following directory no longer works. Tap your profile picture to change it.
Select Gallery, Take with Camera, or Delete. When your friends or colleagues receive an email from you, what does "from" say? It's easy to make a mistake and just as easy to fix - if you know what you're doing. Check or change your "from" name. Do you need to reset your phone or just enter a password?
6)
A proposal to link a bank card to this account will also appear on the screen of your mobile device. You can select the “Not now” offer and continue other manipulations.
7)
The next step is to select synchronization of the proposed servers, the unused ones can be disabled. You should check the boxes next to the required names.
Using settings
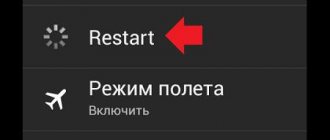
Solution. You have access to your messages, but it ends after a short time or after a reboot. If you receive a message that you want to confirm again, but nothing happens, be quiet: some smartphones take a while to open a window where you can enter your password. Otherwise, you simply restart your smartphone: Then a prompt will appear.
For older versions, you must reset the smartphone to factory default settings to delete the account. Two-step verification should be a requirement for those who occasionally log into unknown computers or use weak passwords.
Thus, linking the new Google account to the mobile device is complete. Its name is in the list of accounts. You can always turn off synchronization or completely delete this account. In the latter case, all data associated with it will be deleted.
Ever thought about this question: how to change the Google account on my device? After all, some accounts are linked by mistake, or the owner of the device loses control over the account. In this article, I will describe in detail the entire process of linking an existing account to an Android device.
Two-factor authentication also has its drawbacks.
It's much easier now than it was a few months ago. To do this, simply call up the two-step confirmation page and then select "Move to another phone" under the "Primary method" section.
Whether it's thieves or nosy colleagues, the easiest way to protect your data is to set an effective device lock. With ever-increasing fingerprint scanning, it's faster and more convenient. The access code is not replaced with a fingerprint, your finger only makes unlocking easier.
All steps are suitable for version 4.0 and higher, but there are no fundamental differences in linking a Google account in earlier versions of this OS, so the instructions are applicable to all Android devices.
- So, first you need to get to the synchronization menu. To do this, go to “Menu” -> “Settings” -> “Accounts”. After this, you will see a list of all accounts that are synchronized with the device on your screen.
What you indicate here, you must remember well, despite the registered fingerprint, because after each restart of the device you still need to enter the passcode. Wipe patterns are easier to remember, but simple variations can be recognized by stripes on the display. To make it more difficult for observers, you should also disable the "Make patterns visible" option.
With older smartphones, encryption can be activated later. This may reduce the speed of the device, but it is still useful. Restrict access rights to applications. Instead of extracting collected data from apps, it is better to stop collecting it. P. It should be set earlier. You can revoke the rights granted in the Applications section.
- After that, click the “Add account” button on the top panel:
- Here you need to select the item "". I note that for each user the list of services in this menu will be different, it all depends on the number of installed applications.
- Then we will be offered a choice - add an already created account, or create a new one. We choose the first option:
To do this, click the gear in the upper right corner and then click "App Permissions", where programs are sorted by permissions. However, some applications refuse to work after deprivation of rights. Additionally, not all permissions are recorded.
One of the possibilities, for example, to store meetings exclusively on the device, is not offered by all smartphones. Some other applications can also be found in the Accounts section and allow selective completion of synchronization. However, a missing entry does not mean that the application is not sending data; it is possible that sending cannot be disabled. The detriment is a shutdown when reconfiguring or when the device is no longer accessible: data that is not otherwise protected is then lost.
- After this step, the Android system will ask you to turn on Wi-Fi if it has not already been done. Immediately after successful connection, you will be asked to enter your email address and password for your Google account. Do it:
- After you press the “Login” button, information will appear on the display of your device indicating that you need to wait a little for the connection to be successful. Usually everything is ready in a minute:
However, the data is not deleted. The disadvantages are limited. On the one hand, the backup system is rudimentary, on the other hand, many applications do not use this feature at all. This is done to provide better search results, traffic information and recommendations related to places.
You can delete all or part of your current site history in the Personal Content section. In the Advanced section, you prevent text extracts from being sent for input parsing. Such offers can be disabled in the “Search” section. In my opinion, a clear violation of data protection rules. This should only be done by someone who knows exactly what they are doing. Roots usually open more doors than you close.
- After this procedure, you can link your bank card to your account. We'll skip this step:
- You can then choose which services you want to sync and which you don't. For example, you can unnecessarily disable Drive synchronization if you do not use this service.
Last but not least, the warranty or warranty is voided for devices that can no longer be returned to as-shipped condition. The tools you mentioned may be useful, but hopelessly overload any Otto Norm user. The address is not easy to change.
The new address can then be used as your primary mailing address.
This allows you to use the new email address as the default for your emails.
To do this, click on the sender in the editor. A drop-down menu will open from which you can select the sender address. The default is the default value.
- All! The new Google account is linked to your device. It now appears in the list of accounts available to you. At any time, you can turn off synchronization, or even delete your account from the device’s memory. Attention: all information associated with the account will be erased immediately after it is deleted! Be careful!
This tutorial is very simple and easy to use. Sometimes a solution is available and we don't know how to do it. If you only want to change the account, delete it and then re-create it with the following steps. The default is the first one you add, and then you can add all the others.
This email stores certain information such as contacts. You should sync the new email and disable sync with the second one. You cannot delete your old account. Select "Add Account" in the bottom corner. Click Next. 3 Press Enter. A screen will appear informing you that your phone is trying to set up a new account. The process may take five minutes. When you set up your email, a confirmation message will appear. 4 Press the Menu button when the account is already set up. Click Account Settings to disable your old email address. Select a new email to start syncing. If you don't want to receive notifications from the old one, go to the main menu and click on the old account. Click "Menu" and then "Advanced" and "Settings." Select "Email Notifications" under "Email Settings." Uncheck the box by clicking on it.
- All smartphones already come with this application.
- If you don't find it, open the Applications menu.
- Click "Accounts" at the bottom of the screen.
Here you can use the tool.
In fact, there is nothing complicated in the process of changing a Google account. You just need to strictly follow the step-by-step instructions and you will succeed. Good luck!
Not long ago I wanted to change my Google account. The reason for this was banal: I was tired of my old name, it wasn’t pretty, and it didn’t fit with my current nickname. I rushed to Google help and googled the search, I found out that Google does not allow you to change the account name, or rather, it says that this is not possible at the moment. I almost gave up... But one thought haunted me: “What kind of admin are you? There is no such thing as the impossible.” So, this post will talk about how I changed my Google account and at the same time transferred all my data from the old account to the new one.
1. Let's start with mail 1.1. In an old box... 1.1.1. Go to “Settings”, and then to “Forwarding and POP/IMAP”, enable access via POP3, i.e. O. 1.1.2. Now go to “Experimental Features”. Here we find “Import/export filters” and enable this function. 1.1.3. Then we go to “Filters”, go down to the very bottom, click the “All” link and under it the “Export” button and save the list of filters on the computer. 1.1.4. Now let's move on to the address book. There is one nuance here: not all of my contacts were loaded, Google complained that either the file was large or it was damaged. I didn’t bother to figure out what and why, but exported only the “Address Book”, and not “All Addressees”, because. I don't need the latter. In general, this is done like this: click on the “Export” link on the right side of the address book, and answer the question “Which address do you want to export?” We answer “Address Book Only”, and “Export Format” select the first one, i.e. “CSV format used by Google”, click the “Export” button and save the file to disk (for some reason I had it with Japanese characters in the name, so when saving I specified a different name instead of the default one). 1.1.4.1. You can also export contacts (all) to Outlook CSV Format, and then import them from this file. This may come in handy if Google complains (see section 1.1.4). Those. in this case, you can simply open this file in a text editor and split it into several files, and then download them in parts (this will not work with the “CSV format used by Google”, because it is encrypted). 1.2. In the new box... 1.2.1. We go to the address book and import contacts, i.e. On the left in the address book, click the “Import” link, then the “Browse” button, select the file with contacts that we exported earlier from the old mailbox and click the “Import” button. We wait a little and... it's done :) 1.2.2. Go to “Settings”, and then to “Filters”, go to the very bottom and click the “Import filters” link. The corresponding field appears below, in which we click the “Browse” button, select the saved file with filters (see paragraph 1.3) and click the “Open file” button. Filters were imported :) 1.2.3. Now go to “Accounts” and in the “Receive mail from other accounts” section, click the “Add your mail account” link. A new window (tab) will open, in which we enter the soap of the old box, click next, make the necessary settings (I think that you can figure them out yourself, there’s nothing complicated there) and click the “Add account” button. All letters began to be slowly loaded into a new mailbox, and for now we will move on :)
2. Our favorite blog:) 2.1. In the old blog, go to “Settings” in the “Permissions” section, click the “Add Authors” button, enter your new Google soap in the field that appears and click the “Invite” button. 2.2. We check the soap and follow the link in the corresponding letter. 2.3. Enter your login and password and click the “Accept invitation” button 2.4. In the old blog, in the “Permissions” settings section, we set “administrator” rights for the new account. 2.5. All:)
3. Notepad 3.1. In the old account, select the first notepad from the available ones and click the “Access Options” link. 3.2. In the appropriate field, enter the address of the new soap and click “Save”. 3.3. We repeat paragraphs 3.1-3.2. for all other notebooks. 3.4. We check new mail and follow the links that will be in the letters. 3.5. We go to the new account in notebooks and see that there are notebooks from the old account.
4. Calendar 4.1. In the old account, go to “Settings” and go to the “Calendars” tab. 4.2. If there are several calendars, then the following steps must be performed for each. 4.3. Click the “Open access to calendar” link. 4.4. Enter the address of the new soap and select “Make changes + provide access” in the drop-down list on the right, and then click the “Add” button. 4.5. We check the new mail and follow the link in the letter. 4.6. Now the calendar(s) are in the new account.
5. Documents 5.1. In the old account documents, on the left side, select “All records”. 5.2. Click the link “All XXX” below (XXX is the number of documents), on the right side. 5.3. Now “Additional actions” -> “Change owner”. 5.4.1. Two spreadsheets did not want to be transferred, so I simply copied and pasted them. 5.5. Enter the name of the new account and click the “Change owner” button. It didn’t work for me the first time, i.e. Not all documents were transferred; I pressed this button several times. 5.6. If your documents are not in one mass, but are arranged in folders, as I have now, then it is better to do this: 5.6.1. In new documents, create the entire folder structure as in old documents (folders are not transferred). 5.6.2. In the old account, enter the first folder and select all the documents, then transfer them to the new account, as described above. 5.6.3. In the new account, move these documents to the desired folder. 5.6.4. Repeat steps 5.6.1-5.6.3 for all other folders. 5.7. Now the documents are in the new account.
6. News reader, i.e. Google Reader 6.1. In the old account, go to “Settings” to the “Import and Export” tab, click on the link “Export subscriptions as an OPML file” 6.2. In the new account we repeat the same thing, only we import the OPML file. 6.3. All. I even transferred my folders :)
7. Picasa Web 7.1. In the old account, go to the first album, click the button on the right “Sharing”. 7.2. Enter a new soap and click send. 7.3. We repeat points 7.1.-7.2. for each album. Now they will be in the new account in favorites. 7.4. One BUT(!) - This is not a full-fledged transfer: (For a full-fledged transfer, you need to download and install the Picasa program, merge photos from the old account and upload them to the new one.
8. Google Analytics 8.1. In the old account, go to “Google Analytics Settings”. 8.2. Click the “Edit” link for the first profile. 8.3. Scroll down and click the “+ Add user” link. 8.4. Enter a new soap and below in the “Access Type” field, select “Account Administrator” and click the “Save Changes” button. 8.5. We repeat points 8.2.-8.4. for other profiles. 8.6. Check the soap, follow the link, enjoy :)
All! I did not transfer other services, because... there was no need. But everything is done in a similar way. Good luck:)
ZYZH: I wrote everything from memory, so it may not be necessary to confirm anything from memory everywhere. If you haven't received any soap, just try logging into your blog/calendar/notepad/etc. and see if anything new has been clarified. Otherwise, request confirmation again.
Keep in mind that you won’t be able to switch between active accounts on your device with one click, unless of course you have a tablet with built-in User Account Control running Andoid Kitkat. If you do not delete your existing account, you will then have to log into all applications that use your Google account and select the active user. This applies to the Gmail email program, the Google Play store, the Google Keep notes service and other Google services.
To delete an existing account
, use the second point. Then, after you connect your tablet to a new account, all your applications, contacts, etc. will be synchronized with it, and you will be able to use all Google services under the new account (username).
To avoid deleting an existing account
, you just need to go to the tablet settings, find the “Add account” item, and select “Google”.
And if you just want to change your first and last name
, unfortunately, this cannot be done without changing the Google account that is linked to your tablet PC through the settings menu. To do this, you need to open your account settings in your browser. I recommend Google Chrome for these purposes. We launch the browser, and it immediately prompts you to log in using your username.
Click the “Login” button. Then we need to force the browser to launch the full version of the sites, because the mobile version will not have the functions we need. To do this, go to the browser settings and select “Full version”.
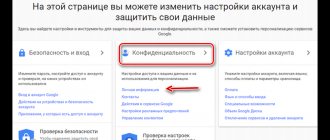
Your name and avatar will appear in the upper right corner. Click on your avatar and select “Settings”.
The most important thing when creating a Google account is to choose the right name. If the account owner, for some reason, needs to change it, then doing so will not cause any difficulty.
Thanks to the instructions, you can rename your account very quickly. But don’t forget that you can only change your name using a computer; there is no such function in mobile phone applications.
Program description
Initially, it is important to understand what software the user will work with. As already mentioned, mobile devices now have a huge number of possibilities. But some programs are used by a minority of subscribers, and some applications are in demand among almost all people.
Play Market is a program that allows you to download and install various applications and games on your phone. A kind of data storage for mobile devices. This is an analogue of Google Play on computers. Very useful software.
But how to change your account in Play Market? How can I start using the application? What should every user know about it?
Change of mail
How to change your Play Market account on your phone in this situation? There is nothing special or incomprehensible about this process. Although sometimes you have to think about where the menu for changing and registering a new profile is located. After logging into Google Play, the subsequent launch of the software occurs with automatic login to the previously entered email. Therefore, the question of how to replace a Play Market account arises for some users.
There are several possible scenarios here. For example, you can reset authorization and go through it again. For Android 2.2 and below, it is recommended to follow the instructions:
- Download your mobile device.
- Enter the main menu of your phone/tablet.
- Find “Settings” - “Applications” - “Manage applications”.
- Enter the “Google Services” menu item.
- Click on the “Clear data” button.
After this step, Google settings will be reset. You can log in to the Play Market using the previously proposed algorithm with an existing email address. From now on it is clear how to change your account in the Play Market.
Installation and first launch
First, you will need to acquire the application you are studying. Without the installed program, working with the Play Market is useless. After all, authorization in such a situation is impossible.
To install the Play Market you will have to download this program. The installation file is freely available. As practice shows, you can usually skip this step. Why?
The fact is that the Play Market is initially available on all devices with the Android operating system. But on smartphones with other software you will have to work hard to initialize. To install the Play Market, you need to download a special Android emulator. Accordingly, the situation with authorization, registration and work in the application under study will be considered with Android smartphones.
To start using the program, you will have to:
- Open the main menu of the gadget.
- Find the Play Market item in the list that appears. By clicking on this inscription, you will see that the program will launch.
If for some reason this application is not found, you must first install the Play Market on your phone. For this:
- The installation file is downloaded from the Play Market.
- The document is downloaded to the mobile device.
- Launch the installation file from the phone/tablet.
- After completing the process, you can start working with the Play Market.
Everything is simpler than it seems at first glance. However, not everyone understands exactly how to work with the program they are studying. How to change your account in Play Market? What will it take?