Almost all modern laptop models are equipped with a built-in camera. It often happens that a user wants to capture himself in a photo using a laptop. In the case of an external camera, there are no difficulties, since the device has a button specially designed for this. But what if you need to take a photo using your laptop camera?
There are many different ways:
- Built-in utilities.
- Skype.
- Paint.
- Internet sites.
- Third party programs.
Not all of these methods are universal, so we will consider each of them separately to make it easier to understand and choose the most suitable option.
Taking photos using built-in Windows utilities
Very often, a special Camera program comes standard with Windows. Through it you can not only take pictures, but also make videos. It is not available on all laptops, but it is very easy to check its availability.
To do this, we perform the following actions:
- Open the Start menu - All Programs.
- Find the Camera application.
- In the window that opens, set the necessary settings, such as photo size, quality, etc.
- If desired, go to the “Driver Properties” menu and adjust saturation, brightness, etc.
- On the right side of the window, select the camera icon and press the shutter.
- All photos are saved in the Pictures folder by default.
If this program is not in Start, you can open the camera through the notification panel:
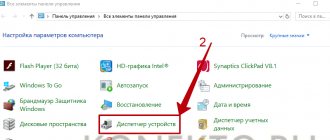
- Start - Control Panel.
- View scanners and cameras.
- Select the laptop camera (it may have usb in the name).
- Take a photo and set the path to save the file.
On a note! The resulting images can be opened through any graphic editor and edited (for example, remove unnecessary edges) .
Take a photo with a webcam on a laptop online
This method should be suitable for those who have difficulty installing software. All you need is the camera itself and a connection to the global network. There are a lot of online services that allow you to do all the work in a few clicks; let’s look at the most popular ones.
Picachoo
When you open a page on this site, it requests access to the equipment that will be used for filming.
- after gaining access, an image and shooting settings appear in the center of the screen, allowing you to take regular, continuous or animated shots;
- When you press the “Take Photo” button, the timer starts counting down, after which the captured image remains on the screen and the “Effects” function becomes active, when accessed, the image can be processed with various filters. At the same time, their work can be assessed by the thumbnails located under the large photo;
- After processing, you need to save the result by clicking on the appropriate button, after which you have the opportunity to post it on social networks, delete it, or download it to your computer.
Pixect
After opening the site page you need to:
- press the “Let’s go” button;
- as in the previous case, after opening the page you must go through the procedure of confirming access to the camera;
- after refreshing the page, an image from the camera appears on the monitor, under which there is a shooting settings menu;
- now you need to select a filter, since the Pixect service does not provide post-processing capabilities;
- Now you can take a snapshot, use a shutter delay, or take a collage by clicking on the corresponding icon;
- If you get a satisfactory result, you can save the photo, otherwise return to the previous page and start over.
Webcam Toy
Despite the “toy” name, the site offers a set of powerful tools for editing and changing settings. When you press the button that resembles a gear wheel, a menu opens that allows you to select a countdown time, flash, and a full-screen version of the photo.
Just like in the previous online service, effects are selected before shooting begins, and the results are saved in the same way. The obvious advantages of this method of obtaining images are ease of use, no need to install additional software, and the possibility of processing. To operate these services, you only need Adobe Flash Player, which is almost always already installed.
Most laptop users consider the quality of photographs obtained in this way to be quite acceptable for publishing on social networks and saving as “memories”. And those who are not satisfied with the result should remember that quality is not only the result of the program, but also the size of the matrix of the capture device, its optics, the lighting of the room where the shooting is taking place and other factors.
Photos taken via a webcam are obtained quickly and do not require the highly skilled photographer required when using cameras.
Skype as a way to take a photo
Most often, Skype is used for video chat, but few people know that it can also be used to take photos. The advantages of this program are that it is completely free, has Russian language and supports almost all cameras. This program is used by most Internet users, so it’s worth considering the option in more detail.
In Skype, you can customize the camera down to the smallest detail, for this:
- Open Skype and go to “Tools” - “Settings”.
- Select “Video Settings” and open “Webcam Settings”.
- We adjust the parameters at our discretion, smile and take a screenshot (PrtSc button on the keyboard).
- Go to any graphic editor, the same Paint. Click on the “Insert” function, crop what is unnecessary and save the photo.
The above method requires some steps that can be avoided in other special programs, but the Skype camera has many settings and is capable of taking a fairly high-quality photo.
Using the Camera app in Windows 10
The Camera application can be found in the Start menu, or through search.
We launch it and immediately see the image from the web camera. If you do not have a picture from the camera, or the error “Your permission is required,” then at the end of the article we will look at solutions to this problem.
This is what a standard application for working with a webcam looks like in Windows 10:
To open the application settings, you need to click on the gear-shaped button in the upper right corner of the application.
There aren't many settings there. Let's look at them:
- The action that will be performed when you hold down the camera button in the Camera app. It is disabled by default. You can select either “Photo series” or “Video recording”.
- Photo proportions and resolution. By default, the maximum resolution of the photos that we will take with our laptop camera is set there.
- Framing grid. It's disabled. And I don’t think we need it.
- Serial shooting. If you enable this setting, the program will constantly take photos if the timer is turned on. Until you stop this process by pressing the button.
- Settings for recording video from a web camera. Video quality and flicker reduction. Depending on the camera, settings may vary.
- Digital video stabilization. I haven't checked how it works. You can try turning it on.
- And the last useful setting is “Change location for saving photos.”
The settings look like this:
Simple and functional application. Nothing extra. Everything is simple and clear.
Graphic editor Paint
Absolutely all Windows users are familiar with the Paint graphic editor. The program is supplied with the system and serves as a standard editor. The menu in Paint is very simplified, so even a novice PC user can figure it out.
There is a special function for taking photographs in Paint:
- Open the graphic editor.
- In the menu, select “From a scanner or camera”.
- Click on your camera.
- We take a picture that automatically goes into the editor window.
- Edit and save to the required folder.
Unfortunately, you can’t shoot video in Paint, as you can do in the built-in Windows program, but it’s completely suitable for regular photography.
Internet sites
This method requires an Internet connection, so if there are no problems with this, you can use special sites. There are many of these on the Internet. Each of them has different functions for adjusting the shot. Some even flash while taking pictures, by lighting the screen white.
In addition, on such resources you can choose ready-made color or distortion special effects. To find such a site, you can use any search engine. The Internet will give you many options that will take photos for free and save the files on your laptop.
Download third-party programs
If you don’t want to take photos online, and the standard Windows capabilities do not meet your desires, you can use a third-party program. Each of them has different settings designed to improve your photo.
Such programs include:
- Live WebCam.
- MyCam.
- WebCam Max.
- Webcam Surveyor.
These are not all programs with which you can take pictures. The list goes on, but the choice is individual and depends on the user’s preferences. At the moment, Live WebCam is the most popular photography program, as it has an easy and intuitive interface.
Video
In this video you will learn how to take a photo using a webcam.
How to take a photo on a laptop
Selfie online
Selfie on a laptop
Special services on the Internet help you get an impressive photo. They are free to use and you do not need to install any applications on your computer. You can find a suitable service by a simple search query in Yandex or Google.
Select the appropriate site and allow it to access your laptop's webcam. Controlling the selfie process is intuitive, so no training is required. All operations are clearly shown on the screen. The most popular services are: Russian-language – Picachoo.ru, international – Webcamtoy.com, as well as Pixect.com.