One way or another, people travel, change their place of residence, move from country to country in search of a promising job or simply a better life. And in most cases, in a new place, they are faced with the fact that they need to use the App Store and the iTunes Store content store of the exact country in which they are currently located. In these cases, you have to change the country (region) in your Apple ID (iCloud) account. But over the years of living in the previous country, the user could buy a sufficient number of applications, games, movies, music, ringtones, and he quite naturally wants to continue using them. Apple is rather evasive on its official website and warns that before changing the region in your account, you need to download all previous purchases. In 2021, I decided to check for myself how this all happens and share my own experience with you.
The App Store has a ton of apps, but not all of them are available in a specific country.
Option 1 - fast
Step 1 . Open Safari on your iPhone, iPad or iPod Touch.
Step 2 . Enter the name of the application in the search bar. The first result will be displayed in the App Store.
Step 3 . Click on the application you are interested in. You will be redirected to the application store and a notification appears about the need to change the country.
Step 4 . We agree to change the store and restart the App Store.
PROFIT!
What to do before changing the country in your Apple ID
Make sure your Apple ID balance is zero
In this case, we do not mean the balance of the bank card linked to the Apple ID, but the money that is in the account account. Typically, the Apple ID balance is topped up using Gift cards (gift cards) and codes, using direct top-up from a bank card or using a mobile operator.
To check your Apple ID account balance on your iPhone or iPad, open the App Store app and click on your profile picture in the top right corner. On the page that opens, the current balance will be indicated under your first and last name.
It is necessary to spend the remaining funds in the Apple ID account (so that it is “0”).
If the balance is 0, then nothing is indicated in this place.
If there is an amount on your balance for which you cannot buy anything in the App Store, iTunes Store, etc. (i.e. it cannot be spent), you will have to top up your account to the required amount. It is necessary to take into account that there are limits on account replenishment (for example, for a Russian Apple ID - 500 rubles).
Example . If you have 3 rubles in your account, then to fully repay the funds in your account, you can first top up your account with 525 rubles, which will give you 528 rubles. And with them you can buy two excellent games for iOS costing 379 rubles + 149 rubles = 528 rubles (as a rule, games in the Russian App Store cost: 15 rubles, 29 rubles, 75 rubles, 149 rubles, 379 rubles, etc.).
Cancel all existing subscriptions
Cancel or wait for any existing subscriptions, including Apple Music, to expire (including orders, iTunes movie rentals, and annual passes).
Prepare a payment method for the new region
Thus, Russian credit cards can only be used to purchase content in the Russian sections of the App Store, Apple Books or iTunes Store. Your usual credit card may not work in another country.
Back up your iPhone, iPad or iPod touch
Changing your country or region may temporarily require you to reduce the size of your purchased iCloud storage. No data will be lost. After the change during the account relocation process, you will have to repurchase a data plan for your iCloud cloud storage.
Some previous purchases (such as books, movies, software or music) may not be available in the new region
There are countries where certain types of content purchases are not available at all. To get guaranteed access to your previously purchased content in a new region, you will have to re-download these purchases on each device on which you may later need them.
Changing region or country may be prevented by being in a Family Sharing group
Leave family sharing yourself, or ask the group organizer to remove you.
The procedure for changing a country can be done in several ways.
You can change the country in your Apple ID directly on your iPhone, iPad and Mac or on a special web page (details below).
ON TOPIC: How to “Find Friends” on iPhone, or how to view the location of friends on iOS.
Option 2 - classic
Step 1 . Go to Settings -> iTunes Store and App Store.
Step 2 . Tap on your Apple ID. Click View Apple ID.
Step 3 . Enter your password or log in using Touch ID.
Step 4 . Click the Country/Region button. Please indicate the country you are interested in. We confirm and restart the App Store.
Step 5 . Select a payment method and enter payment information.
Russian cards are not accepted, but you can always set up payment without a card.
Step 6 . Enter your billing address and click Next.
PROFIT!
This method will be useful if you accidentally changed the region and want to change it back.
Geolocation on iPhone
It has been said more than once that Apple strives for “total” control of its devices and applications. This fate did not spare the geolocation function either. By default, iOS smartphones constantly monitor the location of an object, but if such “surveillance” bothers you, then in the settings you can disable this function.
We immediately draw your attention to the fact that the geolocation function works on all Apple devices, except iPodTouch, iPad (versions without SIM card support). These devices do not have a GPS module installed.
To use the geolocation feature, you must activate it. To activate, we carry out the following steps: go to “Settings”, then – “Privacy”, then – “Location Services”.
Please note that here you can enable or disable this feature for all programs.
It is also possible to enable or disable this function for selected programs. This is very convenient, since using geolocation greatly drains your device, and the presence of a feature request filter to enable it allows you to save battery consumption.
When you hover over the selected program, the system will offer two options: “never turn on” and “only when using the program.” Our advice is to use the second option - iOS itself calculates the relevance of using the program and will enable geolocation if it is needed for this application. And if you completely block access by selecting the “never enable” option, then the application you need may subsequently not work correctly.
So, we figured out what geolocation is and why it is needed. The main thing you need to understand is that there are applications in the App Store that use geolocation in their work, and its correct use will ensure safe use of the device and save the gadget’s battery power.
Option 3 - the most reliable
Important : it happens that the store checks the binding of the IP address to a specific country. Therefore, we recommend downloading any VPN client before use. For example, TunnelBear.
Step 1 . Go to Settings -> App Store and iTunes Store. Sign out of your existing Apple ID.
Step 2 . Open the App Store application. Select any free application you like and click Download.
Step 3 . Select the country required for your profile.
Step 4 . Let's register. At the stage of choosing a payment method, select No.
Step 5 . Confirm your email.
Step 6 . We return to Settings -> App Store and iTunes Store and log in with the newly created account.
PROFIT!
Congratulations, you have successfully changed your country in the App Store.
How to change the region in the App Store on a MAC/PC computer
- Open iTunes and enter your Apple ID. Next, you need to click on your nickname, a menu will open, select the “Account Information” item.
- Select “Change country or region”.
- Next, you should familiarize yourself with the terms of the change. Further steps are identical to the process of changing geolocation on iPad and iPhone.
By the way, if for some reason changing your geolocation caused you difficulties, and you can’t make an American App Store for yourself, take the simplest route - get a new Apple ID for the country you need. Rest assured that changes to accounts and installed applications from different IDs will not affect the correct operation of your gadget.
So, following the instructions above, you can go to the American App Store, or to the market of any other country. There is another way - download the Chinese app store. That is, do not “pretend to be Chinese” in your account by changing the geolocation, but naturally download a free, unlicensed and completely unprotected Chinese analogue of the App Store (there are several of them, and you will never find them in the official list of software for Apple equipment). But is it worth risking your gadget like that?
Problems when changing country
When changing the country, the user may encounter problems that should be resolved to resolve all difficulties. After analyzing the table below, it becomes clear that there may be problems with changing countries. The main thing is to be aware of your actions and not change your location just like that.
Vyacheslav
For several years he worked in mobile phone stores of two large operators. I understand tariffs well and see all the pitfalls. I love gadgets, especially Android ones.
Ask a Question
Question to the expert
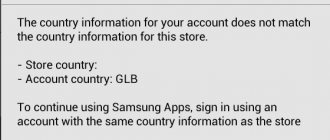
The region does not change.
The user may have funds in his account or there may be an error in the system. You need to spend the money until the end, and only then try to change the region again. If this does not help, then you should contact support.
What to do if there are funds in the account?
As mentioned earlier, you need to spend the money or contact support to transfer it to another account.
No payment method.
If there is no payment method, then most likely the user will not be able to change the country. It is necessary to create a new, up-to-date card for the territory.
4.2/5 — (19 votes)
Subsequent activations
If you get your hands on a gadget with an unfamiliar localization already installed, then you will have to navigate further using the pictures. First of all, we find the icon with gears in the iPhone menu, that is, settings. Next, in the window that opens, click on the identical shortcut and scroll down the screen to the iTunes Wi-Fi inscription. Regardless of the localization, this item will always be depicted in English letters, so there should be no further confusion.
We are interested in the point above this inscription, which is precisely responsible for working with languages. After clicking on it, a new window will open where you need to select the top line in the menu. This item opens a list of all available languages, including Russian.
Next, click on the selected language until a blue checkmark appears and click on the icon in the upper right corner, which is located exactly under the battery indicator. This is a kind of "Accept/Enter". After some time has passed to install the localization, your gadget will take on its usual Russian-language appearance. If something goes wrong and you miss somewhere, then it is best to turn off and then turn on the device again and repeat the procedure from the very beginning, rather than try to continue wandering through the hieroglyphs. Keep this point in mind before changing the language on your iPhone.
On an iPhone or iPad, the interface language can be changed in two ways: either during the initial setup of the device or using a separate section in the device settings. In the first case, there are usually no problems, since choosing a language is the first thing the device asks when setting up.
But, if you need to change the language on an already working device, then you may get into a dead end. For example, if the system uses Chinese, then you simply will not find the settings section responsible for changing the language. Because there will be only hieroglyphs everywhere, and you will not understand anything.
In this article we will talk about how to get out of such an unpleasant situation. Here you will learn how to change the language on an iPhone or iPad from Chinese to Russian.
In order to change the language on an iPhone, for example, from Chinese to Russian, you first need to go to the settings. To do this, we leaf through the desktops, look for the well-known settings icon and open it.
After you are in the iPhone settings, you need to open the “Basic” section. Finding this section is also not difficult. We simply select a section with an icon that resembles the icon of the “Settings” application. This is an icon with a white gear on a gray background.
After that, you need to find the language settings section. In the Russian-language interface, this section is called “Language and Region”. In order to find it, simply find the “iTunes Wi-Fi” section and open the section that is one line higher.
After this, a list of available languages will open. Here we simply select Russian and click on the button in the upper right corner of the screen.
After this, the message “Change language” will appear on the screen and the iPhone will reboot. After rebooting, you may need to sign in again using your AppleID.
Changing the language on iPad in detail
To set the interface language, we do not need any software; everything is done inside the operating system, through the settings. Fortunately, Apple has taken care of the multilingual nature of its platform, and it contains all the major international languages, including Russian.
First, we need to turn on the iPad. After turning on, on the first screen, you need to find the “Settings”
(in English
“Settings”
) and click on it.
After clicking, the settings window for your device should open in front of you. In this window we need to find the “Basic”
(
“General”
) and also click on it.
Having done everything described above, we will be taken to the iPad’s main settings page, which you can see on the right side of your screen. In it, we need to find the item “Language and text”
(
“International”
), then click on it.
This will take you to your tablet's language settings. Here we are interested in the “Language” item, it is the top one in the list.
By clicking on it, a dialog box will open in front of you in which you will have the opportunity to select the language you need.
To install the Russian language, you need to find “Russian”
and click on the
“Done
”
button , then wait a few seconds until your iPad reboots, after which your interface will be in Russian.
If you want to set the English language, then select “English”
, after which we also click on the
“Done”
button
and wait about 10 seconds, that’s all.
This completes the installation of the new language, congratulations! As you can see, it turned out to be very simple. For those who did not succeed, I suggest watching the video instructions.