The Android file system structure is normally hidden from the user. Access to various data is provided through the corresponding applications: multimedia gallery, contacts, text editors and others. To make changes to system settings and work directly with files, you need to use a file manager. Before making changes, you need to understand the intricacies of the Android file system.
Components
The file system of Android devices is organized somewhat differently than the usual Windows one. You can get to the root directory from the file manager (usually called “Explorer”, “File Commander”, “Total Commander”). Next, the available memory sections will appear, the data in them is organized as follows:
- Device memory . The folders in it look the same as in Windows: they contain files of different formats, they can be changed, deleted and created at the request of the owner.
- SD card . External drives are not required, but are in great demand. In memory, they are allocated to a separate section; if desired, you can make it a place to install new applications or move already downloaded ones.
- Root . The root folder in which information about system settings and their changes is saved. To open it, you must have root rights; not every manager program can access it.
If there is not enough space, the question arises of removing garbage from the smartphone’s memory. Usually special applications are used for this, but they are not always effective. To clean up correctly, you need to understand which folders can be deleted on Android and which cannot be touched.
Removal methods
How can I delete a specific folder? The first way is to use standard functions. To do this you need:
- Launch the File Browser application or similar on your phone.
- Find the required folder and hold it with your finger.
- When the selection menu appears, click the “Delete” line.
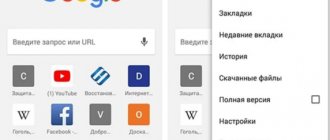
Please note that standard tools do not display all existing folders and files, since system files are often hidden. Any third-party file manager, for example, the ES Explorer program, will help you see more.
You can download it from the Google Play store. The application offers ample opportunities. With it, you can view existing folders, as well as delete some of them. To do this you need:
- Launch the application.
- Select Internal Storage or SD card at the top of the screen.
- Hold your finger on the required file. Once it is checked, check the other required items.
- In the bottom menu, click "Delete".
It is worth noting that deleting system folders is impossible, since the user has limited access rights. They can only be deleted by obtaining special superuser rights (the equivalent in Windows is Administrator).
What and where is
When opening the system manager on Android devices, an inexperienced user will be surprised by the abundance of folders. By the name of some you can understand their contents, with others it will be more difficult. To avoid making mistakes when working with files, it is advisable to familiarize yourself with the main elements of the directory:
- Boot . This is an important folder, it is not recommended to change it: it contains files related to the system kernel and the virtual disk.
- System . Contains information about all system settings and changes made.
- Cache . Temporary files created while programs are running are stored here.
We recommend: Google Play Services
- Misc . Information about the settings of the cellular operator, installed configurations and other parameters is saved in this folder.
- Recovery . This partition is created for data backup.
- Data . Stores user data: photos, videos, downloads and others.
By default, the owner can only work with the last folder; others require special rights. Typically, the user needs exactly the files from Data; it is convenient to work with them even in the built-in manager.
Advice! If for some reason it is inconvenient to view the root directory on the smartphone screen, this can be done via a PC. Simply connect the device via a USB cable and select the file transfer mode.
Cleaning methods
On smartphones running Android 8.0 Oreo and higher, there is no cache clearing feature; the developers decided to remove this feature. In such devices, the system automatically manages the data. When an application exceeds its quota, the intermediate buffer is erased. Users need not worry about this issue.
In other cases, you will have to clean it manually or using a specialized program.
Manual cleaning
It will not be possible to give universal instructions, since the specific settings depend on the version of the operating system. We will tell you about the general rules that should be followed:
- Go to settings and find the “Storage” section. It provides information about how much memory is occupied and what exactly.
- Go to the applications section, sort them by size.
- Go inside the heaviest ones, find the “Clear cache” button.
Clean Master
If you don’t want to go into every application, you can use a special program that performs comprehensive cleaning. Algorithm of actions:
- Download Clean Master in the Play Market.
- Open the program and go to the "Trash" section.
- The application will begin to analyze the information and look for files available for deletion. Wait for the process to complete.
- The total size of files available for deletion will appear on the screen. Make sure that there is a checkmark next to the “Unnecessary cache” line.
- Click the green button at the bottom of the screen, cleaning will begin.
The application is free, but its functionality is limited. The paid version has options for optimizing basic processes, cooling the smartphone, analyzing all applications and how they affect the device.
There are other analogues that cope with their task. For example, OneBooster, Avast Cleanup, AVG Cleaner, SD Maid. They have similar functionality and minimal differences. All are installed for free, so you can test several applications and observe how the device works, and then make a choice.
All such applications have a disadvantage - the use of system resources. Therefore, despite the fact that they speed up some processes and perform complex actions, the device also slows down.
Data folder structure
As noted above, this memory section contains all files created or downloaded by the user. You can perform various actions on them: delete, copy, change or move. For ease of finding, they are divided into several folders:
- Documents . Contains documents created in the smartphone editor.
- Downloads . All downloaded information is saved here by default.
- Bluetooth _ All files transferred via Bluetooth are copied to this folder.
- Podcasts .The folder is created when listening to podcasts.
- Video, Music, Movies . Multimedia storage is automatically displayed in the lists of programs suitable for reading them.
- Ringtones, Alarms, Notifications and others. Designed to save alarm sounds, ringtones and notifications.
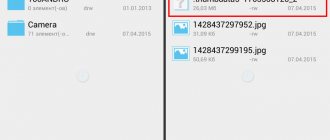
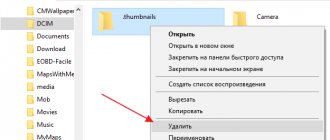
Many users are concerned about DCIM - what kind of folder is it and why does it weigh so much. The answer is simple - all pictures and videos taken are saved in it. Therefore, its contents can be easily reduced by transferring elements to a PC or external drive.
Suspicious folders
Some smartphone owners are faced with the presence of an element with an unclear name in the root directory. If you come across the Dianxin folder on Android, it’s not difficult to figure out what it is. This is a product of Chinese firmware, or rather, its custom shell. The system places all files related to processors and smartphone operating data into it. Its size can be large due to the abundance of information; deleting it in the usual way is pointless - it will be restored again.
We recommend: How to turn off the Internet on iPhone
Many people mistake it for a virus, because this folder is most often discovered by accident. To completely remove Dianxin from the catalog, you need to go, for example, to the EU Explorer settings and uncheck the “Notify about application permissions” option. After that, delete the folder itself and reboot the device.
It is also rare, but you can find the chartboost folder on Android, but what it is is more difficult to explain. It is the result of advertising being displayed on a device. Usually it accompanies games for children, these are banner displays - this is the method of monetization chosen by the developers. This item is not easy to detect; it is usually hidden in the SD card. There is no harm from it, but a lot of memory space can be taken up - up to several gigabytes!
There are two ways to try to solve the problem:
- Disable writing to the file, keep it read-only, or delete it. This is done in the settings of the folder itself.
- Create an empty file without an extension (duplicate) by deleting the folder with the old data.
If you cannot remove Chartboost this way, you can install file managers and use them. In any case, there is no benefit from this folder, it only wastes traffic (advertising appears when you connect to the Internet) and takes up space.
How to get ROOT rights to Android using Root Genius
Everything is very simple and clear - absolutely any user can understand it.
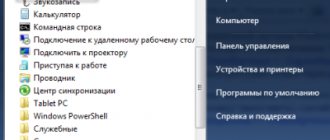
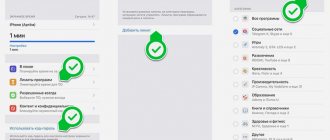
1. Download the Root Genius program. Link to office website. No installation required. 2. Connect the phone to the PC - select the “Media device (MTP)” mode and enable USB debugging:
3. Confirm your choice:
4. Launch Root Genius
5. Press the big Root button and wait a few minutes, watching the process.
6. Upon completion of this procedure, the device will reboot on its own and on the computer screen you will see a message indicating that your device has been successfully rooted.
All. Route access granted. Go ahead.