The development of technology has given rise to many mobile games, which are often not inferior to classic computer entertainment. A large number of games with excellent graphics and thoughtful plots are now being released on Android. The creators are trying to adapt the touch screen for control as much as possible, but in some cases it would be much more convenient to use a gamepad. This is especially true for modern action games, racing and other 3D entertainment. The possibility of connecting a gamepad to Android is discussed in this article.
Features of connecting a gamepad to a smartphone
Unfortunately, a minimum number of consoles connect to phones running Android and IOS without any problems. Most often, remote controls are oriented either to a special set-top box or to communicate with a computer. The last option is much simpler: you just need to use a USB OTG adapter, which we talked about in the article “How to connect a USB flash drive to Android via OTG.”
Bluetooth synchronization is another good method that requires installing an emulator on your device. Read about this procedure below. The smartphone must have Root rights!
The need to connect a joystick
Such control is necessary for users who play complex games that use an emulator to run. These “toys” include GTA and a number of others. Their distinctive feature is the presence of a large number of different possible actions and different elements associated with the need to press several buttons at once or make “clamps”.
The implementation of such “toys” on a PC is simpler, but in any case, very often gamers even in this case have difficulties, which consist in the fact that there is no ability to quickly respond to a situation that arises during the game. In tablets and phones, unlike a desktop computer, there are no buttons at all, or interactive buttons are created, and gamers also work through a gyroscope. The way out of this situation is to connect an Android joystick to modern gadgets. It will make gaming truly enjoyable.
How to connect a joystick to an Android phone from PS3 and PS4 via Sixaxis Controller
We will need: two utilities, a USB cable and access to a computer. First, download the first program, namely SixaxisPairTool from a trusted source. We install it on the computer using the standard method and launch it. Connect the controller to the PC.
Link to the official program page - https://dancingpixelstudios.com/sixaxis-controller/sixaxispairtool/
In the meantime, you need to download the Sixaxis Compatibility Checker application, which is freely available on Google Play, on your phone or tablet. Please note that without the “Superuser” mode the program will not function!
If the application is not on Google Play, download it from w3bsit3-dns.com (they have already tried to block it several times, so...) - https://w3bsit3-dns.com/forum/index.php?showtopic=257429
Once the preparation is completed and all the utilities are installed, in the Sixaxis Compatibility Checker we find the following inscription at the bottom of the screen: “Local Bluetooth Address”. We copy this address in the format xx:xx:xx:xx “Change Master” field located in the computer program.
Next, disconnect the gamepad and turn it on by pressing the large central button. If one green light comes on, the connection process was successful; if we see an inscription in English, unfortunately, the device is not supported . And the last final action: click in the “Change input method” and specify the desired gamepad.
Setting up a gamepad on Android - a practical guide
admin 01/14/2020
There are many games written for smartphones, many of which are almost as good as computer games. Virtual touch buttons are used as controls This is especially noticeable in the action genre, where you need to move a lot, aim and perform other similar actions. In this article, we'll look at how to connect a gamepad to Android to ensure only the best gaming experience.
Depending on the type of joystick, the connection can be made in one of three ways:
- Via a USB cable and a special adapter.
- Directly via Bluetooth.
- Using an application via Bluetooth, for joysticks from game consoles.
Each method has its own nuances and settings, so let’s look at each of them in more detail.
We connect the joystick to a smartphone from Xbox 360 and One
Alas, Microsoft 360 consoles do not have possible Bluetooth connections , but communicate with each other via special radio antennas. Perhaps the company made such a scheme specifically to avoid synchronizing its devices with devices from other developers. But there is still a way out.
Connecting Xbox 360 via USB
There are special receivers to connect the joystick to the PC, so we will use them for the Android connection. These are small receivers that are inserted into the gamepad via a USB cable, but operate via a radio signal.
But first you must be sure that the mobile device supports the OTG standard, otherwise nothing will work. To check, use the excellent USB OTG Checker application, available for free download from the Google Store.
QR Code
USB OTG Checker Compatibility?
Developer: FaitAuJapon.com
Price: Free
If the result is positive, we can begin the procedure itself. We connect the receiver to the joystick via USB and press the large central button to search for Xbox. In the meantime, we activate the pairing mode on the console (the button is on the end). The devices should communicate without problems, after which the controller becomes available for interaction in games on Android devices.
Not all smartphones recognize the Xbox 360 controller, and controls may not work in specific games downloaded from third-party sources. Typically, performance is guaranteed only in applications from Google Play.
Connecting an Xbox One wireless joystick via BlueTooth
Things are much better with the Xbox One The fact is that this set-top box has a built-in Bluetooth module , thanks to which a more or less simple connection of the joystick to a phone or tablet is available.
It’s just that this pairing is aimed at Samsung phones with an Android operating system no higher than 6.0, which is no longer relevant for many users. But it’s still worth a try, even if you updated to eight .
Stage 1: Connection
You should start setting up, of course, by connecting the gadget to your smartphone or tablet. The procedure is generally standard, but differs for USB and Bluetooth devices.
Wired and wireless USB
For USB options, you will need to use an appropriate adapter, which most often looks like this:
The radio module of wireless gamepads that do not use Bluetooth must also be connected to this adapter. After connecting to the phone, you do not need to perform any additional actions; proceed to the next step.
Bluetooth solutions
Gamepads using the Bluetooth protocol must be connected first. This is done like this:
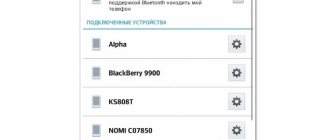
- First, make sure Bluetooth is turned on on the target device. To do this, open “Settings” and go to the appropriate parameters - they can either be available immediately or located inside the “Connections” items or something similar in meaning.
Next, activate the switch.
- Now let's move on to the gamepad.
The connection method depends on the specific type - for example, the Xbox One Controller wireless revision and DualShock 4 simply need to be turned on and put into pairing mode. Computer gaming devices like the Logitech F710 or solutions from others are connected in a similar way. v-android.png" class="aligncenter" width="777″ height="336″[/img] With purely mobile gamepads the situation is a little different - they often have several operating modes (for example, separate ones for iOS and Android), and To connect to the “green robot” you need to select the appropriate one. As a rule, the method for turning on the desired mode is described either in the instructions for the gadget or on a sticker pasted on the back of its body. - Turn on the gamepad and switch it to Android compatible mode. Wait a few seconds until an entry with the name of the one you want appears in the discovered Bluetooth devices panel of your smartphone or tablet, then tap on it to pair.
- Under the name of the gamepad there will be an inscription “Connected” - now you can proceed to configuration.
If you encounter problems at this stage, please refer to the appropriate section of this article.
Connecting a joystick from iPega
Here the user will have significantly fewer problems. The fact is that iPega joysticks have many advanced modes, and you will definitely find the one that suits you best. Namely:
- GamePad Mode - designed for games that easily support external controls. Suitable for Windows and, of course,
- SPP Mode – created for applications that do not have the above function. In this case, for smooth interaction between the console and the smartphone, ROOT rights are required.
- Keyboard – for games that require a keyboard.
- Mouse – a mode that creates a mouse emulator.
Method 1
So we have listed the most important and effective modes. But how do you connect the game console? There are two methods for this: simplified and standard. The simplified method involves only two steps: activate Bluetooth on the controller using the X+HOME keys, also turn it on on the phone and select our gamepad from the list of devices available for pairing. Ready.
Method 2
The second method is a little more complicated, but it allows you to immediately configure everything you need for a comfortable game. Download the special program Bit Games Center, go to the “Settings” item, where we click on the shortcut called “Search Handle”.
Now on the gamepad we press the above key combination again, and the utility detects the device. Click “Connect”. Go to “Settings” – “Language and input” – “Input methods” and specify the iPega controller. Made.
Information on setting up a joystick on Android
How to set up an Android calendar - instructions
Setting up a joystick on Android is done by using various emulators that allow you to quickly change control commands in a particular game.
Experienced specialists give several simple recommendations that make it possible to set up a gamepad on Android:
- You need to set only those commands that will actually be used in the game. The gamepad has a limited number of buttons, so they may not be enough for minor commands;
- applications for assigning gamepad keys have a similar principle of operation. It is better not to change some functions to avoid unpleasant consequences, for example, resetting parameters. In this case, the user will have to reassign the keys;
- turn off notifications. As a rule, programs for joysticks are filled with a lot of advertising and notifications. The latter can be turned off in the software settings. To get rid of annoying ads that will interfere with the gameplay, you need to disconnect from the Internet for a while or close the application. The last option is most preferable, since many users prefer to play online.
Application interface for setting up a gamepad on Android
Important! Some gamepads from consoles are not compatible with smartphones.
How to synchronize the joystick from a VR helmet with Android
Immersion in virtual reality allows you to experience the game more subtly, and for this purpose special VR helmets have been created, which are a kind of glasses. Most of these devices are, of course, aimed at individual consoles and PCs, but there are also devices for Android devices.
For the first time, such helmets were developed by Google Cardboard. They are lenses placed in a so-called box, into which the phone is inserted. They don’t require any special settings, but sometimes such VR glasses require a joystick. It should be purchased specifically for a specific model.
Launch and setup
Congratulations, the devices are connected and ready to use, now all that remains is to select the joystick mode and start playing. The program offers many control options:
- Android as a steering wheel for racing (with G-sensor support - that is, control by tilting the phone)
- phone like a joystick
with 2 control sticks and 12 programmable buttons - Android phone as a gamepad for shooters
(sticker for turning and walking, programmable buttons and rotating the screen in an empty field) - tablet or phone as a joystick for flight simulators
.
Game joystick for Android TV console
Many users connect keyboards, mice, gamepads to Smart TV, and, of course, peripherals are also available for Android TV . If you decide to spend a lot of time at the console, take care of purchasing a high-quality game controller that will initially be suitable for TV.
Several connection options are available: via Bluetooth, via a radio signal and via a single Wi-Fi network. The last option is the most optimal, easy and affordable.
Installing the necessary software
We will do everything using the PC Remote
. A most ingenious application with great capabilities of Chinese origin. So, first you need to download the application and install it on your computer.
We will consider installation and configuration using Wi-Fi - it is as convenient as possible and
there are no wires
(you can also connect via USB, but then the main idea - convenience - is lost).
You can download the application itself and the PC client here:
- Install the program on your Android smartphone
- Install the Reciever client program on your PC
- Connect your smartphone and PC to the same router
Answers to popular questions
How to connect a Wii joystick?
To do this, install the Wiimote Controller , activate pairing via Bluetooth. Next, click in the Search and Connect , and on the controller hold down buttons 1 and 2 . The application finds the joystick. Click on this model in the list that appears. Ready.
How to connect a wireless joystick to an Android phone via Bluetooth?
Please note that for such a connection, the joystick must have a built-in Bluetooth module, and not operate via a radio signal. If there are no problems with this, then you need to download a special program, thanks to which the devices will be paired. Standard Bluetooth activation in the notification shade will not be enough.
Stage 2: Setup
Configuring a controller in Android depends on whether a particular application supports working with it. If this feature is officially declared, the setup is done directly through it. Otherwise, you will have to use a special shell. The procedure in one or the other version has the same principle, so as an example we will show it for the multi-system emulator RetroArch.
- This program has an auto-detection feature - to use it, simply launch RetroArk with the controller connected and press any button on it.
- If you want to assign controls yourself, open the settings panel and tap “Enter.”
- Next, tap “Port 1 Layout”, which is responsible for the main gamepad.
- There are two types of configuration - sequentially all at once, or each parameter separately. For the first, use the "Assign all controls" option and follow the onscreen instructions.
To set individual items, scroll the page a little lower, then tap on the desired one and perform the suggested action.
- After assigning the buttons, you need to additionally set a combination to call up the emulator menu - return to the “Input” page and use the “Hot Keys” item, in which select “Menu Call Combination” and set the desired one.
- To disable the virtual gamepad, go to “Settings” – “On-screen display” – “Overlay” and turn on the “Show overlay” switch.
As you can see, there is nothing complicated.
