Sleeping your computer has many benefits. It allows you to leave your computer on if you need to go away and temporarily interrupt your work, without the risk of losing your data. Moreover, sleep mode is a power-saving state in Windows that can extend the life of your laptop's battery.
When the computer goes to sleep, it stores the current context in RAM. It will take literally two seconds for the system to get back to work. Sometimes problems arise with this mode that are difficult to solve on your own. In this case, you can disable sleep mode for a while.
How to remove sleep mode on your computer
What to do if power settings are not available
Often, adjusting the power supply helps to cope with the attenuation, but it also happens that after changing some parameters, when saving them, an error appears indicating that the data about the current power plan cannot be viewed. Typically, people using Windows 7 Basic or Starter editions encounter such problems.
You can solve the problem as follows:
Note! If all else fails, you can reset the operating system to its original settings or perform a simple reinstallation. This may solve the problem if the power configurator software has been corrupted at the software level.
The scope of the current scheme
Thus, it was explained how to disable monitor dimming in Windows 7 and change the corresponding settings in a special section of the “Control Panel”. To turn off fading or screen saver, you do not need to use the registry or command line. What can be changed is in the “Control Panel”.
Source
How to increase computer wait time? — Simply about computers
In order for the results of the Windows 7 boot acceleration procedure to be somehow recorded, before you start using this tweak, you should measure the current boot speed of Windows 7 using any method and write down the results.
Since we will not use tweakers at the first stage, and we will have to change the registry settings, I recommend making a current copy of the registry and saving it.
To launch the Registry Editor, press the Win+R key combination and type regedit .
To save the current state of the registry, select File - Export from the main menu and save the file under any name.
To restore the registry to its previous state, select File - Import from the main menu and specify the saved file.
And one more note : if you are not sure, do not touch the registry! If you are interested in this topic - loading Windows 7 and ways to speed it up, but you are very poorly versed in the concepts, try doing this with a more competent friend.
Method one - automatically changing registry settings
1. Download the REG file with the new registry parameters, unpack it (there should be a speedwin7.reg file) and run it (double-click on it).
SpeedWin7
2. Restart the computer and check the download speed. Let's compare the results. For example, my measurement results showed an improvement in loading by 20 seconds.
Method two - changing parameters manually
This method may be interesting for those who like to experiment with parameters. Therefore, there is nothing special to explain here, we can only give a definition of the changeable parameters.
Open the file of new registry settings that you downloaded, open it in Notepad, set the parameters that you consider necessary and save the file. After that, run your REG file and reboot the system.
Contents of the REG file and comments to the parameters.
Windows Registry Editor Version 5.
00 [HKEY_CURRENT_USER\Software\Microsoft\Windows\CurrentVersion\Policies\Explorer] "NoLowDiskSpaceChecks"=dword:00000001 "LinkResolveIgnoreLinkInfo"=dword:00000001 "NoResolveSearch"=dword:00000001 "NoResolveTrack"=dword: 00000001 "NoInternetOpenWith"=dword: 00000001 [HKEY_CURRENT_USER\Control Panel\Desktop] “AutoEndTasks”=”1” “HungAppTimeout”=”1000” “MenuShowDelay”=”0” “WaitToKillAppTimeout”=”2000” “LowLevelHooksTimeout”=”1000” [HKEY_LOCAL_MACHINE\SYSTEM\Con trolSet002 \Control] "WaitToKillServiceTimeout"="1000" [HKEY_LOCAL_MACHINE\SYSTEM\ControlSet001\Control] "WaitToKillServiceTimeout"="1000" [HKEY_LOCAL_MACHINE\SYSTEM\CurrentControlSet\Control] "WaitToKillServiceTimeout"="1000" [ HKEY_USERS\S-1-5 -19\Control Panel\Desktop] “AutoEndTasks”=”1” “HungAppTimeout”=”1000” “MenuShowDelay”=”0” “WaitToKillAppTimeout”=”2000” [HKEY_USERS\S-1-5-20\Control Panel\ Desktop] “AutoEndTasks”=”1” “HungAppTimeout”=”1000” “MenuShowDelay”=”0” “WaitToKillAppTimeout”=”2000”
NoLowDiskSpaceChecks = Disable notifications about low disk space.
LinkResolveIgnoreLinkInfo = Disables checking for mapping shortcuts to programs (Windows checks the paths in the shortcuts that are on the desktop every time you boot, and if it doesn’t find a program in the path specified in the shortcut, it starts searching for the program, wasting time accordingly)
NoResolveSearch = Prevents Windows 7 from searching for the target device by its shortcut.
NoResolveTrack = disables Windows 7's NTFS snooping functionality when searching for target shortcut files;
NoInternetOpenWith = Specifies whether to use Microsoft Web Services to find applications to open files with raw file associations.
AutoEndTasks = Automatically terminate frozen applications
HungAppTimeout = indicates the time interval at the end of which the program is considered to be frozen after the user has pressed the end program button and the program does not respond during this specified time.
MenuShowDelay = time delay after the user clicks on the Start menu
WaitToKillAppTimeout = Set the time interval for waiting for unresponsive programs when shutting down the Windows 7 operating system. If the value of the AutoEndTasks described above is set to "1", then the system terminates the process automatically.
LowLevelHooksTimeout = Time before shutting down a hung service in Windows 7
WaitToKillServiceTimeout = The parameter is responsible for the time that the operating system gives to all services to complete their work before Windows 7 begins to shut down
Close the laptop lid
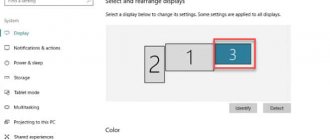
You can configure your laptop so that when you close the lid, the screen turns off, but the computer continues to work.
To do this, go to Settings > System > Power & Sleep > Advanced power options and select "What happens when you close the lid" in the left pane. Next, select “Do nothing” next to the “When closing the lid” option.
Ready! Now, when you close the laptop lid, the screen will turn off, but the laptop itself will continue to work.
How to change screen timeout on Windows 7
» windows 7 » How to change screen timeout on windows 7
Hello! I haven’t written anything useful on the blog for two days; I was busy with one very important thing, which I’ll tell you at the end of the article :). And right now I’ll tell you how to disable sleep mode and turn off the display in Windows 7. You probably know that if you leave the computer alone, do not press keys or touch the mouse, then after a certain time the screen will turn off and it will go into sleep mode, that’s all this is done to save energy.
All this is of course good, you need to save energy, global warming and other disasters, but automatic switching to sleep mode very often brings a lot of trouble, as well as automatically turning off the screen.
Perhaps you have had cases when you watch a movie most often online, and every approximately 10 minutes the screen turns off, you need to press keys or move the mouse. Or they left something to download from the Internet, but the computer went into sleep mode and everything stopped, these are the problems. And in order to solve them, you just need to disable automatic screen shutdown and sleep mode. That's what we'll do now.
Click Start and go to Control Panel.
In the control panel, look for “Power Options” and select it.
Automatic screen shutdown and sleep mode can be configured differently for two plans: “Balanced” - this plan is most often activated on desktop computers and laptops connected to the mains. And “Energy Saving”, this one usually turns on automatically when the laptop is disconnected from the power supply. Let's set up for the “Balanced” mode, click opposite it “Power plan settings”.
As you can see, I have the screen turn off after 10 minutes, and automatically go into sleep mode after 30 minutes. All you need is to simply change the time, or completely disable these actions by selecting “Never”. After making changes, do not forget to click the “Save Changes” button.
That's it, friends, now you can safely watch movies and leave the download for a long time. The computer will not automatically turn off the monitor and will go into sleep mode.
And a few more words about what I was busy with these two days. I'm making a new design for the blog, which if everything goes well in a few days can be seen on this blog, so come back, I'll wait :), I won't say anything more. Good luck friends!
Keyboard shortcut
Pay attention to the very top row of buttons on your keyboard, where the F1-F12 keys are located. As a rule, they contain various images.
For example, on Asus laptops the F7 key shows a monitor with a cross. When you press this button in combination with the Fn key, the laptop monitor turns off. The laptop continues to work. When pressed again, the monitor turns on again.
An example of the location of the display off button on the F7 key
For Acer laptops this combination is different. Fn + F5 or Fn + F6 depending on the model. At the same time, the screen off button also has a corresponding image.
An example of the location of the display off button on the F5 key
Look closely at the top row of the keyboard button on your laptop and find an image that looks like a monitor. Try pressing this button once in combination with the Fn button, as well as without it.
An example of the location of the display off button on the F10 key
Fn button on the keyboard