Windows 10 takes copying and pasting text to the next level with a feature called Clipboard History, which lets you see a list of items you've recently copied to the clipboard. Just press Windows + V to view your clipboard history.
What is saved in the clipboard history?
Clipboard history first appeared in the Windows 10 October 2022 Update (version 1809).
Currently, clipboard history supports text, HTML, and images smaller than 4MB. Larger items are not saved in history. Clipboard history stores up to 25 entries, with the oldest items disappearing as new ones appear. Additionally, if an item is not pinned to the clipboard, the clipboard history list will be reset every time you restart your computer.
Clipboard history feature
The October update to Windows 10 introduces a feature that allows you to track the presence of copied items and gives you the ability to reactivate previous ones. The option will be useful for users who often use the “Copy”, “Cut” and “Paste” commands.
If you have encountered situations where you accidentally copied part of the text, overwriting an important element that was copied earlier, then this function will be useful to you. With its help, you can view a list of previously downloaded parts of text or images for insertion, and select the one that should be active at the current time.
In addition, it is possible to add history to the data synchronization option in your Microsoft account, so you can exchange buffered content with other Windows 10 devices. For example, when using a personal or corporate laptop on which you log in with a Microsoft account. Thanks to which fragments of text loaded into memory on one laptop will appear on the clipboard of another.
Enable clipboard history in Windows 10
This function allows you to view all the elements copied previously and select the one you want to activate at the current time. However, it is disabled by default in Windows, so if you need to use it, you must enable it manually.
Open the Start menu, click on the gear icon to enter Settings. Then go to the "System" section. From the side menu, select the Clipboard tab.
Oh to turn it on. History will now be available.
Press the Win+V button combination. A window will appear in the lower right corner of the screen in which you can view a list of downloaded fragments. Click on the selected fragment to activate it for insertion.
To synchronize content between computers, you need to enable the “Sync across devices” option. Located on the same settings tab.
To enable this option, click on the “Get Started” button. A new window will appear to log into your Microsoft account, where the copied items will be synchronized and displayed on other devices through the same account.
When you log in, you will be asked to confirm your identity, for example, via a code via SMS to the phone number specified in your Microsoft account settings. After verification, synchronization settings will appear.
Content from temporary data storage can be synchronized automatically or on demand. If we enable automatic synchronization, then all elements will be displayed immediately on other devices.
If we don’t want to synchronize everything automatically, we need to specify the second item (see figure). Then press Win+V and specify the desired fragment that you want to exchange with other computers.
How to paste text on your phone?
Select the desired fragment. Click Copy. Touch the screen where you want to paste the copied fragment and hold down. Click Insert.
Interesting materials:
How can you say in other words that she is beautiful? How to inflect Latin words? How to inflect the word citizen? How to divide words into syllables? How do you hear the word day? How to put commas in an introductory word? How do you understand the word courageous? How do you understand the word feat? How to remove automatic word hyphenation in Word 2007? How to remove automatic word entry?
How to view the clipboard on Windows 10 and remove data from it
Let's look at a built-in and third-party tool for displaying the contents of the clipboard.
Is it possible to do this with built-in system resources?
In Windows 10, a standard ability has appeared to view what you previously copied on your computer. It is only available in versions “tens” 1809 and higher. By default, the function is active in the settings. How to launch the built-in application for viewing the buffer and what you can do in it:
- Just hold down the Windows key combination and V on the keyboard. After a couple of seconds, a buffer window will appear. In it, copied items are presented in the form of tiles. Scroll through the list and find out what you have already copied during this session of work in Windows 10.
In the buffer window, you can select a previously copied fragment to paste in the active window
If you do not see a window with a buffer, you may have an outdated OS version - update the system. If you have build 1809 or higher, enable the buffer view option:
- Go to Windows Settings using the Windows key combination and I or through the Start button (gear icon). Go to the system section.
Click on the “System” tile
Enable buffer log in menu
What utilities can you use?
If it turns out that your “top ten” build is inferior, or if you are not satisfied with the built-in functionality for viewing the buffer, you can always download a third-party tool. For example, you can take CLCL, Clipdiary, Office Word or Free Clipboard Viewer.
We will look at working in a third-party program using Clipdiary as an example. In it you can create entire folders of important copied elements, various templates, and restore accidentally deleted elements. The utility is paid, but the developer provides a free period of use (two whole months):
- Go to the developer’s website and download the program. We install it on the PC.
- Launch the utility and click “Next” for the initial setup.
Click immediately on “Continue”
Select a combination and click “Next”
Familiarize yourself with how the program works
Do the exercise on the page
To view the clipboard in the "ten" you can use the built-in tool if you have build 1809 or higher. If below, download an additional program, for example, Clipdiary. This program has more features than the built-in one: creating templates, folders with important copied elements, etc.
How to view the Windows 10 clipboard
All Windows operating system users use the clipboard, even if they don't know about it. Since the copied text goes to the clipboard, and from there it is pasted into the right place.
Therefore, in this article we will talk about how to view the Windows 10 clipboard, as well as how to clear the Windows 10 clipboard yourself. Actually, the operating system itself does not allow built-in tools to view data on the clipboard; for this we will use third-party software.
Viewing information from the clipboard
First of all, it must be said that there is no separate clipboard tool as such. BO is a regular section of PC RAM where any information is written when copied. All data stored in this area, like all other contents of RAM, is erased when the computer is restarted. In addition, the next time you copy, the old data on the clipboard is replaced with new ones.
Let us remind you that all selected objects are added to the clipboard to which the combinations Ctrl+C, Ctrl+Insert, Ctrl+X or through the “Copy” or “Cut” context menu are applied. Screenshots obtained by pressing PrScr or Alt+PrScr are also added to the BO. Individual applications have their own special means for placing information on the clipboard.
How to view the contents of the clipboard? On Windows XP, this could be done by running the system file clipbrd.exe. But in Windows 7 this tool is missing. Instead, the clip.exe file is responsible for the operation of the BO. If you want to see where this file is located, then go to the following address:
It is in this folder that the file we are interested in is located. But, unlike its counterpart on Windows XP, the contents of the clipboard cannot be viewed by running this file. On Windows 7, this can only be fully done using third-party software.
Let's find out how to view the contents of a BO and its history.
Method 1: Clipdiary
Using standard Windows 7 methods, you can view only the current contents of the clipboard, that is, the last copied information. Everything that was copied before is cleared and is not available for viewing using standard methods. Fortunately, there are special applications that allow you to view the history of information placed in the BO and, if necessary, restore it. One such program is Clipdiary.
- After downloading Clipdiary from the official website, you need to install this application. Let's look at this procedure in more detail, since, despite its simplicity and intuitiveness, the application installer is equipped with an exclusively English-language interface, which can cause some problems for users. Run the installation file. The Clipdiary installer welcome window opens. Click "Next".
A window with the license agreement opens. If you understand English, you can read it, otherwise just click “I Agree”.
A window opens indicating the application installation directory. By default, this is the “Program Files” directory of drive C. If you have no significant reason for this, then do not change this parameter, but simply click “Next”.
In the next window, you can choose in which Start menu folder to display the program icon. But we recommend leaving everything unchanged here too and clicking “Install” to start the application installation procedure.
The Clipdiary installation process starts.
Upon completion, a message indicating the successful installation of Clipdiary will be displayed in the installer window. If you want the software to be launched immediately after exiting the installer, then make sure that the checkbox next to “Run Clipdiary” is checked. If you want to delay the launch, then this checkbox must be unchecked. Perform one of the following actions and click “Finish”.
After this, the language selection window opens. Now you can change the English-language installer interface to the Russian-language interface of the Clipdiary application itself. To do this, find and highlight the value “Russian” in the list and click “OK”.
The “Clipdiary Settings Wizard” opens. Here you can customize the application according to your preferences. In the welcome window, simply click “Next”.
The next window prompts you to set a hotkey combination to call up the BO log. The default is Ctrl+D. But if you wish, you can change it to any other by specifying the combination in the corresponding field of this window. If you check the box next to the “Win” value, then this button will also need to be used to open the window (for example, Win+Ctrl+D). After the combination is entered or left as default, click “Next”.
The next window will describe the main points of working in the program. You can familiarize yourself with them, but we will not dwell on them specifically now, since a little further we will show in detail how everything works in practice. Click "Next".
The “Practice Page” opens in the next window. Here you are invited to try for yourself how the application works. But we will look at this later, for now check the box next to “I understand how to use the program” and click “Next”.
After this, a window opens asking you to select hot keys for quickly inserting the previous and next clip. You can also leave the default values (Ctrl+Shift+Up and Ctrl+Shift+Down). Click "Next".
The next window again asks you to try the steps using an example. Click "Next".
It then tells you that you and the program are now ready to go. Click Finish.
Clipdiary will run in the background and capture all data that comes into the clipboard while the application is running. There is no special need to launch Clipdiary, since the application is registered in autorun and starts along with the operating system. To view the BO log, enter the combination that you specified in the “Clipdiary Settings Wizard”. If you have not made any changes to the settings, then by default this will be the Ctrl+D combination. A window appears that displays all the elements that were placed in the BO during the program’s operation. These elements are called clips.
You can immediately restore any information that was placed in the BO during the program’s operation, which cannot be done with standard OS tools. Open the program or document into which you want to insert data from the BO history. In the Clipdiary window, select the clip you want to restore. Double-click on it with the left mouse button or press Enter.
- The data from the BO will be inserted into the document.
Method 2: Free Clipboard Viewer
The next third-party program that allows you to manipulate the BO and view its contents is Free Clipboard Viewer. Unlike the previous program, it does not allow you to view the history of placing data on the clipboard, but only the information that is currently there. But Free Clipboard Viewer allows you to view data in various formats.
- Free Clipboard Viewer has a portable version that does not require installation. To start working with the program, just run the downloaded file.
On the left side of the interface there is a list of various formats in which you can view the data placed on the clipboard. By default, the View tab is open, which follows a regular text format.
In the “Rich Text Format” tab you can view data in RTF format.
The “HTML Format” tab opens the contents of the BO, presented in the form of HTML hypertext.
The “Unicode Text Format” tab displays plain text and encoded text, etc.
If there is a picture or screenshot in the BO, the image can be viewed in the “View” tab.
Method 3: CLCL
The next program that can show the contents of the clipboard is CLCL. It is good because it combines the capabilities of previous programs, that is, it allows you to view the contents of the BO log, but also makes it possible to see data in various formats.
- CLCL does not need to be installed. Just unpack the downloaded archive and run CLCL.EXE. After this, the program icon appears in the tray, and in the background it begins to record all changes that occur in the clipboard. To activate the CLCL window to view BO, open the tray and click on the program icon in the shape of a paperclip.
The CLCL shell starts. On the left side there are two main sections “Clipboard” and “Journal”.
When you click on the name of the “Clipboard” section, a list of various formats opens in which you can view the current contents of the BO. To do this, just select the appropriate format. The content will appear in the central part of the window.
In the “Log” section you can look at the list of all the data that was placed in the BO during the operation of CLCL. After you click on the name of this section, a list of data will open. If you click on the name of any element from this list, the name of the format that corresponds to the selected element will open. The contents of the element will be displayed in the center of the window.
Method 4: Standard Windows Tools
But perhaps there is still an option to view the contents of the BO using the built-in tools of Windows 7? As mentioned above, there is no such complete method. At the same time, there are still small tricks that allow you to look at what BO currently contains.
- To use this method, it is advisable to still know what type of content is on the clipboard: text, image or something else.
If there is text in the BO, then to view the contents it is enough to open any text editor or processor and, placing the cursor on an empty space, use Ctrl + V. After this, the text content of the BO will be displayed.
If the BO contains a screenshot or picture, then in this case open an empty window of any graphic editor, for example Paint, and also apply Ctrl+V. The picture will be inserted.
If the BO contains an entire file, then in this case you need to use the Ctrl+V combination in any file manager, for example in Explorer.
Method 5: Internal clipboard of programs on Windows 7
In addition, some programs that run on Windows 7 contain their own clipboard. Such applications include, for example, programs from the Microsoft Office suite. Let's look at how to view BO using the word processor Word as an example.
- While working in Word, go to the “Home” tab. In the lower right corner of the Clipboard block, which is located on the ribbon, there is a small icon in the shape of an oblique arrow. Click on it.
The content log of the Word program BO opens. It can contain up to 24 of the most recently copied items.
As you can see, Windows 7 has rather limited built-in tools for viewing the contents of the clipboard. By and large, we can say that there is no full-fledged ability to view content in this version of the operating system. But there are quite a few third-party applications for these purposes. In general, they can be divided into programs that display the current contents of the BO in various formats, and applications that provide the ability to view its log. There is also software that allows you to use both functions at the same time, such as CLCL.
Thank the author and share the article on social networks.
All Windows operating system users use the clipboard, even if they don't know about it. Since the copied text goes to the clipboard, and from there it is pasted into the right place.
Therefore, in this article we will talk about how to view the Windows 10 clipboard, as well as how to clear the Windows 10 clipboard yourself. Actually, the operating system itself does not allow built-in tools to view data on the clipboard; for this we will use third-party software.
What is a clipboard
The clipboard itself was created to simplify the use of your computer and save your time. Because with the help of the clipboard you can copy and save not only text, but also other objects, such as images.
To use the clipboard, all you need to do is copy text or any other object. To do this, you can use Windows 10 hotkeys.
| Ctrl+V or Shift+Insert | paste text from clipboard |
| Ctrl+C or Ctrl+Insert | copy selected text to clipboard |
| Ctrl+X | cut selected text to clipboard |
| Ctrl+A | select all text in the current line if the line contains text |
| Win+V | open clipboard history (available since version 1809) |
The clipboard application itself has been located in the path C:Windowssystem32 Windows XP and is called clipbrd.exe . After switching to Windows 7, active users may have noticed changes in the name, which became clip.exe .
The main difference between clipbrd.exe and clip.exe was that in Windows XP you could easily open the clipbrd.exe and view the data on the clipboard. In new versions of the Windows operating system, this feature has already disappeared.
How to view the Windows 10 clipboard
Since Windows 10 users now cannot use the built-in clipboard application, we will have to download a small utility. We offer two clipboard viewing utilities CLCL and Clipdiary. You can also take advantage of the additional features of the office software package.
Windows 10 version 1809 and later
In Windows 10 version 1809, you can use the built-in clipboard history. It is now possible to save multiple items to the clipboard for later use. You just need to press the Win+V key combination to view the clipboard history and paste an element from it.
It also became possible not only to go to the clipboard and paste a previously copied element, but also to enable synchronization between devices. When this feature is enabled, Microsoft will receive clipboard data to sync with other devices.
CLCL - clipboard caching utility
The advantage of this utility is the presence of the Russian language and a really simple interface.
- Download the CLCL utility from the link: www.nakka.com/soft/clcl/index_rus.html.
- Launch CLCL.exe from the archive.
- Then we can simply copy the text.
- Then on the taskbar we look for the icon CLCL and launch the utility.
- Go to the Journal and look at everything that was copied to the clipboard. You can also use
Clipdiary - View clipboard history
The downside of this utility is the need to activate the program and a trial period of 30 days. A plus is the presence of a more convenient interface and the possibility of free activation of the program.
- Download the program from the link: clipdiary.com/rus/ . I recommend the portable version of the program.
- Launch the program and select the interface language.
- Next, follow the Clipdiary Settings Wizard to configure and get acquainted with the program.
- Now all data that ends up on the clipboard will be saved in the program window. Here you can copy the necessary data.
Microsoft Office Word
Although few people know, in Microsoft Word it is possible to look at the clipboard and see what was on it until the last time. To do this you need:
- Click on the Clipboard button.
- And in the list below you can see everything that is in it.
- If necessary, you can paste everything or clear the buffer.
Windows 10 October 2022 Update (1809)
In November 2022, a new version of Windows 10 was released, called Windows 10 October 2022 Update (1809). One of the improvements in this version is the new clipboard. Now the user can view the history of copied data and use cloud synchronization of this data on different computers.
To control the operation of the new function, a new section has been added to the Settings menu. In order to access it, you need to open the “Options” menu (Win-i combination) and go to the “System - Clipboard” section.
There are two options available in the “System – Clipboard” section:
- “Clipboard history” – enable or disable clipboard history. After enabling this option, the user can view the latest copied elements (Win-V) and paste them into any programs.
- “Synchronization between devices” – enable or disable synchronization between your devices. After enabling this option, the user can copy data on one computer and paste it on another. For this feature to work, all computers must use the same Microsoft account.
If you do not have the “System - Clipboard” section in the “Options” menu, then most likely you have not yet updated Windows 10 to version 1809. In this case, you need to check the version of Windows 10 and update.
How to clear the Windows 10 clipboard
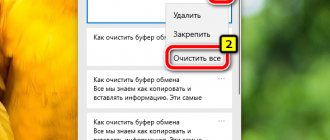
To clear the clipboard in Windows 10, you can use just one command. Be careful as this command will completely clear your clipboard. And with the help of previous programs you can clear the clipboard in any order.
- Launch the command line as administrator.
- Insert and execute the command: echo off | clip.
In this article, we learned how to view the Windows 10 clipboard and how to clear it if necessary. All these utilities are very convenient and it is possible to download a portable version of the programs, and Microsoft Office is installed on every computer with the Windows operating system.
After updating to version 1809 of the Windows 10 operating system, the user receives additional functionality for working with the clipboard. Therefore, to take advantage of the new built-in clipboard history, we recommend updating to the latest version of the Windows 10 operating system.
Convenient programs for working with the clipboard
There are a large number of programs that are designed to interact with BO. Most of them are free and have a simple interface. The most popular are the following:
- CLCL 1.1.2 program for Windows;
- MemInfo - minimalistic task manager;
- Comfort Clipboard - a convenient manager;
- Clipdiary - view clipboard history;
- Free Clipboard Viewer.
Clipdiary - utility for viewing history
The program has many advantages - it takes up little space, simple and accessible functionality. As for the disadvantage, it has a trial period of 30 days, after which activation is required.
At home, it will work if you follow the following instructions:
- Download the program installation file on the official website of the developers. It is recommended to give preference to the portable version of the program.
- After downloading, enter the utility and select your preferred interface language.
- Then the user needs to go to the “Settings Wizard” to set the required parameters.
Now in the utility window you can find all the data that goes into the BO. From here the information can be copied repeatedly.
Clipdiary program interface
The clipboard is a built-in option that makes using your PC much easier. Its use is very simple, even beginners do not have any difficulties.
How to view and clear the clipboard in Windows 10
We've all asked this question. But usually the solution came down to replacing the data with others by copying a small part of the text (so to speak, “cleaned up”). But what if the copied information is needed, but the data type is unknown? Let's look at how to view and clear the clipboard in Windows 10.
Let's start with the fact that the clipboard is an area of RAM in which a copied (Ctrl+C) or cut (Ctrl+X) object is stored. It can be text, image, file, etc. You can paste (Ctrl+V) the content into the appropriate location: a text editor, a folder on your hard drive, etc. You can also perform these operations using the right-click context menu.
How to view the clipboard?
There are several ways to view copied content.
Insertion into a suitable environment
If the type of data on the clipboard is known, the user can guess where it is displayed. For example, the text should be looked at in any text editor, and the file should be looked at in a folder on your hard drive.
Using third party software
For heavy users of office applications, it is recommended to download the CLCL application. It will allow you to view, edit and clear the clipboard in two clicks.
How to clear the clipboard?
If you know or are not interested in the information stored in RAM, you can delete it. There are several ways to do this.
Replacing content
Regular replacement of information. If the clipboard stores video files, photos or other large objects (and all of this affects the speed of the computer), then you can simply copy part of the text or a shortcut, which will take up to 3 megabytes of RAM and will not affect the performance of the system.
Where is the clipboard saved on the phone?
Clipboard
is located in the device's RAM.
As such, there is no specific location for the clipboard
. RAM automatically allocates the required amount of resources for temporary storage of the copied file.
Interesting materials:
How to enable eSIM Pixel? How to enable cookies in the browser on Samsung? How to enable cookies in the iPhone browser? How to enable cookies in chrome? How to enable Fast Boot in BIOS? How to enable face ID on the application? How to enable ID's face while wearing a mask? How to enable face ID? How to enable TP Link MAC address filtering? How to turn on fitness bracelet 5?