Hello! As we all know, when registering a new Apple ID, be sure to indicate your mailbox, which will subsequently be your login in the system. All services, iCloud, iTunes, App Store, etc. will be linked to it. True, at first not much attention is paid to this. After all, the main thing is to start using the device as quickly as possible. And what kind of email account the account is registered in... it doesn’t matter!
But then the realization comes that too many things are connected with this particular Apple ID (purchases, downloads, backups), but no one remembers the email to which the ID was originally registered. This means you urgently need to change it to another one. How to do this? This is what we will talk about today.
Are you ready? One, two, three, let's go!
What to do if you forgot your backup password?
If you forget your backup password, you won't be able to view that backup or use it for anything. If you accidentally use other passwords, you may see a note: “ The password you entered to unlock your backup was incorrect
.” At this time, I'm sorry to tell you that your backup can no longer be used, but you should try: (Can't find the app on your iPhone or iPad?)
1. Ask someone who knows your password.
2. Check if you have iCloud backups later. If you have it, please use it or back it up via iCloud now.
3. Try using an old iTunes backup.
If you still have problems logging in with your Apple ID and password, please leave your message in the comments. How to start recording on iPhone and iPad with one click?
Apple ID is a unique identifier that is automatically assigned to each user in the system. When registering, each new buyer simply cannot avoid the procedure of assigning such a unique name.
Each user of Apple products must have their own personal code
However, many do not pay due attention or simply forget the data that was entered. And when any service requires entering an Apple ID, the user asks the question: “Where can I get it?” Let's take a closer look at how to get information about your Apple ID if it is: forgotten or simply reset along with all device parameters.
Naturally, it is best to find out your registration details directly from a company representative. To do this, just go to the official Apple website and enter the required data in the request form. If you did not provide false information during registration, the method for finding out your Apple ID is quite simple:
- How to delete an account on iPhone 4s
- We go to the official website.
- Go to the “My Apple ID” page.
- Find the “Find” item.
- Enter the requested data: first name, last name, email address, and so on. If the exact address is also forgotten, you can enter several (the system provides this option). Use the e-mail that was most often indicated during various registrations.
Next, the system will prompt you to reset your access password. Apple ID is not possible, but you can change it. Protection from intruders is simple - you not only need to indicate the date of birth of the ID owner, but also go through an additional authorization procedure. This can be either a confirmation by email specified in the registration data, or an answer to the security question that was entered when the identifier was first created.
If everything is done correctly, the user receives his Apple ID and access to it. Of course, it is better to change the new password immediately for security reasons.
Create an account using iPhone
You can create Apple company accounts directly from your iPhone. To do this, there are two options: go through standard registration, in which you need to provide information from your bank cards to make payments, or create an Apple ID without a credit card. Up-to-date payment information will be required if you purchase any software from the AppStore. If you do not plan to make purchases and do not want to do it accidentally, for example, by mistake. We recommend using the second, more sophisticated method.
The standard procedure is carried out as follows: you need to open the iTunes Store, App Store tab and find the “Create a new Apple ID” item there.
If you want to register an Apple ID without payment cards and for free, proceed as follows:
- Go to the App Store.
- Select a game or application that is offered for free.
- Download and wait for it to install on your iPhone.
- The next step is to log into an existing account or create a completely new one. When prompted, select “create a new ID.”
After this, the steps are similar in both options:
- If you do not want to link a card, for one reason or another, it is better to set Russia as the country, even if you live in another country - this will give you a wider selection of applications, programs and other things.
- After this, you need to carefully read and accept the standard user agreement.
- Then personal information is entered. When specifying your existing email address and password, be careful - for security reasons, the password must consist of at least eight characters and have letters in both cases.
- When indicating your age, please note that you cannot indicate less than 13 years of age, and if you indicate less than 18, access to the content will be limited.
- It is best to save the answers you enter to security questions in a text file or write them down on paper and hide them. This is done so that, if necessary, you can quickly and safely restore access to your account.
- If you register using the first method, you will then need to enter payment information.
- The procedure is completed.
After this, you need to go to the mailbox that was used to create the account. You should receive a letter from technical support confirming the creation of your Apple ID. For the first apple id registration to go quickly and correctly, just click on the highlighted link in the text of the letter.
Request the email to be sent again
To resend the letter, repeat the procedure for recovering your password or security questions. Apple will send a follow-up email to your primary or backup email.
If you want to request an Apple ID verification email, go to My Apple ID, select Manage your Apple ID , and sign in to your account. Click the Resend button next to the email address you want to confirm.
A letter will be sent to this email box containing a verification link.
How to create an Apple ID through iTunes
Launch iTunes on your computer and look for the “Login” button in the upper right corner. We click on it and in the window that opens, prompting us to either enter an existing Apple ID or create a new one, select “Create an Apple ID.”
Next comes a greeting, and then Apple invites you to read the company's terms, conditions and privacy policy, and only after that we proceed to filling out the Apple ID information.
Here we need to indicate an active e-mail, password, select security questions and give answers to them, indicate the date of birth and, if possible, a backup e-mail. Unlike registering an Apple ID from an iPhone or iPad (see below), iTunes does not offer to create a new @icloud.com mailbox, so you must have an e-mail and, importantly, an active one. After entering the required information, you will be redirected to the next page where you must indicate the payment method.
If you use a bank card, this registration step will not cause you any difficulties. Otherwise, read the instructions below.
How to create an Apple ID account without a card
The method of creating an Apple ID using the iTunes program requires, at one of the registration stages, to select a payment method and indicate a bank card number. This can be a problem for some, but it is very easy to solve.
You can create an Apple ID account without a card in iTunes. Launch iTunes and go to iTunes Store > App Store.
Here we are interested in any free application. We choose what we like and try to download it.
In this case, of course, the program will immediately prompt us to either specify an Apple ID or create a new one. We agree to create a new one and go through the same procedure for filling out the data described above. Moreover, at the stage of specifying the payment method, a pleasant surprise awaits us - the opportunity to refuse to select a card.
We select “No” in the “Payment Method” line, after which we only need to fill out the “Billing Address” section. You will no longer be required to provide an iTunes card. Don’t forget to check your mailbox afterwards and activate the created account.
You can also create an Apple ID without a card on your iPhone in the device settings. The following explains how to do this.
Via "Settings"
- Open default settings on your phone;
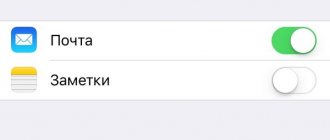
- Scroll to the iCloud item on the main page - below it is the email address that matches your email address.
Email addresses used with Apple ID
Your Apple ID uses email addresses to sign into your Apple account. With your Apple ID, you can access services like the App Store, Apple Music, iCloud, iMessage, FaceTime, and more. Your email addresses are used to send you account information and to help friends and members families communicate with you and share various data.
Before you use your new or updated Apple ID, we'll send you a verification email to make sure the email address is yours.
Apple ID email address
Additional email addresses
Many of us have multiple email addresses that we use to communicate with friends and family. Add your frequently used email address to your Apple ID so your friends and family can easily find and communicate with you through Apple services like FaceTime, iMessage, and Find My Friends.
To add an additional email address, follow these steps:
- 5 ways to unlock your iPad if you forgot your password
- Sign in to your Apple ID account page.
- Under Account, click Change.
- Below the Contact Details option, select Add.
- Please provide an additional email address and we will send a confirmation message to it.
- Enter the verification code and click "Verify".
Make sure the email address you enter is not used as your Apple ID. If you need to remove one of the additional email addresses, click next to the address.
What mistakes can be made?
To find out how to register an ID on an iPhone correctly, how to change the ID on the device, you need to know what mistakes to avoid. Most often, the following difficulties arise in the process:
- You don't want to make purchases on the App Store. To avoid even accidentally purchasing any paid content without providing bank card details.
- It is best to indicate your real age, but only if it is over 13, or better yet, over 18 years old. If you set the age to 12 years or less, the system simply will not allow you to create your own Apple ID. And if you indicate an age of less than 18, you will not have access to all content.
- If you managed to get an email address with an @iCloud.com or @me.com address, you will have to create a new email account to register an account for your iPhone. These addresses are not suitable for creating accounts.
- If the name you entered contains invalid characters, please note that there are no Russian letters in the email address, and that there are no extra symbols, dots, numbers, etc. in the first and last name.
- The password must be complex. If the password is too simple, the system will not allow you to complete the process completely. Numbers, large and small letters, symbols - the more of them in the password, the better.
- An obstacle to creating an ID on an iPhone can be a server failure. In this case, it is best to wait and continue after half an hour - an hour, when the servers are working properly.
In general, registering a new Apple ID does not take much time. Even an inexperienced user can carry out this operation if he follows the instructions.
We'll tell you how to set up and manage your Apple ID in the next article, stay tuned.
Benefits of using icloud mail
The iCloud service has long been a leader in the reliability and security of not only personal data, but also user correspondence itself. Even if the device with the entered email is lost, this will not reveal any personal data of the owner.
In addition, it is easy to return mail back after just a few simple operations. Apple has taken great care of the safety of its customers, so the cost of devices sometimes justifies their expensive use.
It's worth noting that compared to other email clients, iCloud has absolutely no ads and works great throughout its life. When a message is received, the device owner receives a push message indicating the received letter.
How to find out your mail settings through the Apple website
In order to find out what your mail settings are, you can simply use the Apple website. To do this, do the following (or just follow the link):
1. Select "Support".
2. Click "iPhone".
3. Scroll down the page and select the “Programs” tab.
4. Click Mail.
5. Tap “Search for Mail program settings.”
6. Enter your mailbox address.
As a result, the user will receive settings for the Mail program. This is a convenient and quick way that allows you to easily find out which mailboxes have already been integrated, how filters are configured, etc.
What is the difference?
It’s easy to see that there are practically no differences between two-step verification and authentication. Both require an Apple ID verification code to sign in, so what's the difference?
Apple claims that it is more reliable and modern protection. And although the user does not see the difference, the authentication system more effectively verifies devices and sends verification codes. Overall the optimization is much better.
Now you know where to enter your Apple ID verification code. But first the protection needs to be turned on.
Which ID can be changed and which cannot?
One thing I would like to say right away is that if your primary Apple ID email address ends with @icloud.com, @me.com or @mac.com, then such IDs cannot be changed to another email address.
Such IDs are created when registering with iCloud. Learn more about Apple accounts. Currently you can only register in the @icloud.com domain. The me.com and mac.com addresses remain from the previous services and are no longer issued.
An account that cannot be changed is both good and bad:
- The bad thing is that this is another mailbox and needs to be remembered. And there are no more beautiful names left in iCloud.com domains for a long time.
- The good thing is that even if someone finds out your ID and password, they will not be able to take away your account by replacing the e-mail with their own. This is how any shared account works. We'll talk about security settings later.
Well, if your ID does not end with @icloud.com, @me.com, @mac.com, then you have the right to change it.
Change Apple ID via Apple website
1. Open the My Apple ID website.
2. Follow the Manage Apple ID link and sign in.
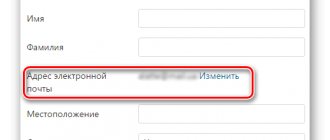
3. Selecting the “Name, ID and email addresses” field. email", click the "Change" button next to the "Apple ID and primary email" section.
4. Enter a new email address.
5. Make sure the email address you entered is:
- is used by you regularly because this will be the primary address for your account;
- is a valid email address;
- not yet associated with another Apple ID of yours;
- does not end with @mac.com, @me.com or @icloud.com.
You will be asked to verify your email address to confirm that you have access to it and that it belongs to you.
A confirmation email will be sent to the new address. Once you receive the message, click the "Check Now" link and sign in to appleid.apple.com with your new Apple ID and password to complete verification.
interesting
The iPhone 14 series will receive a new 5G modem
Apple took most of the profits from the smartphone market in 2021
Immediately after changing your Apple ID, you will not be able to log in with your old ID.
If you entered the new email for your Apple ID incorrectly
What happens if you incorrectly entered the e-mail address of the new ID. That mail confirmation will arrive at a non-existent address and you will not be able to confirm it. At the same time, you will no longer be able to log in using your old ID.
If you know a new, unverified Apple ID, then log in using it at appleid.apple.com.
You will see a window like this. Your mailing address has not been verified. Click on “Change” and enter the correct e-mail information.
After which the procedure will be repeated with a confirmation letter sent to the specified postal address.
And following the link from the letter you will be redirected to the Apple ID confirmation page.
If you forgot your Apple ID
What happens if you incorrectly entered the e-mail address of the new ID and did not remember it. Well, you just made a mistaken letter somewhere, but you don’t know where. This is exactly what happened to me when I wrote this article. This is where the ambush lies. Because the mail confirmation will arrive at a non-existent address and you will not be able to receive it.
You will no longer be able to log in using your old ID. But you don’t know the new one.
There is only one way to solve this problem:
Call Apple support +7 495 5809557 extension 4. Monday to Friday from 9 to 19:45.
I'll warn you right away.
They no longer have your old Apple ID in their database.
He disappears at the moment of change. But it can be found through the central support service, which must be contacted by a specialist from Russia. This takes about 20 minutes, so use a landline phone or Skype. You will then be asked to answer the security questions listed on your account. And if everything went well, they will tell you your new Apple ID. Knowing it, you can replace the postal address, as described in the paragraph above.
For this reason, I recommend using secret questions in your account that do not raise any doubts in your own mind. Also, link your device to your Apple ID by turning on Find My iPhone in iCloud. In this case, technical support specialists will be able to determine the ownership of the account by your iPhone number.
And further. Some issues can only be resolved by calling the Call Center. When communicating personally with support, you can even steal someone else's Apple ID if you know what to tell the operator
Determine if you need account recovery
Account recovery is a last resort option if you can't sign in or reset your Apple ID password using other methods. Before you begin this procedure, make sure it is right for you:
- Have you already tried to reset a forgotten password from a trusted device? This is the fastest way to reset your password. Do not start the account recovery procedure if you have forgotten your password if you have access to a trusted device that is protected by a passcode.
- Will you soon have access to a trusted device that will display the verification code required to log in? In this case, there is no need to start the account recovery procedure. It is usually faster to gain access to a trusted device than to wait for an account to be restored.
- If you can't access any of your devices, you can also try resetting your Apple ID or password from a friend or relative's iPhone, iPad, or iPod touch. Open Find My iPhone. If the sign-in screen appears, tap "Forgot your Apple ID or password?" and follow the onscreen instructions. Don't see the login screen? Tap Sign Out, then select Forgot Apple ID or Password.
Have you tried the previous steps but the problem was not resolved? It's time to resort to the account recovery procedure. To do this, use Settings on an iOS device or System Preferences on a Mac.
On an iPhone, iPad, or iPod touch
- Go to Settings > Sign in to [your device]. On iOS 10.2 or earlier, go to Settings > iCloud.
- Tap "Don't have or forgot your Apple ID," then select "Forgot your Apple ID."
- Enter your Apple ID and click Next.
- Enter your trusted phone number and click Next.
On a Mac
- Go to Apple menu > System Preferences and click the iCloud icon.
- Click "Forgot your Apple ID or password."
- Enter your Apple ID and click Continue.
- Provide a trusted phone number and click Continue.
- On-screen instructions will vary depending on whether you have access to a trusted phone number or other device. Complete the procedure.
Still unable to start account recovery? Only if you do not have access to a trusted iPhone, iPad or iPod touch or Mac computer, go to iforgot.apple.com. Enter your Apple ID, enter the code from the image and click the “Continue” button. Provide a trusted phone number and click Continue. Select "Can't access trusted devices or phone number?" Select "Start Account Recovery".
- How to create an American account in the App Store: instructions
Find out Apple ID on a Windows computer or Macbook
Provided that the user has previously logged in from a computer (even if you can’t remember your email), you can find it in iTunes. To do this you will need:
- Launch the program and go to the “Account” menu. The information will be at the very top of the user menu.
- Go to the Media Library. If there is at least one file there, this means that the user previously made a purchase with an ID.
- You need to go to the “Programs” section and right-click on any part of the window so that the context menu appears. Click “Information”.
- The “Buyer” column will reflect the necessary information.
Problem cases
Users often encounter rather unpleasant situations, for example, when they purchase something second-hand. The previous owner may forget or accidentally delete his registration data. For example, the tablet settings were reset. A full reset involves re-registering the device. And since it is already linked to the Apple ID, a password for the account is required.
Naturally, the new user does not know it. And he cannot reset it, since the exact data of the previous owner is unknown, and even more so there is no access to his email. There are two :
- Find out Apple ID by IMEI device. There are specialized services that, for a small fee, will provide information about the Apple ID and email of the previous owner. To begin with, you can simply write to the received address asking for a password.
- There are software and hardware ways to bypass the problem, but they do not work everywhere, not always, and can create problems in future work. Therefore, we will not list them.
- There remains a second working method - communication with the company's support service. You will have to answer a number of questions and prove that the device came to the new owner legally. After this, the credentials will be reset and the device will work.
Video on how to change Apple ID:
As practice shows, be careful about your registration data. When turning on your phone or tablet for the first time, record all entered and received data, and when buying a device from another person, require accounts and passwords. The minimum is an ID and password. And then in the future you will save yourself from many hassles and worries, such as communicating with support operators.
When generating an Apple ID, the user must come up with a complex combination of letters and numbers. It is extremely difficult to remember such a password, and few people think of writing it down in a safe place. As a result of all this, problems arise in the future when the password is simply forgotten.
If you find yourself in such an unpleasant situation, this material will help you out. Today we’ll talk about methods for recovering your Apple ID password so that you can once again taste all the delights of the Apple company’s ecosystem.
But there are situations that are more complicated. We are talking about when the login, that is, the e-mail, is also lost. If your iPhone does not have a block, you can find it in the settings. To do this, you need to go to iCloud and then to the AppStore item. This is how the e-mail used as login during registration will be given.
But if the gadget has a block and the user has completely forgotten the login, here’s another hint. Remember that it is just an e-mail address. Therefore, when creating an account, one of several mailboxes was specified. And all that remains to be done is to remember how many boxes are available and where they are located. Then you should log into each of them and try to look for messages from Apple. In the box where such messages are found, the ID will appear.
When everything has been figured out with the identifier, you can think about how to recover the password. As always, we offer several methods to choose from. Which one to choose depends on the specific situation and the information that has not been forgotten.
iTunes to the rescue
Alternatively, you can create an account for an iPhone or iPad using the official iTunes program. In this situation, you will be able to choose whether to provide information about your cards or not. Before you change your ID, you need to go to the menu and find the iTunes Store item there. If you want to learn how to create an Apple ID without payment data, as in the first case, you need to download any free application and go to this menu using it.
After this, the steps are standard in both cases:
- The system will offer to log in to a newly created, existing account or create a new one.
- Having chosen the option to create a new one, enter your data. As stated earlier, they must be factual for you to verify their authenticity.
- After this, you will have to answer security questions (it is better to write down the answers) and enter your card details or refuse this if you want to create an Apple ID without a credit card.
- After completing registration, be sure to go to your mailbox and immediately confirm creation in the mail using the highlighted link in the body of the letter.
If the letter is from those. support does not arrive for a long time, check your spam folders and filtered letters by other categories - often letters arrive there by mistake.
Different IDs
There is one more nuance - registration data is different for services. For example, the master ID is registered with iTunes. It can be used in iCloud to store your music collection and so on.
But the user can register separate identifiers for each service
. To find out what name is used by a specific service, tablet or phone. The relevant sections indicate the identifier used. It can be copied, rewritten and used wherever it is needed.
How to Set Up Gmail on iPhone
To set up Google mail on iPhone devices, you need to perform a number of simple manipulations according to the algorithm:
- Open the Mail application, which should be installed by default and its icon located on the phone's desktop.
- In the menu of options that opens, this time you need to click on the “Google” line to select this type of mail setting.
- In the next window, fill in all the fields: “Name”, “E-mail”, “Password”, “Description”.
- Click on the “Next” button to start checking the entered information. The verification may take some time. Its speed depends on the technical characteristics of the gadget.
- At the end of the check, a new menu will open in which you will need to go to the “Gmail” tab and move the sliders next to each field to the active position.
- Check the result. When the above steps are completed, the iOS operating system will send a notification that Gmail has been added to the device. After this, the user will be able to go to the Mail application and correspond with other people.
To avoid having to enter your Gmail login information on your iPhone every time, you can save your password in the Mail application settings.
How to add Yandex mail to iPhone
To add Yandex mail, there are several ways to do this - using the IMAP and POP3 protocol. But, before setting the settings for these protocols, you need to enable them. To do this, go to the official website in the settings.
A window appears where you need to select “Other” and go to the “Email programs” section.
It is necessary to check the protocols. After this, you can carry out all the necessary operations.
IMAP mail settings
The IMAP protocol is the storage of all messages on the server itself. This method is convenient for those who need to save all their data. To configure mail via this protocol, you need the following:
- Click on “Mail” on the desktop and select the “Other” section;
- In it, click on “Add an account”. In this section you need to indicate exactly the data that is available, that is, name, address, password and description;
- Select the IMAP protocol. To do this, specify the node name and outgoing mail address. For incoming mail it is “imap.yandex”, and for outgoing mail it is “spmt.yandex”;
- Synchronizing mail and notes. This will allow you to synchronize the information.
After this, you can freely synchronize Yandex mail on your iPhone and perform all the necessary manipulations.
POP3 mail settings
The main difference is that different outgoing and incoming sources are established. Other link addresses play a larger role, so these setup methods are different. This protocol also allows a copy of all letters to be saved, but they can be deleted manually using the web interface. On IMAP, deletion can occur directly using an email program.
Note! Deleting emails manually is much more difficult, so this method is suitable for those who carefully filter emails.
If we briefly explain the configuration device for this protocol, then first you need to carry out all the same settings as with IMAP, that is, allow access. Next, you need to enter the same section and enter the correct links:
- For incoming mail: pop.yandex;
- For outgoing: smtp.yandex.
By specifying these settings, the user must be authenticated and then simply save all entered data. The Yandex mailbox is saved using this protocol.
Create an Apple ID on a Windows computer
How to create an Apple ID on Windows? On a Windows system, there is only one way to create an Apple ID:
- Enter the Microsoft Store, which is available on the tenth version of the operating system.
- Search for, download and install the latest version of iTunes. This can also be done from the official Apple website.
- Launch iTunes.
- In the top panel of the program interface, select “Account”.
- Click on the “Login” item.
- Select "Create a new Apple ID."
- Follow the instructions provided by the system. Enter your email (in some countries and regions, you can use a mobile number).
- Please provide all required payment information. This is necessary for future purchases. If there is such a possibility and necessity, then select the “No” button.
- Confirm your email address. You will find a letter with instructions in your email inbox.
Email client applications for iPhone
For correspondence, we recommend using official programs from postal services. The algorithm of actions for all applications is the same:
- Install and launch the software.
- Enter your login and password.
- Login to your email client.
All settings are already built into the application, so the user does not have to manually enter the addresses of incoming and outgoing correspondence nodes. They do not always work correctly with multiple accounts. Developers monitor reviews in the store and respond when problems arise.
| Name | Advantages | Flaws |
| Yandex | You can read letters and view calendar events offline, supports multiple mailboxes. Convenient mode for transmitting coordinates with transition to Maps. | Errors after updates and on older iPhones. If there is a failure, emails will no longer be displayed. When the Internet is slow, attachments cannot be opened. |
| Gmail | Simple interface without unnecessary details. Connected with Google services, there are notifications about receiving letters and unread messages. | Intrusive advertising, no multitasking. Crashes on old gadgets. |
| Mail. RU | Supports multiple accounts, grouping emails by subject. You can access your email on your browser using a QR code. | The new interface is difficult to navigate. Errors on weak devices. A lot of advertising. |
How to sign out of mail on iPhone
If you need to delete an account from your smartphone, it is not necessary to reset the gadget to its factory configuration. Sequence of owner actions:
- Open settings.
- Go to the “Addresses and mail” section.
- In the accounts window, select the mailbox that needs to be removed from the iPhone. They press their finger on the name.
- In the account configurations o.
- Confirm actions. Activate the “Remove from iPhone” mode.
If the mailbox worked using the POP protocol, then all outgoing letters will be lost. We recommend saving valuable correspondence or redirecting it to other accounts. To save data, you must first reconfigure the application to IMAP. After synchronization, the information is duplicated on the server.
4.7/5 — (28 votes)
other methods
The service is a place where you can find out your Apple ID if it is completely and irretrievably lost. However, in most cases, the device is in working condition, and the ID data is simply requested by a new service. For situations like this, there is an easier way. The algorithm for how to find out your Apple ID using the settings of your tablet or phone is as follows:
- Let's go to .
- Select “Settings”. The Apple ID is indicated immediately below the window title, and there is a separate button for viewing it if, for example, the number of characters does not fit in width.
This is the easiest way. When registering a device for the first time, the identification number is entered here. Another way when you need to enter your Apple ID without having a phone or tablet at hand is to go to the email inbox to which the ID is linked. There you will receive a letter containing your password. Copying a line from there is useless - the input fields will not allow you to simply paste information, you will need to do everything manually.
Create an Apple ID on Mac
On a Macbook, you can create an Apple ID through the App Store or in the gadget settings. Let's consider each method separately.
App Store
How to create an Apple ID on Macbook through the App Store? Although the App Store interface on a Mac system differs from the mobile version, the actions are identical:
- Open the App Store on your computer.
- Using the “Login” button, select “Create an Apple ID.” This option may not appear, so sign out of iCloud.
- Follow the instructions on the gadget screen: enter your email address and, if necessary, mobile number. This number can be changed later.
- Please provide your credit card number and required payment information.
- Confirm your email address. You will receive an email containing a confirmation link.
Mac Settings
How to make an Apple ID in Mac settings? The steps apply to macOS Big Sur 11.0, but the principle of creating an Apple ID is identical on other versions of operating systems. Do the following:
- On your computer, click on the menu button with the Apple branded icon in the top bar.
- Go to "System Settings".
- Select "Login".
- At the bottom, find and click on “Create an Apple ID.”
- Follow the instructions provided by the system: fill in the required fields, confirm your email.
Please note that in some countries and regions, you can use your mobile phone number instead of your email address as your Apple ID.
Apple ID and password recovery by email
This is the easiest and fastest method for returning a password. It consists of sending a special message to the user’s e-mail. And then we restore the characters using this algorithm:
- You need to go to https://iforgot.apple.com/ in your browser and enter your ID e-mail. Click on the continue button.
- Select the option to receive messages by e-mail and click on the continue button again.
- An email will be sent to the specified address with a link to reset the password characters. You need to walk along it and then follow the instructions on the display.
Note! You should carefully check where exactly the SMS will be sent. Often messages are sent to an additional mailbox instead of the main one.
If you haven't received the email yet, check your spam folder. If it is not there either, most likely it is in an additional box. Try to remember what other address you indicated when creating your account. If you can’t remember this either, check all available boxes.
You can recover your Apple ID password in these 3 simple steps. Even an inexperienced owner of a tablet or smartphone can handle them.
How to configure IMAP mail ru?
Configure via IMAP protocol
- Launch the Email application. ...
- Enter the mailbox name and password for the external application. ...
- Click "Manual";
- Select IMAP;
- On the page that opens, enter the following parameters for the incoming mail server: ...
- On the page that opens, enter the following parameters for the outgoing mail server:
Interesting materials:
Who is a materialist person? Who is an organization manager? Who is a tradesman? Who is Norbert Winner? Who is an office manager and what does he do? What is an optimizer? Who is Pasha in the Ottoman Empire? Who is a pensioner definition? Who is Pontius Pilate? Who is a consumer in nature?
To learn more
Apple email associated with your Apple Account ID always comes from If you receive a suspicious email, learn how to spot a scam email.
FaceTime is not available in all countries or regions.
E-mail has transformed from a communication tool into an essential tool: we use it to communicate with friends, to build and develop a business, to register on various sites and access payment systems and Internet banking. A modern user cannot do without email; a fan of Apple devices and services cannot do without an email address with @icloud.com at the end.
Below the cut is information on how to create iCloud mail on iPhone/iPad and Mac computers, and activate an iCloud account.
iCloud replaced the MobileMe Internet service and was available to users on October 12, 2011. From now on, every owner of an iPhone, iPad and Mac computer can register an email address in the @icloud.com zone and use Apple's email service along with other functions of the cloud service (Find iPhone, cloud backup, synchronization of contacts, notes, calendar, photos, Safari bookmarks).