I've been using exclusively wireless mice for quite some time now. They are very convenient to use with both a laptop and a desktop computer. I've probably replaced about five already. True, I had to spend money on batteries, but I bought the latest model with charging capabilities and am very pleased. Today the article is not about my gadgets, but about how to connect a wireless mouse to a PC or laptop on Windows. The connection process itself is not very complicated, but since people ask, it means it’s not always possible to connect. I will try to make a universal instruction that is suitable for different mice (Logitech, Rapoo, Trust, Microsoft, Maxxter, Defender, HP, A4Tech, Razer, Speedlink, etc.), with different connection interfaces. Wireless, of course.
Today, the market mainly offers wireless mice with the following wireless connection interfaces:
- Radio interface (Wireless) are those mice that are connected via a special USB adapter (receiver). It comes with a mouse. The connection itself most often operates at a frequency of 2.4 GHz and often suffers from interference (from the same Wi-Fi routers). The connection is very simple: insert the receiver into the USB port of your computer/laptop, turn on the mouse and everything works. This is the most popular interface for connecting wireless manipulators.
- Bluetooth – there are much fewer mice with this connectivity option compared to a conventional radio interface (which comes with a receiver). These are mainly more expensive models. They are very convenient to use with laptops, as they have a built-in Bluetooth module. And such a mouse connects without a receiver. But for a PC you will have to buy a USB Bluetooth adapter.
- Wireless + Bluetooth is when the mouse supports two connection options. Via a regular USB radio adapter and via Bluetooth (without an adapter on laptops). To choose from.
I think you know which connection interface your wireless mouse supports. If not, see the instructions and information on the official website.
Let's look separately at the process of connecting via a radio interface (USB adapter) and separately via Bluetooth using the example of a laptop with Windows 10. There are differences. I will enter when connected via Bluetooth.
Rules for connecting a wireless mouse
The connection method will depend on the type of mouse.
There are 2 types of pairing: USB and Bluetooth to connect the manipulator and computer. All mice require power as there is no wire and the computer cannot provide power to the device. At the bottom of the mouse there is a compartment where the battery is inserted. Bluetooth mice connect to a PC using Bluetooth communication. Therefore, the computer must support this type of connection. You can check this like this:
- On the “My Computer” shortcut, right-click and select “Manage.”
- On the right, go to the “Device Manager” tab.
- If there is an integrated Bluetooth adapter, the list of devices should have the value “Bluetooth”. If it is not there, then the computer does not support such a connection without additional equipment.
The computer may not immediately recognize some models, and then the mouse will not work. To do this, the kit with the manipulator also includes a disk with which you can install the driver on your computer. The utility will allow you to synchronize a laptop or PC with a mouse.
Difficulties and their solutions
During operation, the user may encounter several problems. One of them is the loss of the USB mouse adapter.
If you lose or lose the adapter that came with the mouse, you can try several ways to correct the situation:
- In a digital equipment store, you can ask about the availability of adapters for a particular mouse model. Many manufacturers take into account the fact that the consumer may lose this part and sell adapters separately.
- You can purchase the same mouse model hand-held along with an adapter. You need to change the “stuffing” of your mouse with the internal parts of the purchased one so that the adapter can receive signals from this particular manipulator. Of course, you should buy a used mouse at a low price to make the cost worthwhile.
If the described methods turned out to be useless, then it is best to buy a new mouse.
The second difficulty is that the computer does not have a built-in Bluetooth adapter. It would seem that connecting a mouse using such a connection is impossible, but there is a solution. You should purchase an external adapter that will implement this feature on your computer. Purchasing such a Bluetooth accessory will allow you to use the connection functions, and there are no differences at all between the integrated version and the external one.
Bluetooth on PC with Windows 10: connection, drivers, setup
Windows 10 is generally a cool system in this regard. Why? Yes, because in almost all cases, no matter what kind of adapter you have, after connecting, all drivers will be installed automatically, and a blue Bluetooth icon will appear in the tray. And you can immediately connect the necessary devices.
In the device manager, I immediately saw the “Bluetooth” section and the adapter itself. If the adapter is not recognized and is displayed as an unknown device (another device), you will have to install the drivers manually. You can see how to do this using Windows 7 as an example at the end of this article.
And to connect headphones, gamepad, mouse, keyboard, or other Bluetooth device to your computer, go to “Settings” in the “Devices” section. Or click on the tray icon and select “Add Bluetooth device”.
Click on “Add Bluetooth or other device”.
Next, select “Bluetooth”. The computer will begin searching for available devices to connect to. Our device must be in search mode. In my case, these are headphones. There is a separate button there. When they are in connection mode, the indicator blinks on them. When the computer detects our device, we simply select it and connect.
And if you want to connect a smartphone or tablet to your computer, then on the mobile device itself you will need to confirm the connection (pairing).
I wrote in more detail about connecting wireless headphones in the article How to connect Bluetooth headphones to a computer or laptop on Windows 10.
This way you can connect absolutely any Bluetooth device.
Possible problems
If you have any connection problems, please check the list below. You may find a workaround here:
- Windows doesn't find the device. Try restarting your laptop and mouse. Also check the battery charge level.
- The device is connected, but the cursor does not move. This problem may be due to an incorrect driver or a faulty mouse sensor.
- The mouse turns off periodically. This problem is related to the operation of individual applications. Monitor the moment at which the mouse turns off and check the settings of the program, game, and so on.
How to connect a mouse and other Bluetooth devices
Wireless mice are becoming more and more common these days. It is especially convenient to use these on laptops, since it is convenient to put it in your bag without winding up the wire.
One type of wireless mouse is bluetooth mouse. Bluetooth is a technology for transmitting data over radio waves (most likely familiar to you from cell phones).
You can read about how to connect bluetooth devices using the example of a smartphone in Windows 8.1 in another article.
So how to connect such a mouse to a laptop or computer? First, before purchasing, you need to make sure that your laptop or computer has a bluetooth adapter installed. You can view it in Device Manager. To enter it you need to go to the desktop and right-click on the My Computer icon. Select Properties. In the window that appears, select Device Manager. And look for Bluetooth devices in the list of devices:
As we see in our configuration there is such an adapter, remember the icon.
Now let's move on to connecting our mouse. Let's turn on its power if it is turned off (usually the switch on the bottom of the mouse, put it in the ON position). Find the bluetooth icon on the taskbar (the one with the clock):
Click on it and select Add device:
We get the following window:
Select our mouse or bluetooth device (for example, a cell phone) and click Next, wait a little and the following window will appear:
Attention: some devices (especially cell phones) may require drivers (they can be downloaded from the official website of the device or from the installation disk included with the device)!
Click close and enjoy the connected device.
Attention: When you start your computer, it takes some time to detect bluetooth devices. Therefore, the mouse will not work immediately when you see the desktop
This is fine. It takes some time to detect.
Hotkeys
Connecting a mouse to a laptop keyboard is also called mouse emulation. The function allows you to comfortably control the pointer using only the keyboard. It turns on in several steps:
Step 1. Hold down three buttons: “Left Alt+NumLock+Left Shift” (“Left” means that we are holding the keys on the left side of the keyboard).
Simultaneously hold down the keys “Left Alt+NumLock+Left Shift”
Step 2. A dialog box will open where it is advisable to select “Yes”. By the way, it is better to be located directly on the desktop, and not in documents or programs.
Use the arrows to move to the “Yes” button, press “Enter”
Step 3: Use the arrow keys or the Tab key to navigate to the "Go to Ease of Access Center..." link and press Spacebar. You will be taken to a section called "Special Features". If desired, you can configure almost all the necessary parameters, including the speed of cursor movement.
Using the arrow keys or the Tab key, move to the Ease of Access Center link and press Spacebar
In the settings window, use the arrows to set the appropriate parameters, go to the “Apply” button, then “OK”, press “Enter” on each
Step 4. If you did everything correctly, a mouse icon will appear on the notification panel. It disappears if you exit this mode. This is done with the same set of keys: “Left Alt+NumLock+Left Shift”.
After confirming the action, the keyboard mouse icon will appear on the taskbar
It is easy to connect the touchpad by clicking the “F” key in the top row. Usually a corresponding picture is drawn on it. The touch panel is also activated using various keys. Different laptop brands have their own combinations:
- Fn+F1 – Gigabyte;
- Fn+F7 – Acer;
- Fn+F5 – Samsung brand;
- Fn+F5 – Dell brand;
- Fn+F6 – Lenovo brand;
- Fn+F5 – Toshiba;
- Fn+F1 – Sony;
- Fn+F4 – manufacturer Fujitsu;
- Fn+F9 – ASUS laptops.
The key responsible for turning the touchpad on and off displays the corresponding icon
There are also laptops where the touchpad is activated with one simple button located next to the touchpad. It can be a depression or a small dot, and sometimes even a fairly noticeable button with a special designation. HP supplies almost all of its devices with just such a hardware button.
On some laptops there is a special button in the upper left corner to turn the touchpad on and off
Hotkey assignments
In a special dialog box with mouse emulation settings, which was already mentioned above, you can configure the assignment of hot keys.
However, there are some standard keys that you can use on any device by default:
- The NumLock key pauses or re-enables the keyboard mode on the laptop.
Location of the NumLock key - To use the cursor, you need to press all the number keys in addition to “0” and “5”.
All number keys except “0” and “5” are used to control the keyboard mouse. - The "Ctrl" key slows down the cursor movement, and the "Shift" key speeds it up.
The "Ctrl" key slows down the cursor movement, and the "Shift" key speeds it up - Explorer launches the key set “Win+E”, “Shift+F10” displays the context menu, locks the device “Win+L”.
How to turn on a wireless mouse on a computer
Wireless devices connect in a variety of ways. There are devices that support Bluetooth connection, radio frequency with a module, and induction.
Bluetooth mouse
All modern laptops have built-in Bluetooth modules, so connecting a wireless mouse is often not difficult. Made using a Bluetooth connection, they are distinguished by a fairly fast response and reliable switching.
In order to configure a wireless device, you need to go to the appropriate menu. To do this, open “Start”—“Control Panel”—“Devices and Printers.”
The menu that opens will display a list of connected devices. In order to add a new one, you need to click on the “Add device” item. The computer will only be able to find the mouse that is turned on. Usually the power button is located on the panel itself and is indicated by the words “On\Off”. If you cannot find the button, you should use the technical documentation, which describes in detail the basis of the device.
After the computer itself has found the desired model, click “Next” and Windows will install the necessary software itself. After this, the device is ready for use.
RF mouse
A very common type of mouse that comes with the receiver. This device is universal and does not require additional equipment. To configure an RF mouse, you need to insert the receiver into the USB port. Windows will then automatically begin installing the software.
The mouse itself must be turned on and the switch button pressed. It is usually located next to the wheel, but the design may vary between models. For more detailed information, please refer to the technical documentation.
Induction mouse
The most outdated variation. At the moment, such models are almost never produced. An induction mouse works using a tablet that acts as a mouse pad and transmits signals to the PC.
To configure the device, you need to connect the mat to the USB port. After automatic setup, it should be ready for use, as indicated by a special indicator. After this, you need to press the “Tune” button and the device is ready for use.
How to identify a malfunction?
If the mouse cursor does not move after connecting it, you can try turning the mouse off and on again. You can also try changing the USB port on your laptop into which the receiver (dongle) is inserted.
If this does not help, you need to refer to the “Problems” section of the manual supplied with the mouse to solve any problems that may arise.
If the mouse connects directly to your laptop, you can also try reinstalling the Bluetooth driver on it.
- Go to "Device Manager".
On a note! The correct connection of the RF mouse may also be interfered with by installed antivirus software, which can be disabled while it is running.
Apple Magic Mouse 2 Bluetooth
If we make a list of any equipment, there must be a representative of Apple on it. Our list is no exception. Apple Magic Mouse 2 Bluetooth is distinguished by the company's proprietary design, high cost and quite ordinary, one might even say mediocre, characteristics. All Apple products have the same features.
Here are the characteristics we are talking about:
- sensor type – laser;
- resolution – 1000 dpi;
- 3 buttons and one wheel;
- dimensions – 1.13×5.71 cm;
- price – 115 dollars.
The main feature of the Apple Magic Mouse 2 Bluetooth is its touch surface. There are no buttons or wheels here.
On the one hand, it’s convenient and interesting, but on the other, it’s an additional headache. After all, you need to be careful not to damage the sensor and not touch it with dirty hands.
With ordinary mice, everything is simpler - after use, you can wipe them with an ordinary cloth and continue to use them completely calmly. And the Apple Magic Mouse 2 Bluetooth should be protected like the apple of your eye!
Rice. 6. Apple Magic Mouse 2 Bluetooth
How to connect a mouse to an Android phone via Bluetooth
Connecting a mouse and phone using Bluetooth is the simplest and best option. To do this, you must activate the wireless connection on both devices.
After turning on, the phone will begin searching for devices located nearby. A mouse is selected from the list presented. In order for synchronization to begin, you may need a special code listed in the user manual. A small arrow will light up on the device screen, indicating a successful connection. Further connections will be made automatically.
The above methods will also be useful when connecting a mouse to a tablet. A keyboard can be connected using similar methods if necessary. Wi-Fi is also used to make the connection. To do this, the presence of a radio module in both devices (mobile phone and computer mouse) is mandatory. The downside of this connection is the rather complex settings, which are not easy to handle on your own. This connection option is more suitable for a printer.
Modern mobile devices can replace a computer or laptop due to their advanced functionality. An additional connection to a computer mouse can significantly improve the performance of a smartphone. Using a mouse, you can quickly work with important documents, conduct financial transactions, or play your favorite games. A few tips and additional recommendations will help you connect on your own.
Features of a wireless mouse
A Bluetooth mouse differs from a wired mouse in several important ways:
- You should stay relatively close. While you can move up to 10 meters away from your computer with a Bluetooth mouse—much longer than a wired mouse with a 2-meter cable—moving the mouse out of range may require you to re-pair the device.
- A wireless mouse requires a battery. Therefore, you will need to carry spare batteries or a charging cable for wireless mice with non-replaceable batteries. While most modern Bluetooth mice last for months or years on a single set of batteries, Murphy's Law means your mouse will run out of battery at the worst possible time. So plan ahead.
- Different mice support different numbers of paired devices. Some mice connect to one computer at a time; a few models can support two or three devices. If you travel with one mouse but two computers (such as a laptop and a Windows tablet), choose a mouse that can support a low-profile model that can handle both without having to re-pair each time you use it.
- Wireless mice and their keys sometimes get lost. If your computer requires a dongle, look for a dongle you can leave permanently inserted into the USB slot. Large keys may fall or get damaged in your laptop bag.
- Different computers load Bluetooth drivers at different points in their startup sequence. If you need to troubleshoot a computer that won't start up properly, you may find that your Bluetooth mouse won't boot up while the computer isn't running. Typically, USB drivers load before wireless drivers, so you may have better luck finding a faulty computer using a wired mouse.
How to connect a wireless mouse to a laptop
Nowadays, many already know how to connect a wireless mouse to a laptop or PC.
But still, office equipment has the unpleasant property of causing difficulties for people who do not understand it well. A wireless mouse helps make working on your PC more comfortable. In addition, the workplace will look more stylish and modern.
All wireless mice can be divided into 2 main types, the first of which uses a receiver (USB receiver) to transmit the signal, and the second uses Bluetooth. The connection methods of these two types are quite different.
Connection via receiver
First of all, you need to make sure that the batteries are inserted.
To do this, you need to turn the mouse upside down, find the cover and carefully remove it. Next, you need to insert the correct type of batteries. Most often, mice use “AA” or “AAA” class elements. Typically, wireless mice have a switch to turn them on. You need to turn it from the “OFF” position to the “ON” position after the batteries have been inserted.
Now you can connect the receiver to any free USB port. Some models of USB receivers are also equipped with power buttons. You need to make sure the receiver is turned on.
Most modern wireless mice support the Plug and Play standard. This means that they are automatically recognized by the Windows operating system and do not require additional software.
If for some reason the user gets an outdated or non-standard model, then when the receiver is connected to the USB port, Windows will automatically download the necessary drivers from the Internet or ask permission to download.
If the cursor on the monitor screen responds to mouse movements, then everything is done correctly and the device is ready for use.
Through the Start menu on the desktop, you can go to the control panel and find the mouse settings there, and then adjust its sensitivity and other parameters. Some mouse models may come with software on a CD. It is recommended to insert this disc into a CD-ROM and install the necessary software.
If the mouse was correctly connected in accordance with the above instructions, but it does not work, then you need to try to find the necessary software yourself. Just enter the company name) into the Google search engine. The first few search results are most likely the manufacturer's websites where you can find and download the necessary drivers.
Sometimes the mouse cannot be connected due to a faulty USB port. To check the connector for functionality, you need to try connecting some other USB-compatible device to it, for example, a mobile phone (smartphone). If the other device doesn't connect either, then the port is most likely faulty. You need to try another connector, because there are always several of them.
Connection via Bluetooth
When connecting via Bluetooth, first of all you also need to make sure that the batteries are inserted into the mouse and the Bluetooth receiver is connected to USB.
In the Windows 8 operating system, you need to hold down the windows + C key combination and enter the keyword “bluetooth” in the search bar. The option “Add a Bluetooth device” should appear in the left pane. You need to click on it, and then on “Add device”, after which the computer should automatically find and connect the mouse.
For Windows 7, you need to click the "Start" button on the desktop, then select "Control Panel" and "Add a device." The computer should detect the new mouse and indicate it or any other), then you need to click on it and select “Next”. When the device is ready for use, a notification will appear on the screen.
On Mac OS X, click "System Preferences" and then "Bluetooth".
If Bluetooth is not activated, you need to turn it on. The mouse should now appear in the “Devices” panel, where you need to click on it to activate it.
Bluetooth mice can also be supplied with drivers included on CD.
Instructions for connecting via adapter
The vast majority of wireless computer mice are connected to a laptop or computer via an adapter. The signal is transmitted via the Wi-Fi protocol from the device to the adapter and then processed by the computer. The maximum operating range is usually 15 meters. Next, we will describe in detail how to connect a wireless computer mouse to a laptop. The instructions provided will also be relevant for those who are interested in how to connect a wireless mouse to a personal computer.
Manipulating the mouse and adapter
If you have a wireless mouse, the first thing you need to do is find and connect the adapter. Typically, it comes in a box with the product itself or is hidden inside the mouse body. It is usually located in a special recess or compartment on the back of the mouse.
Make sure your device has fully charged batteries. After that, plug the adapter into the USB port on your laptop/computer and turn on the mouse. Move the switch to the On position. If the wireless mouse is a laser mouse (not to be confused with an optical one, in which the beam is not visible), then when it is activated, you will see a red light under it. Place it on a glossy surface and check its functionality.
Driver installation
Many mice are detected by most versions of operating systems and without specially installed drivers. At the same time, there are a number of models for which a driver must be installed to be fully functional. You can find it:
- on the disk that comes with the device;
- on the global Internet on the manufacturer’s website.
You can see if the driver is installed correctly and even update it in the task manager. If the driver is not installed correctly, there will be a yellow triangle with an exclamation mark next to the device. Right-click on the device (for example, via a touchpad) and select “Update Drivers” to update through the OS.
Settings in the operating system
As a rule, with a correctly installed driver, there is no need to perform any settings in the OS. But through the interface, the user can configure various parameters of the mouse’s functioning: its sensitivity, pointer type and much more. To go to the desired section, follow the following instructions:
- Go to your control panel. On Windows 10, right-click on the Start icon.
- In Control Panel, select Mouse. A window will appear with several tabs where you can fully configure the device.
- In the “Hardware” tab, make sure that the system recognizes your device. The “Status” field should read “The device is working normally.”
Connecting a wireless mouse via Bluetooth
Connecting a wireless mouse using a Bluetooth wireless network is a little more complicated and may vary depending on your version of Windows. In this article, we'll show you how to do this in Windows 10, since most new laptops come with this operating system.
As in the previous case, you need to start by checking the batteries and the power button. Make sure the mouse has working batteries and the power button is in the “ON” or “On” position.
After this, you need to turn on Bluetooth on your laptop. To do this, open the “Options” menu (Win-I), go to the “Devices - Bluetooth” section and enable the corresponding option there.
In the window that opens, you need to enable all available options and click on the “OK” button.
After this, in the “Options” window, in the “Devices - Bluetooth” section, your Bluetooth mouse should appear. If the mouse does not appear, then you may need to press the connect button, which is located on the underside of the mouse body.
After the mouse appears in the “Options” menu, you just need to click on it and click on the “Link” button. This will start the process of connecting the Bluetooth mouse to the laptop.
A few seconds after clicking on the “Pair” button, the wireless mouse should start working.
If the connection does not occur, check the power button and batteries. Also read the instructions that come with the mouse. Perhaps your mouse has some features that were not taken into account in this material.
comp-security.net
"options"
First, let's look at a separate application created for Windows 10 called Settings. It replaces the classic “Control Panel”, and now you can configure the touchpad there.
- Open the Start menu and click on the gear icon.
In the Settings app, go to the Devices section.
Using the panel on the left, switch to the “Touchpad” subsection.
In the central part of the window, click on the first switch to activate the touchpad. However, if you prefer not to control it manually, but to turn it off only while you connect a USB mouse, it’s better to simply uncheck the “Do not disable the touchpad when connecting a mouse” checkbox. Accordingly, now when you connect an external device, the touchpad will be blocked without your participation, just like you can get out of this blocking.
Connecting a mouse to a phone using an OTG cable
Most devices on the market have a standard USB port. If there is such a connector, the connection can be made using a regular USB cable. Many smartphones running Android OS have a mini or micro connector. In this case, to connect a computer mouse you will need a special OTG cable.
If you have the necessary cord, the connection occurs in several stages. One part of the wire is connected to the phone connector, the second to the computer mouse. On many devices the connection is automatic.
If you need to connect a keyboard to the phone along with a mouse, you will need a special splitter - a USB hub. This is because the device only has one connection port.
It happens that the phone does not support the OTG cable. In this case, it is better to try wireless options to make a connection.
Article information
This article was produced by our experienced team of editors and researchers, who reviewed it for accuracy and comprehensiveness.
Categories: Computers and laptops
In other languages:
English: Connect a Wireless Mouse, Español: conectar un mouse inalámbrico, Deutsch: Eine drahtlose Maus anschließen, Português: Conectar um Mouse Sem Fio, Nederlands: Een draadloze muis aansluiten, Italiano: Connettere un Mouse senza Fili, Français: connecter une souris sans fil, 中文: 连接无线鼠标, Bahasa Indonesia: Menghubungkan Tetikus Nirkabel, العربية: توصيل ماوس لاسلكي, Tiếng Việt: Kết nối Chu ột Không dây, हिन्दी: एक वायरलेस माउस को कनेक्ट करें (Connect a Wireless Mouse), Č eština: Jak připojit bezdrátovou myš, 한국어: 무선 마우스 연결하기, ไทย: เชื่อมต่อเมาส์ไร้สาย, 日本語: ワイヤレスマウスを接続する, Türkçe: Kablosuz Fare Nasıl Bağlanır
This page has been viewed 231,594 times.
Was this article helpful?
Not really
How to connect an RF mouse
The first thing you need to do before connecting the mouse is to check its compatibility with the computer to which it will be connected.
There are 2 types of radio mice:
- connected to a 27 MHz USB receiver supplied with the mouse;
- connected to the 2.4 GHz USB Bluetooth receiver that came with the mouse, or to the Bluetooth module inside the laptop.
You can check the website or read the mouse packaging to make sure it is compatible with the operating system you will be connecting to.
On the box or on the manufacturer’s website we find and check information about the compatibility of the mouse with our system
Reference! Depending on the model of the radio frequency mouse, the connection may differ slightly, but its basic principles are almost the same for all radio mice.
Step 1. To make the connection, insert the receiving device (USB receiver), usually supplied with a wireless mouse, into the USB connector of the PC. Windows will automatically search for and install the required driver.
Step 2. Install batteries of the desired type into the wireless mouse, observing the polarity. On most models, you can lift the top panel of the mouse or open the lid on the bottom to reveal the battery compartment.
Insert the batteries of the desired type into the wireless mouse, observing the polarity
Important! Wireless mice typically use AA batteries to power them. If batteries are not included with the mouse, you will need to install new purchased batteries.
If batteries are installed in the battery, they may need to be charged.
Step 3. Turn on the mouse. This usually requires pressing a button or moving a switch on the underside of the mouse. In the photo, the button is located on the top side of the platform.
Turn on the mouse by pressing the button or moving the switch on the underside of the mouse
Reference! If you find the power button or can't find it, you can refer to the manual that came with your mouse for any information you need.
Step 4. If possible, select the required channel with the button. Channel selection is required to connect the mouse to multiple PCs in a room.
Use the button to select the appropriate channel, if necessary.
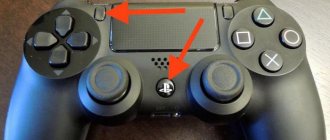
Step 5. Connect the mouse to the receiving device. To do this, press and hold the device pairing button on the mouse. If necessary, also simultaneously press and hold the button on the USB receiver. Continue holding the buttons until the light on the underside of the mouse lights up or the indicator on the top of the mouse changes its glow.
Press and hold the device pairing button on the mouse
Reference! Typically, after pairing, the mouse light will go from flashing to a steady light. Some wireless mice are plug-and-play and do not require these button pressing steps.
When the mouse and PC are successfully paired, the mouse indicator changes from a flashing state to a constant light.
Step 6. Turn the mouse over, place it on a flat surface and start moving it, checking that it is connected correctly and the cursor is moving correctly. If the cursor moves normally, the device is connected.
Using a mouse pad, we begin to move it, checking that the cursor is correctly connected and moved on the monitor screen
Important! Do not use an optical mouse in rough, wet, dusty areas as this may reduce its tracking accuracy
Tip #2: Check if the USB port is working
If the laptop still does not see a wired mouse or wireless pointer, at the next diagnostic stage, check whether the port to which you are connecting is working properly. This is not difficult to do: just connect any other compatible device to the connector, from flash memory to a scanner. Are there any problems? You can immediately move on to the next step. Does the problem persist? — Then you need to check the status of the port.
Let us warn you right away: if the connector is faulty from an electrical point of view, repairing it at home will be problematic, especially if you do not have sufficient knowledge and experience. But don’t worry - first check if the port you are using is activated.
This can be done by accessing the hardware-software link menu:
- Using the specification supplied by the manufacturer, data on the official website, or information displayed in the bottom Enter Setup line that appears at the very beginning of startup, find out which key or combination you can use to open the list of available BIOS/UEFI settings.
- Turn off the laptop, then, the next time you start it, press the corresponding key until you find yourself in the desired menu. With a high degree of probability, it will be in English - but in order to figure out why the laptop does not see the USB mouse, you won’t need any special knowledge.
- Find the section responsible for activating the connectors. The names can vary greatly - but they must contain the words Peripherals or Advanced. In some cases, once you are in the appropriate section, you will see a subsection whose name will contain the word USB - this is what you need. Sometimes the configurable parameter is located directly in the section - and contains the words USB Support/Storage/Controller in the title.
- Once you find the line you need, set the parameter to Enabled. If it is the default, don't change anything - just press F10 and restart the laptop in normal mode.
After completing the above activities, check again whether the equipment is connected - you can, as in the beginning, use any “peripheral”. Now the device should receive power again, which means it will be recognized.
Connecting a wireless mouse
RF (with adapter)
This mouse comes with a small adapter (looks like a flash drive). As a rule, the size of this adapter is very modest: after installing it in a USB port, the protruding part is barely noticeable (shown in the photographs below).
I would also note that, on average, mice in this category are cheaper than Bluetooth mice (today prices are comparable to classic wired ones).
I'll look at connecting it step by step.
STEP 1
And so, first check the contents: there should be the mouse itself, batteries and an adapter (see photo below)
It is worth noting that batteries are not always included with the mouse (pay attention to this when purchasing!)
2) Before you start connecting: disconnect your old mouse from the computer.
RF mouse contents
STEP 2
Turn the mouse over, open the battery compartment and install them (pay attention to the polarity)
STEP 3
Some mice are equipped with additional switch. Check that it is in the “ON” position (i.e. turned on). If you do not have such a switch, then the mouse, in principle, should start working immediately after installing the batteries.
Pay attention to the switch!
STEP 4
Connect the adapter to the USB port (after a few seconds you should hear a characteristic sound from Windows, which always happens when connecting USB devices).
Connecting the adapter to the USB port
STEP 5
Try moving the mouse, spinning the wheel, pressing the right/left buttons. As a rule, after 1-2 clicks the mouse should establish a connection and start working.
In general, that's all. If everything is in order with the mouse, the batteries are new (and not yet empty) - then the mouse will start working. No extras. No settings are required.
STEP 6
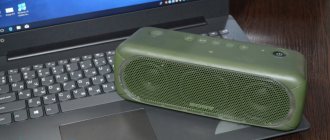
If the pointer movement speed is too fast (slow), then you can go to the control panel (to do this, press Win + R and enter the control command), go to the “Hardware and Sound” section and open the mouse settings (see screenshot below).
Control Panel - Mouse
Next, in the “Pointer Parameters” section, set the pointer speed. In general, everything is standard.
Pointer speed
Bluetooth mouse
Bluetooth mice are less popular than previous ones. To use them, of course, you must have a Bluetooth adapter installed on your computer/laptop (usually all modern devices are equipped with it). Before setting up and connecting, I recommend checking whether Bluetooth is working for you (and turning it on if necessary).
Now, actually, to the point.
STEP 1
Go to Device Manager and see that the Bluetooth adapter is working fine and there are drivers for it (how to open Device Manager).
The device works fine (Bluetooth adapter)
STEP 2
Check if Bluetooth is enabled in Windows settings (some laptops have a special button on the device body).
Is Bluetooth turned on (Windows 10)
STEP 3
Insert batteries into the mouse and turn it on (some mice have a special switch, others do not).
Pay attention to the switch!
STEP 4
Click on the Bluetooth icon in the tray and launch the add new device function (see example below).
Adding a Bluetooth device
Alternative option #1
In Windows 10, you can add a Bluetooth device from the system settings (note: to open them, press the Win+i combination), in the “Devices/Bluetooth” section. “(see screenshot below).
Windows 10 - Adding a Device
Alternative option #2
If you have Windows 7 (or other options do not work*): open the Control Panel (how to do this), section “Hardware and SoundDevices and Printers”.
Alternative option for adding a device
STEP 5
After this, the hardware setup wizard will launch: you need to indicate that you want to connect a Bluetooth mouse and click next. As a rule, after several seconds, Windows will automatically connect the device and you can start using the mouse.
Not so long ago, Wi-Fi mice also appeared (released by HP). But, to be honest, I haven’t worked on this yet and therefore, as they say, “know comments” (and they have not yet become widespread).
ocomp.info
Special function
The reason that the touchpad does not turn on may also be a special function that is configured manually. The touchpad is automatically disabled when an external mouse is connected to the laptop. This option will have to be disabled manually if you are going to use both external peripherals and the built-in panel.
To do this, just five steps are enough:
Step 1. Find yourself in the “Control Panel”. How to do this without an external mouse is described above.
Click on the button with the Windows logo
Use arrows to move to the “Control Panel” line, press “Enter”
Step 2: Find the Hardware and Sound section.
In the “View” mode, check or set the “Category” value, find and open the “Hardware and Sound” sectionStep 3. Select "Mouse".
Select "Mouse"
Step 4. In the properties there is a section “Pointer Parameters”, which is what you need.
In the “Pointer Options” tab, use the arrows to set up the ones that suit us
Step 5. Next, you should go to the appropriate tab, on different laptops it has a different name, “Enable” or “Disable” the option “Turn off the touchpad when an external mouse is connected”, confirming the decision with the “OK” button.
Go to the “Elan” tab, check the box “Disable when connecting an external USB mouse”, click “OK”
When a special function is not active, it is worth looking deeper for the reason. You can try setting up the mouse on the laptop keyboard via Bios.
How to connect a wireless mouse to a computer or laptop
Wireless technologies for connecting peripheral devices are becoming increasingly popular.
Today you can even connect a printer to a computer without using wires, not to mention input devices. The mouse long ago got rid of the annoying “tail”, turning into a completely portable device. To enjoy freedom of movement, your wireless mouse must first be connected correctly.
Preparatory stage
Knowing how to connect a wireless mouse to a computer, you can successfully connect it to a laptop. In both cases, two methods are used - using a USB receiver and via Bluetooth. There is also the technical possibility of connecting via Wi-Fi, but this method has not become widespread. With any connection method, the first step is to install the batteries in the mouse. Batteries are the only source of power for a wireless device, so you will have to constantly monitor their performance.
USB receiver
Using a receiver that connects to a computer or laptop via a USB interface is the most popular method. There are USB ports on any computer, but even if they are busy or missing, you can use a PS/2 to USB adapter.
Note: When using the PS/2 port, be careful not to accidentally occupy the keyboard slot. Find out how to connect your keyboard to your computer via PS/2 or USB to avoid any mistakes.
- Install batteries.
- Connect the receiver to the USB port.
- The connection should happen automatically. Move your mouse to check the connection.
Possible faults
If the cursor does not move, try restarting your computer. Then check that the connection is correct: the indicator on the mouse should be lit. If the LEDs do not light up, check the batteries.
- The mouse may have an On/Off switch. Look at the position he is in.
- Change the USB port, perhaps this connector simply does not work.
- Look at the instructions for the mouse: some models require pressing a special button to establish a connection with the receiver.
Bluetooth connection
This method is more suitable for laptops, since these portable devices in the vast majority of cases are equipped with a Bluetooth module. With a computer, things are a little more complicated.
Before purchasing a wireless mouse, be sure to check through the “Task Manager” whether you have a Bluetooth module, so that you do not have to additionally purchase and install an adapter.
- Install the batteries and turn on the mouse.
- Find the Bluetooth icon on the taskbar or in your laptop settings (use the search in the Start menu).
- Click "Add Device".
- A window will appear in which the name of the connected device should be indicated.
- Click Next to connect your mouse and laptop via Bluetooth.
Sometimes driver installation is required for an input device to function correctly. They can be installed from the included disk or downloaded from the manufacturer's website.
Practical recommendations
If additional configuration software comes with your wireless device, use it to ensure the mouse works correctly.
You can also configure the mouse through the “Hardware” menu in the “Control Panel”. If you know how to connect a scanner to a computer or any other peripheral device, then you have probably already visited this parameter settings section more than once.
Use a wired mouse when connecting to a wireless input device. This will help you take the necessary actions faster.
Keep your wired mouse as a backup device. Batteries tend to die suddenly, so a trusty corded device can be the answer at a critical time.
>
Wired
More often they use compact manipulators connected to a USB port. Older copies connect to the PS/2 port - if this is the one you use, connect it to the USB connector using a PS/2 adapter. Check the operation of the mouse on another computer - if it stops working on yours, then the problem is with the PC.
Connect the mouse in series to all USB ports; if you use passive hubs without additional power, plug the mouse directly into the connector. Disconnect other devices connected to the USB connectors - if the manipulator starts working right away, the laptop controllers do not have enough power for all gadgets. In this case, purchase an active USB hub, which additionally plugs into a power outlet.
A possible cause of the problem is that USB ports are disabled in the BIOS, so the laptop does not see the USB mouse. What to do in this case? Go to the BIOS - when the computer starts, press the Del or F12 key several times (you will see the exact combination in the signature on the welcome screen). In the menu, go to “Advanced” or “Integrated Peripherals”, there activate the function sub-items and the USB controller.
If no problems are found in the computer and connectors, the manipulator itself is faulty. Inspect the cable to see if there are any kinks on it, and the mouse itself. Wipe the wheel and optical lens with alcohol wipes - contamination will interfere with the operation of the sensor.
How to connect and configure a wireless mouse
Installing a wireless mouse on a computer is quite simple: turn on the computer or laptop, insert the radio adapter supplied with the mouse into a free USB slot on the PC or laptop, install batteries in the mouse (there are models that run on 1 or 2 AA batteries), wait, When Windows installs the necessary drivers suitable for this mouse model, right-click and move the cursor. If everything works and the cursor moves across the screen, you can already use a wireless mouse.
If the system does not find suitable drivers, you will have to download them from the manufacturer’s website and install them yourself. After this, you can remove and reinsert the mouse adapter into the USB slot, the system should automatically initialize the drivers and the mouse will work.
For fairly expensive manipulators, in particular gaming ones with many additional buttons, manufacturers are developing special utilities for configuring and adjusting the buttons and the sensitivity of the optical sensor. These programs require some study and careful customization to suit the player's requirements. By the way, these mice come with a wire, and they can “turn” into wired ones.
Possible problems and solutions
Wireless equipment may not connect for a variety of reasons, from incorrectly installed drivers to defects. We recommend the following setup steps:
- turn the mouse on and off several times and then check again;
- check if the battery is charged;
- Check the functionality of the USB port into which the adapter is installed (try connecting another device to it).
- make sure the bluetooth module is working properly (connect your phone or tablet to your laptop);
- install the driver (be sure to restart your computer after this);
- Make sure that the operation of the wireless adapter or Bluetooth module is not blocked by administrator rights or other software (antivirus).
How to connect a wireless mouse to a laptop
Before connecting, I advise you to find out whether this mouse will suit your laptop. There are two different types of wireless mice, such as:
- A wireless mouse that comes with a USB adapter and operates at a frequency of 27 MHz.
- There are also mice that connect to a USB Bluetooth adapter, or to the internal adapter in a laptop (built-in). These mice operate at a frequency of 2.4 GHz, the very frequency of your mouse can be found on the box.
- First, we need to connect the wireless adapter to the laptop; this adapter is included in the kit. As soon as you insert it into the USB connector, Windows will immediately begin searching for drivers and installing them. If there is no such driver, you can install it from the disk that comes with the kit.
- Next, take our mouse and open the bottom part to insert the batteries. Be careful not to confuse the polarity (plus and minus), otherwise your mouse will burn.
- Then we turn on our mouse. The button or switch is usually located on the back of the mouse.
- Also, do not forget to switch the data transmission channel if the mouse does not work at the very beginning. Some models have a corresponding button.
- Next, you need to connect the mouse to the wireless adapter; to do this, press the button on the mouse and hold it until it changes the type of backlight. Sometimes you need to press a button on the adapter itself, simultaneously with the mouse.
As soon as the mouse enters operating mode, it will stop blinking and begin to glow continuously. I advise you not to use the mouse on rough surfaces. Thus, it will transmit data poorly and naturally will not work normally.
Friends, I told you how to connect a wireless mouse to a laptop, and now let’s move on to reading how to connect a Bluetooth mouse.
Types of laptop mice
To understand what problems may arise with a computer mouse, you need to understand what the main differences between different types of mice are.
Wired
This is the most common type of mouse and is considered universal. Older models have a PS/2 interface and are only suitable for ancient desktop computers, because laptops and newer PCs simply do not have a PS/2 interface.
As for laptops or tablets with a docking station, they support a USB interface and corresponding mice. Mice made specifically for laptops usually have a compact size and shorter cable lengths. This cable is precisely the main disadvantage of a wired mouse, because it somewhat limits the user’s freedom. But it will not allow the mouse to “sit down” at the most inopportune time.
Wireless
Wireless laptop mice have different interfaces: radio interface, Wi-Fi, Bluetooth or Wireless+USB. They are considered the most convenient and mobile, since to connect to a computer they only require a small base, which is inserted into a USB connector and protrudes beyond the laptop by no more than a few millimeters. The disadvantage of wireless mice is the periodic change of batteries. However, good batteries or accumulators allow you to forget about this for a long time.
Touchpad
The touchpad can also be called the simplest mouse, consisting of two touch buttons (sometimes a scroll is added). It can be located either on the bottom panel of the laptop or on a separate keyboard.
In addition to the main listed types, manufacturers are starting to create all sorts of hybrids - mice with a retractable cable, with recharging, etc. This allows you to compensate for the shortcomings of each type and reduce the likelihood of breakdown.