All the best, friends. Just recently I went through interesting topics on the Internet to write another article. Not because there are no people of our own, but to awaken the muse, so to speak. And then I came across an interesting method that tells how to turn off computers connected via a local network. Let's say you are at school, college, or work, where there are probably a bunch of computers and they are all, as a rule, connected via a local network. With some simple manipulations, you can enter a couple of commands from one computer and turn off all the others. Not a bad prank, by the way.
Before this tidbit, I will write in general how to turn off the computer in order to make this article fatter.
How to turn off a computer running any OS
I think there is no need to explain how to turn off the computer through the Start menu of the operating system. Those who use operating systems based on the Linux kernel most likely also know how to do this. But I’ll explain anyway.
You click the Start menu, select the “Shutdown” section or the shutdown icon, like on Windows 10, and there you will find several options responsible for turning off the PC, restarting, sleeping and hibernating.
There is an interesting point that many users are guilty of. Unscrupulous people turn off a computer or laptop using the shutdown button, which is responsible for a forced shutdown. But why do this? Do you really want to lose your unsaved data? Over time, many programs may not start at all due to such manipulations. If your computer shuts down easily through Start, then do just that.
Why turn off the PC, no need
You all know about functions such as sleep mode and hibernation. Sleep mode transfers the current system state to RAM and puts your computer into a low-power mode, allowing you to very quickly wake up your computer and continue working. Hibernation mode is even cooler. It transfers the current system state to the hard drive and the computer turns off completely, thereby consuming no energy at all. After switching on, everything returns to its original state. The disadvantage of this method is that it creates a hibernation file hiberfil.sys, which can take up quite a lot of space. Therefore, you must first take care of increasing the volume of the system partition, or increasing it using specialized software.
Do you need cheap VKontakte bots? Buy them at https://doctorsmm.com. Here you will receive a huge selection of various conditions and criteria for this service, which will allow you to make not only an inexpensive purchase, but also a truly useful one. The added pages will work and not hang as a dead weight, reducing the page's ranking.
The shutdown command to shutdown, reboot, or hibernate
To shutdown, reboot, or hibernate using the command line, use the shutdown command. Main list of parameters:
- /? — Display help. Same as without parameters.
- /i - Display the graphical user interface. This parameter must come first.
- /l - End the session. This option cannot be used with the /m or /d options.
- /s - Shut down the computer.
- /g - Shut down and restart the computer. After the system restarts, launch all registered applications.
- /a - Cancel system shutdown. This option can only be used during the waiting period.
- /p - Immediately shutdown the local computer without warning. Can be used with the /d and /f options.
- /h - Switches the local computer into hibernation mode. Can be used with the /f option.
- /e - Indicates the reason for the unexpected shutdown of the computer.
- /m - computer Specifies the destination computer.
- /t xxx — Set a delay of xxx seconds before shutting down the computer. Valid range: 0-315360000 (10 years); default value: 30. If the timeout period is greater than 0, the /f option is applied.
- /c - “comment” A comment with the reason for restarting or shutting down. The longest length is 512 characters.
- /f - Forces closure of running applications without warning users. The /f option is used when the /t option is set to a value greater than 0.
- /d xx:yy - You must specify a reason for rebooting or shutting down. "p" means scheduled reboot or shutdown. "u" means the reason is user defined. If neither "p" nor "u" is specified, the reboot or shutdown is unplanned. "xx" is the primary reason number (a positive integer less than 256). "yy" is the reason auxiliary number (a positive integer less than 65536).
If you are interested in the full list of parameters, then run the shutdown
without parameters.
Shutdown the computer using CTRL+ALT+DEL
A well-known key combination that, on modern operating systems, opens a special window from where you can get to the task manager, lock the system, exit it and turn off the computer.
On tablets, although there is no keyboard (although some still have one), you can hold down some keys to make this window appear.
You can also quickly lock Windows (if you have a password or PIN code), which is done by pressing the Win+L keys, and then turn off the PC.
Well, the well-known combination Alt+F4. I think there is no need to explain what it is.
You can create a shortcut on your desktop to turn off your computer, but I will not describe this method now. You can read about it in the article on how to quickly turn off your computer on Windows 8.
Disable remote access in Windows 10
Remote Access (Remote Assistance) in Windows 10 allows you to connect to your computer remotely. This can be useful if your computer is having problems and you want someone to connect to you remotely and help you solve the problem. This is also useful if you want to remotely access your home or office PC.
In this article, I will show you how to disable remote access in Windows 10 using the Control Panel and using the Windows 10 Registry.
Through the Internet
Another method is suitable for those who like to install and manage programs. It is complex, but inexpensive, and consists of controlling a PC via the Internet using the NodeMcu v3 board. To implement it you will need the following components:
- NodeMcu board;
- electromagnetic relay;
- connecting wires;
- power supply.
Next we perform the following actions:
- The board and relay are connected according to the diagram: IN - to D0, GND - to GND, VCC - to 3V.
- We connect the created connection to the computer.
- We check the installed drivers in the device manager by opening the “Ports (COM and LPT)” tabs. The connection is defined under COM6.
- If the drivers are not installed, additional installation will be required. To do this, you need to download the supporting software for the purchased NodeMcu board.
- The library with unpacked and installed files is copied and pasted into the folder with the Arduino program. Program path: local drive C, Program Files (x86), Arduino, Libraries.
- From the text file located in the package of board documents, copy the link. We launch the program and set a number of configurations: go to the “File” section, “Settings”, enter the copied data into the “Additional links for Board Manager” field and click “OK”.
- Open “Tools”, then click on the “Arduino/Genuino Uno” board tab and the “Board Manager” item.
- We type “esp8266” in the search to download the library for this controller. Click “Install”.
- After installation, go to “Tools”, “Arduino/Genuino Uno”, and click on NodeMcu 0.9.
- Click on the tools tab again, select COM6 through the “Ports” item.
- Download the Blynk program to your smartphone.
- In Arduino, insert the rele code in the “sketch” window and change the identification key in the “YourAuthToken” line, issued in the application on the phone after registration.
After that, set up the downloaded Blynk program on your phone:
- We register: enter your e-mail and created password.
- Click “Connecting”.
- Click on “New Project” and give it any name.
- In the next section, select the NodeMcu board and click “OK”.
- Create a project by clicking on “Create Project”.
- Confirm the actions by selecting “OK”. Token will be sent to the specified email address.
- By clicking on the free field of the project, a menu appears in which the “Styled Button” item is selected. We configure the key by specifying Select Pin: opposite Digital, put D0 - the output previously used on the NodeMcu board. Leave other changes as default and click OK.
The last step is to complete the computer control setup:
- In the Arduino program code window, enter the Token, indicate the name and password of the Wi-Fi network.
- We write the created sketch to the board by clicking on the top arrow.
- We check the operation of the board on the smartphone by clicking on “Play”.
- After the tests have been carried out, we directly connect the Wi-Fi relay to the F-Panel of the motherboard via the RSL connector.
- Launch the application on the phone.
Turning the PC on and off occurs with a short click on the “OFF” key. During operation of the board, a characteristic click occurs. You can turn off the device by long pressing “OFF”, but this method is recommended to be used extremely rarely.
How to disable remote access in Windows 10
Windows 10 Remote Assistance is a useful feature, but it also leaves your system vulnerable to attacks, so if you don't use this feature, it is recommended to disable it.
The Remote Assistance feature is enabled by default on Windows operating systems. Here are two ways through which you can disable remote access in Windows 10.
Disable remote access in Windows from Control Panel
You can use Control Panel to disable the Remote Assistance feature on your Windows 10 PC. Start with:
Step 1 : Open Control Panel.
Step 2 : In the Control Panel window, select System and Security.
Step 3 : Then click on System.
Remote shutdown via command line
The shutdown command is most flexible when used from the command line because you can add multiple switches to it that allow you to customize the behavior. Go to Start , then Run and type CMD . You can see the list of switches by typing shutdown /? in the command window.
You must use at least one switch for the command to do anything. Basically you would type off / x / y / z where x, y, z are the letters in the list above.
Here are a couple of the most common command options and the actions they perform:
/C: Turns off the computer
/r: Reboot the computer
/m\ComputerName: Target remote computer to shutdown
/E: Force closes programs
/T: Will wait a certain amount of time in seconds before shutting down or restarting
/A: Aborts shutdown if you used a previous shutdown command with /t.
Therefore, to remotely shut down another computer on your network, you must enter the following commands into the command prompt:
shutdown /m\computername /r/f
This command will restart the computer named Computer Name and force close any programs that are still running.
shutdown –m \computername –s –f –c “The computer will restart, save all your work.” –T 60
This command will shut down the computer named Computer Name , force close all running programs, show a message to the user, and start a countdown 60 seconds before it shuts down.
Remote shutdown via shutdown dialog
If you don't like all these switches or using the command line at all, you can bring up the shutdown dialog. You can do this easily by simply using the /i command switch for the shutdown command.
Now the Remote Shutdown dialog box will appear as shown below.
Click on Add or Browse button to add computers to the list. You can then run the commands on the entire series of computers. If you click Add, you will need to enter the computer's network name in the format \Computer Name or just Computer Name Either works.
Of course, you need to know the actual computer name I mentioned, as you can determine above. So add as many computers as you like to the list and then configure the settings. You can shutdown, restart, or annotate unexpected shutdown.
You can also display a warning if you want for as many seconds as you like, and you can enter a comment at the bottom that will be displayed to users. That's all!
We prohibit remote access
As mentioned above, we will only change system settings that allow third-party users to view the contents of disks, change parameters and perform other actions on our PC. Be aware that if you use remote desktops or the machine is part of a local network that shares devices and software, the following steps may disrupt the entire system. The same applies to situations where you need to connect to remote computers or servers.
Disabling remote access is carried out in several stages or steps.
Step 1: General ban
With this action, we disable the ability to connect to your desktop using the built-in Windows feature.
Access is disabled, now third-party users will not be able to perform actions on your computer, but they will be able to view events using the assistant.
Step 2: Disable Assistant
Remote Assistance allows you to passively view your desktop, or rather, all the actions you perform - opening files and folders, launching programs and adjusting settings. In the same window where we disabled sharing, uncheck the box next to the item allowing the connection of remote assistant and click “Apply”.
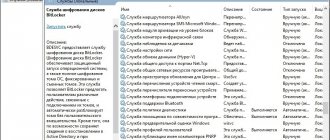
Step 3: Disable Services
At the previous stages, we prohibited performing operations and generally viewing our desktop, but do not rush to relax. Attackers, having gained access to a PC, may well change these settings. You can further increase your security level by disabling some system services.
All the steps above can only be performed under an administrator account or by entering the appropriate password. That is why, in order to prevent changes to system parameters from outside, it is necessary to work only under an “account” that has normal rights (not “administrator”).