« Updates could not be completed. Cancel changes 'usually occurs if Windows update files are not downloaded properly, if your system files are corrupted, etc. due to which users have to deal with a perpetual loop of the said message whenever they try to boot their system. This problem is frustrating because it keeps popping up the same message over and over again on every boot.
However, the error occurs frequently and you will encounter it most of the time when Windows update fails. . Users tried to reboot their system countless times, but the problem remained the same. This article will help you solve your problem with some simple and straightforward solutions. When your Windows won't boot, there's not much you can do, so to get rid of your woes, follow the steps below.
How to solve the problem with installing updates in Windows 10
Errors that the installation cannot complete are not new to users. Many people have encountered an error in Windows 7 in which the system notifies that updates could not be completed, and then the process of undoing the changes starts. For some time now, more and more users have been seeing this problem in Windows 10.
The system downloads updates correctly and displays information that they are ready to install. If you ignore the installation, then after a while the OS itself will “throw out” a notification that you should update Windows, prompting you to restart the computer to complete the operation.
And this is where the problem begins. The update is theoretically installed, but at some point a warning appears about a possible failure. The notification “We were unable to complete the updates” appears, and the screen below displays “Undoing changes” - Windows 10 begins the uninstallation procedure and rolls back the system to the state before it was installed. And so again and again, every time you try to update the OS. How to fix?
What to do when an error message appears
Regardless of the exact text, the notifications make it clear that an error occurred while trying to install updates. Windows cannot complete the upgrade procedure, so it begins to undo the changes, returning to the working configuration.
What should the user do in such a situation?
Wait until the rollback of changes is completed. The computer should be turned off forcibly only as a last resort, as this can lead to system crash.
The rollback may take a long time (up to several hours), but after it Windows will definitely work, and you will not have to restore the system.
Method No. 1. Windows Update Troubleshooting Tool
To get started, you can use the automatic troubleshooter in Windows 10. This is an official tool that can be downloaded from the Microsoft website. The utility diagnoses the system area for faults, and then tries to solve them using basic methods. The effectiveness may be less or more depending on the problem, but it is always worth giving this program a chance when starting to troubleshoot problems.
Download the troubleshooter
Once downloaded, launch the utility and follow the onscreen instructions. The program will automatically search for problems and then try to fix them.
If a notification appears that "
"restored, then you can try updating the system.
Windows Update Troubleshooter
Regarding method 3, you can only run the Windows 8 update diagnostic utility from a running system, but since it won’t boot, let’s try to perform such a check in safe mode.
To do this, we need to boot from the boot or installation disk/flash drive for Windows 8. Then we need to launch the command line. If you are using an installation disk with Windows 8, the easiest way to do this is by pressing the key combination Shift+ F10 .
On the command line we will execute
After the next reboot, the computer should boot into safe mode.
Launch the Update Service Diagnostic Wizard by running the command:
Then simply follow the wizard's instructions.
After the wizard finishes, disable booting Windows 8 in safe mode:
We reboot the system and try to boot in normal mode. If it doesn't help, move on to the next method.
Method No. 2. Clearing the SoftwareDistribution folder
The SoftwareDistribution folder contains update installers. The problem may be due to them being damaged or compatibility errors. Therefore, it is worth deleting the contents of this folder and restarting the service.
To be able to do this, you should temporarily stop the service
, otherwise file deletion will be blocked.
Press the Win + R key combination and enter the command:
Find a service in the list
, right-click on it and select “Stop”. The service will be suspended.
Again, simultaneously press the Win + R keys, enter the path to the directory below and press Enter:
You need to delete all the contents of the SoftwareDistribution directory - it should remain empty.
After deleting all files from the folder, open the list of services again (enter the command “services.msc” in the Run window), find
, right-click on it and select “Run”.
Reinstall drivers using Device Manager
Sometimes a hardware device connected to your computer can cause problems with your updates. You can find and reinstall these devices from Device Manager, which will likely resolve the update issues.
- Right-click the Start menu and select Device Manager.
- Hardware devices with the problem will show up with an exclamation mark in Device Manager.
- Right-click the problematic device and select “Uninstall device” from the menu.
- Enable the Uninstall driver software for this device option and select Uninstall.
- Once the device is removed, restart your computer.
- Your computer will automatically install the correct drivers for your connected device.
We were unable to complete windows 10 updates
When you install the next Windows 10 or Windows 8 update, in some cases you may need to restart your PC. After restarting your computer or laptop, you receive the error “ We were unable to complete the updates. Cancel changes. Do not turn off the computer " or " Windows updates could not be configured. Cancel changes. Don't turn off your computer , where you can wait an hour or more without any progress. Also, you may be stuck in an endless download and get an error every time you start your computer. An error when it was not possible to install updates can be caused by a failure to install the update, damage to system files, lack of disk space, sudden loss of electricity, or the laptop running out of power while installing the patch. Let's look at how to fix the problem when Windows updates cannot be completed after restarting your computer or laptop.
Free up disk space on your Windows 11/10 PC
Last but not least, your computer must have enough disk space to store new Windows updates. If you're low on disk space, consider deleting unnecessary files from storage.
While there are many ways to free up disk space in Windows, you can use Disk Cleanup for a quick start.
- Open the Start menu, search for Disk Cleanup, and select the app from the search results.
- Select the Windows installation disk and click OK.
- Wait while the tool determines how much disk space you can free up on the selected drive.
- In the Disk Cleanup window, check the items that Windows should remove. Then click OK at the bottom.
- In the window that opens, select “Delete files.”
- Once your files are deleted, restart your computer.
And the “We were unable to complete the updates” error on your PC should now be fixed. You will be able to go straight to your desktop after logging into your account in Windows 11/10.
Windows 10 updates failed. Cancel changes
There are two scenarios when you receive an error, and after rebooting three times, you will be able to boot and get to the desktop. When you get to the desktop, click “Start”, hold down Shift+Shutdown+Reboot to get to additional options and boot into safe mode.
The second scenario is when the error appears endlessly every time you turn on the computer. In this case, try pressing the reset button on the PC case 4 times, with an interval of 5 seconds. You should be automatically taken to advanced options where you can boot into safe mode. If this does not help, then create an installation USB flash drive with Windows, start the installation, and click on “System Restore” at the bottom. You will be prompted to additional options where you can select CMD and boot into safe mode.
Troubleshooting > Advanced Options > Boot Options > Restart > Enable Safe Mode (press F4 or 4).
Deleting a folder and disabling services
You need to clean out the SoftwareDistribution folder with updates. Go to C:WindowsSoftwareDistribution and clear everything inside the SoftwareDistribution folder. After reboot in normal mode and check if the error is resolved.
If, when you try to delete files in the SoftwareDistribution folder, you get an error that the file is occupied by another process, then you need to stop some services. Open a command prompt as an administrator and enter the commands one by one:
- net stop wuauserv
- net stop bits
- net stop cryptSvc
- net stop msiserver
Ignore if it says that the service is not running. Do not close the command prompt, but follow below.
Next, go to the path C:WindowsSoftwareDistribution and clear the contents of the folder. The contents will be cleared without any errors. Next, we start back the services that we stopped above. Enter the following commands into the command line to start services:
- net start wuauserv
- net start bits
- net start cryptSvc
- net start msserver
We boot into normal mode and see if the error when the updates could not be completed is resolved.
Troubleshooting
Try running automatic update troubleshooter. Go to Settings > Update & Security > Troubleshoot > Windows Update and run the troubleshooter.
Enable Application Readiness Service
Enabling Application Readiness may help, especially if there has been a major version update. The service prepares applications for use the first time a user logs in. Press Win+R and enter services.msc to quickly open services. Find the “ Application Readiness ” service and double-click on it. In properties, select the startup type “ Automatic ” and click “ Run ”. Check if the error where Windows 10 updates failed to complete is resolved.
Removing the anniversary update
An Anniversary Update is a global update that usually has a circular version, such as "Update v2.0". You can remove such an update, but provided that 10 days have not passed since the installation of the global update:
- Go to your computer settings, for example, using the Windows search bar.
Open computer settings
Select the “Update and Security” section
Go to the “Recovery” block
We begin to roll back the system to the previous build
Error: We were unable to configure Windows updates
The Windows 10 operating system requires constant updates to function properly. With each new patch, Microsoft improves the system in terms of security and also adds new features to it. But Windows updates do not always go smoothly, and sometimes users have to deal with errors. After downloading an operating system update, the computer must traditionally be rebooted for it to install and take effect. However, during the installation of updates after a reboot, the user may encounter one of the following errors:
- We were unable to configure Windows updates. Changes are being discarded;
Both of these errors make it clear that something went wrong during the system update process. In this article, we will look at what to do if these errors occur and how to fix them.
Method 1:
When you try to install updates, the OS notifies you that it is impossible to configure these updates and that you are canceling the changes. The PC reboots, again updates unsuccessfully, the process repeats, repeats again, and repeats again, the evil user pulls the cord plug from the socket or presses the button on the system unit to reboot in the hope of changing something, since the computer does not turn off after Windows 7 shuts down There is no point in doing this, because the work is not completed!
You need to wait for the next reboot, or you can do it using Reset. On the laptop, press the power button. When loading BIOS
press
F8
to open the OS boot menu.
Safe Mode
launch option and start the system.
Because Since most services are inactive in safe mode, the update download service will stop working. After loading the OS, click on the checkbox on the taskbar. Now you need to open the My Computer
.
Select the local OS drive on which Windows was installed. If you have several of them, and you have no idea which OS is on them, then go through them ( of course, at a glance! The local disk with the OS is marked with a flag
), there should be a folder called Windows:
Next, select a folder called SoftwareDistribution
, and in it we look for
Download
:
A window will open in front of you with long and strange folder names. You will need to look by date and delete the latest ones, see the picture:
If you have difficulty deleting the latest update releases, then select all existing folders and delete them. Now reboot the OS and try to enable updates, but if you own a pirated version, then updates must be disabled to avoid a repeat crash.
Of course, the screenshot with the checkboxes highlighted and updates enabled (with a green picture) shows what to do with the licensed program. Well, where everything is disabled and the checkboxes are unchecked (accordingly, the picture is red) - an option for pirated OS releases.
Reboot your PC again and look at the changes.
What to do if Windows Update can't complete
When a Windows update fails to complete, the user sees a message on the screen that changes made to the system will be rolled back. You just need to wait until the computer returns the system to the state it was in before installing the latest update.
However, it often happens that the message “We were unable to configure Windows updates” hangs for a long time or appears even after the computer automatically restarts. In such a situation, turn off the computer only as a last resort. It is recommended to wait until all changes are canceled. This may require more than one, not two, or even three system reboots. Sometimes undoing changes can take several hours.
Please note: The duration of undoing changes depends on many parameters, but, first of all, on the speed of the hard drive and the amount of information on it. For example, on laptops with slow hard drives, undoing a Windows update can take 5 hours or more.
Solution 6: Perform a system restore
In most cases, this problem can be resolved by performing a system restore. To do this, you will need to access the Troubleshooting Options screen. If you don't know how to do this, you can find out how to access it by reading the paragraphs above Solution 1: Once you are there, follow the instructions below:
Note. : Any data or changes made to your computer after the restore date will be deleted and no longer available. Consider backing up your data/configurations and files.
- On the screen Troubleshooting select Extra options .
- Select " System Restore ».
If nothing has helped so far, either restart your Windows computer or perform a clean install of Windows.
How to complete a Windows update if an error occurs
It is not recommended to leave your computer without updating - this may cause errors in the future when trying to run applications, reduces the level of security and can lead to various problems. There are several options for what to do if you cannot configure Windows update, and we will discuss them below.
Delete the Windows 10 update cache
The first thing you need to try if you can’t configure Windows update is to clear the SoftwareDistribution folder, in which the operating system update cache accumulates, or delete the contents from it. Depending on the “behavior” of the computer, this will have to be done in different ways.
If the computer finishes undoing the changes and allows the system to boot
- Press Ctrl+I on your keyboard and select “Update and Security” from the options menu that opens. Next, on the left side of the window, select the “Recovery” section and in the “Special boot options” item, click “Restart now”;
- A window will appear with a choice of options for rebooting the system. You need item number 4 – “Enable Safe Mode”. To select it, press F4;
- When the computer restarts in safe mode, run Command Prompt as an administrator;
- Enter the following command at the command prompt to rename the SoftwareDistributio folder:
Important: If your system hard drive is lettered D, E, or another, replace the letter C in the command above with that letter; - After this, restart your computer as normal.
If your computer does not complete undoing changes and keeps restarting
- Get a flash drive or disk to restore the Windows 10 operating system. Please note: If you don’t have one, you can create one on a third-party computer;
- Next, boot the system from the recovery drive. To do this, you need to insert a flash drive or recovery disk into the computer, and then set the BIOS settings to initial boot from this drive;
- When the recovery panel loads, at the language selection stage you will need to click on the “System Restore” item in the lower left corner;
- A blue menu will open, in which you need to go to the following items: “Troubleshooting” - “Command line”;
- Type the following commands one at a time, pressing Enter after each:
Important: After entering the Liest Vol command, make sure that the system drive is named “C” or any other name that you plan to enter;
After performing the steps described above in the first or second way, make sure in the system settings that Windows downloads and installs the update without errors. Next, restart your computer for the update to be applied. Please note: If no more errors occur, you can delete the SoftwareDistribution.old folder, which contains an unnecessary update cache.
Checking your computer with diagnostic tools
If the method described above does not help fix the problem that is preventing you from completing a Windows update, you can try using the operating system's built-in diagnostic utilities. As with the solution to the problem above, the steps will depend on whether or not you can boot Windows.
If the computer finishes undoing the changes and allows the system to boot
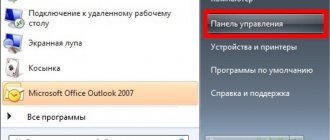
- Right-click on “Start” and select “Control Panel”;
- In the window that opens, set the viewing mode to “Large icons” and in the list of available categories, select the “Troubleshooting” option;
If your computer does not complete undoing changes and keeps restarting
- Open the command line using a bootable USB flash drive (the detailed process of how to do this is described above in the instructions for deleting the update cache);
- Write and apply the following command to restart your computer in safe mode:
- Once your computer is restarted in Safe Mode, run the commands to launch diagnostic tools through the command line. To do this, on the command line, write one by one:
- Next, enter the command to disable safe mode:
- After a reboot, the “We were unable to complete updates” error should no longer bother you.
Checking user profiles
Another reason for the “Update could not be completed” error on Windows 10 is a problem in the registry with user profiles. It can be eliminated in two ways. The simplest one is to perform a registry restore. A more complex option involves making changes to the registry yourself as follows:
- You need to press the combination Windows + R on your keyboard and enter the regedit command in the “Run” window to go to the registry editor;
- Next, proceed to the section:
- The folder contains several other folders, some of which have short names, and some of which have long names. You need to analyze folders with long names and look at the values of the available parameters in them. In the “Value” column, you need to make sure that the user’s folder is referenced by the ProfileImagePath parameter from only one section. If a second section is found in which the parameter refers to the user's folder, you must remove the ProfileImagePath parameter. To determine in which section a parameter cannot be deleted, you need to look at the value of the RefCount parameter. If its value is “0”, the ProfileImagePath parameter in this section is a duplicate of the main one and can be deleted. Also indicates that the ProfileImagePath parameter can remove the presence of the ".bak" suffix at the end of the section name.
Important: Before you begin deleting or changing registry settings, we recommend that you create a restore point.
Other ways to fix the “We were unable to configure updates” error
If none of the methods above helped fix the error that occurs when you try to install Windows updates, you can try the following:
If none of the tips listed in the article helped solve the problem, you can try resetting Windows or, as a last resort, reinstalling it.
Restoring the Windows 8 Component Store
Let's try to restore the Windows 8 component store using DISM. To do this, boot into safe mode again and execute the commands sequentially on the command line:
Disable booting in Safe Mode and check if Windows 8 boots normally.
If this does not help, and the message “Setting up Windows updates. Reverting changes" does not disappear, you should probably think about resetting or reinstalling the system...
Source
Clearing the SoftwareDistribution folder (Windows 10 update cache)
All Windows 10 updates are downloaded to the C: Windows SoftwareDistribution Download folder and in most cases, clearing this folder or renaming the SoftwareDistribution folder (so that the OS creates a new one and downloads the updates) allows you to fix the error in question.
There are two possible scenarios: after canceling the changes, the system boots normally, or the computer restarts endlessly, and you keep seeing a message that Windows 10 updates could not be configured or completed.
In the first case, the steps to solve the problem will be as follows:
- Go to Settings - update and security - recovery - special boot options and click the "Restart now" button.
- Select "Troubleshooting" - "Advanced options" - "Boot options" and click the "Restart" button.
- Press 4 or f4 to boot into Windows Safe Mode
- Run the command prompt as Administrator (you can start typing “Command Prompt” into the search on the taskbar, and when the required item is found, right-click on it and select “Run as administrator.”
- At the command prompt, enter the following command.
- ren c:windowsSoftwareDistribution SoftwareDistribution.old
- Close Command Prompt and restart your computer normally.
In the second case, when the computer or laptop constantly reboots and the undoing of changes is not completed, you can do the following:
- You will need a Windows 10 recovery disk or an installation flash drive (disk) with Windows 10 in the same bitness as that installed on your computer. You may need to create such a drive on another computer. Boot your computer from it, you can use the Boot Menu for this.
- After booting from the installation drive, on the second screen (after selecting the language) at the bottom left, click “System Restore”, then select “Troubleshooting” - “Command Prompt”.
- Enter the following commands in order
- diskpart
- list vol (as a result of running this command, look at what letter your system drive has, since at this stage it may not be C. Use this letter in step 7 instead of C if necessary).
- exit
- ren c:windowsSoftwareDistribution SoftwareDistribution.old
- sc config wuauserv start=disabled (temporarily disable automatic start of the Update Center service).
- Close the Command Prompt and click Continue to restart your computer (boot from the HDD, not the Windows 10 boot drive).
- If the system boots successfully in normal mode, enable the update service: press Win+R, enter services.msc, find “Windows Update” in the list and set the startup type to “Manual” (this is the default).
After that, you can go to Settings - Update & Security and check if the updates download and install without errors. If Windows 10 updates without telling you that updates could not be configured or completed, go to the C:Windows folder and delete the SoftwareDistribution.old folder from there.
Additional ways to fix the error
If all the proposed solutions to the problem of undoing changes due to the fact that Windows 10 updates could not be configured or completed were not successful, there are not many options left:
- Run a Windows 10 system file integrity check.
- Try to clean boot Windows 10, delete the SoftwareDistribution\Download contents, download the updates again and start installing them.
- Remove third-party antivirus, restart the computer (needed for the removal to complete), install updates.
- Try the long way to restore Windows Update components to their original state, described on the official Microsoft website
And finally, in the case when nothing helps, perhaps the best option is to perform an automatic reinstallation of Windows 10 (reset) while saving the data.
source-remontka
Troubleshooting Windows 10 Update
Windows 10 has built-in diagnostic tools to help fix update problems. Just as in the previous case, two situations may arise: the system boots or Windows 10 constantly reboots, all the time reporting that the update setup could not be completed.
In the first case, follow these steps:
- Go to the Windows 10 control panel (at the top right in the “View” field, put “Icons” if “Categories” is set there).
- Open "Troubleshooting" and then, on the left, "View all categories."
- Start and run two troubleshooters one at a time - Background Intelligent Transfer Service (BITS) and Windows Update.
- Check if this solves the problem.
Using the control panel
This method allows you to erase updates using the same list that was described in the previous method, but the transition to it will be done differently:
- Open the computer control panel, for example, through the Windows search bar.
Open the control panel through the Windows search bar
Go to the “Programs and Features” section
Let's move on to viewing installed updates
Click on the “Delete” button
We confirm that the update needs to be removed
Fixing Windows 10 update installation errors
There are currently three different issues that Windows 10 users are facing when installing updates. Firstly, there is an error downloading the update or the download process is frozen. Secondly, there are problems during the installation of the update, and finally, the system crashes with BSOD after a reboot. Below are several possible troubleshooting solutions.
Content
Fixing Windows 10 update download problem
The update won't download
If the cumulative update does not download, try the following steps:
Disable your antivirus and VPN/Proxy client before updating.
Please wait while the update is installed, sometimes this process may take a long time depending on the speed of your Internet connection.
If the update fails, you can use Windows 10's built-in Troubleshooter to fix the problem.
Press the Windows key + i to open the Settings . Go to Update & Security > Troubleshoot . Run diagnostics and fixes section, select the Windows Update and click the “Run the troubleshooter” button.
You can also download and run the Windows 10 Update Troubleshooter utility.
Fix Windows update download stuck from 5% to 95%
If a cumulative update freezes during download or the installation fails, something has gone wrong with the update files. After the folder containing the update files is cleared, Windows Update will try to download the update components again. In Windows Explorer, go to the following location:
Delete all files/folders, but do not delete the Download folder itself. Select all files and folders using CTRL + A and press Delete key to delete. Restart your computer and run the update process again.
Fixing a Delivery Optimization service error
If the cumulative update freezes during download, try the following solution:
- Click on the Start menu icon.
- Enter Services and launch the desktop application of the same name.
- Scroll to the Delivery Optimization .
- Right-click on the service and select Properties.
- Change the “Startup Type” to “Manual”.
- Restart your computer.
- Check for new updates.
- If Windows 10 update still gets stuck, change the startup type to Automatic (Delayed Start).
Stop the Windows Update service
If stopping the Delivery Optimization service does not solve the problem, you can also try stopping the Windows Update . If the Windows 10 update freezes at the “Initialization” stage. ” try the following solution:
- Click on the Start menu icon.
- Enter Services and launch the desktop application of the same name.
- Scroll to Windows Update .
- Right-click on the service and select Stop.
- Restart your computer.
- Check for new updates.
- The update should proceed as normal.
Windows Update reset script
Reset Windows Update Agent will completely reset the Windows Update client settings. It has been tested on Windows 7, 8, 8.1 and Windows 10. The script will configure services and registry keys related to Windows Update, restoring the settings to default. It will also clean up files related to Windows Update.
Fixing Windows 10 update installation problem
In some cases, you may encounter a problem while installing the update. If the update installation is stuck at some point, try the next solution.
If your computer freezes during the Preparing to Set up Windows stage. Do not turn off the computer , then follow the instructions below.
- While holding the power button, turn off the machine.
- Turn on your computer and boot into safe mode.
- Sign in to your account (if required).
- Make sure all virus scanners are disabled before continuing.
- In the Start menu, type Recovery and select the corresponding desktop application.
- Click Run System Restore .
- Select an earlier restore point, and then click Next.
- Follow the instructions to begin system recovery.
- Wait while your computer completes the system restore process.
- Regardless of whether the restore is successful or fails, you will most likely get rid of the error stuck at the moment “Preparing to set up Windows. Don't turn off your computer."
- Sign in to your account if required.
- Disable virus scanners before continuing.
- Start the Windows update process.
- The update should now install without problems.
Blue screen after Windows 10 update
Some users may encounter a stop error that causes a Blue Screen of Death (BSOD) to be displayed during a system reboot.
If you encounter a BSOD crash when upgrading Windows 10, check out this article:
If the BSOD issue cannot be resolved, then follow the steps to uninstall and reinstall the potentially problematic update on your device. Additionally, you can prevent Windows from installing the problematic update:
Other Windows 10 update problems
After installing Windows 10 updates, you may encounter some problems such as internet connection errors.
To resolve these issues, you need to run the following commands in the Command Prompt (cmd.exe). In the search box on the taskbar, type Command Prompt , press and hold (or right-click) “Command Prompt,” and select “Run as administrator.” After opening the command line, enter the following commands one by one:
If you still encounter the “No Internet Connection” issue, please update your computer's IP address. To do this, open a command prompt (Windows + R, type cmd.exe and press Enter) and enter the following command:
Disabling Windows 10 updates and drivers
Pause update
, the Pause update for 7 days option became available in Windows Update , which allows you to defer all updates, including security updates. If you enable this feature, Windows will not check for and automatically install all updates for 7 days. The option is also available for Windows 10 Home users, who can use it up to 5 times, and thus defer updates for up to 35 days.
If you want to delay (or skip) installing the new Windows 10 preview build, you can quickly do it like this:
- Open the Settings .
- Go to the Update and Security section.
- Click Pause updates for 7 days.
You can also select a specific date within a seven-day period from More options > Pause updates . As a last resort, you can use the option to disable updates completely:
How to disable driver updates
Very often, Windows 10 installs driver updates for your computer's hardware components even when you don't need them. However, you can always prevent Windows updates from being installed or block or hide individual updates using the Show or hide updates utility.
Pro or Enterprise users can also use Group Policy Editor to prevent device-specific drivers from being installed:
DISM commands to check for problems with Windows 10
You can use the official DISM commands to restore a Windows image to fix any problem with your updates. Before you start, it's a good idea to take a full system backup or create a system restore point in case something goes wrong.
Using the CheckHealth option in DISM
/CheckHealth command in DISM allows you to detect potential damage. This command is used only to find damage, but does not perform any repair operations.
To run this command follow these steps:
- Search for Start menu Command Prompt , right-click on the link that appears and select “Run as administrator” because running DISM requires device administrator rights.
- In Command Prompt, type the following command and press Enter:
Using the ScanHealth option in DISM
/ScanHealth command in DISM allows you to scan your Windows image for any damage. Unlike /CheckHealth, the /ScanHealth check can take up to 10 minutes.
To run this command follow these steps:
- Type in the Start menu Command Prompt , right-click on the link that appears and select “Run as administrator.”
- In Command Prompt, type the following command and press Enter:
Using the RestoreHealth option in DISM
/RestoreHealth command in DISM allows you to automatically repair damaged Windows images. Unlike /ScanHealth, the /RestoreHealth scan can take up to 10 minutes.
To run this command follow these steps:
- Type in the Start menu Command Prompt , right-click on the link that appears and select “Run as administrator.”
- In Command Prompt, type the following command and press Enter:
Note: When running /RestoreHealth or /ScanHealth, you may notice the procedure hangs between 20% and 40% - this is completely normal behavior.
How the problem is solved
Such a nuisance may be accompanied by the appearance of one of 2 inscriptions on the screen:
In fact, they are one and the same. The error is that the OS cannot correctly install all the latest updates that have become available for the operating system.
There are several ways to deal with this problem. The user is required to:
Plus, there are several additional measures that could potentially help in this situation.
Cache folder
If the monitor screen displays a message from Microsoft stating that we were unable to complete the update procedure correctly and the changes are being canceled, you should start by clearing the standard folder with the update cache for Windows 10.
Since the computer was unable to fully complete the installation of current updates, it may begin to shut down cyclically, reboot, and again display the same error. If it is not possible to correct the work after 3–5 or more repeated reboots, it makes sense to take action. It is unlikely that you should count on the fact that the procedure will be completed on your own. This is already a problem that requires intervention.
Since this error is specific to Windows 10, we will talk specifically about this version of the operating system. OS updates are downloaded to a special folder called Download, located in the SoftwareDistribution folder. You can get into it by going to the disk with the installed OS and selecting the Windows directory.
In this situation, to begin with, it is recommended to simply rename the final folder, that is, Distribution, and send the PC to reboot. Due to this action, the system will automatically create a new folder, download updates into it and be able to install them correctly.
And here it is possible to go along one of 2 paths:
This will be accompanied by a message stating that for some reason the system failed to configure or install updates normally.
If the system reboots normally, you need to do the following:
The second option involves the computer starting to reboot many times, but the changes are not undone.
Here the algorithm of actions will be different:
Then you need to check whether all current updates are being downloaded and whether they will be able to install normally this time.
If the subsequent reboot was not accompanied by the same error, then everything was done correctly. All that remains is to delete again the same folder into which new products for the OS are downloaded. Upon subsequent reboot, the system will automatically create a new one, and all firmware will be loaded there as it becomes available.
Malfunctions from the update center
If your computer is unable to complete Windows 10 updates correctly, there is another option that could potentially help. Moreover, you do not need to use any third-party tools. At this rate, the system will not update itself. She needs help.
Windows 10 OS initially has built-in tools for diagnosing various types of problems with updates. And here, as in the previous situation, there may be 2 scenarios. That is, the system boots normally and stably, or reboots cyclically, each time producing an error with the appropriate signature.
In the first situation, you need to follow these steps:
Now, after following these instructions, you can restart your computer and see if the problem has gone away or not.
During a cyclic reboot, the algorithm of actions will be as follows:
When finished, the machine simply reboots. In many situations this method helps. But if the cyclic reboot still continues, then probably the only solution is to reset the operating system.
Duplicate profiles
It also happens that Windows 10 OS updates could not be completed because duplicate profiles were detected in the system. Until this is fixed, the operating system will not update correctly.
But here it is important to understand that the user fully bears the consequences of all subsequent actions. You can make a mistake that will lead to not the most pleasant consequences.
In a situation where the Windows update could not be completed normally due to duplicate profiles, you can do the following:
After all this, the computer restarts and a second attempt is made to install the latest updates.
Method 2:
If you are not lucky enough to solve the problem, then there is this option, it is also effective and quite affordable.
Also press F8
at startup, but now select the boot option
Safe Mode with command line support
, do not get confused.
This is what it looks like, type msconfig
and press
Enter
. The command will be executed and the window will open:
Now, a window has appeared on the system configuration, now go to the service and look for the line to restore the system.
After which you should make a choice on the restore point, and then confirm it:
Press it's ready. After the changes have been made, also proceed to updates, and then you can decide whether to do them automatically or refuse altogether. If you forgot something, all this is indicated in the 1st method, do not forget to also check the boxes. Again, reboot your PC.
Please leave your comments via social networks. Tell us which method helped you. What else would you like to see on this site? Feel free to post your thoughts, this will help other visitors and the administration.