- 2shared
- 0Facebook
- 2Twitter
- 0VKontakte
- 0Odnoklassniki
Problems with the Internet connection are one of the most common consequences of a computer being infected with a virus. In this case, the sites either do not open, or instead of one site the user ends up on another, and this behavior can be observed even after the virus is removed. Cause? The malicious program changes system settings and files, among which one of the most important is the hosts file.
What is a hosts file
See also: “How to speed up the Internet on Windows 10: recommendations”
Essentially, this is a regular text document that can be opened with any text editor, but most often an ordinary notepad is used for this. This document contains a list of IP addresses and domain names that must be used to broadcast them. Moreover, the hosts file takes precedence over the DNS server provided by the provider. The contents of this file can be changed at your discretion. However, you must have an account with administrator rights to make adjustments.
By properly configuring this file, you can significantly speed up the loading of web pages. In addition, it is also possible to block any sites.
What is hosts for in Windows 10?
A hosts file is an electronic document containing information about domain names of Internet resources. The submitted data takes precedence over the data received from the DNS server.
On the Internet, each website has its own individual IP address. This is how an Internet resource quickly detects the necessary network equipment and provides the required page. A special indication in hosts helps free up memory from constant address requests and significantly speed up the process of information exchange.
Where is the hosts file located on the computer?
If you do not know where to find this file, then the information below will give you a comprehensive answer to this question.
In Windows 10, this file is located at the same address as in previous versions of the operating system. Here is the full path to it: Windows\System32\drivers\etc .
The “hosts” file has no extension at all. However, it opens very simply, using any text editor.
To do this, right-click on the file, click “Open with” in the context menu and select an available editor, for example, Notepad.
If desired, you can change the location of the file , although the need for this action occurs extremely rarely. But it would still be useful to know about the existence of such an opportunity. And in order to complete this task you will need to do the following:
- Launch Registry Editor. To do this, press Win + R to bring up the “Run” line. Type the command “regedit” and press Enter or “OK”.
You can also use the search bar by entering “regedit” and selecting the best match. - After we have given the application permission to make changes on the PC, in the window that opens, go to: HKEY_LOCAL_MACHINE\SYSTEM\CurrentControlSet\Services\Tcpip\Parameters.
- Find the “DataBasePath” file in this directory. Double-click on it to open the properties and enter a new address for the location of the hosts file. After that, click “OK” and you can close the Registry Editor.
How to download or restore Windows 10 hosts file
As was already written above, the default contents of the hosts file, although it contains some text, is equivalent to an empty file. So, if you are looking for where to download this file or want to restore it to its default content, the easiest way would be:
- On the desktop, right-click and select “New” - “Text Document”. When entering a name, erase the .txt extension, and name the file itself hosts (if the extension is not shown, turn on its display in the “control panel” - “Explorer options” at the bottom of the “View” tab). When renaming, you will be informed that the file may not open - this is normal.
- Copy this file to C:\Windows\System32\drivers\etc
Done, the file is restored to the form in which it was immediately after installing Windows 10. Note: if you have a question about why we didn’t immediately create the file in the desired folder, then yes, it’s possible, it just turns out in some cases There are not enough rights to create a file there, but copying usually works.
Making changes to hosts
In order to make any changes to the “hosts” file, you must open it with system administrator rights.
- Run any text editor as administrator (to do this, right-click on it and select the appropriate item).
- Click on the "File" menu and select "Open...".
- In the file extension field, click on the down arrow, select the “All files” option, then find the required “hosts” file along the path indicated above and click “Open”.
- Pay attention to the text file that opens. The initial default system settings assume that it contains only lines starting with the # sign. This symbol denotes line comments. That is, in fact, initially the document is empty and does not contain any significant information.
- Editing a file consists of adding a new line. It should begin with the numbers of the IP address, then you need to put a space and write the domain name of the site. As a result, when accessing the specified IP address, redirection will be performed to the specified address.
- In order to block access to a site on your computer, enter the IP address “127.0.0.1”, then press Space and write the domain name of the site. You should take into account different spelling options for the address - with and without “www” at the beginning. Below is an example.
- After making all the necessary changes, go to the “File” menu again and click “Save”.
- If suddenly the changes are not saved, then you probably opened the file without administrator rights.
How to change the hosts file: opening, editing and saving
So, we know where hosts is, now let’s see what can be done with it, and why it might need to be changed at all. In essence, the host file is a regular text document, only without an extension. You can open it with any text editor, the same standard Notepad.
There are also special utilities like HostsEditor , but their use in most cases is perhaps unnecessary. The contents of the hosts file are presented with brief information about its purpose and two examples of use. The syntax of entries is very simple. The IP address comes first, followed by the hostname a few spaces later. For example, IP 38.25.63.10 will correspond to the address x.acme.com, and IP 127.0.0.1 or ::1 (for IPv6) will correspond to the address of the local computer (localhost).
Please note that all lines are preceded by a # sign, this means that the line is commented out, that is, it is inactive, which is the same as if the file were empty. It will start working only when you add a new entry. Let's give an example of how to change the hosts file in Windows 7/10 and use it to block a website, redirecting the request to the local computer. Let's say we want to restrict access to the VKontakte social network. To do this, add the following line at the end of the file:
127.0.0.1 vk.com
We save the HOSTS file like any other text file, restart the browser and try to access the site. As a result, you will receive the error “Cannot access the site.” It works very simply. When a user goes to vk.com, the browser first accesses HOSTS and looks for a match between the host name and its IP address, and, having found it, goes to the specified IP address, ignoring DNS server services, since accessing the host file is a priority.
Of course, there is no social network on the local computer, so the browser returns an error. This way you can block any resources by registering them in HOSTS in a column. Another example of using a host file is redirecting to another site on the Internet. Everything is the same here, only instead of the local IP address 127.0.0.1 the address of another site is written. By the way, viruses often do this by changing HOSTS and adding redirects to phishing resources.
This is why it is so important to know what the default hosts file should look like. If you haven't edited it and there are uncommented entries in it, this should be a cause for concern. However, anti-spyware utilities can also change hosts by writing into it the addresses of blocked unreliable resources. Changes can also be made by keygens used to bypass activation of licensed software.
Restoring the original host file
As we said earlier, the source “host” file does not contain any information significant for the system and does not in any way affect its operation. Sometimes it happens that after installing an application, unwanted changes are made to a file, or it disappears altogether (as a rule, this is the work of virus programs). In this case, restoring the original host file will help.
To do this you will need to complete the following steps:
- In any location (for example, on your desktop), create a new text document named “host”.
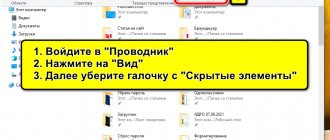
- A file with the extension “txt” will be created. It needs to be removed. To do this, go to any folder on your computer (you can use Explorer by pressing the Win+E keys) and in the “View” tab, turn on the “File name extensions” checkbox.
- Now you can rename the file by removing the extension (along with the dot) from the name. The system will additionally ask whether we really want to change the file extension. We confirm and move on to the next point.
- Copy the created file to the folder where the “host” file should be located (Windows\System32\drivers\etc folder).
What to pay attention to.
If this file on your computer is no different from this standard file, then this means that there are no problems that could arise due to modification of this file by malicious programs on your computer.
Pay special attention to the contents of the file, which are located after these lines:
# 127.0.0.1 localhost # ::1 localhost
Additional entries may be inserted into the hosts file, which are added here by some programs.
For example, in the figure below you can see that Unchecky has added some entries to the standard contents of the hosts file. Additional entries were inserted between commented lines to perform specific actions. This was done so that during the installation of programs on the computer, this utility would cut off unwanted software.
There may be additional lines of this type: first “a set of numbers”, and then after a space - “site name”, added in order, for example, to disable advertising in Skype or block access to a site.
If you yourself have not added anything to the hosts file and do not use the program mentioned in this article (Unchecky), then you can safely remove incomprehensible entries from the hosts file.
Problems with hosts operation
If the changes made to the file do not work, double-check the correctness of the data. If everything is correct, then try the following:
- Run Command Prompt as administrator from the menu, which is called up with the Win+X keys.
- Enter the system command “ipconfig /flushdns“.
- Wait for the command to complete, close the Command Prompt window and check if the problem is gone.
If the problem persists, you need to disable the proxy server .
- Go to the Control Panel of your computer (we have separate instructions on how to do this - “Control Panel in Windows 10: where is it located and how to open it”).
- Click on the “Browser Options” section, changing the preview option to icons (large or small).
- In properties, go to the “Connections” section, then click on the “Network Settings” button.
- We remove all the checkboxes and confirm the changes made by clicking “OK”. Now the problem should be completely resolved.
What are hosts for?
The task of the system hosts file is to store a list of domains (web addresses like site.ru) of various sites and their IP addresses. Thus, in the process of working with the Internet, domains are converted into their IP addresses and vice versa. Each outgoing request to open a particular Internet site is, in fact, a request to convert a domain to an IP address. This query is performed by the Internet DNS service. From the technical side of the Internet veil, there are no web addresses in literal expression like site.ru. They are used for the convenience of web surfing by users and reflect the essence of the site's themes. Designed to facilitate the exchange of data between different parts of the network, the DNS service converts domains into specific sets of numbers, also known as the IP addresses of each individual site.
The hosts file has priority over the DNS system. Before accessing this Internet service, browsers first check their cache, then receive information about the mapping of IP addresses to domains, which is contained in the hosts file of the Windows operating system. And only after this the request goes to DNS.
Some users make changes to the “hosts” in order to speed up the loading of their favorite sites. If you specify in it for individual sites the correspondence of IP addresses to their domains, you can get slightly faster access to these sites, since they will load in the browser window, bypassing the stage of sending a request and receiving data from the DNS service. But this method of optimizing Internet access is not necessary, since there is a browser cache with the highest access priority.
The need for intervention to change the contents of this file arises when it is edited by malware without the user’s knowledge. The hosts file is a Windows vulnerability and is of particular interest to malware creators. By replacing the original system hosts file with its analogue, but with a ready-made list of false correspondences of IP addresses to their domains, Internet fraudsters thus implement a redirection mechanism that is beneficial to them. If we add a false correspondence of the IP address to the domain into the “hosts”, replacing the real IP address, for example, of some social network with the IP address of, say, a site with paid porn content, then every time we try to get into the social network we will actually end up on a porn site. But this is not the worst example of scammers manipulating hosts. Things will be much more difficult when filling out forms on phishing sites. In order to fish out confidential user data, for example, accounts in financial and online payment systems, logins and passwords for them, Internet fraudsters can replace individual web pages of these online systems with their own web pages, specially created for fraudulent purposes. Substitution of file data with redirection to another site is also used as a dishonest way to promote sites, to block social network pages and extort for unblocking money, to block access to web resources of anti-virus software products, etc.
Making changes to hosts is also practiced for the purpose of locally blocking access to certain sites. For example, within the framework of parental control.
Below we will look at how the processes of making changes to hosts are carried out in order to edit it to block individual sites, as well as to correct it if the content is replaced by malware. But first, of course, let’s find the file itself, open it and look at its original contents.
How to remove protection from editing the hosts file
There may be a situation where protection against editing the hosts file is enabled. To do this you need:
- Go to the folder where hosts is located and, highlighting it, select “ Properties ”.
- In the “General” section, uncheck “ Read Only ”.
- Activate "Apply".
Can you tell a cringe from a crash? Take this fun test and find out!
Restoring the hosts file using the AVZ application
There are many OS recovery programs, the AVZ application can work with the hosts file better than a text editor.
The AVZ version can be found free or purchased software for working with a PC.
- In the open AVZ application, in the “Service" in the option "Hosts file manager» its editor opens.
- Then select “Cleaning the hosts file”
- Saving the hosts file is done with a button in the shape of a floppy disk.
Take the test on the topic “Legends of the 90s”, remember which of these you had?
Third-party file editing software
If you look for hosts yourself and don’t want to understand how it works, you can use third-party applications to edit it. The most popular free option is Hosts File Editor.
Hosts File Editor
The program is used for quickly adding and editing addresses, and is practically indispensable for frequent edits and creating a personal ban list. The interface is simple and intuitive: new entries can be added and edited with a double click, it is possible to disable the list and quickly change several pre-prepared templates.
How to reset the DNS cache in Windows 7 to apply the settings in the hosts file?
As already mentioned, in order for the Windows 7 hosts file settings to be applied, you must either wait until Windows updates the dns cache, or reset it manually. And here's how you can do it:
- Close all programs that use Internet connections, including browsers.
- Footnote: If you only need access through browsers, then close them. Other programs will pick up the settings later.
- Open a command prompt
- Enter the following command:
- ipconfig /flushdns
- Press enter and wait until the phrase appears
- DNS resolver cache cleared successfully
In most cases, this will be enough to update the DNS cache.
Note: If for some reason the cache has not been updated, restart your computer. If this does not help, then you need to start searching for the cause with the program that did not pick up the settings. For example, browsers also have their own DNS cache and sometimes may not immediately pick up the settings, although this should not happen.
As you can see, there is nothing complicated about using the hosts file.
Now, you know how to use the Windows hosts file for security purposes to block and redirect sites.
Categories:
- safety
- Internet
- system
- file
☕ Would you like to express your gratitude to the author? Share with your friends!
- PeStudio file analysis program
- RKill is a free program to clean an infected computer from malware
- PeStudio File Analysis Software Tech Tips
- WSCC is a free program to manage hundreds of Windows system utilities. Tech Tips
- How to extract files from an archive with an unusual format? Technical Tips
- RKill is a free program to clean an infected computer from malware. Technical tips
- Hard Drive Space or Why It's Less Than You Think Tech Tips
- Can your personal information be distributed along with the files? Technical Tips
Comments/feedback
0 Yyy 09.20.2018 20:43 I couldn’t find the hosts file, damn it hides microsoftware in all sorts of ways
Reply | Reply with quote | Quote | Report to moderator
Update list of comments
Procedure for changing a file
There are 2 main ways to adjust it:
- Using special programs, for example “Dr.Web Cureit”, which will bring the host to its initial state;
- Manually.
To put things in order manually, you need to open Hosts using Notepad with extended rights. Make adjustments to it and save the changes. Below is an image of the original contents of the file:
