04/26/2020 windows | for beginners
One of the common problems of Windows 10 users is that thumbnails or thumbnails of images (photos and pictures), as well as videos in Explorer folders are not shown, or black squares are shown instead.
This guide will tell you how to fix this problem and return the display of thumbnails (thumbnails) for preview in Windows 10 Explorer instead of file icons or those same black squares.
- Enable thumbnail display in settings
- Resetting the Windows 10 thumbnail cache
- Additional ways to enable thumbnail display
- Video instruction
Note: displaying thumbnails is not available if “Small icons”, display as a list or as a table are enabled in the folder options (right click in an empty space inside the folder - View). Also, thumbnails may not be displayed for specific image formats that are not supported by the OS itself and for videos for which codecs are not installed in the system (this also happens if the player you installed installs its own icons on video files).
Enable showing thumbnails (thumbnails) instead of icons in settings
In most cases, in order to enable the display of pictures instead of icons in folders, you just need to change the corresponding settings in Windows 10 (they are present in two places). It's easy to do. Note: If any of the options below are not available or do not change, please refer to the last section of this guide.
First, check whether thumbnail display is enabled in File Explorer settings.
- Open Explorer, click on the “File” menu - “Change folder and search options” (you can also go through the control panel - Explorer options).
- On the View tab, see if the “Always show icons, not thumbnails” option is turned on.
- If enabled, uncheck it and apply the settings.
Also, settings for displaying thumbnails of pictures are present in the system performance parameters. You can get to them as follows.
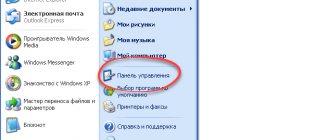
- Right-click on the “Start” button and select the “System” menu item.
- On the left, select "Advanced system settings"
- On the Advanced tab, under Performance, click Options.
- On the "Visual Effects" tab. And apply the settings.
Apply the settings you made and check if the problem with displaying thumbnails has been resolved.
Why are photo thumbnails not showing up in File Explorer?
The system stores copies of thumbnails of all images, videos and documents for quick display when opening a folder. Once these thumbnails are deleted, they will be automatically restored if necessary. May help, especially if you don't have enough memory.
Go to System Drive C:\ Properties Disk Cleanup . You can run the cleanmgr in the Win+R and select the disk. Now check only the Thumbnails and click OK . In fact, thumbnails of unused images are not needed.
To clean up, you can use the updated Windows 10 settings. You need to open Settings > System > Memory and select Temporary files (the location depends on the system version). Now, having selected Sketches , just click Delete files .
You may need to adjust your performance settings. Run the command sysdm.cpl in the Win+R . On the Advanced , select Options . Make sure that Show Thumbnails Instead of Icons .
Conclusion
Displaying photo thumbnails right in File Explorer makes it easy to use. The user does not need to open the image to identify it. The thumbnail immediately shows what kind of photo it is. As mentioned earlier, they should show up by default in Windows 10.
Resetting the thumbnail cache in Windows 10
This method can help if, instead of thumbnails, the explorer begins to display black squares or something else that is not typical. Here you can try deleting the thumbnail cache first and having Windows 10 create it again.
To clear thumbnails, follow these steps:
- Press the Win+R keys on your keyboard (Win is the key with the OS logo).
- In the Run window, type cleanmgr and press Enter.
- If a drive selection appears, select your system drive.
- In the Disk Cleanup window, at the bottom, o.
- Click "Ok" and wait for the thumbnails to be cleared.
After this, you can check whether the thumbnails are now displayed (they will be created again).
Reviews about QuickLook
The program has a very high rating among Microsoft Store users: 4.7 out of 5 based on 103 ratings.
Users note that working in Windows Explorer with this program is no worse than on MacOS, that they have been looking for something similar for a long time and finally found it. The stability of the program and the absence of any problems with it are also noted. Install it and go!
QuickLook sits modestly in the system startup, consumes little memory and does its job conscientiously. I can recommend it to those users who want to get maximum comfort when working with Windows.
Additional ways to enable thumbnail display
If in your case thumbnails are not displayed only if you set Large or Huge icons in the View settings, check that in the registry key
HKEY_LOCAL_MACHINE\SOFTWARE\Microsoft\Windows NT\CurrentVersion\Windows
There were the following parameters with the following values, if they are missing or have different values, change them:
"IconServiceLib"="IconCodecService.dll" "DdeSendTimeout"=dword:00000000 "DesktopHeapLogging"=dword:00000001 "GDIProcessHandleQuota"=dword:00002710 "ShutdownWarningDialogTimeout"=dword:ffffffff "USERNestedWindowLimit"=dword:0 0000032 "USERPostMessageLimit"=dword: 00002710 "USERProcessHandleQuota"=dword:00002710 @="mnmsrvc" "DeviceNotSelectedTimeout"="15" "Spooler"="yes" "TransmissionRetryTimeout"="90"
And in the registry section
HKEY_LOCAL_MACHINE\SOFTWARE\Wow6432Node\Microsoft\Windows NT\CurrentVersion\Windows
following parameters
"IconServiceLib"="IconCodecService.dll" "DdeSendTimeout"=dword:00000000 "DesktopHeapLogging"=dword:00000001 "GDIProcessHandleQuota"=dword:00002710 "ShutdownWarningDialogTimeout"=dword:ffffffff "USERNestedWindowLimit"=dword:0 0000032 "USERPostMessageLimit"=dword: 00002710 "USERProcessHandleQuota"=dword:00002710 @="mnmsrvc" "DeviceNotSelectedTimeout"="15" "Spooler"="yes" "TransmissionRetryTimeout"="90"
And if these sections have the LoadAppInit_DLLs and AppInit_DLLs , then the first should be equal to 0, and the second should be empty.
And just in case, there are two more ways to enable the display of thumbnails in Explorer - using the Registry Editor and the Local Group Policy Editor of Windows 10. Essentially, this is one method, just different implementations.
To enable thumbnails in the Registry Editor, do the following:
- Open the registry editor: Win+R and enter regedit
- Go to the section (folders on the left) HKEY_CURRENT_USER\SOFTWARE\Microsoft\Windows\CurrentVersion\Policies\Explorer
- If you see a value on the right side called DisableThumbnails , double-click on it and set the value to 0 (zero) to enable showing thumbnails.
- If there is no such value, you can create it (right click in the empty area on the right - create - DWORD32, even for x64 systems) and set its value to 0.
- Repeat steps 2-4 for the HKEY_LOCAL_MACHINE\SOFTWARE\Microsoft\Windows\CurrentVersion\Policies\Explorer partition
Close Registry Editor. The changes should take effect immediately after the changes, but if this does not happen, try restarting explorer.exe or restarting your computer.
Same thing using the Local Group Policy Editor (only available on Windows 10 Pro and higher):
- Press Win+R, enter gpedit.msc
- Go to User Configuration - Administrative Templates - Windows Components - File Explorer
- Double-click on the "Turn off thumbnail display and display icons only" option.
- Set it to Disabled and apply the settings.
The preview images should then show in File Explorer. Also note that if the problem is recent and you have system restore points, they may help. There is also a free program called Icaros that is specifically designed to show thumbnails of different file types on Windows.
Installing plugins
You can add support for Microsoft Office documents and a wide range of others that you need to QuickLook using plugins. To do this, we take the following steps:
- Go to the GitHub page, where plugins for QuickLook are posted, and download the one you need.
- In Explorer, press Space on the downloaded file and in the window that opens, click the “Click here to install this plugin” button
- After a message appears about the successful installation of the plugin, restart QuickLook.
This way you can quickly view tables, presentations, e-books, 3D model files, APK installations, etc. without having to install special programs for each of these file types!
Windows 10 Photos app not working
By default, all image files open through the standard Photos application. This program is designed for comfortable and quick viewing of photos and pictures on a computer, tablets, smartphones and other mobile devices. And if the application works correctly on a tablet computer, then on a computer with the Windows 10 operating system, photos take a long time to open, or the application does not start at all.
Why isn't the Windows 10 photography app working? There may be several reasons, and while the developers are working to fix this error, we will try to solve the problem using available methods.
Method 3: Turn thumbnail viewing on and off using a BAT file.
The .bat files below will change the DWORD value in the registry key:
HKEY_CURRENT_USERSOFTWAREMicrosoftWindowsCurrentVersionExplorerAdvanced
IconsOnly DWORD
- 0 = Off – show icons
- 1 = On – show thumbnails
2. Enable Thumbnail Preview in File Explorer
Note: Default value.
2.1 Click the Turn_on_thumbnail_previews_in_explorer.zip to download the BAT file and go to step 4 below.
3. Disable thumbnail previews in File Explorer
3.1 Click the Turn_off_thumbnail_previews_in_explorer.zip to download the BAT file and go to step 4 below.
4. Save and unzip the .bat file.
5. Run the .bat file.
6. You will notice the screen flickering and the Command Prompt window will quickly open and close after you restart File Explorer to apply the registry changes.
7. Once complete, you can delete the downloaded .bat file if you wish.
Last resort method
In those rare cases when nothing helps and you still don’t see the image previews, you have one more option - system recovery. To do this you need:
- To do this, you either need to go to the “Control Panel” and select “Recovery”.
- Or use the Start menu, conduct a search query and select the appropriate program.
- Or it will launch this program using the “Run” icon.
- Next, in the “Computer Recovery…” menu, click on “Run System Restore”.
- In the window that appears, select “Select another recovery point” and click “Next”.
- From the list, select the date preceding the moment when the preview images disappeared. Click “Next”.
- The system will then begin the system recovery process. This may take some time and will require you to restart your computer. The process is almost completely automated; then just follow the program’s instructions.
How to view photos on Windows 10
All of the above methods did not help us in our case. Fortunately, this standard application is not the only one with which you can view images.
Professionals can use familiar programs to organize and view photos. In our case, it will be enough to return the usual classic “Windows Photo Viewer”.
- Go to “Settings” – “Applications” – “Default Applications“
- Select Photo Viewer instead of the Photos app.
But what if there is no such program anymore? It can be returned quite easily.
To do this, copy this code and paste it into a PowerShell window running as administrator.
If ( -Not ( Test-Path "Registry::HKEY_CLASSES_ROOT\Applications\photoviewer.dll")){New-Item -Path "Registry::HKEY_CLASSES_ROOT\Applications\photoviewer.dll" -ItemType RegistryKey -Force}
If ( -Not ( Test-Path "Registry::HKEY_CLASSES_ROOT\Applications\photoviewer.dll\shell")){New-Item -Path "Registry::HKEY_CLASSES_ROOT\Applications\photoviewer.dll\shell" -ItemType RegistryKey -Force}
If ( -Not ( Test-Path "Registry::HKEY_CLASSES_ROOT\Applications\photoviewer.dll\shell\open")){New-Item -Path "Registry::HKEY_CLASSES_ROOT\Applications\photoviewer.dll\shell\open" -ItemType RegistryKey -Force}
Set-ItemProperty -path "Registry::HKEY_CLASSES_ROOT\Applications\photoviewer.dll\shell\open" -Name "MuiVerb" -Type "String" -Value "@photoviewer.dll,-3043"
If ( -Not ( Test-Path "Registry::HKEY_CLASSES_ROOT\Applications\photoviewer.dll\shell\open\command")){New-Item -Path "Registry::HKEY_CLASSES_ROOT\Applications\photoviewer.dll\shell\open\ command" -ItemType RegistryKey -Force}
Set-ItemProperty -path "Registry::HKEY_CLASSES_ROOT\Applications\photoviewer.dll\shell\open\command" -Name "(Default)" -Type "ExpandString" -Value "%SystemRoot%\System32\rundll32.exe `"% ProgramFiles%\Windows Photo Viewer\PhotoViewer.dll`", ImageView_Fullscreen %1″
If ( -Not ( Test-Path "Registry::HKEY_CLASSES_ROOT\Applications\photoviewer.dll\shell\open\DropTarget")){New-Item -Path "Registry::HKEY_CLASSES_ROOT\Applications\photoviewer.dll\shell\open\ DropTarget" -ItemType RegistryKey -Force}
Set-ItemProperty -path "Registry::HKEY_CLASSES_ROOT\Applications\photoviewer.dll\shell\open\DropTarget" -Name "Clsid" -Type "String" -Value "{FFE2A43C-56B9-4bf5-9A79-CC6D4285608A}"
If ( -Not ( Test-Path "Registry::HKEY_CLASSES_ROOT\Applications\photoviewer.dll\shell\print")){New-Item -Path "Registry::HKEY_CLASSES_ROOT\Applications\photoviewer.dll\shell\print" -ItemType RegistryKey -Force}
If ( -Not ( Test-Path "Registry::HKEY_CLASSES_ROOT\Applications\photoviewer.dll\shell\print\command")){New-Item -Path "Registry::HKEY_CLASSES_ROOT\Applications\photoviewer.dll\shell\print\ command" -ItemType RegistryKey -Force}
Set-ItemProperty -path "Registry::HKEY_CLASSES_ROOT\Applications\photoviewer.dll\shell\print\command" -Name "(Default)" -Type "ExpandString" -Value "%SystemRoot%\System32\rundll32.exe `"% ProgramFiles%\Windows Photo Viewer\PhotoViewer.dll`", ImageView_Fullscreen %1″
If ( -Not ( Test-Path "Registry::HKEY_CLASSES_ROOT\Applications\photoviewer.dll\shell\print\DropTarget")){New-Item -Path "Registry::HKEY_CLASSES_ROOT\Applications\photoviewer.dll\shell\print\ DropTarget" -ItemType RegistryKey -Force}
Set-ItemProperty -path "Registry::HKEY_CLASSES_ROOT\Applications\photoviewer.dll\shell\print\DropTarget" -Name "Clsid" -Type "String" -Value "{60fd46de-f830-4894-a628-6fa81bc0190d}" #
After this, the desktop application will appear on your computer.