In this way and with all this we achieve a reliable and functioning operating system for all types of users. At the same time, we can use it in a variety of fields and environments, both professional and home. Nowadays, based on Windows 10, we find teams ideally prepared for both the most professional and leisure environments. This includes viewing photos and videos , listening to music, playing games , etc.
In addition, the operating system itself provides a huge number of functions that we can customize to adapt the software to our needs. But it's also true that there are some features we can use that are more visible or more accessible than others. In fact, many of them are hidden in the system itself, but we are not even aware of their existence. For example, this is the case that we are going to talk about in these lines.
Contents [show]
- What is DxDiag.exe and how can it be useful to us? How to open DxDiag.exe in Windows 10
- PC graphics section in DxDiag
What is DxDiag?
“DxDiag” is a Microsoft utility designed to test DirectX functionality, as well as identify video or audio problems in the operation of your PC.
The abbreviation "DxDiag" is an abbreviation for "DirectX Diagnostics".
The utility executable file is usually located in the Windows\System32 directory. Starting with Windows Vista, the DxDiag diagnostic tool only displays text information about the system, without the previously available ability to test PC hardware components (and DirectX components in particular).
An important feature of the utility is the ability to save results as a text file. The latter can be posted on a forum, added to an email, and so on.
At the same time, in the 64-bit version of Windows 7 there are two versions of dxdiag - 32 and 64-bit.
Some error messages you may receive related to the dxdiag.exe file
(dxdiag.exe) has encountered a problem and needs to close. We apologize for the inconvenience.
(dxdiag.exe) stopped working.
dxdiag.exe. This program is not responding.
(dxdiag.exe) - Application error: the instruction at 0xXXXXXX referenced memory error, the memory could not be read. Click OK to end the program.
(dxdiag.exe) is not a valid Windows application error.
(dxdiag.exe) is missing or not found.
How to run DxDiag
Let's look at how you can run the diagnostic tool in different Windows operating systems:
Windows 7
Click on the “Start” button, type dxdiag in the search bar and press enter.
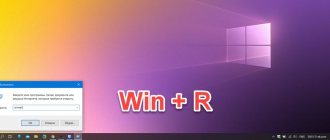
You can also press the Win+R key combination, type the same dxdiag command in the window that appears, and press “Enter”.
Windows 8
Press Win+R, type dxdiag, and press enter. You can also hover the cursor over the “Start” button, right-click, select “Run”, and enter the already mentioned dxdiag command in the window that appears.
Windows 10
Type dxdiag in the search bar on the taskbar at the bottom, and then press enter.
You can also launch the DxDiag diagnostic tool by pressing the Win+R key combination, and then type the already mentioned command.
DirectX versions supported by Windows 7
How to find out which Direct X is installed on Windows 10
Computer technology is progressing at an extremely rapid pace. Each version of this API allows video game developers not only to add new special effects and improve their quality, but also to optimize old technologies. If, for example, we compare DirectX 9 and DirectX 11, the differences are obvious.
Note! The new version offers more realistic special effects and soft shadows. They could have been implemented in the old ninth directive X, but the user would have experienced a significant drop in performance due to the lack of optimization and proper implementation of certain effects.
People believe that increasing the version of Direct X leads to a significant improvement in performance and quality of effects, but most often a user who is far from programming computer games will not even notice the difference between the effects from one or another release.
The main reason for such stagnation in the development of computer graphics is that modern games are developed not only for computers, but also for game consoles, which have significantly fewer resources than PCs and laptops. It turns out that a person plays console games on a computer and cannot choose more modern graphics, hitting the “console” ceiling.
To find out which Direct X is supported by Windows 7, you need to familiarize yourself with the theoretical part of the question. In order not to bother searching for information, it is worth understanding that Windows 7 works with DirectX 11 and later versions. Windows 10 is different in that it supports DirectX 12, released in 2015. The 7 a priori cannot work with DirectX 12.
Important! No matter what programs the user downloads, the latest version of the API will not work on Windows 7. Perhaps visually the player will see that the coveted inscription is in the settings of his video card, but this is only a visual change.
Unofficial resource where you can download
DxDiag diagnostic tool - implementation features
After we figured out what DxDiag means and how to activate DxDiag, let's look at its functionality. Once launched, you will see the diagnostic tool screen, with five main tabs.
- System - Includes system information, including time and dates, PC name, operating system version, computer manufacturer, processor and memory, and DirectX version. To check the digital signatures of drivers, check the “Check WHQL digital signatures” option, after which the drivers will indicate the presence or absence of a “WHQL” signature (Windows Hardware Quality Lab - a special Microsoft laboratory);
- Screen – contains data about the graphics card and the driver that supports it, as well as information about the capabilities of Direct X;
- Converter – contains data about the discrete video card (if available) and its driver;
- Sound – this tab contains data about the sound card and the corresponding driver);
- Input – input devices (keyboard, mouse) and information about the corresponding drivers are presented (keyboard check online).
Each of the last four tabs will indicate whether any problems were found during the scan.
All data collected by the diagnostic tool can be saved as a text file by clicking on the “Save all information” button at the bottom.
Details
Let's start with the fact that Direct X is a set of system libraries responsible for the operation of the graphics API. The product is developed by Microsoft and is completely free. However, it is also proprietary.
It is worth noting that without these libraries not a single game can work. Moreover, specialized software used by programmers will also not be able to function. Especially Visual C.
Also, many user applications use library data. In general, normal operation of the operating system without them is simply impossible. That is why it is so important to install them immediately after installing the system.
However, let's return to the diagnostic tool. First you need to talk about what it is and only then consider the process of use. This will be more correct and logical. Information first. So, let's get started.
Msinfo - quickly obtain system information
In addition to the DxDiag diagnostic tool, Windows OS also has an alternative tool for obtaining information about the hardware and software settings of your PC (including a list of system resources and data about Internet settings).
This tool is called “msinfo32”. Its capabilities allow you to display detailed information about the system, including data about PC components and features of the software environment.
To use the specified tool, press Win+R, and type msinfo32 there and press enter (or click on the “Start” button, type msinfo in the search bar and press enter).
The window that opens will display general information about the system. You can also select any of the tabs located on the left (hardware resources, components, software environment), and, by opening the contents of each tab, become more familiar with the specifics of this section.
DirectX on Windows 7: program description
DirectX is a set of APIs that is designed to perform certain functions related to programming applications and games for the Microsoft Windows operating system. It is most often used for computer games.
DirectX logo
In simple terms, DirectX is a software layer between the hardware of a personal computer and laptop and a video game. It allows you to realize the maximum computing power of the equipment and improve the quality of rendering of the graphic component.
Note! Installing DirectX allows you to recreate believable reflections in mirrors and water in computer games. It also affects texture rendering, filtering and anti-aliasing.
Program installation process
Stage 2: familiarization with the interface
The entire program interface is divided into several tabs:
- "System". It opens by default when you first launch the program. Here the user is shown basic information about the computer and system: current time and date, computer name, operating system build, manufacturer and model of the computer (or motherboard), BIOS version, processor model and frequency, state of physical and virtual memory, current edition of DirectX .
- "Screen". On this tab, the interface is divided into several separate blocks:
- Block "Device". Here you can view information about the manufacturer of the video card, its full name, the type of chips used, the type of digital-to-analog converter (the line is called “DAC Type”), the available amount of video memory, information about screen resolution and monitor;
The “Drivers” block contains basic system information about the video card driver. Here you can view the following values: driver system files, version, last update date, WHQL type digital signature (if any), DDI version (it must match the DirectX edition installed on the computer), driver model;
- "DirectX Features". In this block you can see the status of additional DirectX components.
- In the “Sound” tab you can find the following blocks:
- The “Device” block contains information about the name and coding of the speakers, and there you can also find information about the product and manufacturer code, the type of equipment and information about whether it is the default speaker;
In “Drivers” you can find information regarding the name of the driver file, its version, the last update date, the presence of a digital signature and other files, as well as the name of the supplier.
- The Input tab includes:
- "DirectInput Devices". Here you can find basic information about devices connected to the computer, such as keyboard, mouse, etc.;
"Installed drivers". The block contains information about the drivers of the connectors through which external devices are connected.
- Each window has a special “Notes” field. It displays data about the current state of components. Usually it contains information about possible problems or warnings, so if this field is blank, then everything is fine.
:/> How to enable Windows 10 update: standard and third-party tools for starting the service
Stage 1: launch
Dxdiag can be very easily launched in three ways at once, which are perfect for Windows 7, Windows 8 and Windows 10. The easiest way is to launch it through the system search bar:
- Open this line. Depending on the system version, it may open and look different. For example, in Windows 10, the user just needs to click on the magnifying glass icon, which is located in the “Taskbar”. Windows 7 and 8 users will have to click on “Start” and find the search bar themselves.
- Enter the name of the object you are looking for in the line. In this case it is dxdiag.
- Go to the first result.
Instead of a system search, you can use the special “Run” line, where you enter commands to run certain system files and components:
- Open the "Run" line. To do this, use the Win R hotkey combination.
- Write dxdiag in the line. For the command to be applied, press Enter or the “Ok” button.
You can also run the utility from its “native” folder:
- Go to: C:WindowsSystem32dxdiag.exe
To make the transition you will have to enter this address in the top line of the standard Windows Explorer. - Find and run the dxdiag.exe file.
Stage 3: familiarization with the report
In addition to viewing the report in the program itself, you can download it to a separate text file. This function may be necessary if you need to understand the problems that have arisen in more detail, since the text file will provide additional information that specialists may need on certain issues.
To get a file with reports, you need to click on the button at the bottom of the page “Save all information...”. After clicking this button, a file with all the necessary information will be generated on the “Desktop”. The file will open immediately after its creation.
As you can see, there is nothing complicated about launching and managing the dxdiag utility on Windows. With its help, you can find out important information regarding multimedia parameters, as well as generate a detailed report with a more in-depth description of technical data to provide it to a specialist.